Dream in comfort with this Free Crochet Sleeping Cap Pattern and make a cozy, soft piece perfect for restful nights or thoughtful gifts.
Peaceful nights often begin with the smallest comforts, and a cozy head covering can make all the difference in promoting restful sleep. The Free Crochet Sleeping Cap Pattern introduces a gentle and stylish way to enhance bedtime comfort while keeping warmth in and drafts away. This lovely accessory combines function with charm, featuring soft textures and an elegant drape that feels light against the skin.
How to Crochet Sleeping Cap Step by Step for Comfort

The Free Crochet Sleeping Cap Pattern stands out for its versatility perfect for quiet nights, relaxation routines, or even as a thoughtful handmade gift for someone recovering or seeking comfort. Its simple yet refined structure allows for graceful movement, maintaining a neat shape without losing softness. Each stitch contributes to a soothing rhythm, making the process of making it just as calming as wearing it.
Whether paired with loungewear, nightwear, or used during meditation and rest, this cap brings both style and practicality to daily comfort. With its timeless look and gentle feel, the Free Crochet Sleeping Cap Pattern offers more than warmth, it provides tranquility, care, and the subtle luxury of handmade coziness woven into every thread.
Special Features
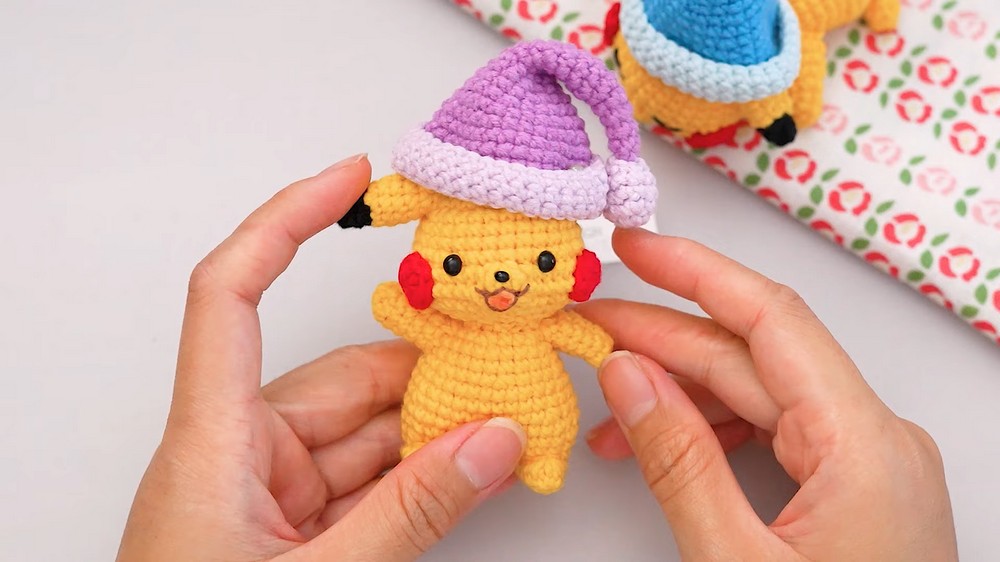
- Versatile Accessory: While originally intended for a sleeping Pikachu doll, this sleep hat can be made for any type of crochet doll, adding a cuddly bedtime charm.
- Classic Design: The iconic brimmed hat look with a dangling ball gives it a lovely, heartwarming aesthetic.
- Quick and Fun: With a simple pattern and a straightforward design, this project is suitable for beginners and can be completed in a short time.
- Customizable: You can choose your preferred yarn colors and adjust the size to fit different crochet doll types.
Level of Difficulty
This project is beginner-friendly, as it mainly uses simple techniques such as single crochet, magic circles, increases, and invisible decreases. The step-by-step instructions guide you through constructing the base, changing yarn colors, and assembling the decorative elements. While attention to detail is necessary, even those new to crocheting can easily follow along.
Tutor’s Suggestions
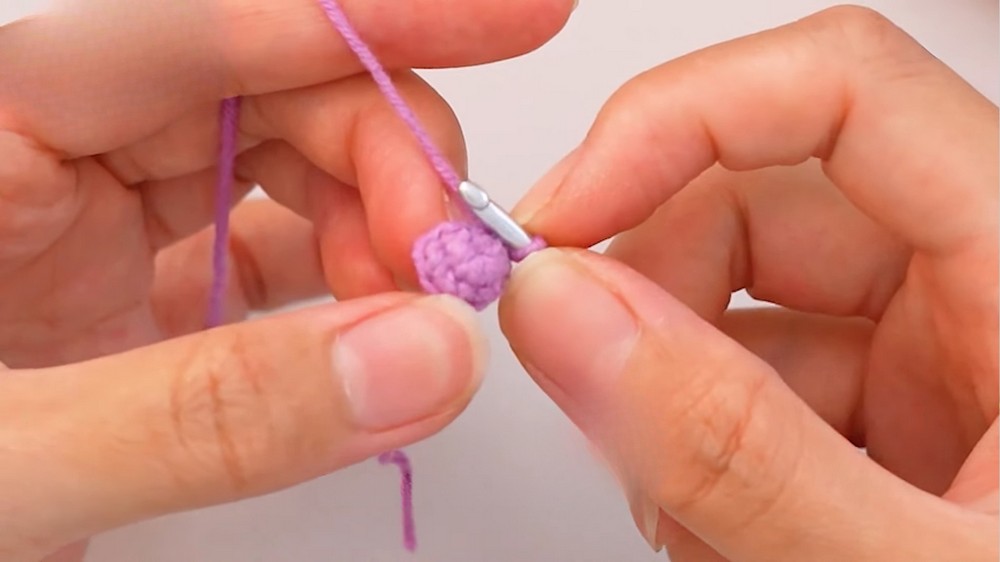
- Start Slow with the Magic Ring: Carefully follow instructions to create a tight and secure magic ring, as this forms the foundation of the hat and ball.
- Count Stitches Carefully: Accurate stitch counting is key to maintaining the structure and size of the hat. Watching for increases and decreases will help keep proportions correct.
- Change Yarn Smoothly: The tutor recommends making a secure chain when changing yarn colors to ensure that the transition is neat.
- Use Gentle Stuffing: When adding the ball to the top of the hat, lightly stuff it with polyester fiber to maintain its shape without making it lumpy.
Materials Required
- Yarn: 4-ply cotton yarn in your preferred color scheme.
- Crochet Hook: 3 mm crochet hook.
- Needle: For weaving ends and sewing the ball to the hat.
- Scissors: To cut yarn cleanly.
- Fiber Filling: Polyester fiber to stuff the ball on top of the sleep hat.
Step-by-Step Instructions
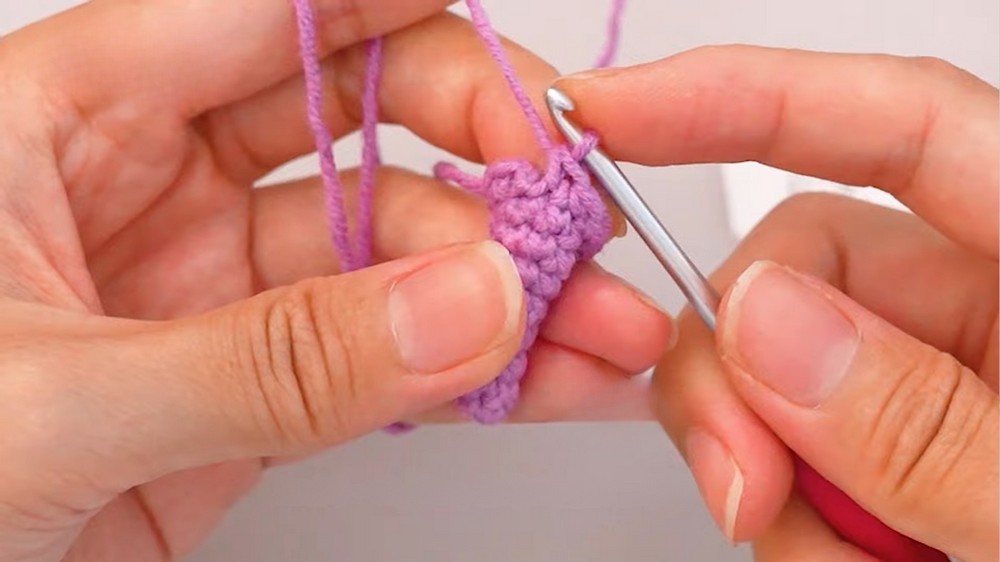
1. Crochet the Base of the Sleep Hat
- Round 1: Use a magic ring technique with 5 single crochets. Pull the yarn tail tight to close the center, then make a slip stitch into the first stitch to close the round.
- Rounds 2-3: Single crochet in each stitch around, starting each round with a chain.
- Round 4: Single crochet through the round.
- Round 5: Begin with 1 increase, then 2 single crochets. Repeat this sequence twice, ending with 8 stitches.
- Rounds 6-7: Continue single crochet rows.
- Round 8: Start with 1 increase, then follow with 3 single crochet stitches. Repeat this sequence twice for a total of 10 stitches.
- Continue following the pattern and written instructions for additional rounds.
2. Change Yarn Color
- Near Round 22, cut the current yarn and switch to a new color.
- Secure the change by making a chain with the new yarn and continue crocheting.
- Round 22: Begin with 1 increase, followed by 9 single crochets. Repeat three times for a total of 33 stitches.
- Rounds 23-26: Single crochet in each stitch around to complete the base.

- Weave the leftover yarn securely, then gently flip the bottom upward to form the brim of the hat.
3. Add the Ball on Top
- Round 1: Create a magic ring with 6 single crochet stitches, pull the yarn tail tight, and close with a slip stitch into the first stitch.
- Round 2: Start with a chain, then make 1 single crochet and 1 increase, alternating until the round ends, giving you a total of 9 stitches.
- Rounds 3-4: Single crochet in each stitch around.
- Round 5: Make 1 single crochet followed by an invisible decrease. Repeat three times, ending with 6 stitches.
- Stuff the ball lightly with polyester fiber and fasten off the yarn.

- Sew the ball securely to the top of the sleep hat, ensuring it holds its shape.
- Bend the top of the hat downward to give it the cute, sleepy look.
Uses
- For Crochet Dolls: The sleep hat works as a charming accessory for dolls, especially bedtime-themed figures like the sleeping Pikachu.
- Decoration: A stand-alone piece that can add cozy vibes to displays or craft creations.
- Gift Idea: A thoughtful, handmade present for anyone who treasures artistic crochet pieces or collectible dolls.
Tip for Success
Pay close attention to stitch counts in rounds with increases and decreases to ensure the hat maintains its shape and structure. Proper counting avoids uneven edges and ensures accurate sizing.
Conclusion
Crocheting the cute little sleep hat is a quick and rewarding project, adding a touch of coziness and whimsy to your crochet dolls or gifts. With its simple steps, customizable colors, and classic design, this hat is bound to delight anyone who appreciates a handmade charm. Whether enhancing a sleeping Pikachu or accessorizing another doll, this sleep hat will definitely be a standout piece in your crochet creations.