Make a vibrant Crochet Granny Square Top Pattern that’s easy to follow, stylish, and that’s for colorful outfits, summer wear, and handmade fashion.
Bright, colorful, and endlessly customizable, this crochet top is as vibrant as your imagination. Granny square top is loved for its charm, beauty, and versatility. It showcase stunning geometric pattern while offering a lightweight, breathable texture, perfect for sunny days or layered looks.
Why Crochet Granny Square Tops Stand Out
These tops pair effortlessly with jeans, skirts, or shorts, making them ideal for casual outings, festivals, or even cozy evenings with friends. The beauty of granny square tops lies in how unique they can be; you can combine different yarn colors to create bold, mismatched designs or soft, uniform palettes to suit your style. Their classic appearance brings elegance to any wardrobe, proving that a simple pattern can create something truly special.

Materials Needed
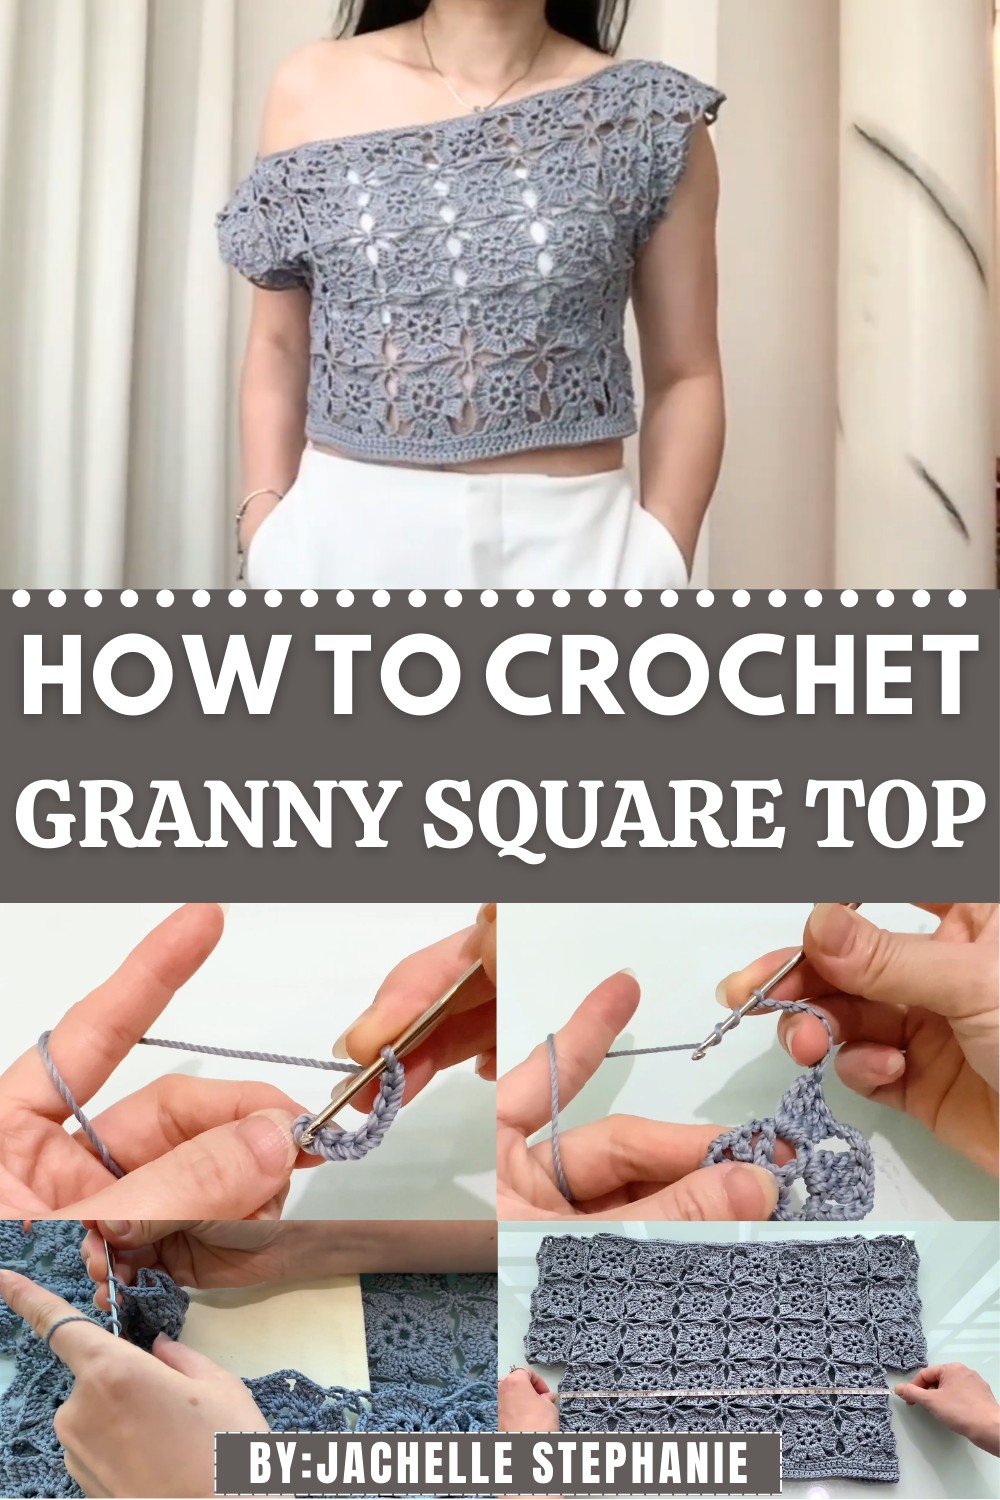
- Yarn: Acrylic yarn (2mm thickness)
- Hook: Steel crochet hook – Size 4
- Optional: Scissors, stitch markers, measuring tape
Skill Level
Intermediate to Advanced
Key Abbreviations (US Terms)
| Abbreviation | Meaning |
|---|---|
| ch | Chain |
| sl st | Slip Stitch |
| dc | Double Crochet |
| tr | Treble Crochet |
| sp | Space |
| sk | Skip |
| st | Stitch |
| sc | Single Crochet |
Special Notes
- The pattern uses treble (tr) and triple treble (trip tr) crochet techniques—ideal for experienced crocheters.
- Always count your stitches at the end of each round to maintain uniformity.
- Join stitches in third ch to create seamless rounds.
Pattern Instructions
Step 1: Foundation Round
- Make a slip knot on your hook.
- Ch 8, then join to the first ch with a sl st to form a ring.
Step 2: Round 1
- Ch 5 (counts as dc + ch 2).
- Dc into the center of the ring.
- Ch 2, dc into the ring. Repeat until there are 8 dc (including the first dc).
- End the round by joining with a sl st into the 3rd ch of the beginning ch-5.
Step 3: Round 2
- Sl st into the first ch-sp.
- Ch 4 (counts as the first tr), then work 3 tr into the same sp (total 4 tr in one space).
- Ch 3, then work 4 tr into the next ch-sp.
- Ch 7, repeat 4 tr + ch 3 in the next ch-sp.
- Continue the sequence of 4 tr, ch 3, ch 7 in each ch-sp until there are 8 groups of 4 tr.
- Close the round with a sl st in the first ch-4.

Step 4: Joining & Squares
- For assembling squares: Align front sides together and join at every ch-3 sp. Use sl st or sc depending on your preference. Ensure consistent joins for a neat finish.
Sleeves and Edging Details
- For the sleeves, use 3 squares and join at edges.
- For the border edging, work sc evenly across all edges, skipping one st between each sc for a straight appearance.
- Add a second row of dc in each st for structure.
- Leave sleeve openings without additional edging for flexibility.

Measurement Guidelines
- Each square measures 7 cm.
- Arrange 6 squares for the body and 3 on each sleeve for a balanced pattern.
- Leave 39 cm or 6 squares open for the neckline/shoulder section.

Pattern Corrections
- Ensure dc and tr counts match instructions for each round; missing stitches may cause unevenness.
- Misaligned joins may impact square arrangement.
Tip for Success
- Use stitch markers to keep track of complex joins, especially when working on multiple squares.
- Block each square after completion for an even, professional finish.
Crochet Granny Square Top Pattern You’ll Freak Over
