Spruce up your look with this FREE Crochet Mesh Sweater that’s light, breezy, and for pairing with anything, from beach vibes to café hangs.
Looking for a lightweight and stylish layer to elevate your wardrobe? A free crochet mesh sweater pattern might just be what you need! Perfect for breezy spring days or cool summer evenings, this airy design adds a touch of elegance while keeping things casual. Whether you’re heading out for a coffee date or layering up for a beach stroll, a mesh sweater offers a versatile option to style over tank tops, bralettes, or even dresses.
Lightweight Crochet Mesh Sweater Pattern for Handmade Fashion
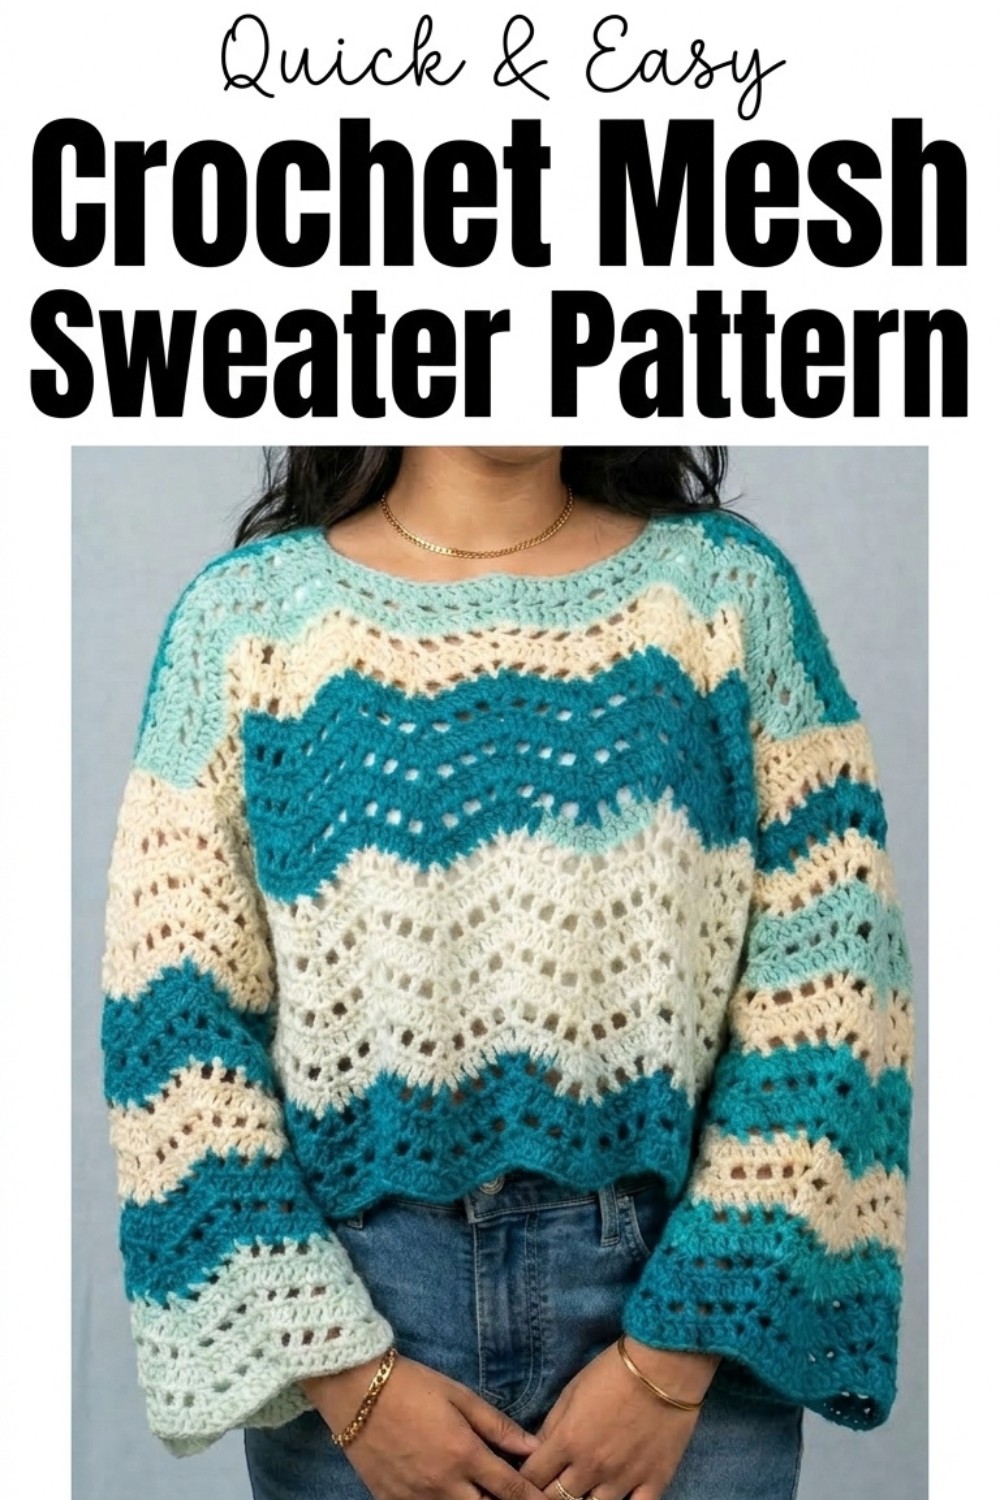
The open and breathable texture makes it comfortable to wear, while the modern look ensures you’re effortlessly fashionable. Crochet enthusiasts will love its simplicity and quick assembly, making it an ideal project for all skill levels.
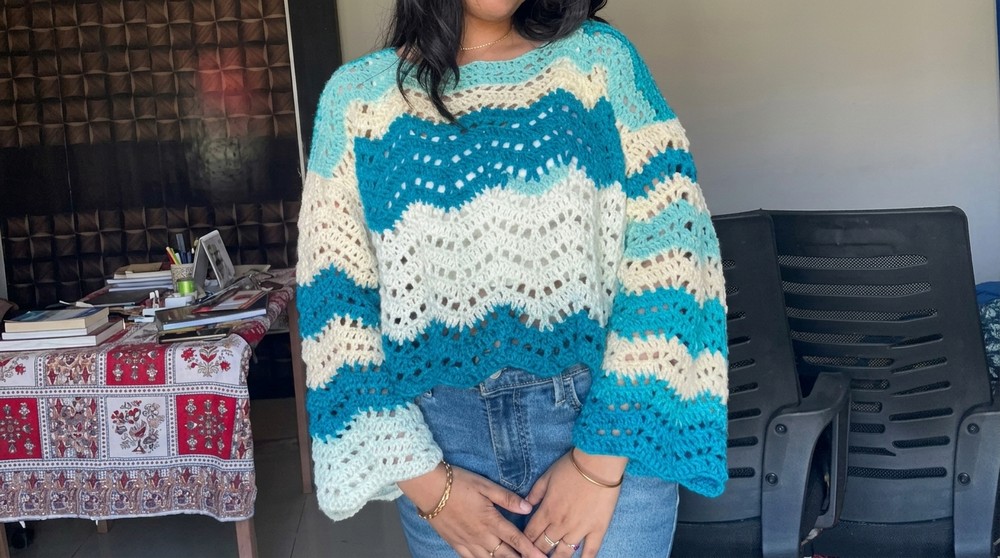
Crochet Wave Stitch Sweater Pattern
Materials Needed
Yarn:
- Multicolor Acrylic Yarn (preferably medium-weight):
- Example used: Hobby Store acrylic yarn.
- Suggest using at least two contrasting colors for an enhanced wave effect.
Hook:
- 5 mm crochet hook.
Additional Tools:
- Yarn Needle: To stitch panels together.
- Stitch Markers: To mark center points and align panels properly.
- Scissors: For cutting yarn.
Skill Level
Intermediate.
Key Abbreviations
Written in US crochet terminology.
- CH: Chain
- SC: Single Crochet
- DC: Double Crochet
- DC3Tog: Double Crochet 3 Together
- SL ST: Slip Stitch
- ST(S): Stitch(es)
- REP: Repeat
Special Notes
- Wave Design: Created by alternating “lower points” (DC3Tog) and “upper points” (DC, CH 1, DC in the same stitch).
- Gauge: Rows and stitch counts should be regularly checked for symmetry between panels.
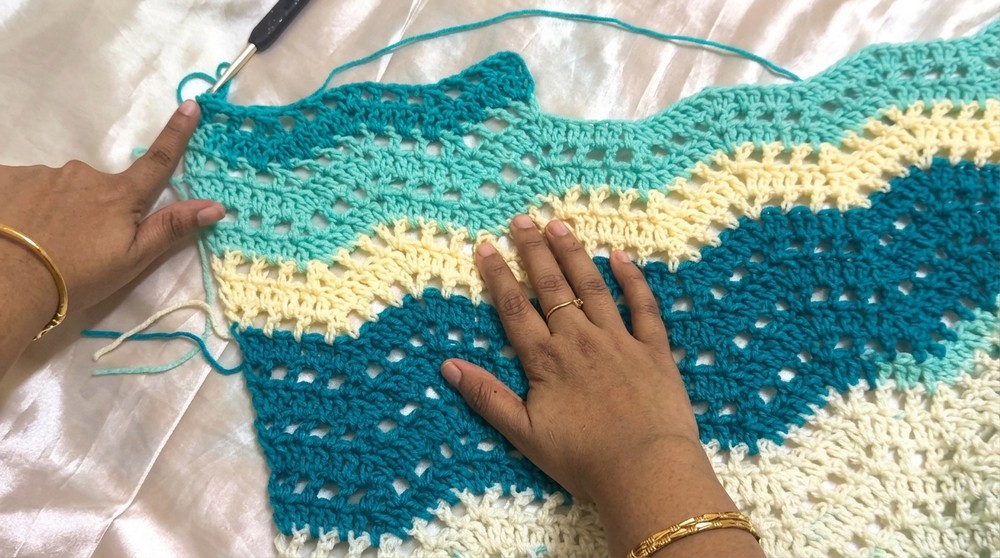
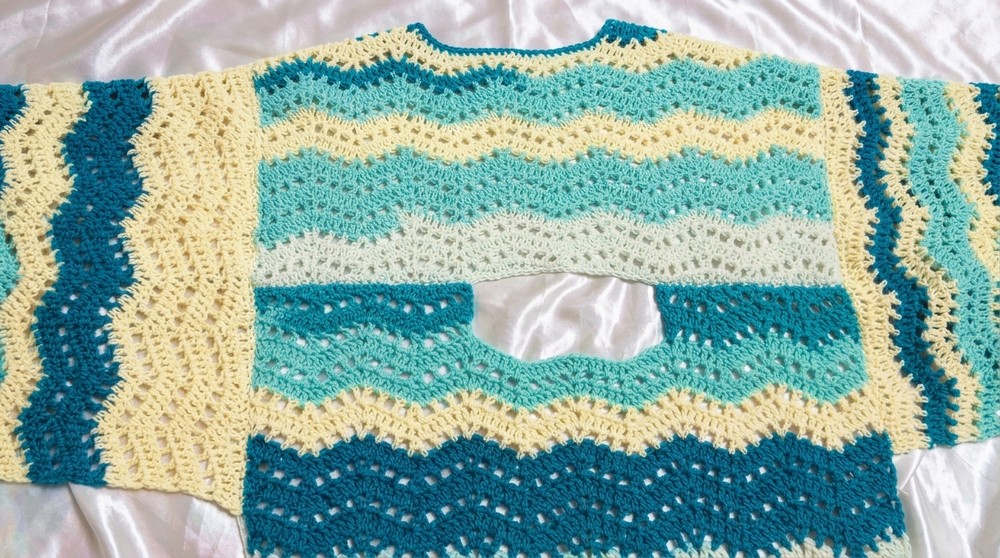
- Panel Construction: Sweater is fully constructed by stitching together four rectangles: front panel, back panel, and two arm panels.
Pattern Instructions
Step 1: Back Panel
Foundation Chain
- CH a multiple of 14 + 4:
- Example for standard size: 88 chains.
- Larger sizes: 102 chains, smaller sizes: 74 chains.
Row 1: Solid Row (Wave Formation)
- Skip the first 3 chains, work DC in the 4th chain.
- DC in the next 5 chains.
- Lower Point:
- DC into the next chain, do not complete (leave 2 loops on the hook).
- Skip the next chain and make another DC. Do not complete (keep 3 loops on the hook).
- YO and pull through all three loops.
- DC in the next 5 chains.
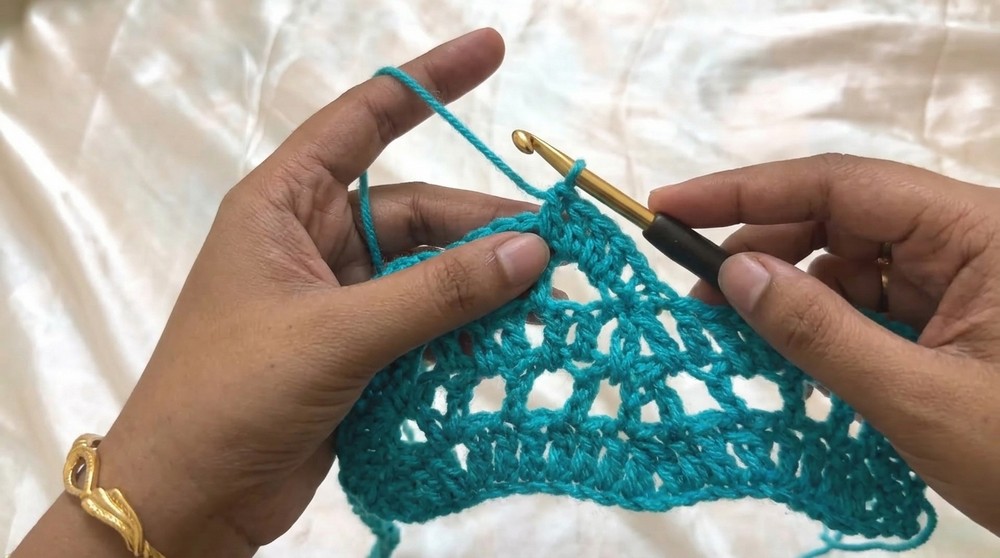
- Upper Point:
- Work DC, CH 1, DC into the next chain.
- Forms the “peak” of the wave.
- Repeat this sequence (5 DC, lower point, 5 DC, upper point) across the row.
- After your last 5 DC, finish with 2 DC into the final chain.
Row 2: Mesh Row
- CH 3, turn your work, work DC in the same stitch.
- Mesh Pattern:
- CH 1, skip 1 stitch, DC into the next stitch.
- Repeat this mesh pattern for 2 boxes.
- Lower Mesh Point:
- DC into the next chain (do not complete), skip the next stitch, and DC into the following stitch.
- Keep 3 loops on the hook and pull through all three loops.
- Continue Mesh Pattern:
- Chain 1, DC into the next stitch, skip 1, DC into the next, etc.
- Upper Mesh Point:
- Into the CH 1 space of the upper point: work DC, CH 1, DC.
- Repeat the sequence (boxes, lower mesh point, boxes, upper mesh point) across the row.

- Finish with 2 DC into the last stitch.
Row 3: Solid Row (Repeat Row 1)
- CH 3, turn your work, and continue creating waves by alternating 5 DC, lower point, 5 DC, upper point, as in Row 1.
Rows 4 to Desired Length
- Alternate between solid rows (Row 1) and mesh rows (Row 2):
- Example: Repeat until reaching 32 rows for standard length, or adjust according to desired sweater length.
Straightening the Top Edge
- CH 1, turn your work.
- SC into the first 4 stitches.
- 3 DC:
- Work DC into the next 3 stitches.
- Skip 1 stitch, 3 DC into the next 3 stitches.
- 3 SC:
- Work SC into the next 3 stitches.
- Skip 1 stitch, 3 SC into the next 3 stitches.
- Repeat this pattern across.
- Finish with 4 SC at the end.
Step 2: Front Panel
- Follow back panel instructions, but reduce total rows by 3 to leave space for the neckline.
- Straighten one end as you did for the back panel.
Neckline Formation
- Attach yarn at the neck points on the front panel.
- Work 3 rows in mesh and solid stitch to form the neckline curve:
- Row 1: Mesh row.
- Row 2: Solid row.
- Row 3: Mesh row.
- Straighten the neckline edges using the same technique as the panels. Leave a long tail for stitching.
Step 3: Arm Panels
Starting the Arm Panels
- CH 60 (for a standard size) or 74 chains (for larger sizes).
- Follow the same sequence of rows as the back panel: alternate solid and mesh rows.
- Create approximately 26 rows.
- Straighten the top edges using the same method as the back panel.
Step 4: Assembly
Joining Panels
- Using your yarn needle, align the front panel to the back panel at the shoulders.
- Stitch the shoulder seams securely.
- Locate the center points of each arm panel and align with the shoulder seam.
- Stitch the arm panels to the sides of the front and back panels.
Side Seams
- Fold the sweater.
- Stitch together the side seams starting from the armhole down to the hem.
- Repeat for both sides.
Conclusion
The Wave Stitch Sweater is a stunning crochet project that combines textured stitches and vibrant color combinations. Its construction is simple, making it suitable for intermediate crocheters. By mastering the solid and mesh rows, along with straightening techniques, you’ll achieve a polished finish.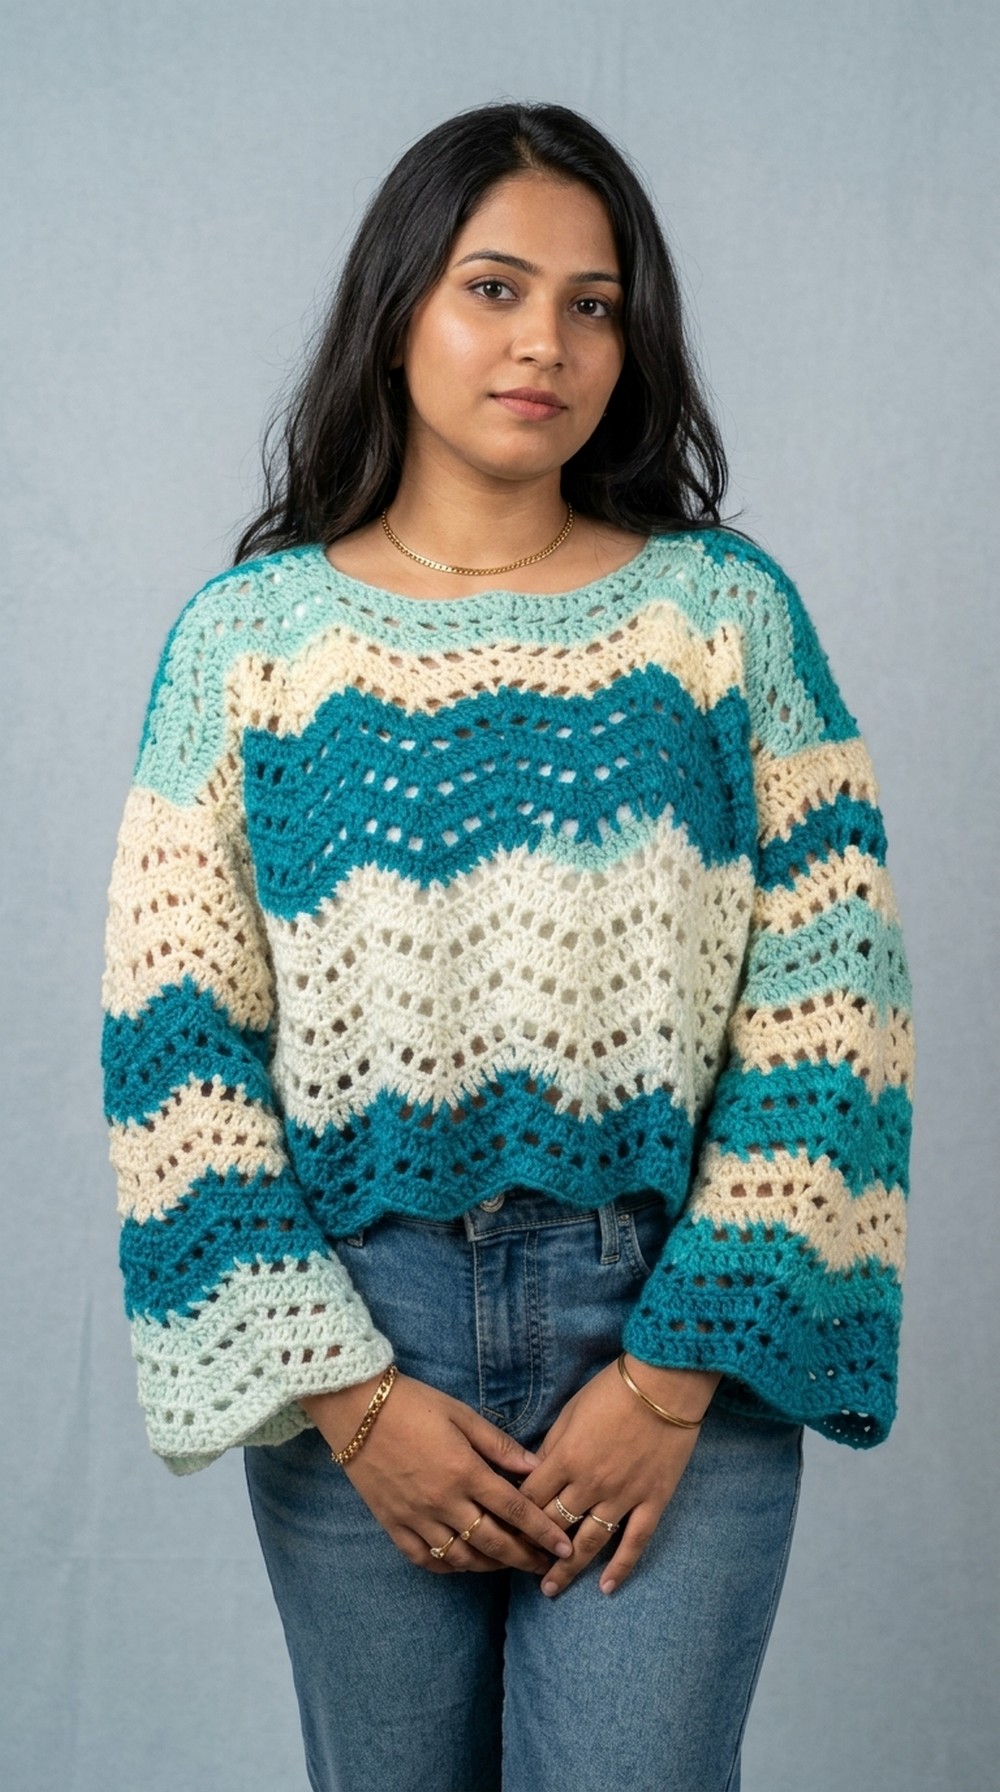
Pattern Corrections
- Ensure stitch count consistency by carefully tracking mesh rows and solid rows. Missteps on lower points can alter the wave pattern.
Tips
- Color Coordination: Use contrasting or gradient yarn to create deeper visual effects.
- Custom Sizing: Lengthen or shorten panels based on preference. Adjust starting chains accordingly.
- Blocking: Block the sweater after assembly for smooth stitches and an even finish.