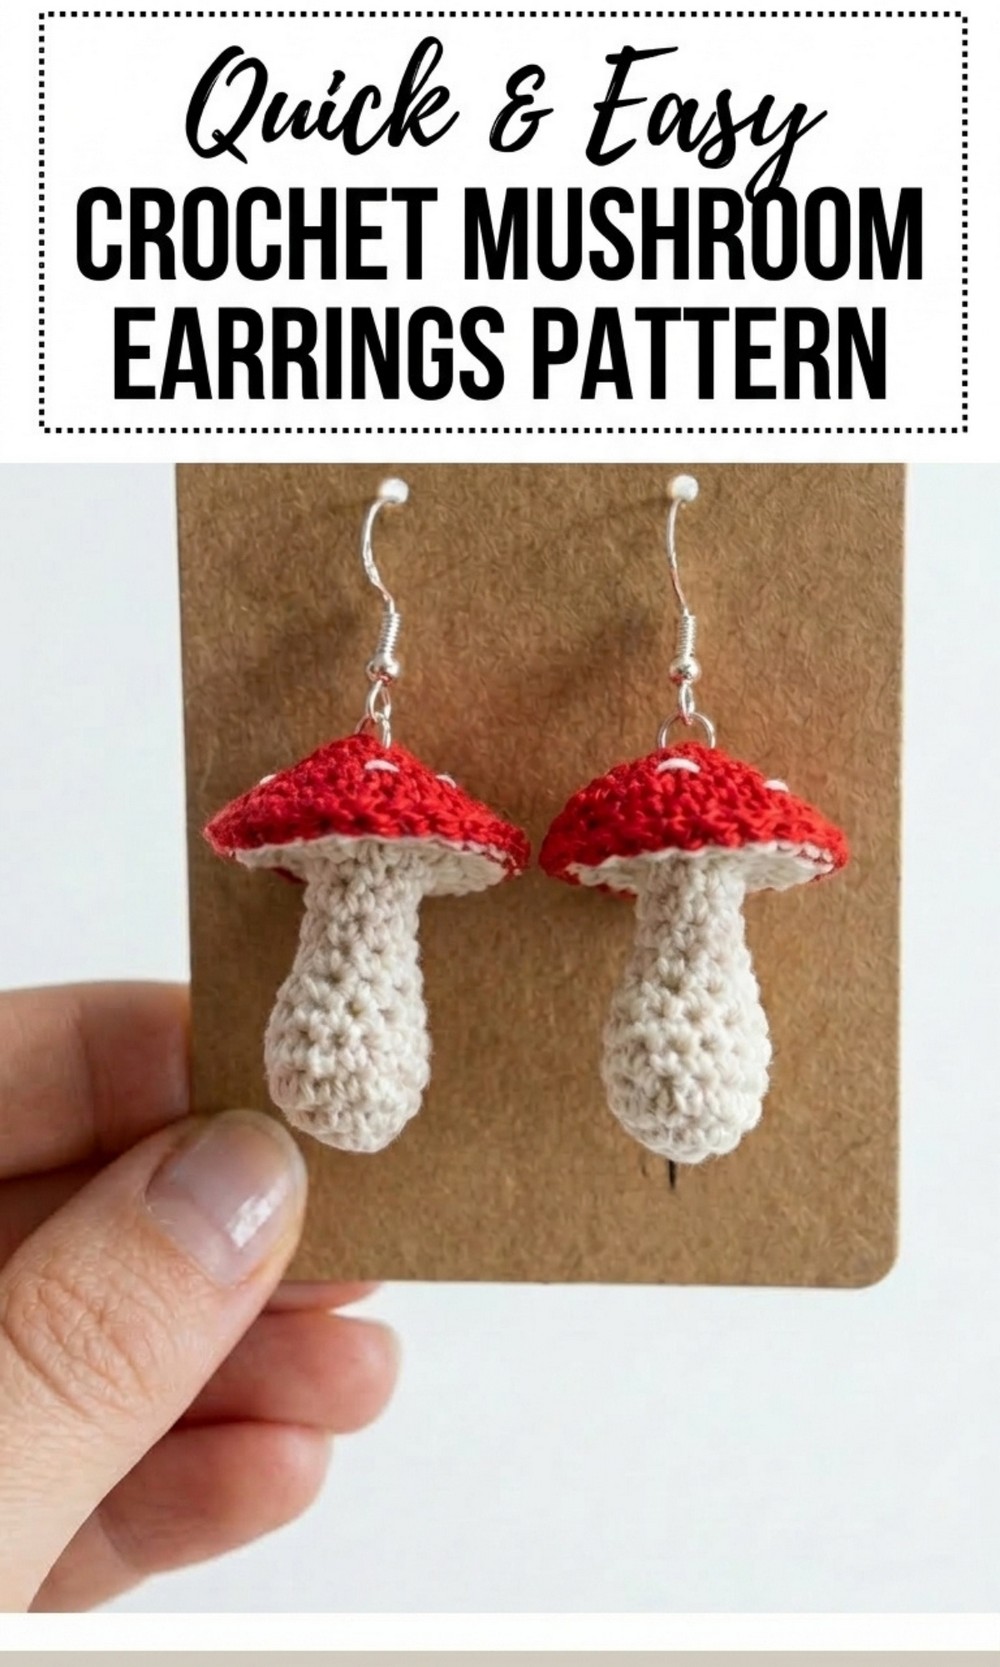
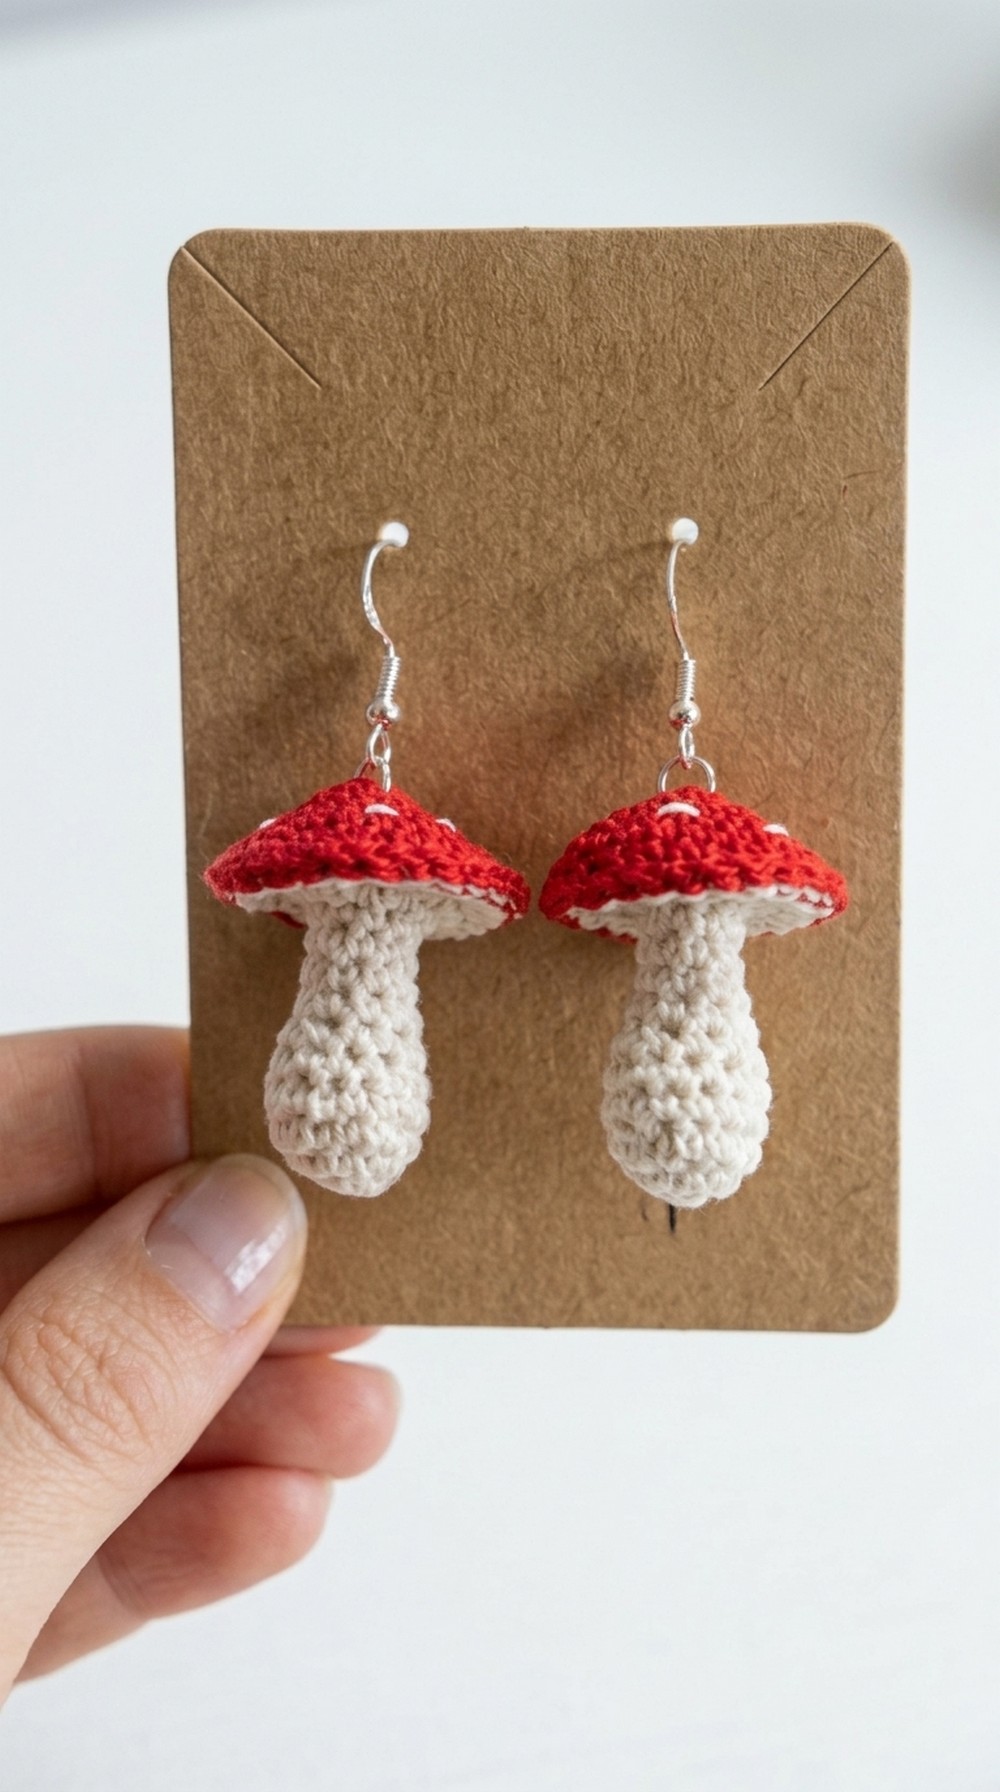
Create unique crochet mushroom earrings with this easy-to-follow pattern, perfect for handmade accessories and creative crochet projects.
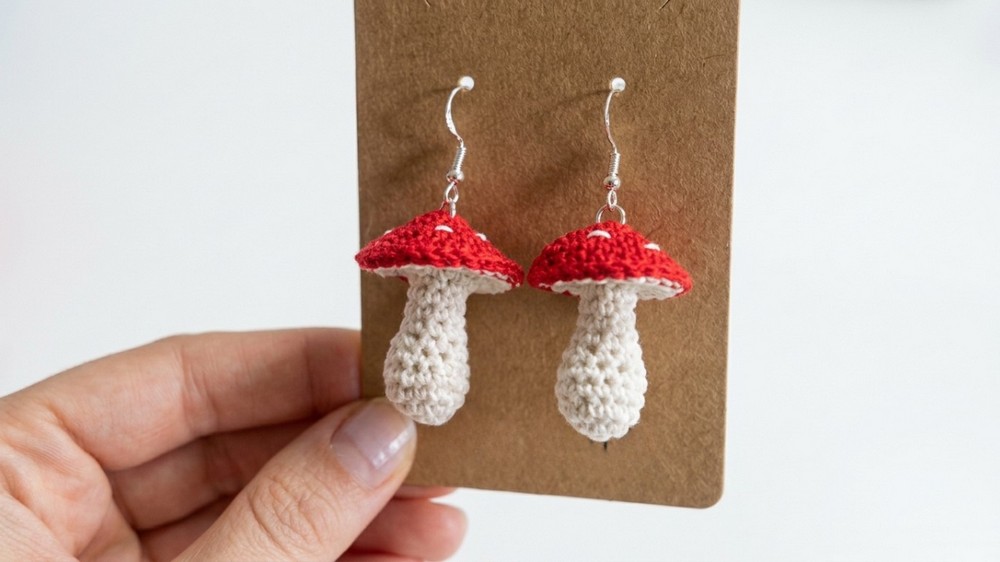
A crochet mushroom earring is a playful and colorful accessory that adds charm to any look. It is lightweight and small, featuring a bright red cap with white spots and a neat white stem, giving it the appearance of a tiny magical mushroom. Its beautiful design makes it stand out, whether worn to complete an outfit or given as a thoughtful handmade gift.
Crochet Mushroom Earrings – Free Pattern for You
It is simple to make using just a little yarn and basic stitches, making it a great project even for beginners. This earring is not only a fun and unique accessory but also a creative way to express love for handmade crochets. Whether used as a personal accessory or shared as a special gift, the crochet mushroom earring is a charming piece that brings joy and personality wherever it goes.
Mushroom Earrings Crochet Pattern (or Keychain/Decorative Item)
Finished Size
- Earrings: Tiny mushrooms suitable for light wearable earrings (<1 inch).
- Decorative Items: By switching to larger yarn and hooks, you can create mushrooms suitable for keychains, ornaments, or decorative pieces (approximately 2–3 inches tall).
Gauge
- Small version for earrings: Gauge is not essential for this size but work tightly to keep stuffing secure.
- Large decorative version: Approximately 1 inch = 4 single crochets worked in cotton yarn using a 4 mm hook.
Skill Level
- Intermediate beginner
Good understanding of basic stitches such as magic ring, single crochet, increase, decrease, and slip stitch.
Materials
Small Earrings
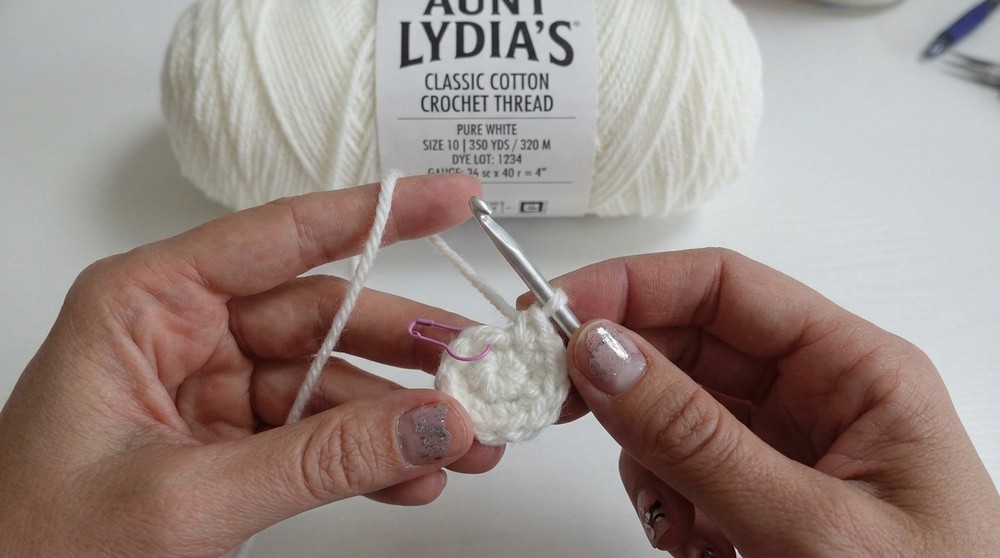
- Thread/Yarn:
- Size 10 cotton thread or equivalent. Use any small-sized thread (two different colors: white and red).
- Color for mushroom spots: White.
- Color for mushroom body: Any shade of beige, brown, or natural tones.
- Hook: Use 1.65 mm steel hook (or similar size like 1.5 mm or 1.75 mm).
- Stuffing: Small amount of polyester fiberfill or scrap thread/yarn fragments.
- Earring Findings:
- Jump rings.
- Earring hooks (any style: hoop, fishhook, or clip-on).
- Tweezers or pliers for assembly.
Larger Decorative Mushrooms
- Yarn: Four-weight (medium) cotton yarn for visible stitches.
- Mushroom cap: Red.
- Body: Beige or brown.
- Spots: White.
- Hook: 4 mm crochet hook.
- Stuffing: Larger amount of fiberfill for plush softness.
- Other Items: Jump rings, scissors, tapestry needle for assembly.
Stitches Used (US Terms)
- Magic Ring (MR): Create a loop, crochet stitches into this loop, and pull tight.
- Single Crochet (sc): Insert hook into stitch, yarn over, pull through, yarn over, pull through both loops.
- Increase: 2 single crochets in the same stitch.
- Decrease (dec): Combine two stitches into one. Pull up a loop in the next two stitches, yarn over, pull through all three loops.
- Slip Stitch (sl st): Insert hook into stitch, yarn over, and pull through the stitch and loop on hook.
Pattern Instructions
Body of Mushroom
Step 1: Start With a Magic Ring
- Create a magic ring.
- Work 6 single crochets (sc) into the ring. Pull the loop tight to close the center. (Round 1: 6 stitches).
Step 2: Increase Rounds
- Round 2: Work 2 single crochets into each stitch around. Place a stitch marker into the first stitch to mark the start of your round. (Total: 12 stitches).
- Round 3: Work 3 sc, then an increase (2 sc in the same stitch). Repeat this pattern for a total of 15 stitches.
Step 3: Regular Rounds
- Round 4: Work 1 sc into every stitch around. (Total: 15 stitches).
Step 4: Decrease Rounds
- Round 5: Work 3 sc, followed by 1 decrease (combine two stitches). Repeat this pattern for a total of 12 stitches.
- Round 6: Work 2 sc, followed by 1 decrease. Repeat for a total of 9 stitches.
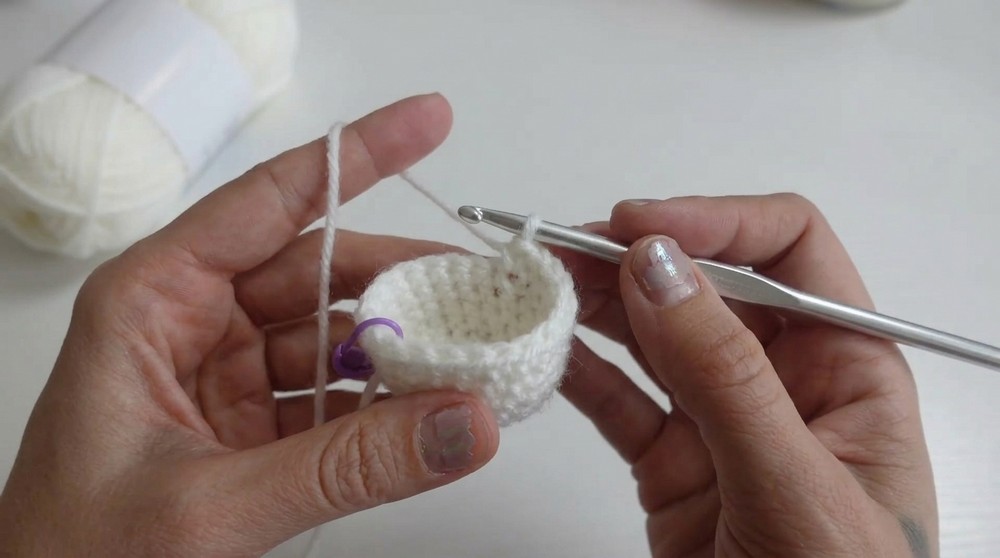
Step 5: Straight Rounds
- Rounds 7–10: Work 1 sc into every stitch for the next 4 rounds. Maintain 9 stitches throughout these rows.
Step 6: Finish the Body
- Stuff the mushroom body using a small amount of stuffing material. Push it in evenly to avoid gaps.
- End the round and tie off securely.
Cap of Mushroom
Step 1: Start With a Magic Ring
- Create a magic ring, and work 6 single crochets into it.
Step 2: Increase Rows
- Row 2: Increase by working 1 sc in the first stitch, then 2 sc in the next. Repeat this pattern for a total of 9 stitches.
- Row 3: Work 2 sc, followed by 1 increase (Total: 12 stitches).

- Rows 4–6: Continue increasing following the pattern below:
- Row 4: 3 sc, then 1 increase (Total: 15 stitches).
- Row 5: 4 sc, then 1 increase (Total: 18 stitches).
- Row 6: 5 sc, then 1 increase (Total: 21 stitches).
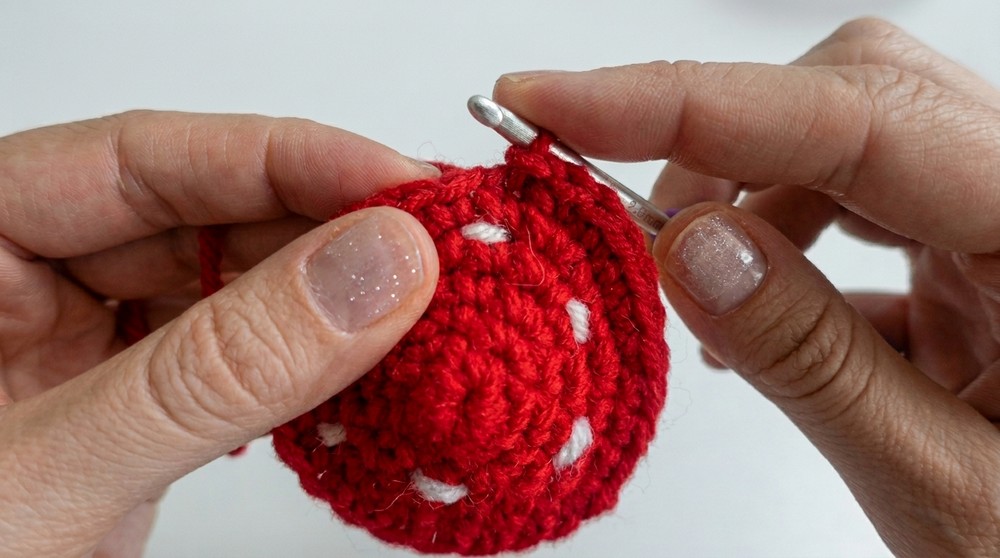
Add Mushroom Spots
- Thread white yarn through a tapestry needle.
- Create small spots randomly across the mushroom cap by embroidering a simple dot or two in the chosen positions. Secure and weave in ends.
Assemble the Mushroom
- Position the mushroom cap over the stuffed body.
- Slip stitch the cap onto the body, matching edges as you go.
Add Earring or Decorative Accessories
- Attach a jump ring to the top center of the mushroom using tweezers or pliers.
- For earrings: Attach an earring hook to the jump ring.
- For keychains: Attach a keychain ring instead.
Customization Ideas
- Colors: Experiment with bright caps (purple, orange, or blue) for fun variations.
- Scale: Use thinner thread for delicate earrings or bulkier yarn for keychains or ornaments.
- Details: Add glittery yarn for extra sparkle or a metallic jump ring for elegance.
Tips
- Keep your tension consistent when working with small threads.
- Use stitch markers to avoid losing your round beginnings, especially in the body.
- Stuff lightly to maintain a clean mushroom shape without bulges.
Conclusion
This pattern creates adorable, vibrant mushrooms that are perfect for earrings or decorations. Small in size but big in charm, these pieces can capture attention wherever used. Whether completing a pair of earrings or designing keychains for gifting, this project is sure to bring joy, creative satisfaction, and lots of compliments.