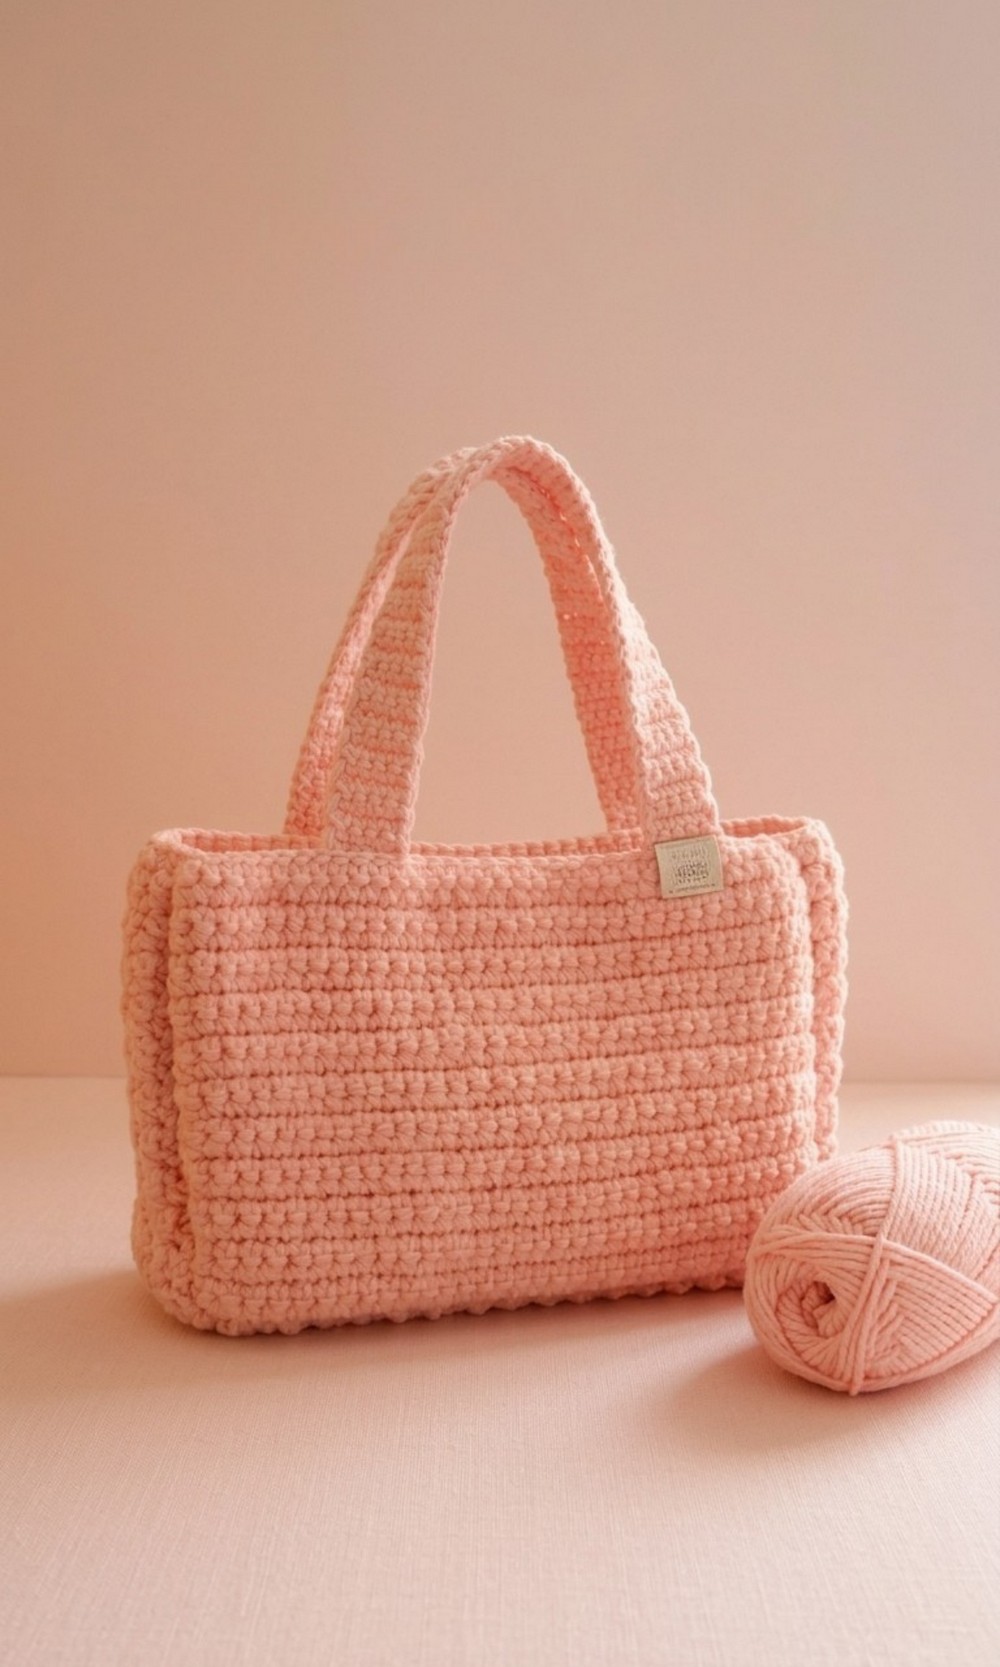
Have fun making a cute and colorful crochet shoulder bag with this free pattern, super easy to follow and great for everyday use or gifting to loved ones.
A shoulder bag can be both stylish and practical, and this crochet pattern lets you make one that’s truly unique. Made with soft yarn and a lightweight design, it’s perfect for carrying everyday essentials like your phone, wallet, or even small books. The gentle texture and cozy look of the crochet stitches make this bag stand out, while its durable material ensures it lasts a long time.
Free Crochet Shoulder Bag Pattern Step-by-Step for Beginners
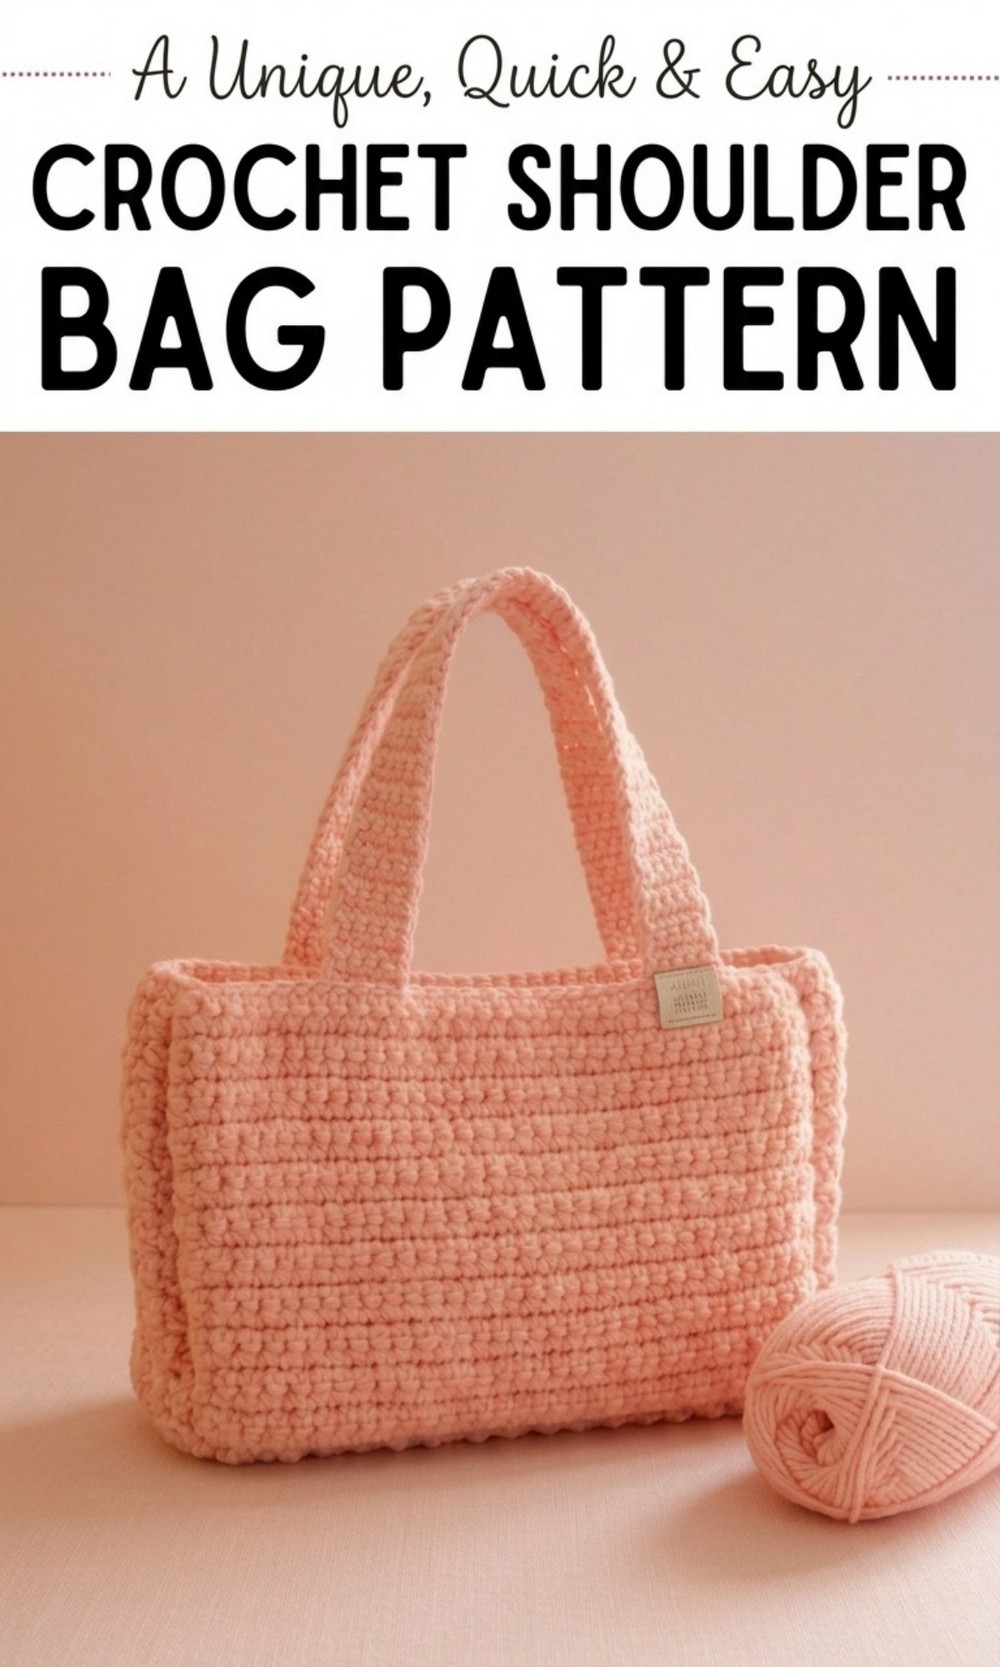
You can choose your favorite colors to match your outfits or customize it with fun details like tassels or pockets. This bag is easy to carry and comfortable to wear, making it ideal for trips, shopping, or casual outings. Its handmade charm and creative design make it more special than regular store-bought bags. Simple to crochet, it’s also a fun way to try a new project that’s useful and stylish at the same time.
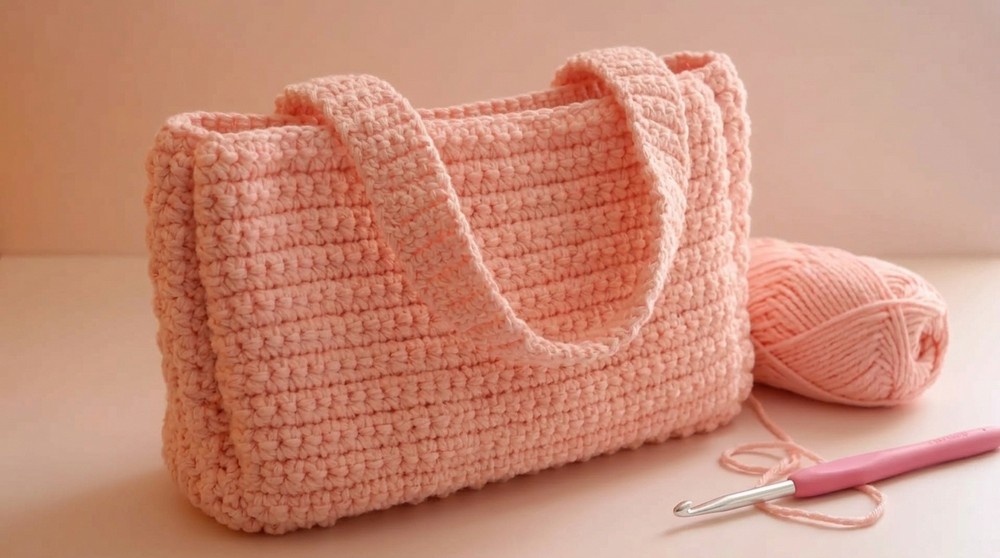
Beginner-Friendly Crochet Shoulder Bag Pattern
Skill Level
Beginner: Simple single crochet stitches repeated throughout, with basic shaping and assembly.
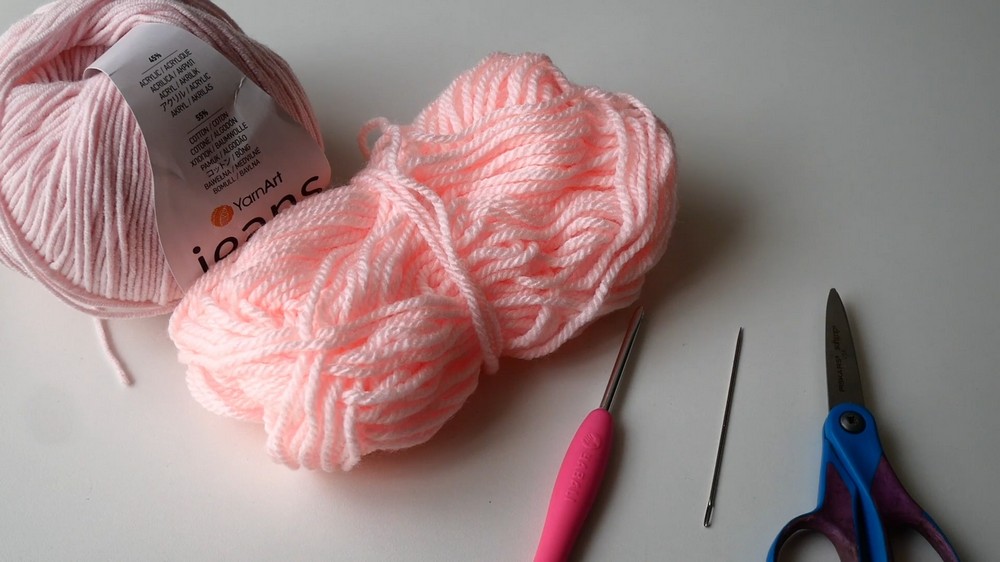
Materials Needed
- Yarn:
- Main Yarn (Pink yarn): Size 2 (Fine) weight yarn (shown as YarnArt Jeans).
- Strap Yarn (Thicker yarn): Size 3 (Light) or 4 (Medium) weight yarn. You can use stash yarn for this, as precise matching isn’t necessary.
- Note: Ensure the yarns complement each other seamlessly for a uniform overall look.
- Crochet Hook:
- 3.5mm hook (adjust size to match gauge).
- Notions:
- Yarn needle (for sewing and weaving in ends).
- Scissors (for cutting yarn).
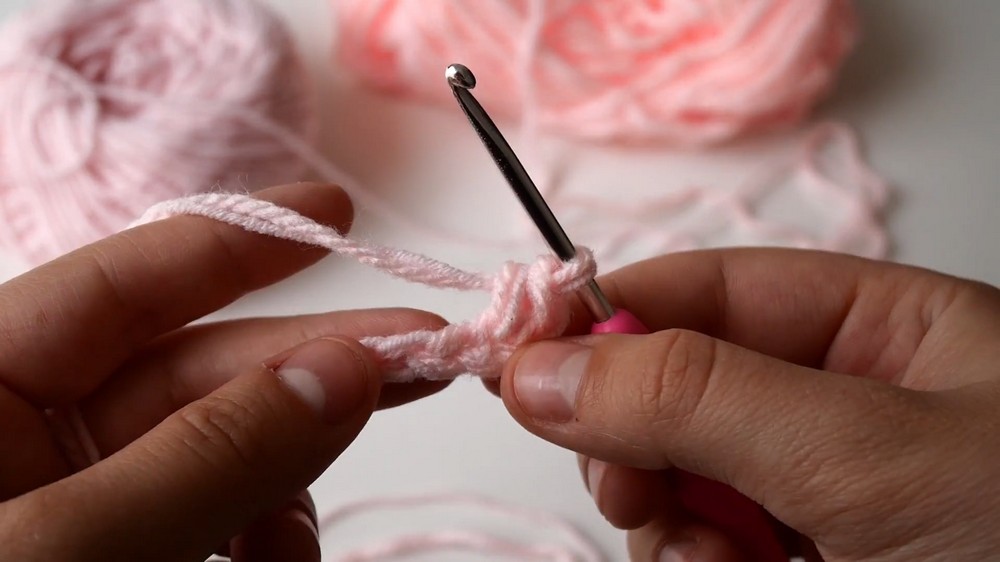
Special Techniques
- Slip Knot: Used to start your work.
- Single Crochet (sc): A foundational stitch used throughout the pattern.
- Slip Stitch (sl st): Used for sewing panels and strap together.
- Chain (ch): To begin rows and create additional elements such as straps.
Pattern Instructions
Step 1: Create Two Panels
Each panel measures approximately 27cm (10.6″) long x 17cm (6.7″) wide.
Panel Foundation Chain
- Make a slip knot and insert the hook.
- Chain 35 (ch 35): This creates the foundation chain and measures about 21cm (8.3″) long.
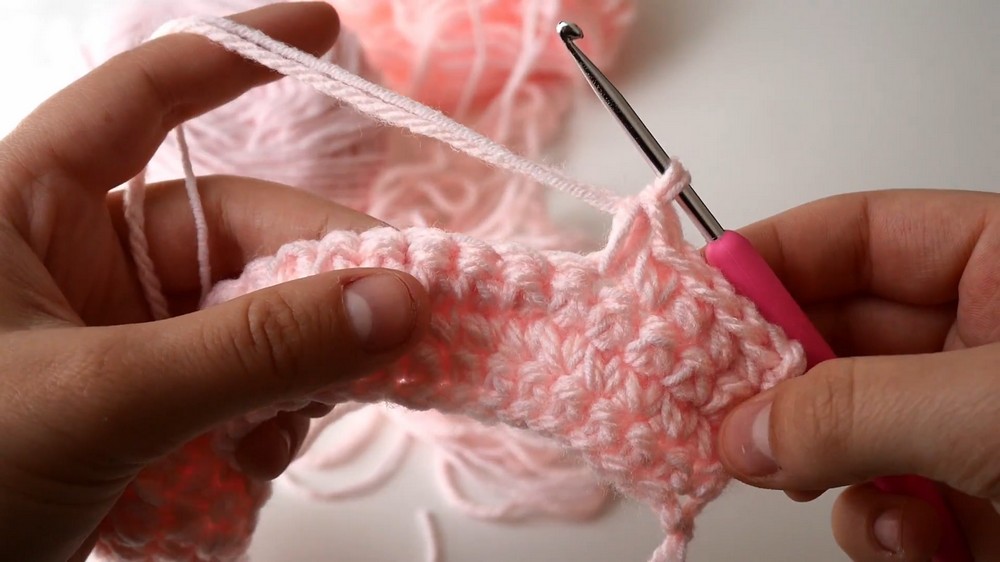
Row 1: Single Crochet Across
- Starting in the second chain from the hook, insert your hook and make a single crochet (sc).
- Continue working 1 sc in each chain across the row (a total of 34 sc stitches).
- Turn your work and prepare for Row 2.
Row 2: Repeats
- Chain 1 (ch 1) and turn your work.
- Work 1 sc in each stitch across the row, inserting your hook through both loops of the stitch (ensures durability).
Repeat Rows
- Continue repeating Row 2 until you have completed 22 rows in total (panel height will measure approximately 27cm (10.6″)).
- Fasten off by chaining 1, cutting the yarn, and pulling the tail through the loop to secure.
Tip
Count your stitches after each row. You must have 34 stitches per row to maintain a consistent shape.
Step 2: Create the Strap
The strap serves as both the handle and the connector between the panels. It measures approximately 1 meter (39″) long.
Foundation Chain
- With the thicker yarn, make a slip knot and insert the hook.
- Chain 5 (ch 5).
Row 1: Single Crochet Base
- Starting in the second chain from the hook, work 1 sc into each chain (a total of 4 sc).
- Chain 1 (ch 1) and turn your work.
Repeat Rows
- Continue working 1 sc in each stitch, repeating Row 1 until you have completed 130 rows (strap length will measure approximately 1 meter (39″)).
- Fasten off and secure by chaining 1, cutting the yarn, and pulling the tail through the loop.
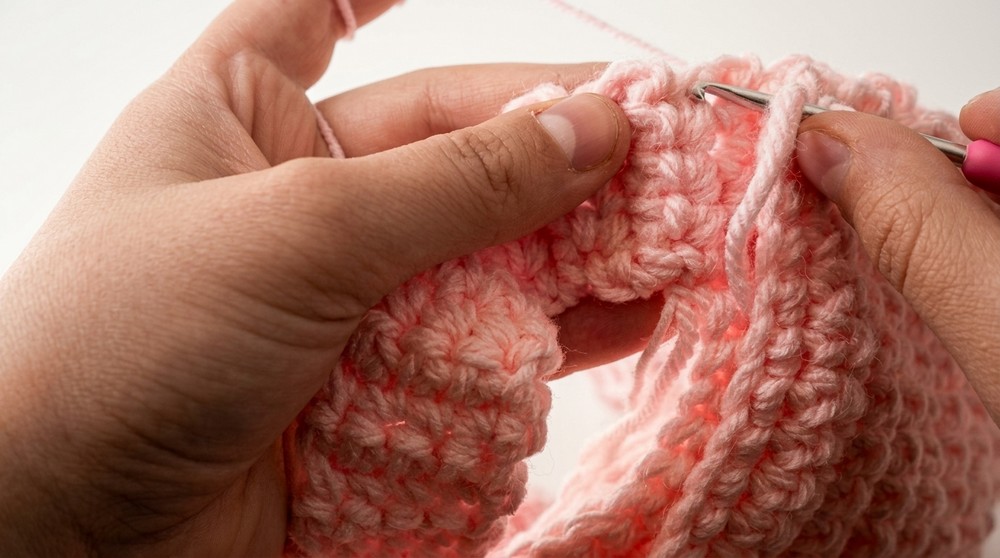
Step 3: Assemble the Panels and Strap
Sew One Panel to Strap
- Position one panel with the strap, aligning each row of the strap with corresponding rows of the panel edges.
- With the pink yarn, attach the strap to the panel using slip stitches (sl st).
- Insert your hook through both loops of the panel stitch and align it with the strap rows.
- Pull yarn through both layers and through the loop on your hook (a smooth slip stitch).
- Continue this until the entire edge of the panel is secured to the strap.
Sew Strap to Second Panel
- Repeat the same process to attach the second panel to the other side of the strap.
- Align all rows of the second panel with the strap and use sl st to securely join.
- Align all rows of the second panel with the strap and use sl st to securely join.
Ensure Proper Alignment
Check frequently that rows are matching evenly across both panels. This prevents uneven edges in the final bag.
Step 4: Close the Bag and Finish
- Finish sewing: Continue slip stitching around all edges of the panels and strap until the bag is secure. Be mindful to leave stitches loose enough for flexibility but tight enough for a neat finish.
- Flip Bag Inside Out: If you want the seams hidden, flip the bag inside out after finishing, so that the clean edges face outward.
Finishing the Pattern
- Weave in Loose Ends: Using a yarn needle, weave in all loose ends carefully into the corresponding stitches to prevent fraying.
- Final Inspection: Ensure all seams (panels and strap) are sewn correctly and that the bag holds its shape.
- Optional Decoration: Add buttons, bows, or charms for personalization.
Final Words
Congratulations on completing your beautiful shoulder bag! This beginner-friendly design is versatile and practical, perfect for casual outings or as a thoughtful handmade gift. The use of single crochet throughout makes it ideal for new crocheters to master tension and uniformity.
Tips to Maintain the Pattern
- Block if Necessary: If your panels curl slightly during work, gently block them to straighten before assembly.
- Check Strap Width: Ensure the strap is consistently even across rows. Adjust tension as needed.
- Customize: Use different yarn colors to make striped panels or a contrasting strap for added visual appeal.
Pattern Corrections
If you encounter issues:
- Row Count: Double-check row counts for panels and straps to ensure uniform measurements.
- Stitch Matching: Align panel rows carefully with strap rows for seamless attachment.