Unlock your creativity with a crochet baby bib bandana pattern that combines function and charm, offering a soft, stylish, and practical solution for little ones.
Babies grow so quickly that everyday messes become a part of life, making stylish and functional accessories a must. A handmade crochet bib in a bandana style is the perfect mix of practicality and charm, helping keep spills and drool at bay while adding personality to your baby’s outfit. Made with baby-friendly yarn, it’s gentle on sensitive skin and lightweight, great for messy meal times or teething moments.
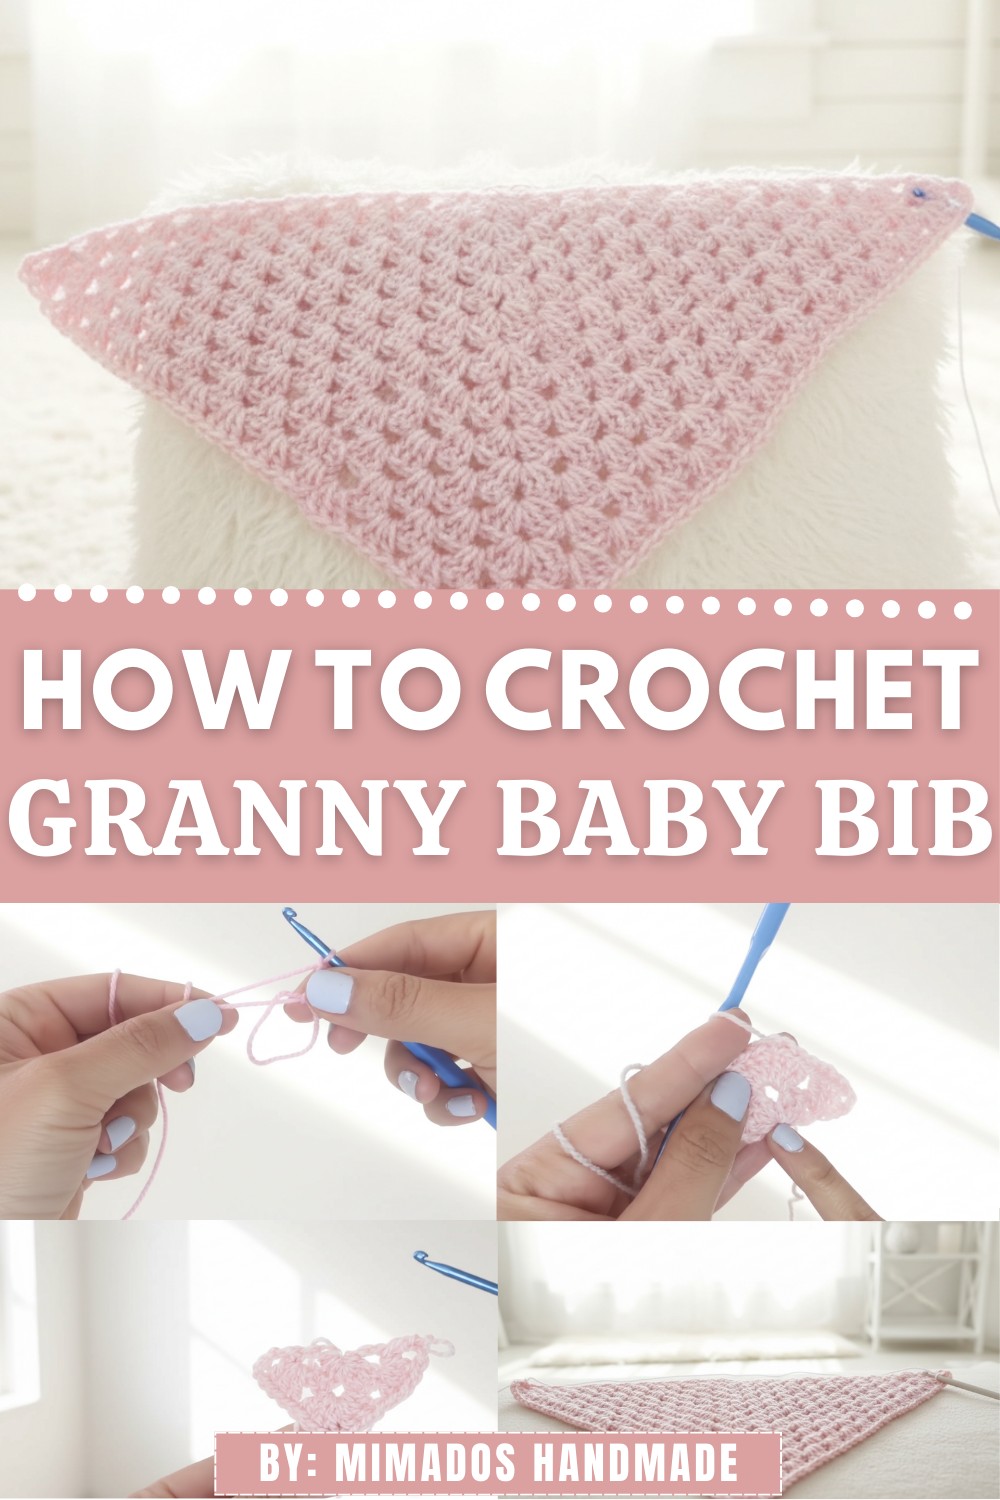
Chic Crochet Baby Bib Bandana That’s Ideal for Drooling
Perfect for casual outings or picture-perfect gatherings, it’s easy to customize with colors and pattern to fit any wardrobe. Beyond its everyday use, it makes a thoughtful and creative gift for new moms or baby showers, blending purpose and style effortlessly. Practical, adorable, and handmade, it’s a win for everyone!
Crochet Baby Bib/Bandana Step-by-Step Pattern
Gauge
- High (Double) Crochet (dc): 12 stitches x 8 rows = 4 x 4 inches (10 cm x 10 cm) with a 3.5 mm hook.
It is highly recommended to measure your gauge before beginning to ensure proper sizing.
Necessary Materials
- Yarn: Lightweight baby yarn (2-ply). Recommended: 100% acrylic for durability and softness.
- Hook Size: 3.5 mm metal crochet hook.
- Scissors
- Sewing Needle and Thread: To sew the button.
- Button: Small-sized button to fit the closure loop (approximately 1 cm).
- Measuring Tape: For accuracy and customization.
Customization Ideas
- Size: Adjust the size by adding or reducing the number of foundation rows or increasing the number of stitches.
- Colors: Experiment with color-blocking, stripes, or multi-colored yarn for a unique look.
- Closure Style: Instead of a button, use a crocheted tie for an alternate fastening method.
- Personal Touch: Add appliqués, embroidery, or a contrasting border for a decorative flair.
Pattern Instructions
Foundation Row – Magic Ring Start
- Create a magic ring.
- Wrap the yarn around your two fingers, insert the hook through the ring, and pull the yarn to form a loop. Secure with a chain stitch.

- Wrap the yarn around your two fingers, insert the hook through the ring, and pull the yarn to form a loop. Secure with a chain stitch.
- Work 4 chain stitches. (Counts as one double crochet and a chain for separation.)
- Inside the magic ring, work 3 double crochets (dc).
- Yarn over, insert the hook into the ring, pull up a loop, and complete the double crochet as per standard technique.
- Chain 1 for separation, then work another 3 dc into the ring.
- Chain 1 and finish with 1 double crochet to complete the row.
- Pull the loose end of the magic ring to tighten it completely, creating a neat triangle tip.
At the end of Row 1, you will have a small triangle base.
Row 2 – Expanding the Triangle
- Chain 4 (counts as dc + chain 1). Turn your work.
- In the first space between stitches, work a group of 3 dc stitches.
- At the triangle point (center space), work 3 dc, chain 1, 3 dc to maintain the shape and ensure even growth.
- Continue to the last space of the row and work 3 dc, chain 1, and 1 dc to finish the row.
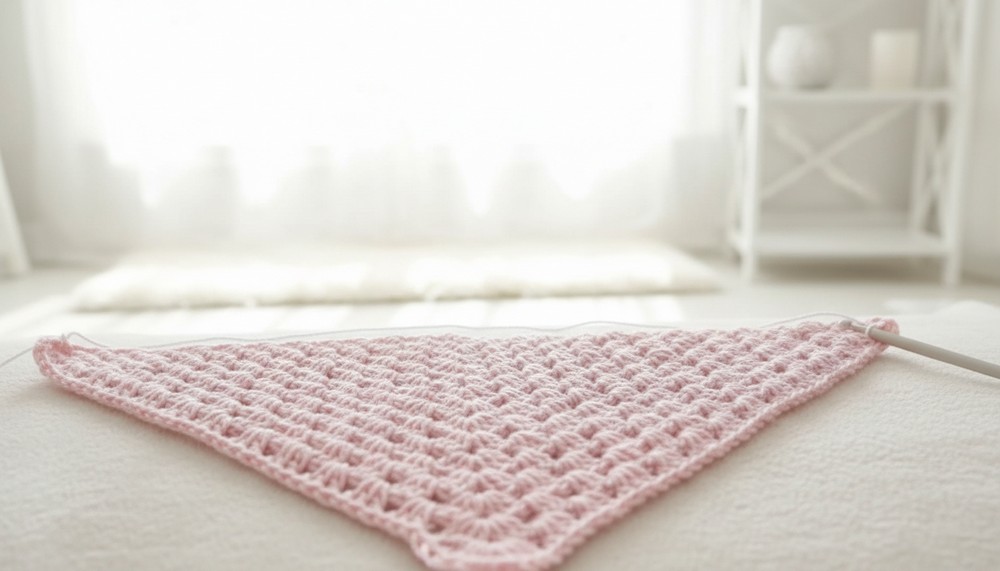
Row 3 Onwards – Continued Growth
- For each row, begin with 4 chains (counts as dc + chain 1) and turn your work.
- Work 3 dc into each space along the edges.

- At the triangle point (center space), always work 3 dc, chain 1, 3 dc to maintain the triangular shape.
- End the row with 3 dc, chain 1, and 1 dc in the last space.
Note: With each new row, the number of spaces and stitch groups will increase as the triangle expands. Continue repeating this pattern until the desired size is achieved.
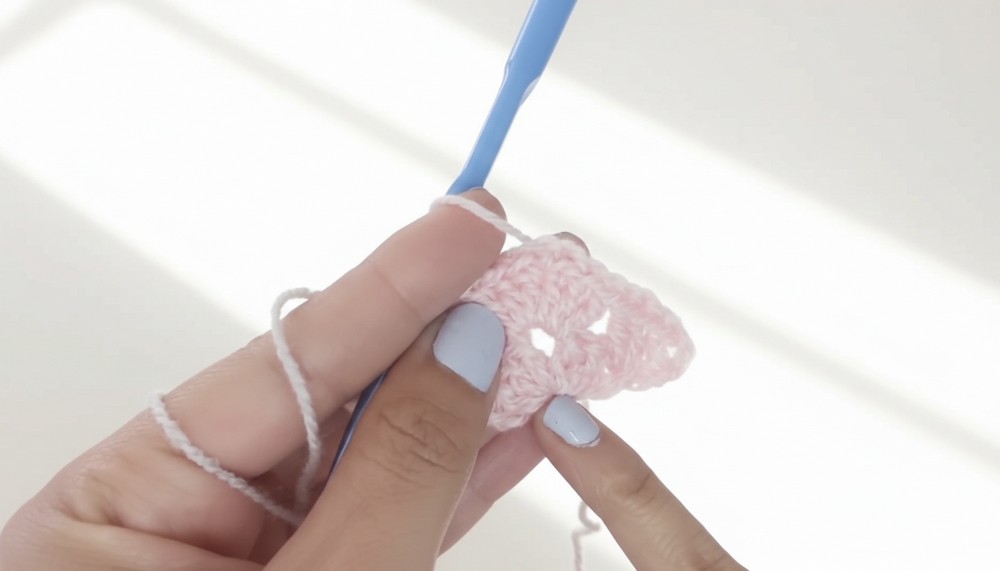
Final Row – Chain Loop for the Closure
- Once your bib/bandana has reached the desired size, add a loop for the button closure.
- On the last row of the project, chain 4 to 5 cm worth of stitches (approximately 12-15 chains or more depending on your button size) right after the last stitch.
- Slip stitch into the same point to secure the loop.
- Fasten off the yarn, leaving a clean edge.
Finishing Touches
- Sewing the Button:
- On the opposite end of the chain loop, securely sew a button using a needle and thread. Test the fit to ensure the button passes cleanly through the loop.
- Edge Refinement (Optional):
- For a polished look, you can work a single crochet border around the entire triangle.
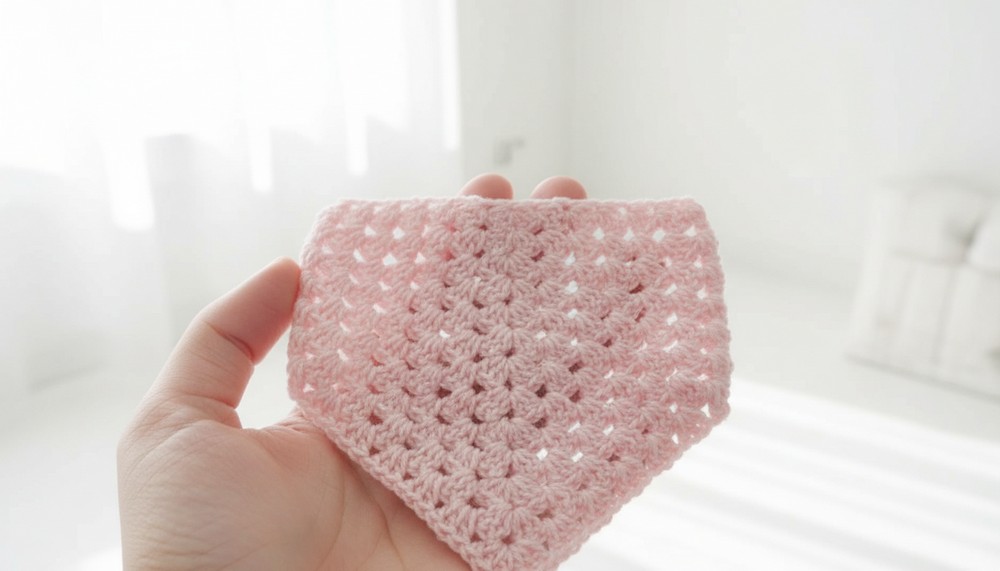
Finished Size
The size of the bib measures approximately 36 cm across the widest point (edge to edge) and 18 cm from top to the tip of the triangle. You can customize the size by adjusting the number of rows worked.
Special Techniques
- Magic Ring: Enables a tight, seamless center to avoid gaps in the fabric.
- Double Crochet (dc): Creates a lightweight and airy stitch perfect for baby items.
- Triangular Growth Formula: Adding “3 dc, chain 1, 3 dc” at the center ensures smooth growth.
Tips for Success
- Keep a steady tension for consistent stitches throughout your project.
- Frequently measure your bib to ensure it matches the desired size.
- Weave in all loose ends securely to avoid unraveling during use.
Conclusion & Final Look
The finished bib features a triangular bandana-style design with a neatly sewn button closure. It’s lightweight, breathable, and perfectly sized for babies, providing a functional yet adorable accessory for everyday wear or special occasions. Experimenting with colors and finishes can make each piece truly unique.