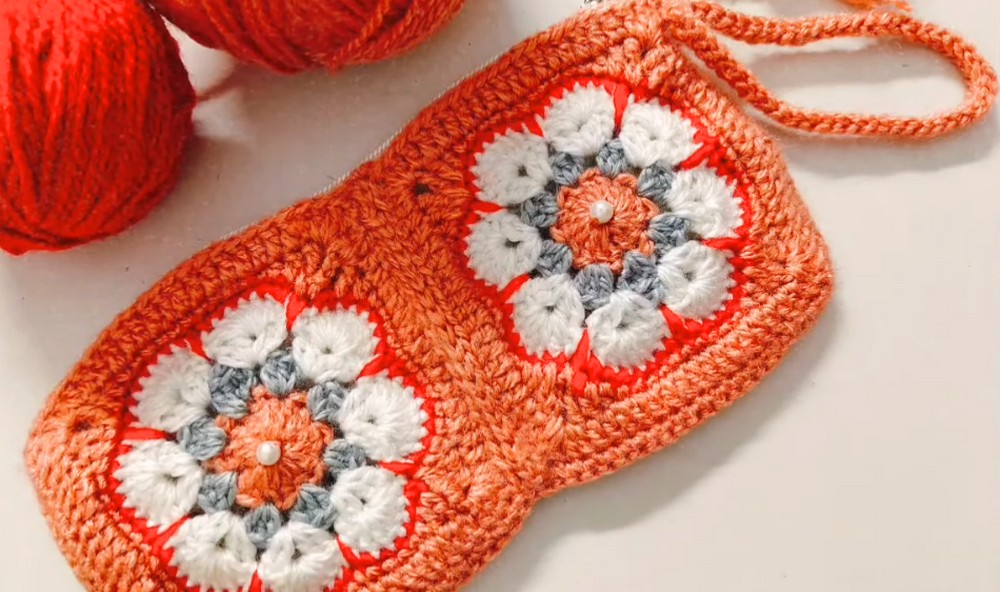
Protect your phone in style with this Free Crochet Mobile Pouch Pattern that offers soft protection, a snug fit, and a sleek look for daily use.
In places where phones are more than just devices, where they carry memories, messages, and moments, keeping them safe has always mattered. From handmade cloth sleeves to modern accessories, the idea of personal protection has evolved. That same care and function is reflected in the free crochet mobile pouch pattern, which offers both durability and elegance for your everyday device.
Functional Crochet Mobile Pouch Pattern for Hands-Free Comfort
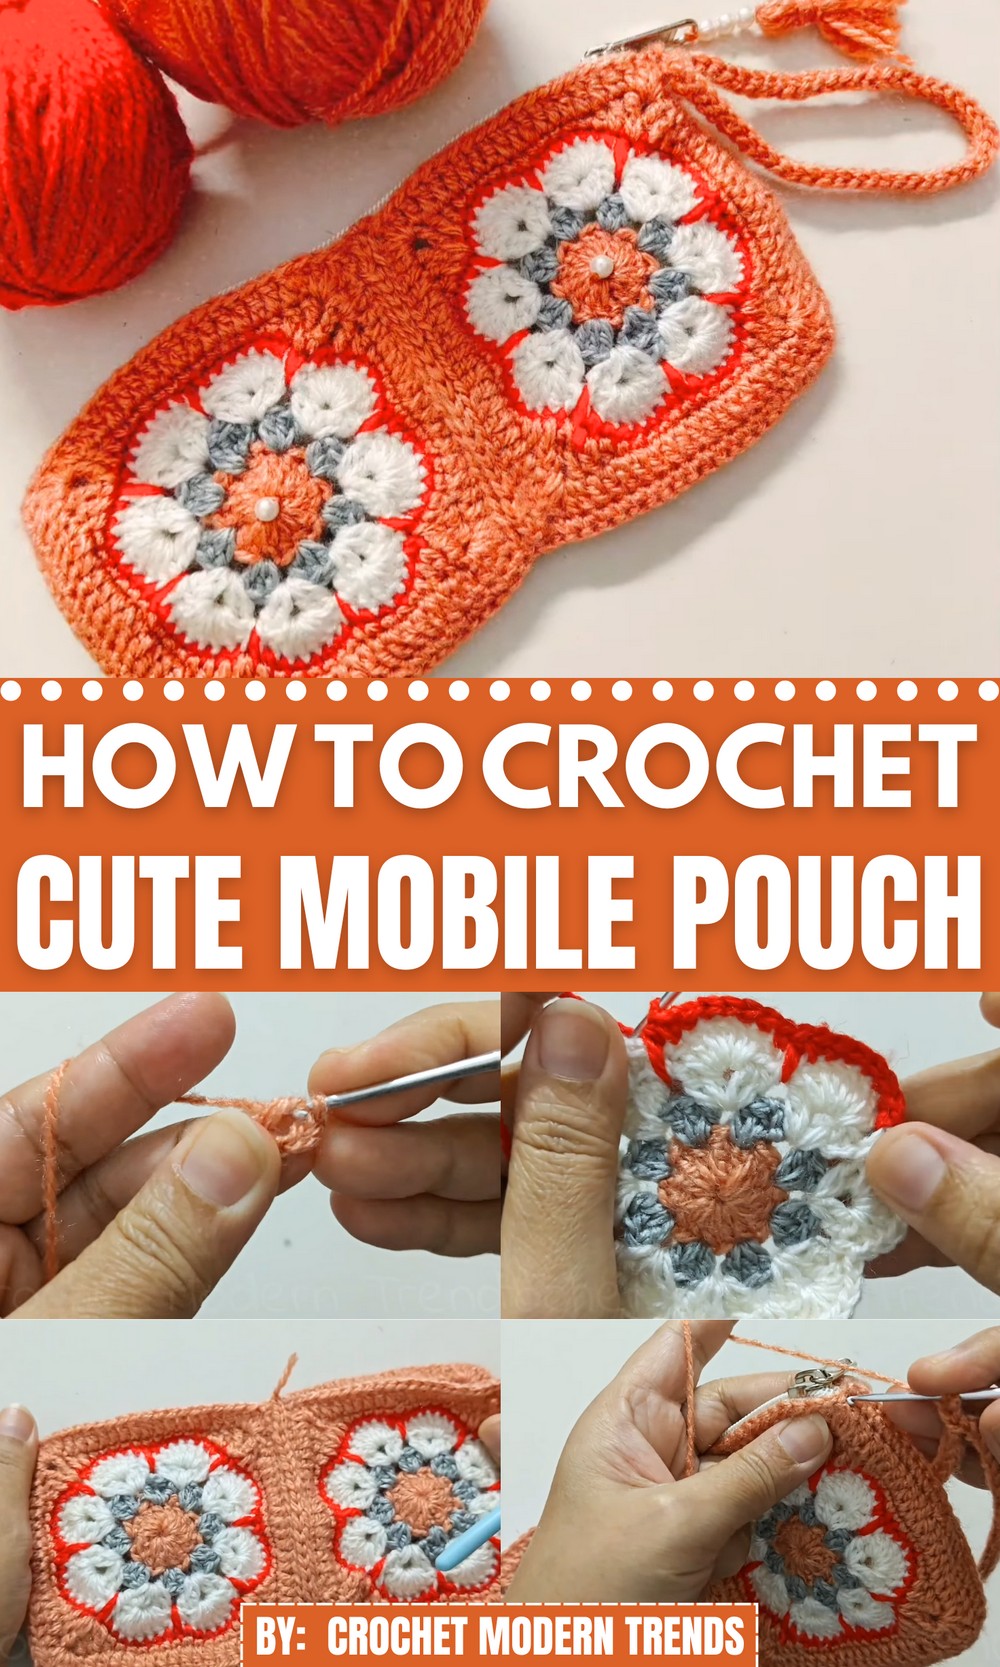
This pouch not only guards your phone against scratches and drops, but also serves as a lightweight, stylish holder when pockets aren’t enough. With a snug fit and soft texture, it’s gentle on screens while sturdy enough for daily use. The pattern typically begins from the base, working upwards in seamless rows, giving the pouch a clean, uniform look. A flap or button closure is often added for extra security, keeping your phone in place even when you’re on the move.
Perfect for gifting, travel, or your own use, it’s small enough to carry in a handbag and sleek enough to be used solo. Whether walking through a market or heading into a meeting, it keeps your phone protected in style. This simple, functional accessory offers more than storage—it quietly adds ease and purpose to your everyday carry.
Materials Needed
- Yarn: Four-ply yarn in four different colors.
- Crochet Hook: 2.5 mm.
- Additional Tools: A pair of scissors, a needle, zipper, and optional beads for decoration.
Step-by-Step Instructions
1. Starting the Square
- Create a slip knot and chain three.

- Insert the hook into the fourth chain, use slip stitch, and create a ring.
- Chain three and work 16 double crochets into the ring.
- Join the round with a slip stitch into the third chain of the first stitch and cut the yarn.
2. Adding Yarn of Color B
- Attach the second-colored yarn using a slip knot.
- Work double crochets in sets of three, skipping one stitch between each set.
- Complete eight sets of three double crochets.
- Join the round with a slip stitch into the third chain of the first stitch, then cut the yarn.
3. Adding Yarn of Color C
- Attach the third-colored yarn.
- Work two double crochets, followed by one chain, and then another set of two double crochets into the spaces between sets of double crochets from the previous round.
- Follow the same pattern across the round and join with a slip stitch.
4. Adding Yarn and Forming Design
- Attach yarn of color D (or next color).
- Work seven double crochets in spaces created by the chain stitches of the previous round.
- Join each cluster of seven double crochets with a slip stitch.
- Repeat the same pattern until the round is complete.
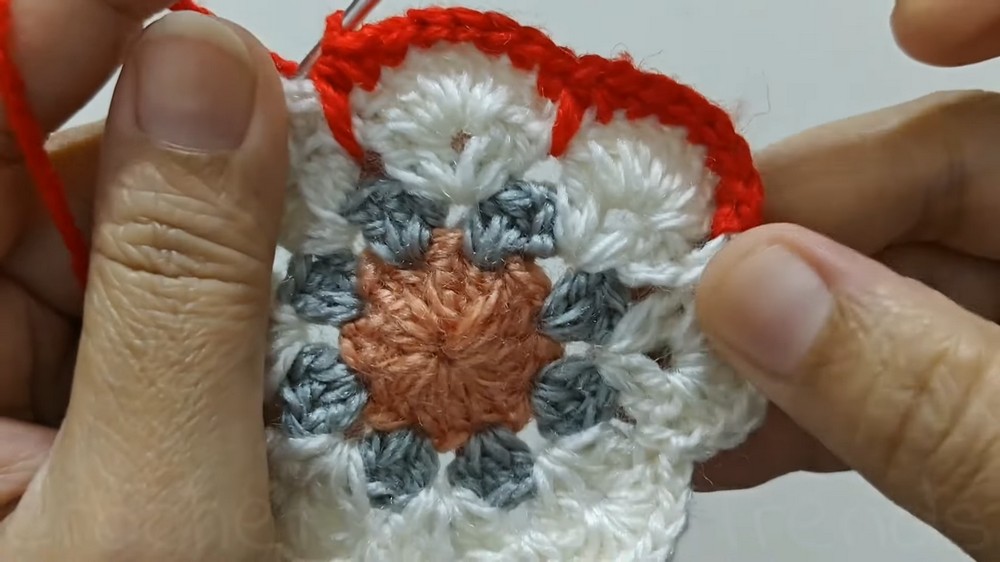
5. Finalizing the Square
- Attach the yarn of color A again.
- Begin with treble crochet in one stitch, followed by a double crochet in the next stitch, and then a half double crochet.
- Work 11 single crochets across the next stitches.
- Complete the square by working this pattern for all sides of the square.
- Join the stitches with a slip stitch and finish the square.
6. Creating Additional Squares
- Follow the same pattern to create three additional squares (for a total of four).
- These squares will be joined to form the pouch.
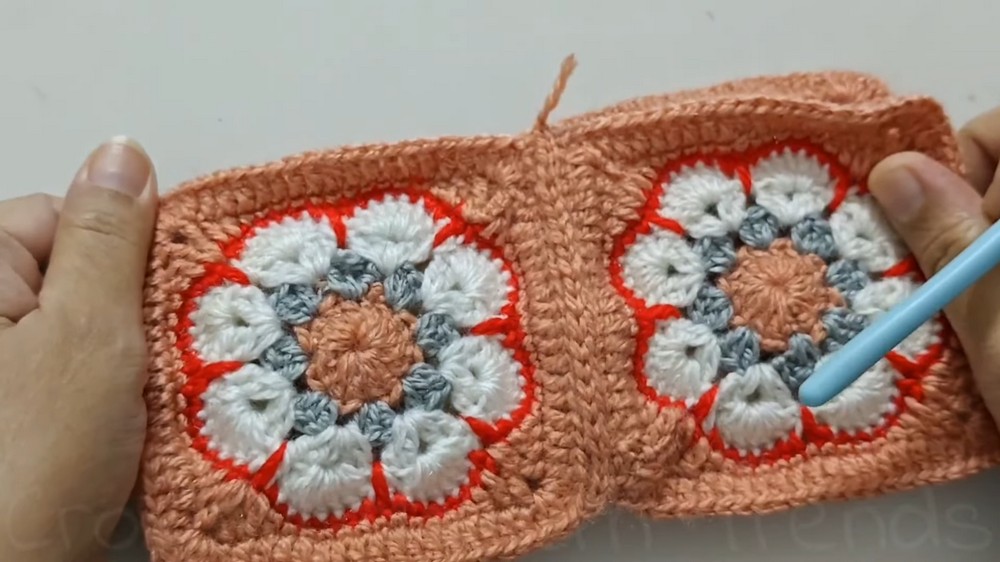
Joining the Squares
- Use single crochet stitches to join two squares.
- Begin from the corner and work through the chain spaces and edges to seamlessly bind the squares together.
- Repeat the process for the remaining squares to form a rectangle.
- Cut the yarn and prepare the pouch structure by joining three edges (using single crochet), leaving the top open for the zipper.
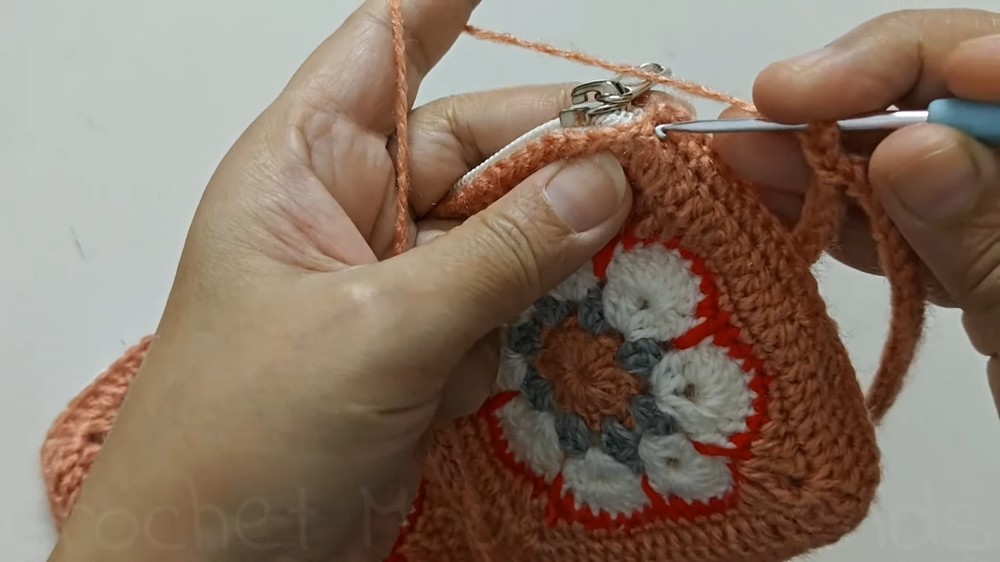
Adding the Zipper
- Use a needle and thread to sew the zipper to the open edge of the pouch.
- Attach with simple stitches.
Creating a Tassel
- Wrap yarn around your finger 14 times to form a tassel.
- Tie the yarn tightly and add optional beads for decoration.
- Attach the tassel to the zipper runner for a decorative finish.
Making the I-Cord
- Form an i-cord using the fourth-color yarn.
- Attach the i-cord securely to the pouch to create a handle or strap.
Special Features
- The pouch is highly customizable with different color options.
- The design is versatile — ideal as a pencil pouch, mobile bag, or small purse.
- The tassel and beads add a personalized decorative touch.
Level of Difficulty
This project is beginner to intermediate level. It requires basic understanding of crochet techniques such as slip stitch, chain stitch, single crochet, double crochet, half double crochet, and treble crochet.
Tutor’s Suggestions
- Follow the pattern carefully for each round.
- Ensure stitches are even and tight for a clean look.
- Experiment with different color combinations to make each pouch unique.
Uses
- Pencil pouch, mobile bag, or coin purse.
- Great for gifting purposes.
- Suitable for personal use or home décor accents.
Tip
To achieve clean edges and a professional finish, consistently count your stitches throughout the project. This ensures symmetry in the final product.
Conclusion
This pattern provides a detailed, step-by-step guide to making a crocheted pouch using squares. With its creative design and customizable elements, the pouch is both functional and beautiful. By following the pattern, you can master basic crochet techniques and create your own stylish accessories with ease.