Twist elegance into your décor with this Free Crochet Flower Wisteria Vines Pattern, adding delicate charm, flowing beauty, and graceful floral accents.
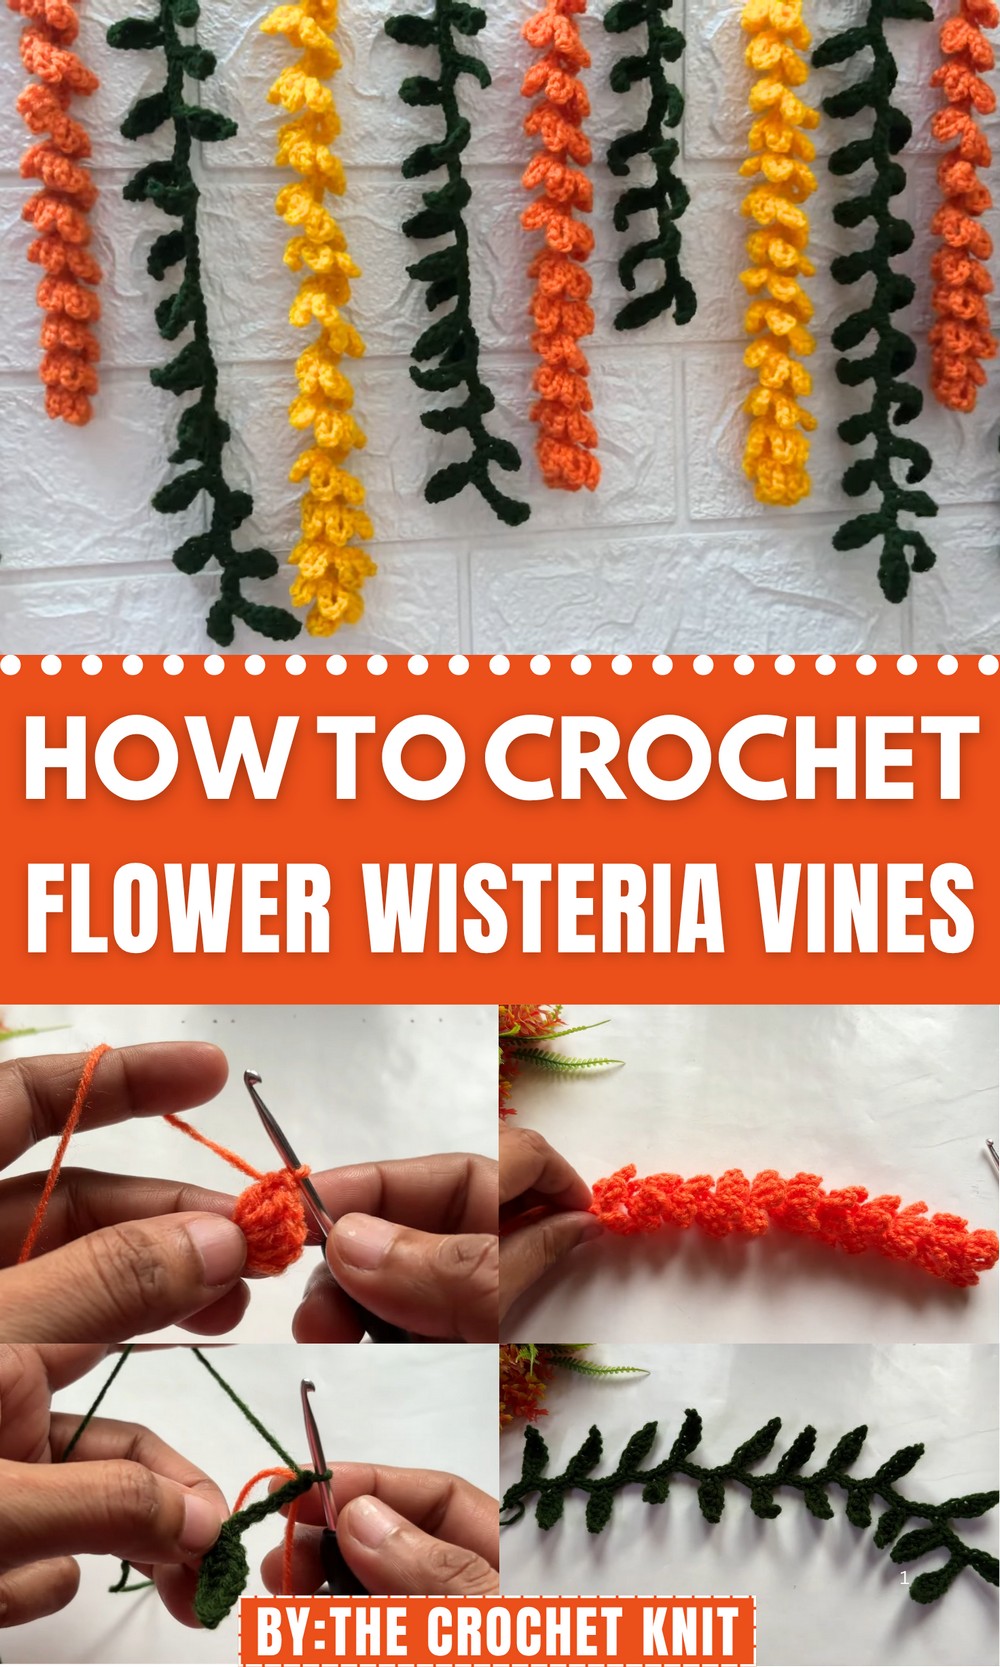
Its appeal lies in the combination of intricate detail and gentle structure, offering a piece that is both decorative and versatile. The specialty of this pattern rests in its adaptability; it can be used to embellish garments, drape over shelves, frame mirrors, or enhance home décor with a botanical touch. Beyond visual allure, it provides practical benefits: lightweight, durable, and easy to handle, the vines can be arranged or joined to suit various spaces and creative ideas.
This pattern also encourages a satisfying and mindful crafting experience, giving makers the opportunity to enjoy both the process and the result. Combining elegance, versatility, and handmade charm, these wisteria vines bring warmth, texture, and a touch of floral sophistication wherever they are displayed, adding a timeless, graceful accent to any environment.
Special Features of the Flower Vine Garland
- Customizable: You can create the garland in any size, with any number of flowers and leaves, and choose your preferred colors to match the occasion or décor theme.
- Realistic Design: The 3D leaves and flowers add an organic and natural touch to the garland.
- Flexible Application: The garland can be used for wall hangings, party decorations, gift wrapping, table centerpieces, photo backdrops, or any creative display.
Level of Difficulty
Beginner-Friendly
This project uses basic crochet stitches: chains, slip stitches, single crochet, half double crochet, and double crochet. While it is beginner-friendly, patience and familiarity with foundational stitches will help create uniform, neat shapes.
Tutor’s Suggestions
- Yarn Selection: Use 3-ply, 4-ply, or 5-ply yarns for the best texture and structure in the flowers, leaves, and garland base. Select colors that contrast well for the vine and flowers for a vibrant, eye-catching design.
- Practice Measuring the Vine: Before starting, decide how long you want the garland to be. This helps avoid miscalculations in chain lengths or placement of flowers/leaves.
- Use Consistent Tension: Ensure your stitches have a consistent tension to maintain the desired shape of the flowers and leaves. Loose stitches may make the pieces floppy.
Materials Needed
- Yarn:
- Green yarn for the base vine and leaves.
- Colorful yarns for the flowers (e.g., reds, yellows, pinks, or any preferred combinations).
- Crochet Hook: A hook that matches your yarn’s weight (recommended size for 3/4/5-ply yarns is 4mm–5mm).
- Yarn Needle: For weaving in the ends and securing knots.
- Scissors: For cutting and trimming yarn ends.
Step-by-Step Instructions
Step 1: Making the Base Vine
- Start with a Slip Knot and Chain the Base:
- Make a slip knot and chain 140 to create the base vine. Adjust the chain length depending on how long you want your garland to be.
- Add Space for the First Leaf:
- Create 6 slip stitches along the chain. This determines the length of the vine before your first leaf. (You can adjust the number of slip stitches based on your preference.)
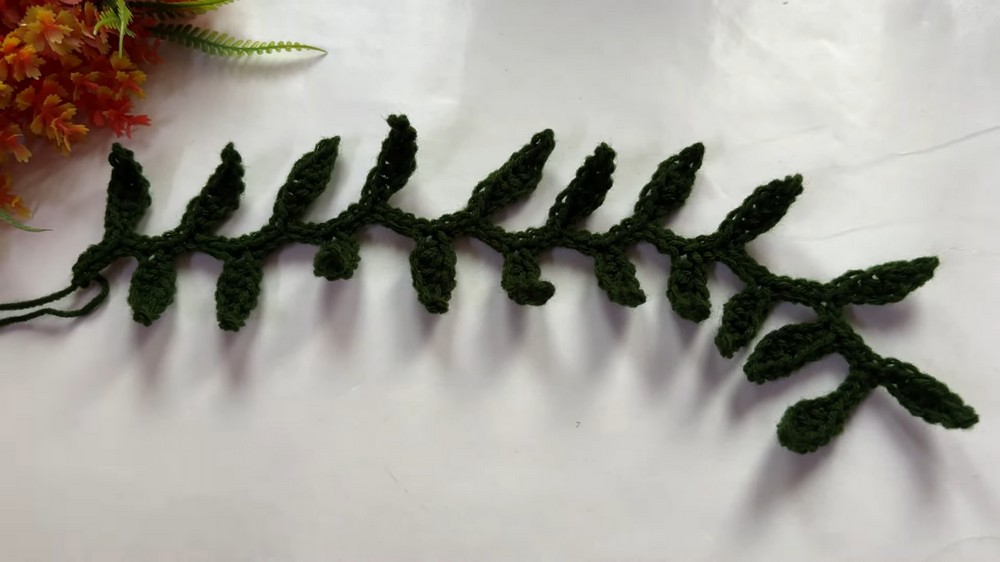
Step 2: Creating a Leaf
- Chain to Create the Leaf Foundation:
- From the last slip stitch, chain 7.
- Shape the Leaf:
In the chain 7 foundation:- Slip Stitch (Sl st) into the first chain.
- Single Crochet (SC) into the next chain.
- Half Double Crochet (HDC) twice in the next two chains.
- Single Crochet (SC) into the next chain.
- Slip Stitch (Sl st) into the last chain.
This creates the tapered shape of the leaf.
- Repeat Leaves Along the Vine:
- Skip some chains (based on your desired spacing), slip stitch to the next spot, and repeat the leaf-making process.
- You can make leaves on one side or both sides of the vine, depending on your design preference.
- Fasten off when done, leaving a long tail to weave in and secure.
Step 3: Making the Flowers
- Create a Magic Ring:
- Wrap your yarn around your fingers to create a magic ring, which serves as the foundation for the flower.
- Form the Base of the Flower:
- Chain 3 (counting as the first Double Crochet).
- Make 4 Double Crochets (DC) into the magic ring.

- Shape the Petal:
- Chain 3 and slip stitch into the same spot to complete the petal.
- Start the Next Petal:
- Slip stitch into the next stitch to move forward.
- Chain 7, slip stitch into the same spot, slip stitch into the next stitch, and repeat the process to create all petals.
The flower naturally starts to curl, creating a realistic look.
- Complete the Flower:
- Once all petals are completed, pull the tail of the magic ring to tighten and secure the center.
- Fasten off, leaving a long tail to tie the flower to the vine.

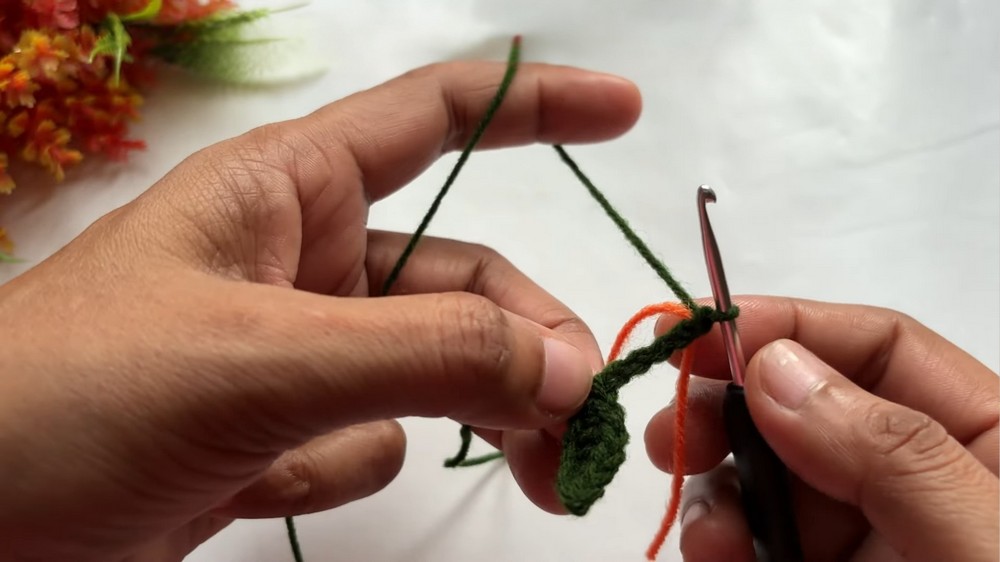
Step 4: Attach Flowers to the Vine
- Position the Flower:
- Choose your desired spacing for the flowers along the vine (e.g., every 8 chains, every leaf).
- Attach the Flower:
- Use the long yarn tail left when finishing the flower to tie it to the vine securely.
- Repeat for as many flowers as you want to add to the garland.

Conclusion
Your flower vine garland is now complete! This lively and colorful garland is a creative project that can brighten up any space or special event. Its simple construction and low-cost materials make it perfect for beginners and experienced crocheters alike. Whether you leave it minimalist or add extra leaves and flowers, this project is endlessly customizable to fit your vision.
Possible Uses
- Party or wedding backdrop.
- Wall décor for bedrooms or living spaces.
- Embellishment for gift wrapping.
- Table centerpiece for festive occasions.
Bonus Tip
When attaching flowers or securing the yarn at any point, make sure to double-knot and weave the tail tightly for durability. This ensures the garland doesn’t unravel over time, especially if it’s tugged or handled often.