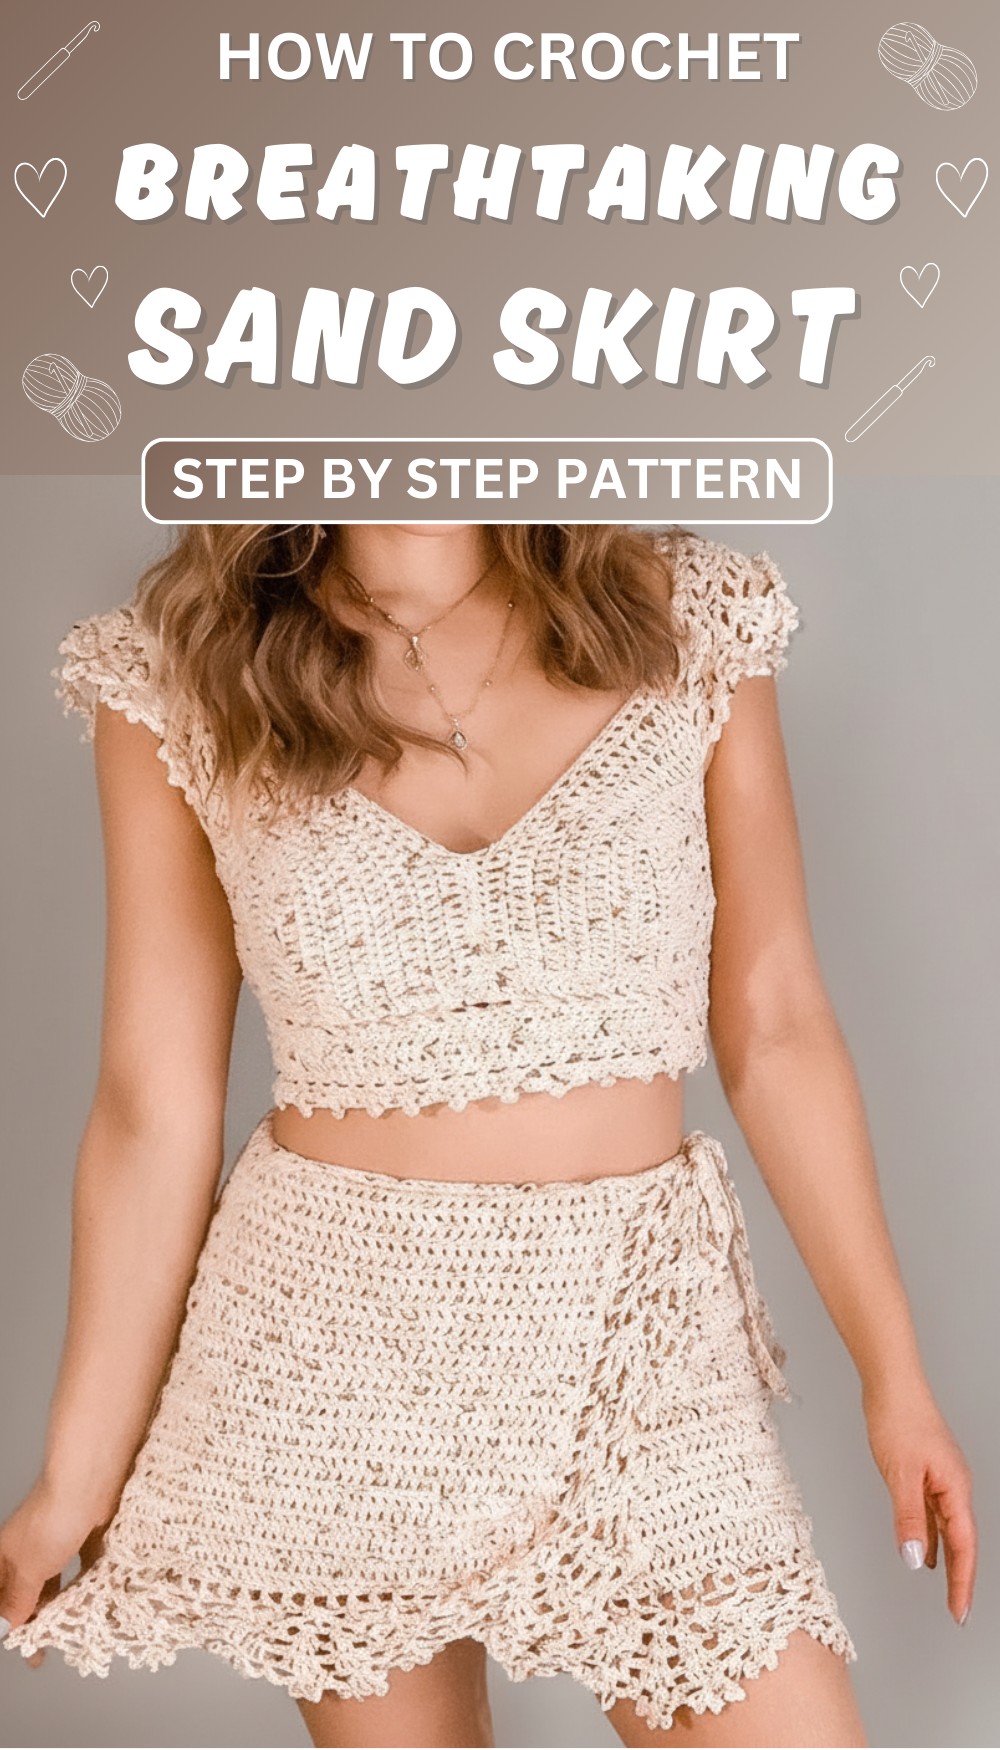
Transform your summer style with this airy and chic crochet sand skirt pattern, perfect for beach outings, poolside moments, or casual boho vibes.
Yourself strolling along the shoreline, the soft sand underfoot and the breeze gently flowing through your handmade creation. This skirt pattern is designed to bring a touch of elegance and comfort to your summer wardrobe. Made with a unique open-stitch design, it offers a lightweight and breathable feel, perfect for warm, sunny days. The skirt hugs your waist beautifully while flowing gracefully down for a flattering silhouette.

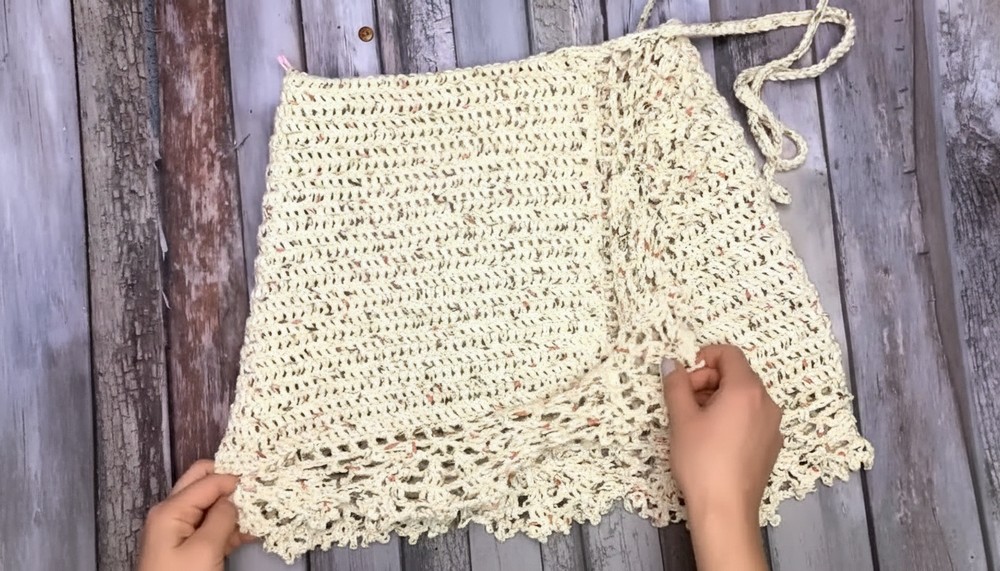
Beautiful Sand Skirt Pattern for Boho Summer Vibes
You can wear it as a chic beach cover-up over your swimsuit or pair it with a cute crop top for cozy evenings at a summer party. With options to customize the length and colors, it’s an excellent way to add your personal touch. This charming piece is not only stylish but also fun to make, giving you the joy of creating something truly special that’s both fashionable and practical

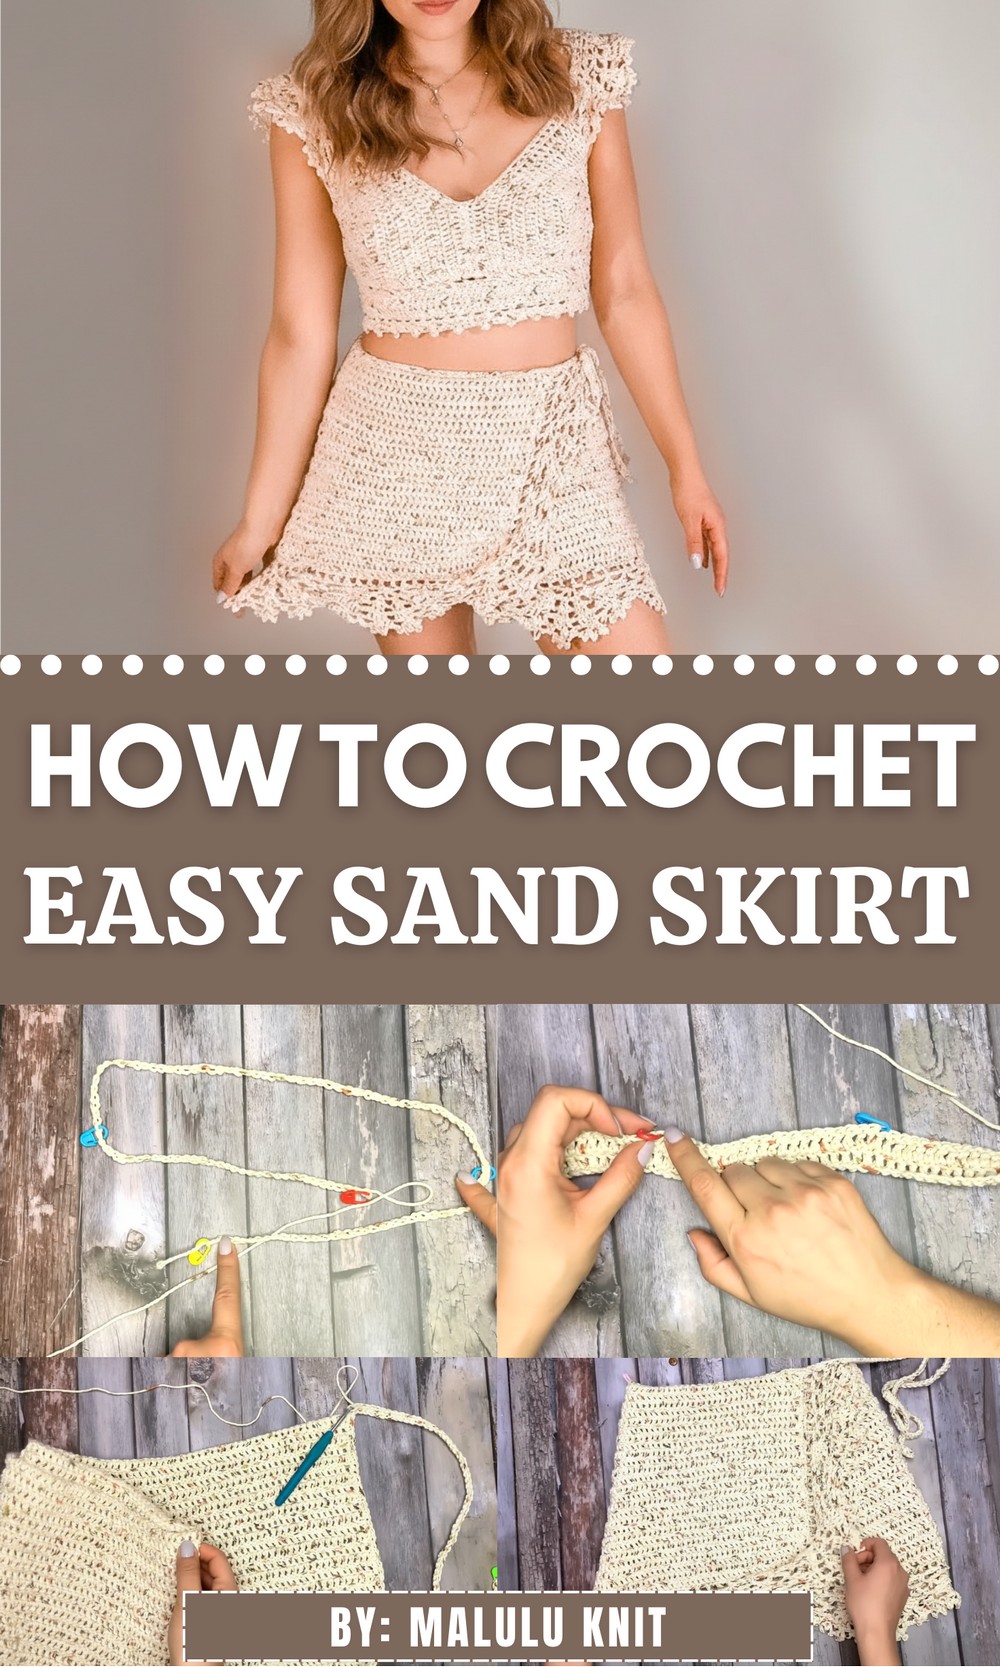
Crochet Wrap Skirt Pattern
Materials Needed
- Yarn: Medium-size #4 cotton yarn (Bernat Handicrafter used in the video).
- Crochet Hook: 5mm (recommended for medium cotton yarn).
- Other Tools: Scissors, stitch markers (at least 4), tapestry needle, and a button to secure the skirt.
Step-by-Step Pattern
Foundation
- Chain Base:
- Begin with chains to match your waist size. Wrap the chain around your waist, between your navel and hips, and end at the same side where you began.
- For reference, 100 chains = approximately 92cm (adjust as needed).
- Place markers on the chain at the start point (one side of the waist) and the end point (opposite side of the waist).
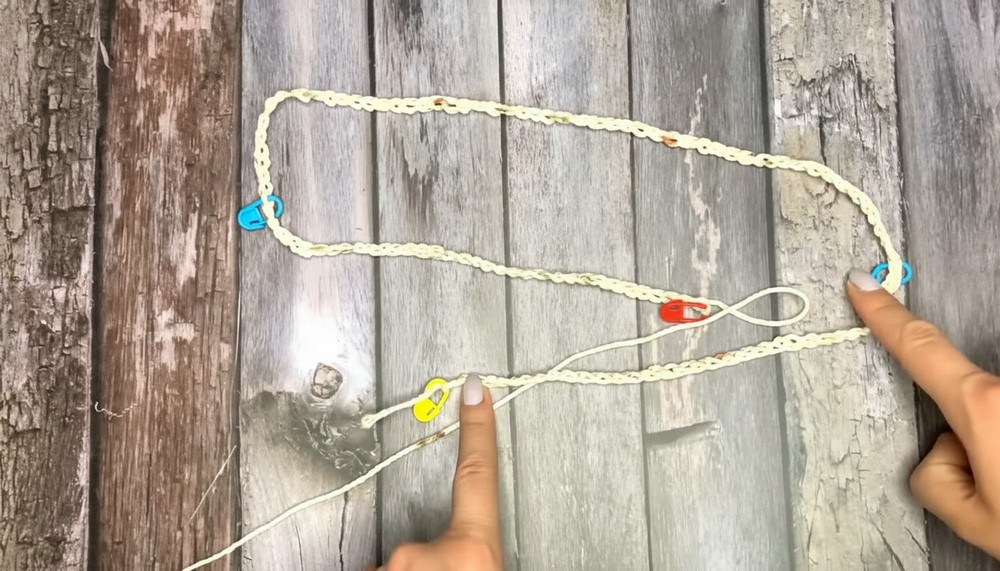
- Shaping Overview:
- The chain forms the base of the wrap. This pattern will include increases at the markers (waist points), creating the wrap-around shape.
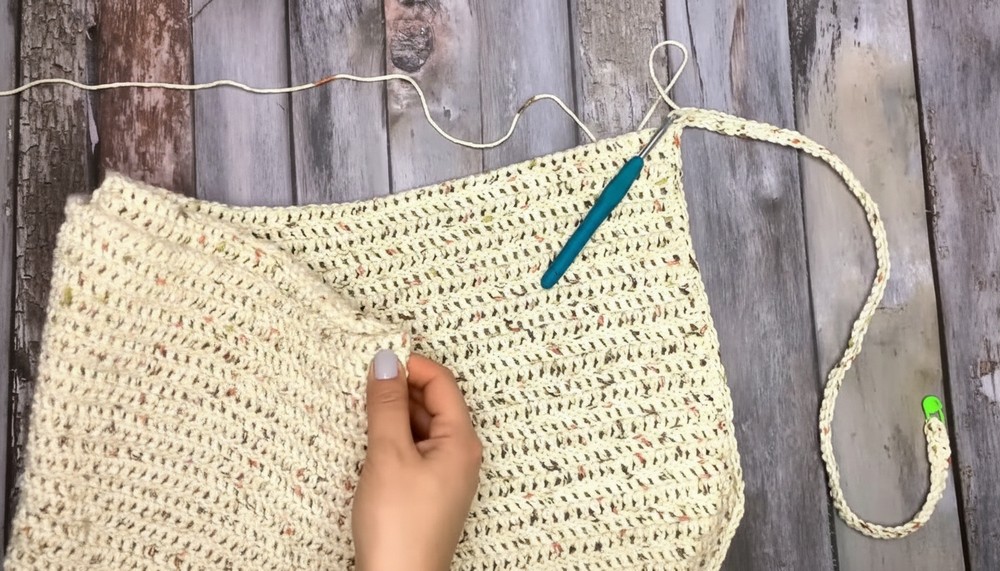
Body of Skirt
- Row 1:
- Chain 1, place a marker, and begin working Double Crochet (DC) in each chain along the base.
- Work 2 DC at each marker point (increase stitch), ensuring markers stay in the first stitch of each increase.
- Repeat DC to complete the row.

- Row 2:
- Turn your work. Chain 1, replace the marker, and work DC stitches as they are presented up to the marker.
- Remove the marker, make 2 DC at the marker point, replace the marker in the first stitch of the increase.
- Continue working DC until reaching the next marker, repeating the increase process.
- Rows 3–23:
- Continue as in Row 2, repeating the increase process at both markers.
- At the end of Row 23, the skirt should measure approximately 27cm in height.

Shaping Curve
- Decreases:
- Row 24: Begin with chain 1, replace marker, and make 2 decreases (work two stitches together as a DC) at the start of the row.
- Work DC stitches as usual until 4 stitches remain at the opposite end. Make 2 decreases again.
- Repeat this process for 2 more rows (Rows 25 and 26).
- Result: These decreases create a curved edge for the skirt, adapting perfectly to the body.
Edge and Buttonhole
- Single Crochet Edge:
- Turn your fabric.
- Work Single Crochet (SC) evenly along the edge, maintaining consistent spacing between stitches.
- Buttonhole:
- At the corner of your skirt, chain 5 and make a Slip Stitch (SS) into the same stitch to form a buttonhole.
- Adjust chain count to match the size of your button.
- Ties:
- At each hip edge, create ties:
- Chain 72 (approx. 54cm).
- Return with SC into each chain for firmness.
- Repeat on the opposite side for uniformity.
- At each hip edge, create ties:
Decorative Motif
- Setup Round:
- Start at the bottom edge. Work DC strides alternating with chains:
- Skip 1 stitch, chain 1, and DC into the next stitch. Repeat across the row.
- Leave the inside front edge smooth (no decorations).
- Start at the bottom edge. Work DC strides alternating with chains:
- Loop Round:
- Chain 5, Slip Stitch into every fourth space to create loops.
- Motif Row:
- Work in the loops between DC groups:
- Two DC, chain 2, two DC into one loop.
- Repeat uniformly across loops to give a textured appearance.
- Work in the loops between DC groups:
- Final Round (Tips):
- Add small “heads” atop motifs:
- DC, then chain 3 and SS into the stitch to create a spike.
- Repeat, adding flare to the edges of the motifs.
- Add small “heads” atop motifs:
Final Touch
- Finishing Edges:
- Hide any loose threads using a tapestry needle.
- Attach a button at the buttonhole for secure closure.
- Final Measurements:
- Double-check fit and adjust button placement as needed.
Special Features
- Adjustable Fit: Button closure and ties ensure a snug fit regardless of material elasticity.
- Custom Size: Easily modify length and width to fit your body.
- Versatile Design: Use as a casual skirt or beach cover-up.
Uses
The wrap skirt is perfect for:
- Beach Days: Lightweight and stylish for lounging by the pool or sea.
- Casual Outfits: Pair with your handmade crop top for a coordinated look.
- Gift Idea: Surprise your friends with a unique handmade crochet piece!
Tutor’s Suggestions
- Use bright summer-friendly colors for a standout vacation piece.
- Ensure stitches at the waist are well-marked to avoid uneven increases.
- For longer skirts, simply add more rows on the body.
Conclusion
This Arena Wrap Skirt beautifully combines comfort and creativity. With its easy-to-adjust fit, intricate motif design, and customizable features, this project is a must-try for crochet enthusiasts of all levels. Whether used as pool wear or featured in your daily wardrobe, this piece will surely turn heads.
Crochet Tip of the Day:
When working with motifs, count your stitches often to maintain symmetry. This will ensure a polished and professional finish.