Elevate your hairstyle with this Crochet Mesh Scrunchie Pattern offering stylish wear comfortable fit and a trendy accessory for any look
A delicate swirl of texture forms effortlessly, transforming simple materials into a stylish and functional hair accessory that elevates everyday looks. Perfect for securing ponytails, buns, or braids while adding a touch of elegance, this scrunchie balances practicality with playful charm. The Crochet Mesh Scrunchie Pattern guides each step with clear instructions and thoughtful shaping, allowing makers to create a lightweight, airy, and durable piece that feels soft against the hair.
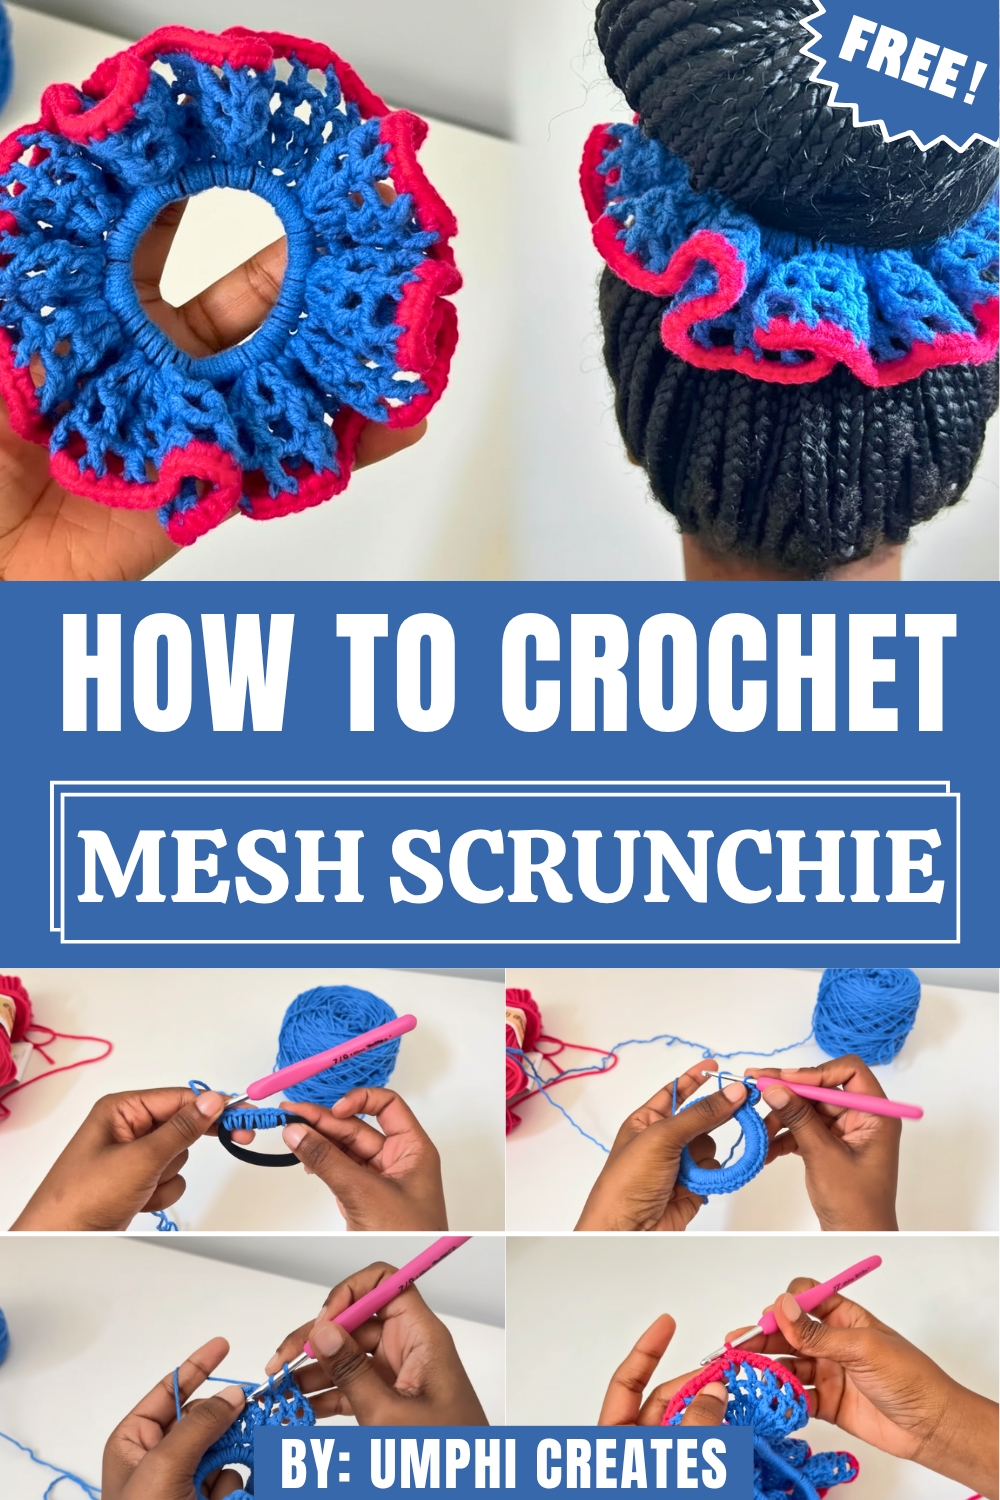
Whimsical Crochet Mesh Scrunchie Pattern Perfect for Parties
The pattern encourages personalization through a variety of yarn types, colors, and sizes, making each finished scrunchie a unique accessory that complements individual style. Working on this project promotes focus and relaxation, turning the rhythmic stitching into a soothing and rewarding experience. Once completed, the scrunchie can be paired with casual, sporty, or chic outfits, offering versatility and flair for all occasions.
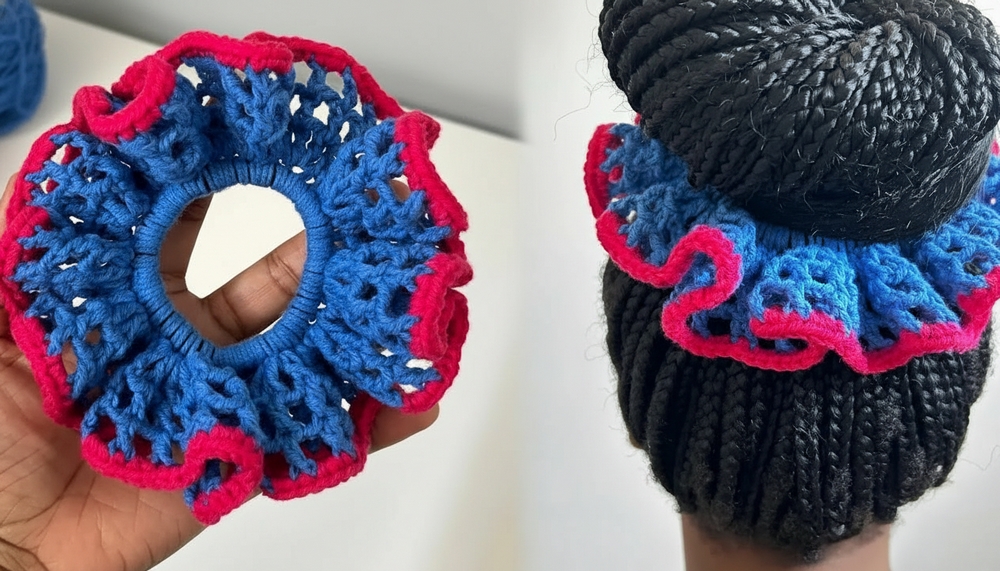
Beyond its practical use, it adds a subtle decorative element that highlights creativity and attention to detail. Blending functionality, aesthetic appeal, and customization, this pattern produces a charming, wearable accessory that brings style, comfort, and a handmade touch to daily hair routines. Its open mesh design not only adds visual interest but also provides gentle elasticity, reducing hair breakage and keeping styles comfortable throughout the day.
Step-by-Step Details
Materials Needed
- DK Yarn:
- Primary color and a contrasting color (optional) for ribbing.
- The tutorial uses blue for the main scrunchie and raspberry for ribbing.
- Crochet Hook:
- Recommended size: 4 mm.
- Acceptable range: 3.5 mm to 4 mm (adjust based on tension and yarn).
- Hair Tie:
- Any plain elastic hair tie of your choice.
- Scissors or Yarn Nipper.
- Tapestry Needle:
- Required for sewing the yarn ends.
Tutorial Process
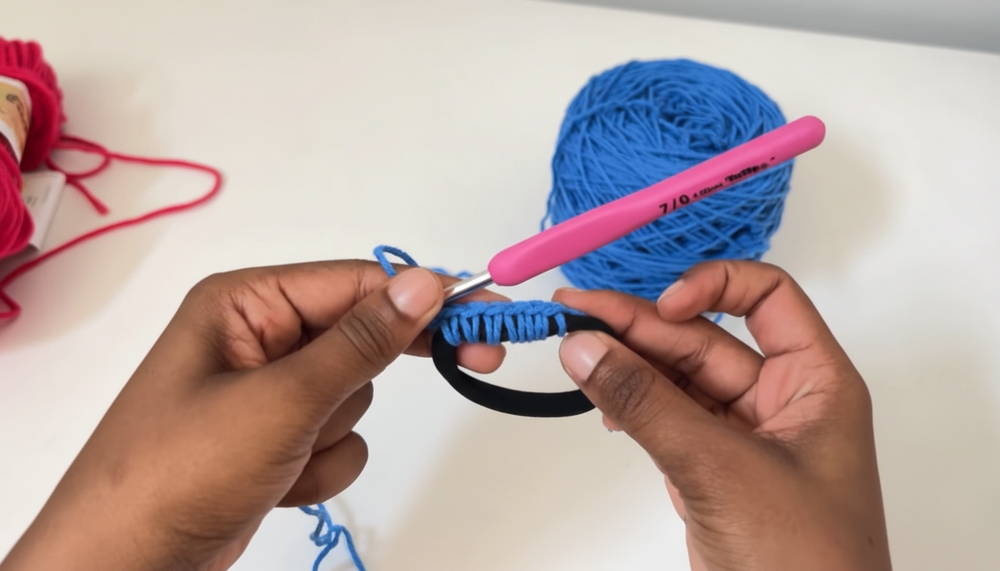
Round 1: Cover the Hair Tie
- Create a slip knot and insert the crochet hook into the loop. Pull the yarn tight.
- Attach the yarn to the hair tie and begin crocheting single crochets all the way around.
- Tip: Keep the stitches moderately loose to ensure the scrunchie doesn’t stretch excessively while covering the tie.
- Tip: Keep the stitches moderately loose to ensure the scrunchie doesn’t stretch excessively while covering the tie.
- Add 35-40 single crochets to cover the hair tie; increase to 50-60 stitches if you want more ruffles.
- Once covered, pull the tail tightly to secure the end of the round.
- Perform a slip stitch into the first stitch. Chain 1, pull the yarn tight, and start the next round.
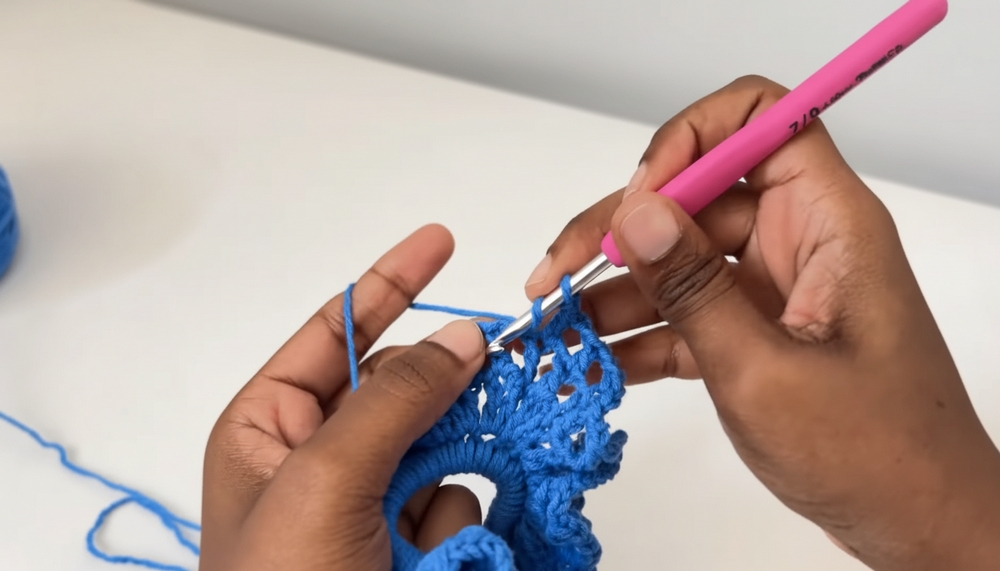
Round 2: Create Mesh Design
- From the slip stitch space where the first round ended:
- Crochet 1 single crochet, then another single crochet in the front loop.
- This creates the first double crochet.
- Chain 2 and perform a double crochet in the same space.
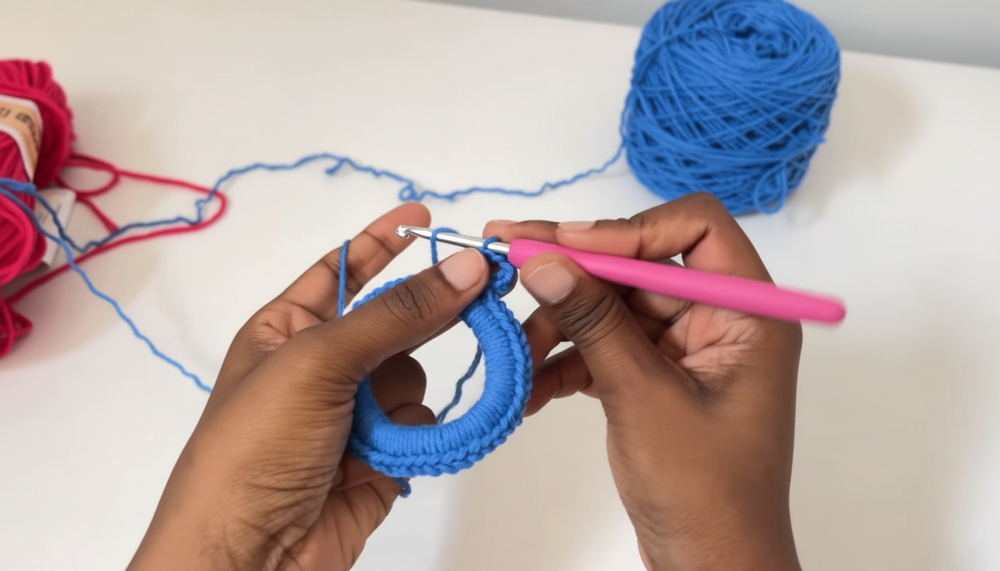
- Move to the next stitch and repeat the pattern:
- Crochet 2 double crochets, separated by chain 2.
- Continue this sequence—2 double crochets separated by 2-chains—all the way around until the end of the round.
- Finish by matching the last stitches with 2 chains and perform a slip stitch to the top of the previous double crochet.
3: Build the Mesh
- Repeat the same pattern from Round 2:
- Work 2 single crochets stacked to form the first double crochet.
- Chain 2 and crochet 1 double crochet in the top of the previous round’s stitches.
- Alternate between 2-chains and double crochets on top of those from the previous round.
- Complete the round using a slip stitch and secure it with chain 1.
4: Optional Width Expansion
- Based on preference, you can add a fourth round to make your scrunchie wider by continuing the mesh pattern.
- Follow the same steps:
- Chain 2 and crochet double stitches in the loops of the previous round.
- Stop if satisfied with the width, or continue for a larger scrunchie.
Final Ribbing Round
- Switch to a contrasting yarn color and create a slip knot.
- Join the new yarn to any stitch (preferably a double crochet loop from the previous round).
- Crochet single stitches around the scrunchie in the following pattern:
- Single crochet into each double crochet loop.
- Crochet two single crochets into every chain-2 space.
- Repeat the pattern until the scrunchie is fully bordered.
Finishing Up
- At the end of the ribbing round, pull the yarn tight to secure your work.
- Cut out enough yarn to sew the edges cleanly.
- Use a tapestry needle to neatly secure and weave in ends.
- Insert the needle through the loops and create a seamless finish.
- If desired, knot the loose ends for extra security before trimming excess yarn.

Special Features
- Mesh Texture: The double crochet and chain pattern creates an airy, open design.
- Customizable Width: Add extra rounds to make the scrunchie wider or more ruffled.
- Versatile Color Combinations: Mix and match your yarn colors to create unique designs.
- Beginner-Friendly: The tutorial uses simple techniques like single crochet, chain stitches, and slip stitches.
- Elastic Integration: Cover a hair tie completely while maintaining flexibility for functionality.
Level of Difficulty
The project is easy and beginner-friendly. Most of the stitches, such as single and double crochets, are basic techniques, while repetitive patterns make it easier to follow along. Slight attention is required for neat finishing (weaving ends or secure closure), which can be practiced with time.
Tutor’s Suggestions
- Avoid Tight Crocheting: Ensure yarn is not stretched too tightly over the hair tie to prevent distortion.
- Experiment with Colors: Try contrasting shades or stick to a single color for a cohesive look.
- Make Extra Rounds for Ruffles: Add more single crochets on the hair tie or more mesh rounds for voluminous scrunchies.
- Use Scrap Yarn: Make use of leftover DK yarn for an economical and eco-friendly approach.
- Secure Ends Carefully: Spend time neatly sewing and securing yarn to avoid unraveling.
Uses and Applications
- Hair Accessory: A practical and trendy item for your personal use.
- Gift Item: Handmade scrunchies are thoughtful and inexpensive gifts for loved ones.
- Customization: Perfect for matching outfits or creating seasonal designs.
- Selling Opportunity: Craft scrunchies to sell at craft markets or online stores with personalized designs.
Tip
When switching to a contrasting yarn for ribbing, test the color combination beforehand by placing small swatches side-by-side. This ensures a cohesive and visually appealing finished product. Additionally, use a tapestry needle for clean closure instead of relying only on slip stitches.
Conclusion
This pattern offers a step-by-step guide to creating a mesh crochet scrunchie, blending simplicity with creativity through basic techniques and customizable features. Whether for personal use, gifting, or selling, the scrunchie is a stylish, functional, and eco-friendly accessory that can brighten anyone’s wardrobe. Follow the instructions and enjoy crocheting your own scrunchies, experimenting with colors, patterns, and sizes.