Celebrate making a cozy and stylish Free Crochet Twisted Beanie Hat Pattern, perfect for intermediate crocheters looking for a unique project.
FREE Crochet Twisted Beanie Hat for Fall & Winter
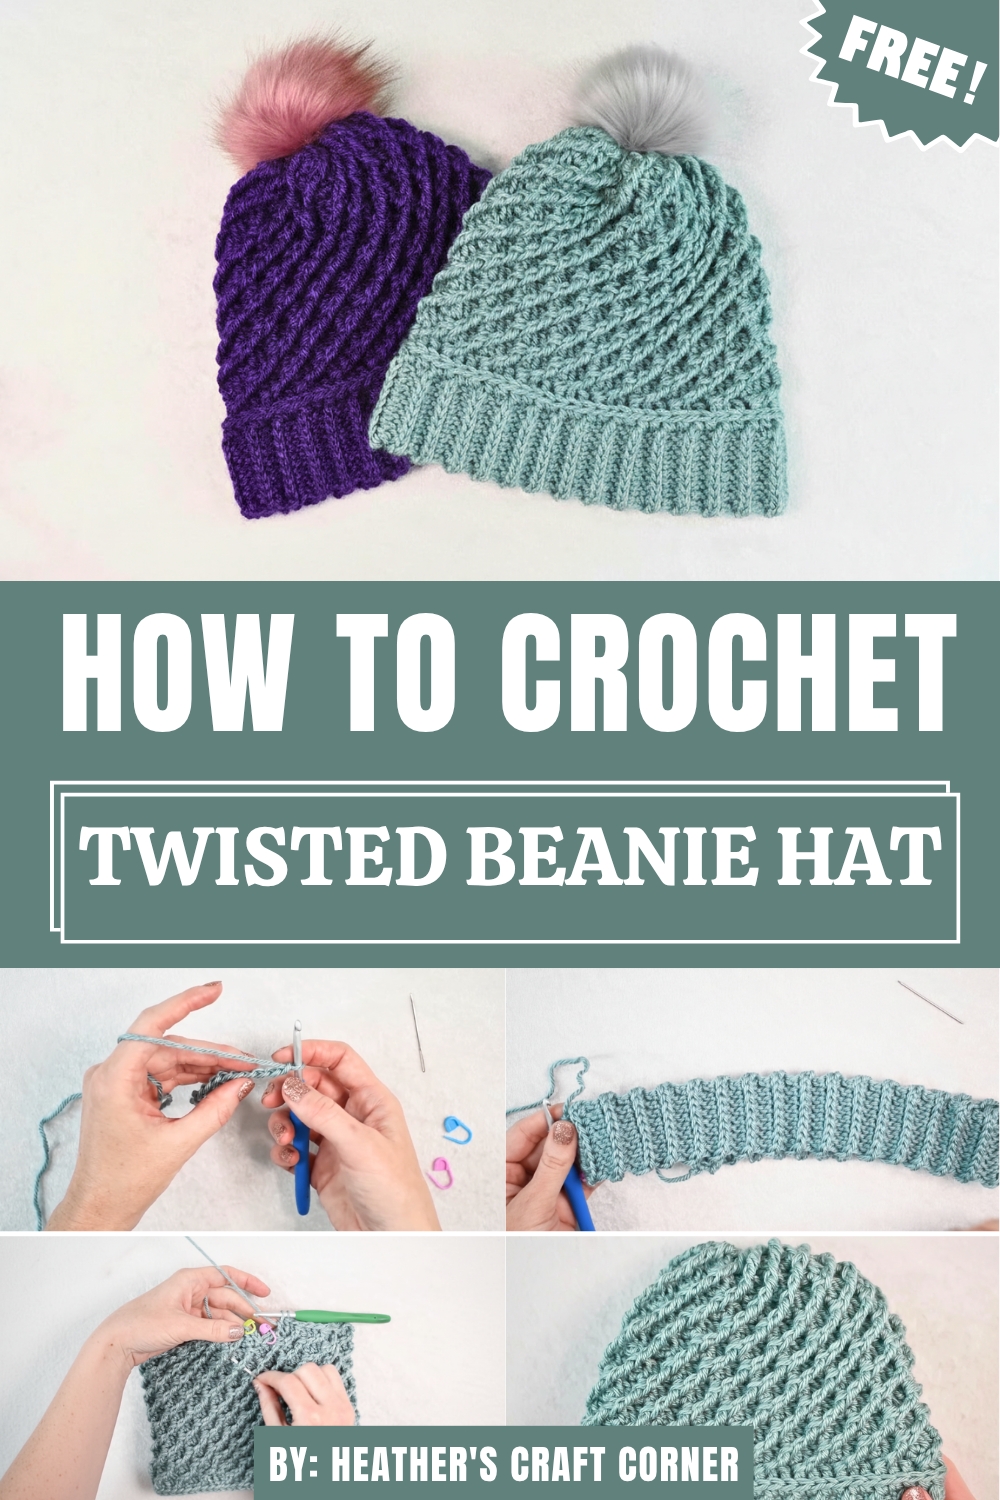
With its unique texture and cozy design, this hat is both stylish and practical for the chilly weather. Perfect for everyday wear or as a thoughtful handmade gift, it adds personality to any wardrobe.
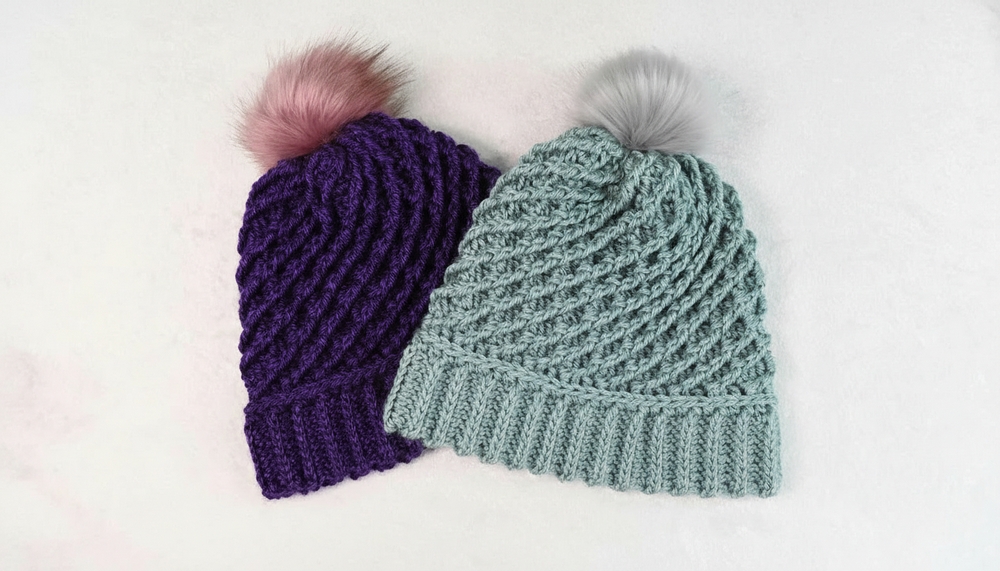
Slightly Twisted Beanie – Crochet Pattern
Materials Needed
- Yarn: ~200 yards of worsted weight yarn
- Crochet Hooks:
- Size H/8 (5mm) for the band
- Size I/9 (5.5mm) for the main body
- Pom-pom: Optional (faux fur or handmade, approx. 4″)
- Stitch Markers: For tracking beginning and end of rows (optional)
- Yarn Needle: For sewing and weaving in ends
Gauge
- Band: Measure around your head for fit after 60 rows; adjust rows or repeats accordingly.
- Body: Gauge is automatically adjusted by repeating stitch and round counts.
Finished Size
- Adult-Sized Beanie: Fits head circumference ~21–23 inches (customization options included below).
Customization Ideas
- Fit Adjustment: Add or subtract rows in multiples of 3 for the band to achieve a perfect fit.
- For example, a 57-row band requires 19 repeats; a 63-row band needs 21 repeats.
- Slouchy Design: Add extra rounds after Round 12 to create a more relaxed, slouchy hat.
- Pom-pom Options: Attach faux fur pom-poms with elastic loops and buttons for removable designs.
Special Techniques Used
- Half Double Crochet (HDC): Worked into the back loop and third loop of stitches.
- Tutorial links for basic HDC are available in Heather’s additional content.
- Front Post Treble Crochet: A textured stitch worked around the post of a double crochet to create dimensional twists.
- Whip Stitch: Used for sewing ends of the band seamlessly.
- Double Crochet Two Together (DC2tog): A decrease stitch that merges two double crochets.
Pattern Instructions
Band
Step 1: Chain Foundation
- Foundation Chain: Chain 10, leaving a 10-inch tail for sewing.
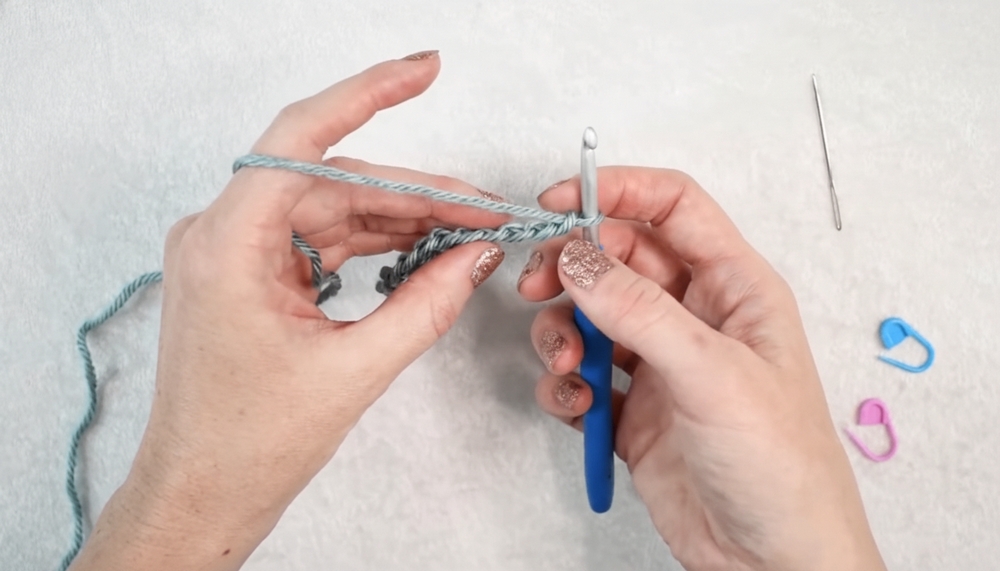
Row 1:
- Insert hook into 3rd chain from the hook (skipping first 2 chains; these do NOT count as stitches).
- Work Half Double Crochet (HDC) into the back loops across.
- Mark the first stitch (optional).
- Total: 8 stitches.
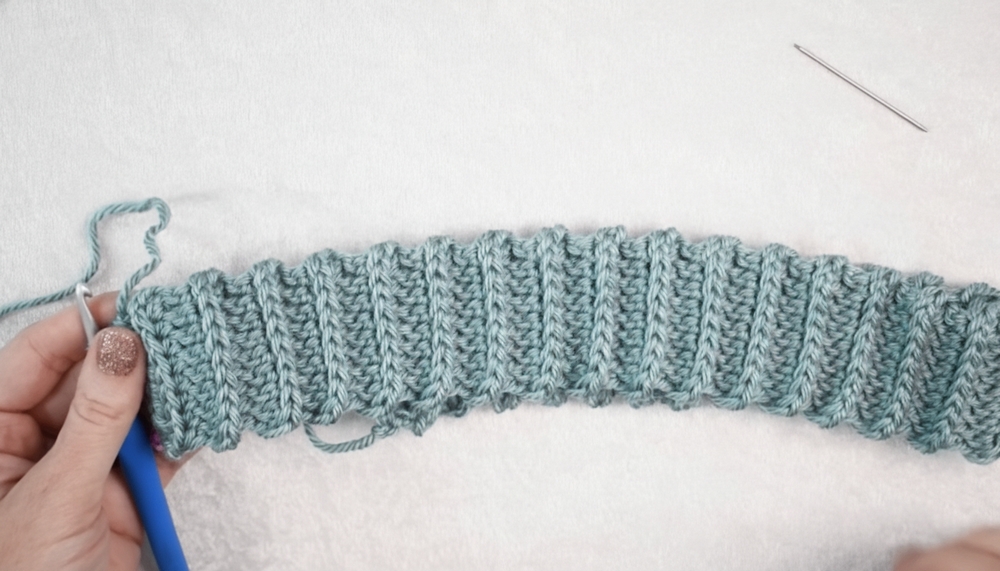
Row 2:
- Chain 2; these do NOT count as stitches.
- Work into the third loop of each Half Double Crochet (below the V-shaped top strands).
- Insert hook into the diagonal strand visible beneath the loop.
- Work Half Double Crochet across.
- Repeat: Mark first stitch for neat tracking.
- Total: 8 stitches.
Rows 3–60:
- Repeat Row 2.
Sizing Check:
- After 60 rows, wrap the band around your head to check the fit.
- Adjust rows in multiples of 3 if needed for size (see Customization Ideas).
- Adjust rows in multiples of 3 if needed for size (see Customization Ideas).
Sewing Ends Together:
- Use the 10-inch tail to sew the band’s ends with Whip Stitch.
- Line up stitches carefully to avoid twisting the band.
- Insert the needle into the third loop and base chains.
- Create a ridge mirroring the band edge for a seamless look.
- Weave in the leftover tail securely after stitching.
Body
Switch to the I/9 (5.5mm hook) for the main body.
Round 1:
- Chain 2; these do NOT count as stitches.
- Work Half Double Crochet (HDC) evenly into the rows around the band.
- Aim for 60 stitches total.
- Pick points for the hook to avoid large gaps.
- Slip stitch to join.
Round 2:
- Chain 2; these do NOT count as stitches.
- Work Double Crochet (DC) into the third loop of each HDC from Round 1.
- Repeat around for a total of 60 stitches.
- Slip stitch to join.
Round 3:
- Begin Double Crochet Front Post Treble Together (DC-FPTr):
- Start DC in the first stitch but leave last two loops on the hook.
- Skip two stitches; work FPTr around the post of the 3rd stitch.
- Finish DC-FPTr by pulling through remaining loops (counts as 1 stitch).
- Fill in skipped stitches:
- Work DC behind FPTr into skipped stitches.
- Insert hook from front to back as usual.
- Repeat DC-FPTr together and DC into skipped stitches around.
- Slip stitch to join; Total: 60 stitches.
Rounds 4–12:
- Repeat Round 3.
- FPTr will now be worked around the Front Post Treble from the previous round, creating a twisted effect.
Optional Addition:
- For a slouchy look, add more rounds here using the same pattern.
Shaping the Top
Round 13 (Decrease):
- Chain 2.
- Begin with DC-FPTr together stitch.
- For skipped stitches, work Double Crochet Two Together (DC2tog):
- Yarn over, insert hook into 1st skipped stitch, draw up a loop, pull through 2 loops.
- Repeat for 2nd skipped stitch, pulling through all remaining loops (counts as 1 stitch).
- Repeat DC-FPTr and DC2tog around.
- Slip stitch to join; Total: 40 stitches.
Close Top:
- Leave a long tail for sewing.
- Use yarn needle to weave tail through every other stitch around.
- Pull tightly to cinch and close the top.
- Turn hat inside out and weave in the tail securely.

Optional Pom-Pom Attachment
- If using faux fur pom-poms with elastic loop:
- Sew a button to the inside of hat near the closure.
- Use a crochet hook to pull elastic through the top hole and loop over the button.
- For permanent attachment:
- Sew and secure pom-pom using leftover yarn.
Tips for Success
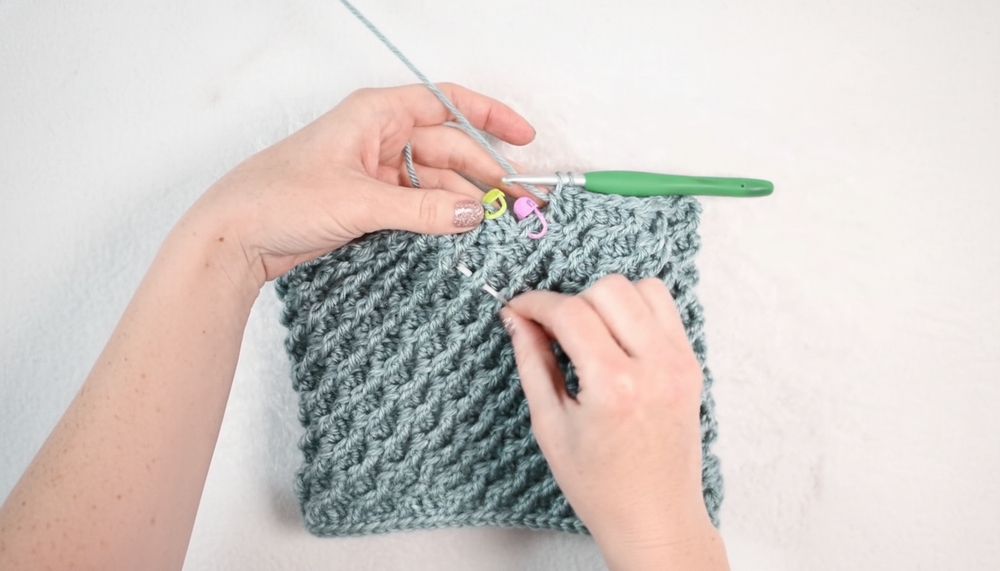
- Use stitch markers to clearly define the beginning and end of rounds.
- Consistent tension is key for neat stitches.
- Experiment with colors: Create a contrasting band and body for added flair.
Conclusion and Remarks
Congratulations! You’ve successfully created a slightly twisted beanie with unique textured patterns. This design is perfect for cooler weather and can be customized for friends and family. Pair with a faux fur pom-pom or leave it simple for a sleek finish.