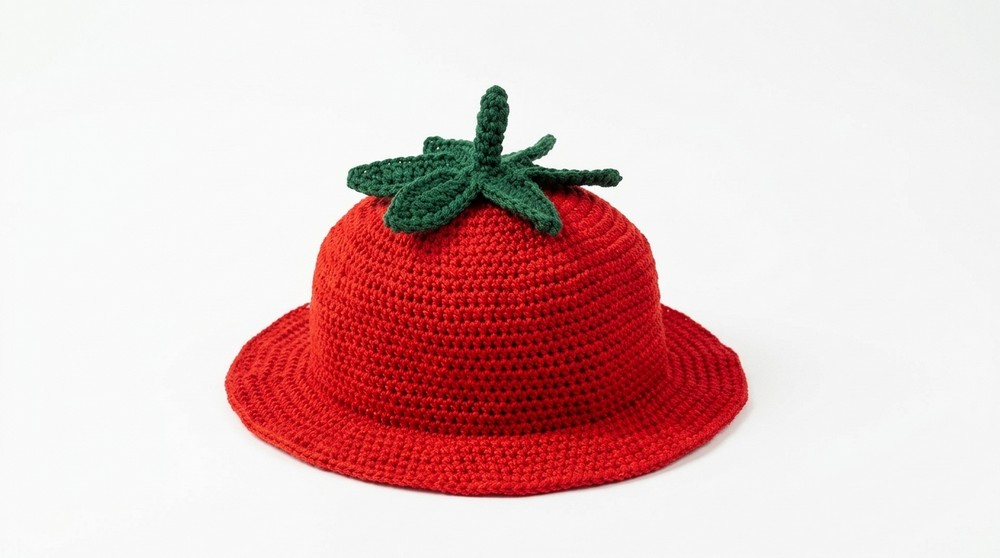
Turn heads this summer with a quirky and vibrant style crochet tomato bucket hat pattern, perfect for adding a playful handmade flair to your sunny day wardrobe.
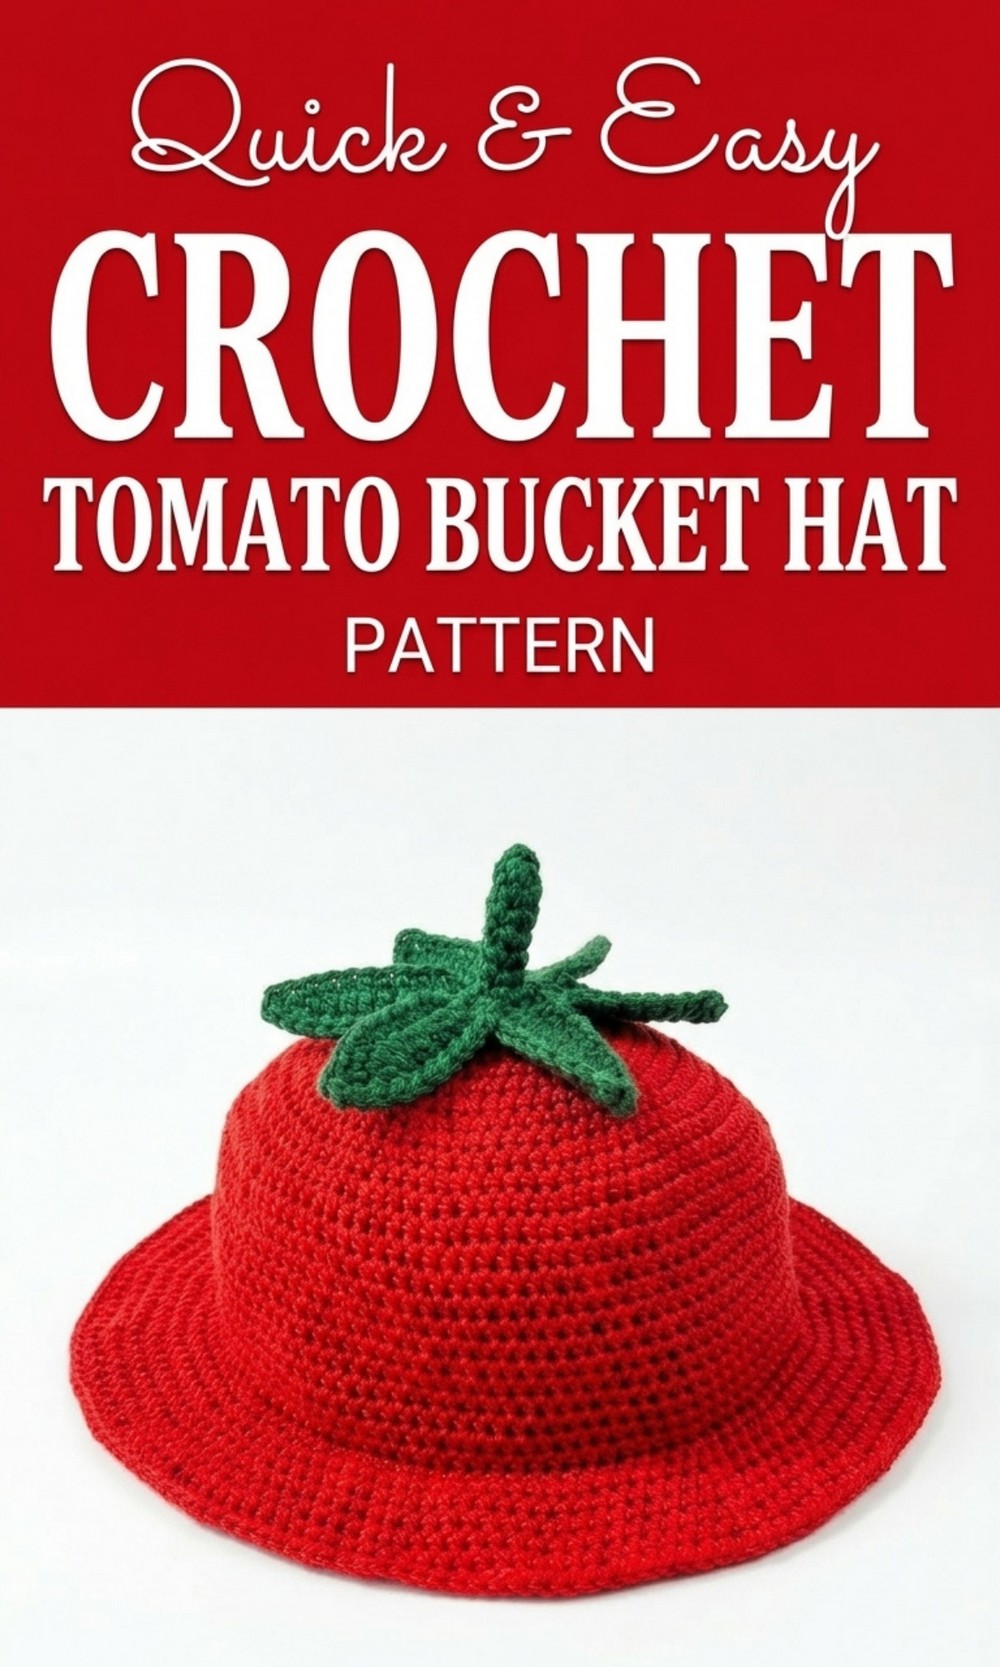
Make a Free Crochet Tomato Bucket Hat Pattern for Cooking Sessions in Style
Add a touch of whimsical charm to your look with this Free Crochet Tomato Bucket Hat. This hat is shaped like a big, juicy tomato with bright red yarn and tiny green leaves on top, giving it a cheerful and unique appearance. The soft and comfortable material makes it perfect for sunny days, and the wide brim keeps the sun out of your eyes while you enjoy outdoor activities. 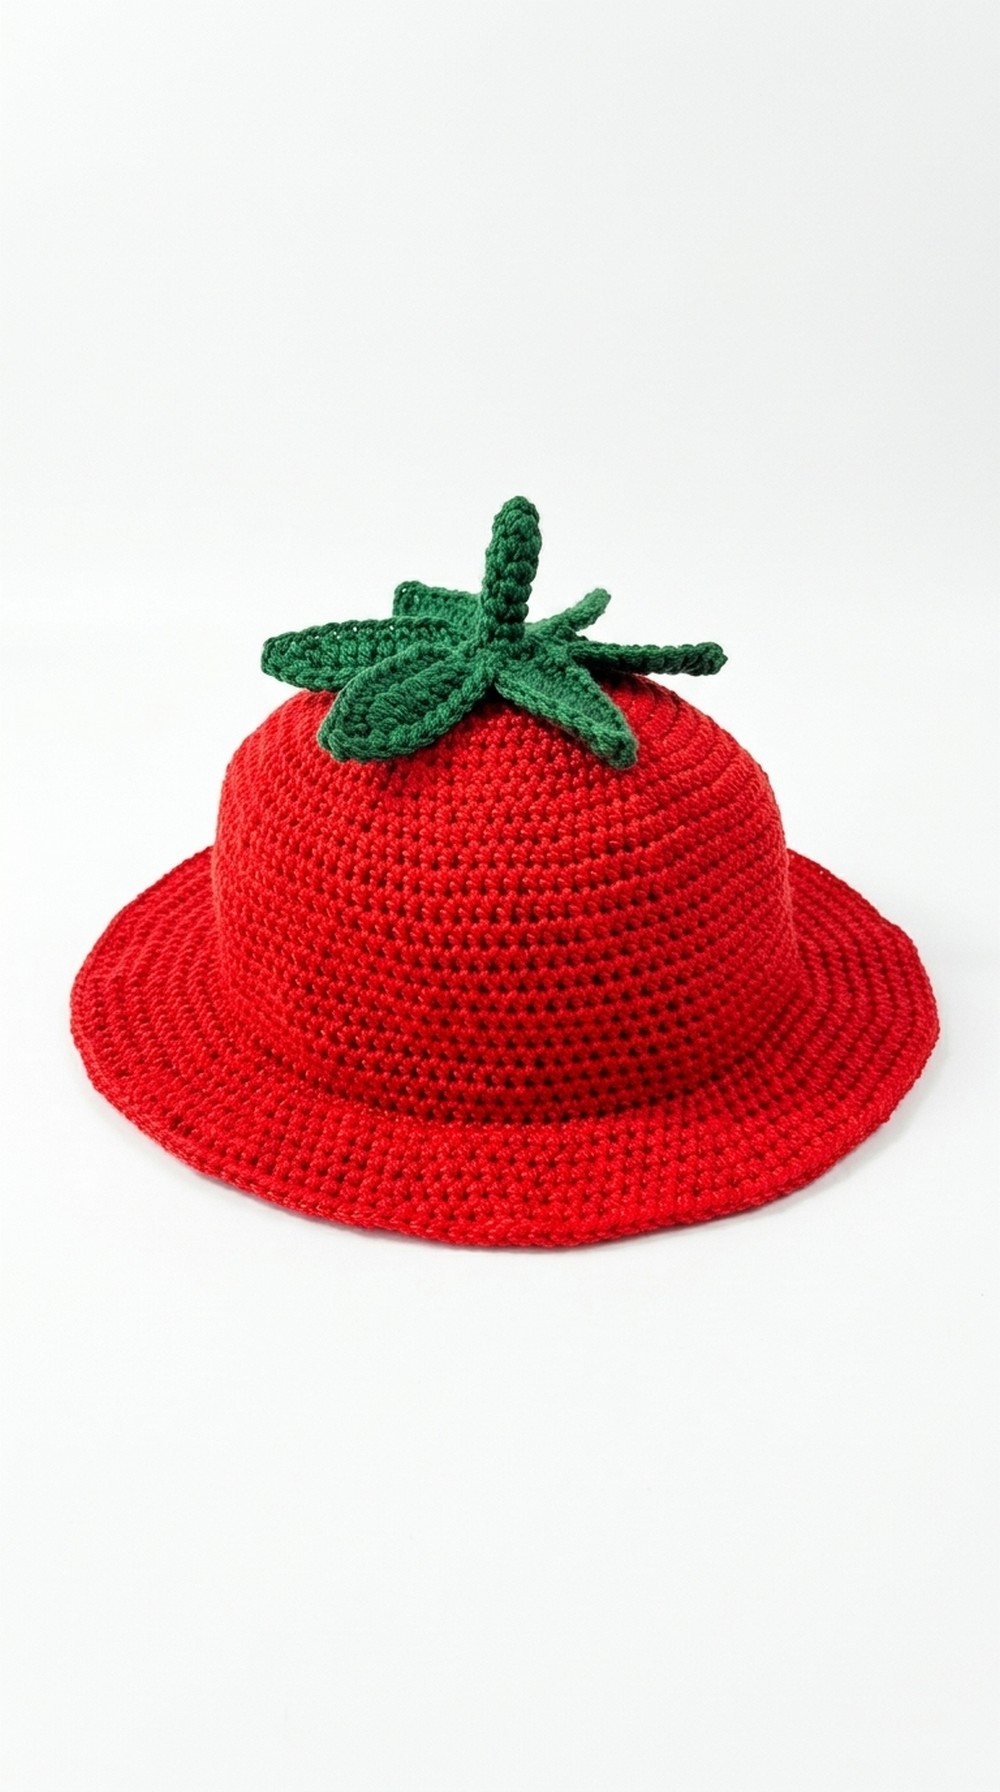
The little green stem at the top adds a fun detail that makes the hat stand out, bringing smiles wherever you go. Whether worn to a picnic, a party, or just for everyday fun, this hat is sure to be a favorite.
Even beginners can easily finish this project, making it a great way to show some creative skills and enjoy wearing something truly one of a kind.
Crochet Tomato Bucket Hat Pattern
Materials Needed
- Yarn:
- 100% polyester yarn in two colors (main tomato red and leaf green).
- Recommended: Lemon brand yarn.
- Crochet Hooks:
- Size #4 hook (for the base of the hat).
- Size #6 hook (for the leaves and details).
- Other Tools:
- Stitch markers.
- Scissors.
- Measuring tape.
- Techniques Used:
- Magic Ring.
- Half Double Crochet (HDC).
- Single Crochet (SC).
- Slip Stitch.
- Chain Stitch.
- Increasing using HDC and SC.
- Suggestions for Yarn Type:
- For a soft and stretchy hat, select yarn that’s comfortable and gentle on the skin, especially for children.
- Use double strands of yarn for sturdier features like the leaves.
Step 1: Determining the Size
This pattern provides size references ranging from newborn to adult:
- Newborn: Diameter (11–12 cm)
- Child (3 years): Diameter (14–14.5 cm)
- Teen/Adult: Diameter varies depending on head size.
Measure head circumference and ensure the initial circle reaches the correct diameter for the size chosen.
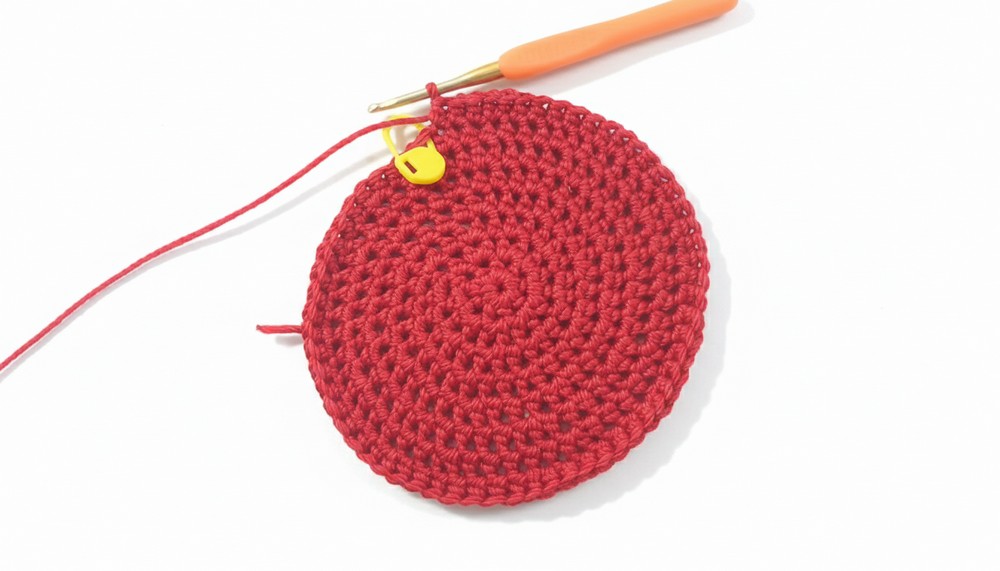
Step 2: Hat Base
- Start with the Magic Ring:
- Using the red yarn and the #4 hook, make a magic ring.
- Chain 1 to secure.
- Round 1:
- Work 8 Half Double Crochets (HDC) into the magic ring.
- Pull the ring tightly to close.
- Join the round with a slip stitch. (Total = 8 HDC)
- Round 2:
- Work 8 HDC Increases (2 HDC in each stitch). Use a stitch marker to mark the start of the round.
- (Total = 16 HDC)

- Round 3:
- (1 HDC in next stitch, 2 HDC in the following stitch); repeat around.
- (Total = 24 HDC).
- Round 4:
- (1 HDC in the next 2 stitches, 2 HDC in the following stitch); repeat around.
- (Total = 32 HDC).
- Round 5:
- (1 HDC in next 3 stitches, 2 HDC in the following stitch); repeat around.
- (Total = 40 HDC).
- Subsequent Rounds:
- Continue the pattern, increasing the number of single HDC stitches between increases by 1 each round (as follows: 4, 5, 6, …).
- Stop once the diameter reaches the required size for your chosen age group (e.g., 14 cm for 3 years old).
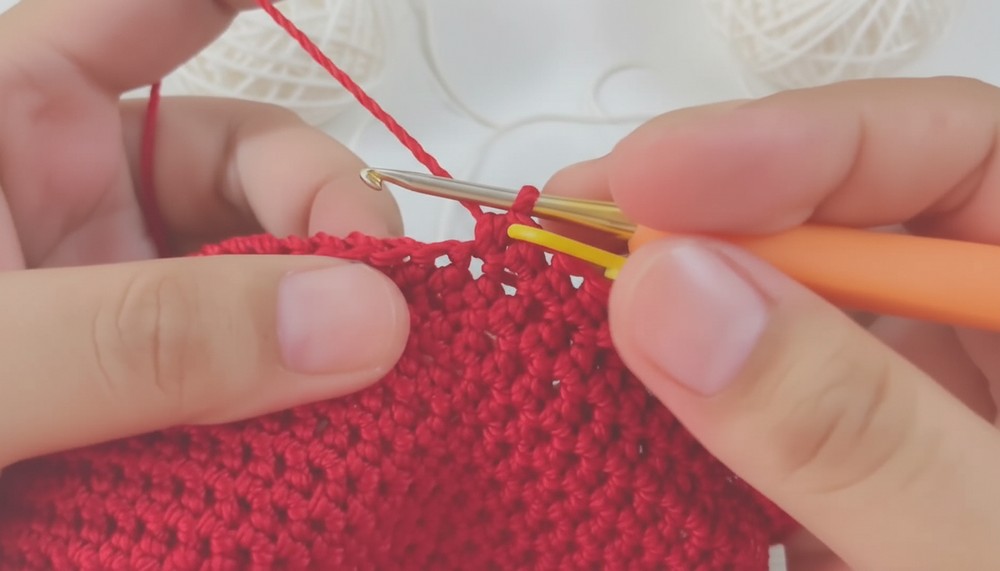
Step 3: Building Height
- Body of the Hat:
- Once the diameter is achieved, switch to working 1 HDC in each stitch around for 10 rounds (or until the desired height is reached).
- Mark the first stitch of every round with a stitch marker to maintain uniformity.
- Measure:
- For the 3 year old size, the height of the hat should measure 14–14.5 cm.
- For the 3 year old size, the height of the hat should measure 14–14.5 cm.
Step 4: Adding the Leaf Brim
- Switch to Green Yarn:
- Use the #6 hook and hold double strands of green yarn.
- Magic Ring:
- Begin with a magic ring and work 6 Single Crochets (SC) into it. Pull the ring tightly and join with a slip stitch.
- Rounds 2–7:
- Work 6 SC per round (no increases). This will form a tube like structure for your leaf base.
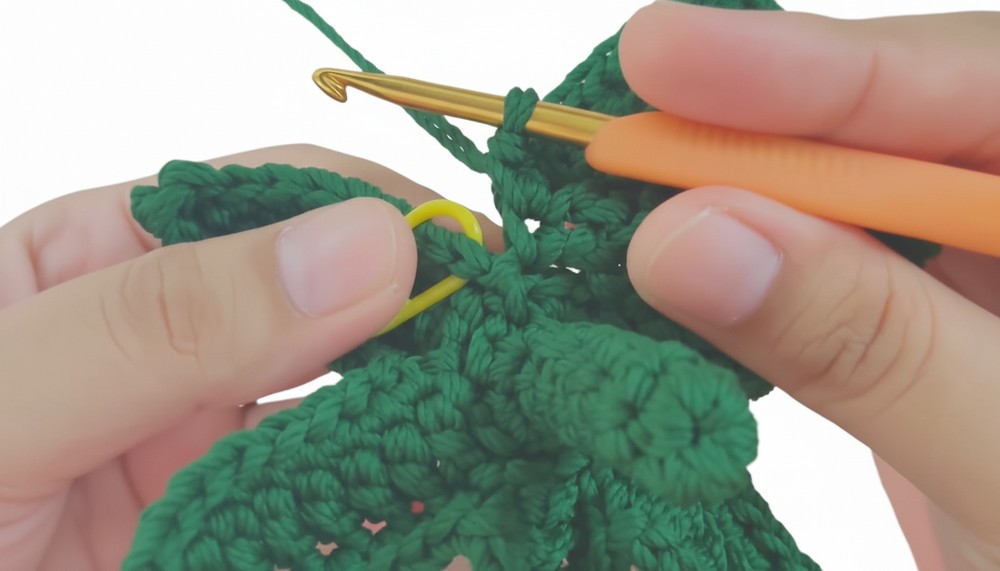
- Leaves Formation:
- Leaf Structure:
- Chain 10.
- Skip first chain, slip stitch into the next chain.
- SC into the next chain.
- HDC into the next chain.
- Work 6 Double Crochets (DC) into the following chains one by one.
- Skip the last chain, and slip stitch to the base.
- Repeat this process to create multiple leaves spaced evenly around the hat brim.
- Leaf Structure:
Step 5: Finishing
- Final Stitching:
- Fasten off all yarn carefully to secure loose ends.
- Weave in yarn tails neatly with a tapestry needle.
- Shaping:
- Adjust the brim and leaves to ensure a uniform look.
- Adjust the brim and leaves to ensure a uniform look.
Tips for Maintaining the Pattern
- Blocking:
- Lightly block the finished hat to ensure the shape holds. Use a damp cloth and allow it to dry naturally.
- Washing Instructions:
- Hand wash in cold water with mild detergent. Lay flat to dry to prevent distortion.
- Storage:
- Store the hat in a cool, dry place to maintain the yarn’s integrity.
Final Words
Congratulations on completing your adorable Tomato Bucket Hat, This hat is not only cute and functional but also a great handmade accessory for children and adults alike.