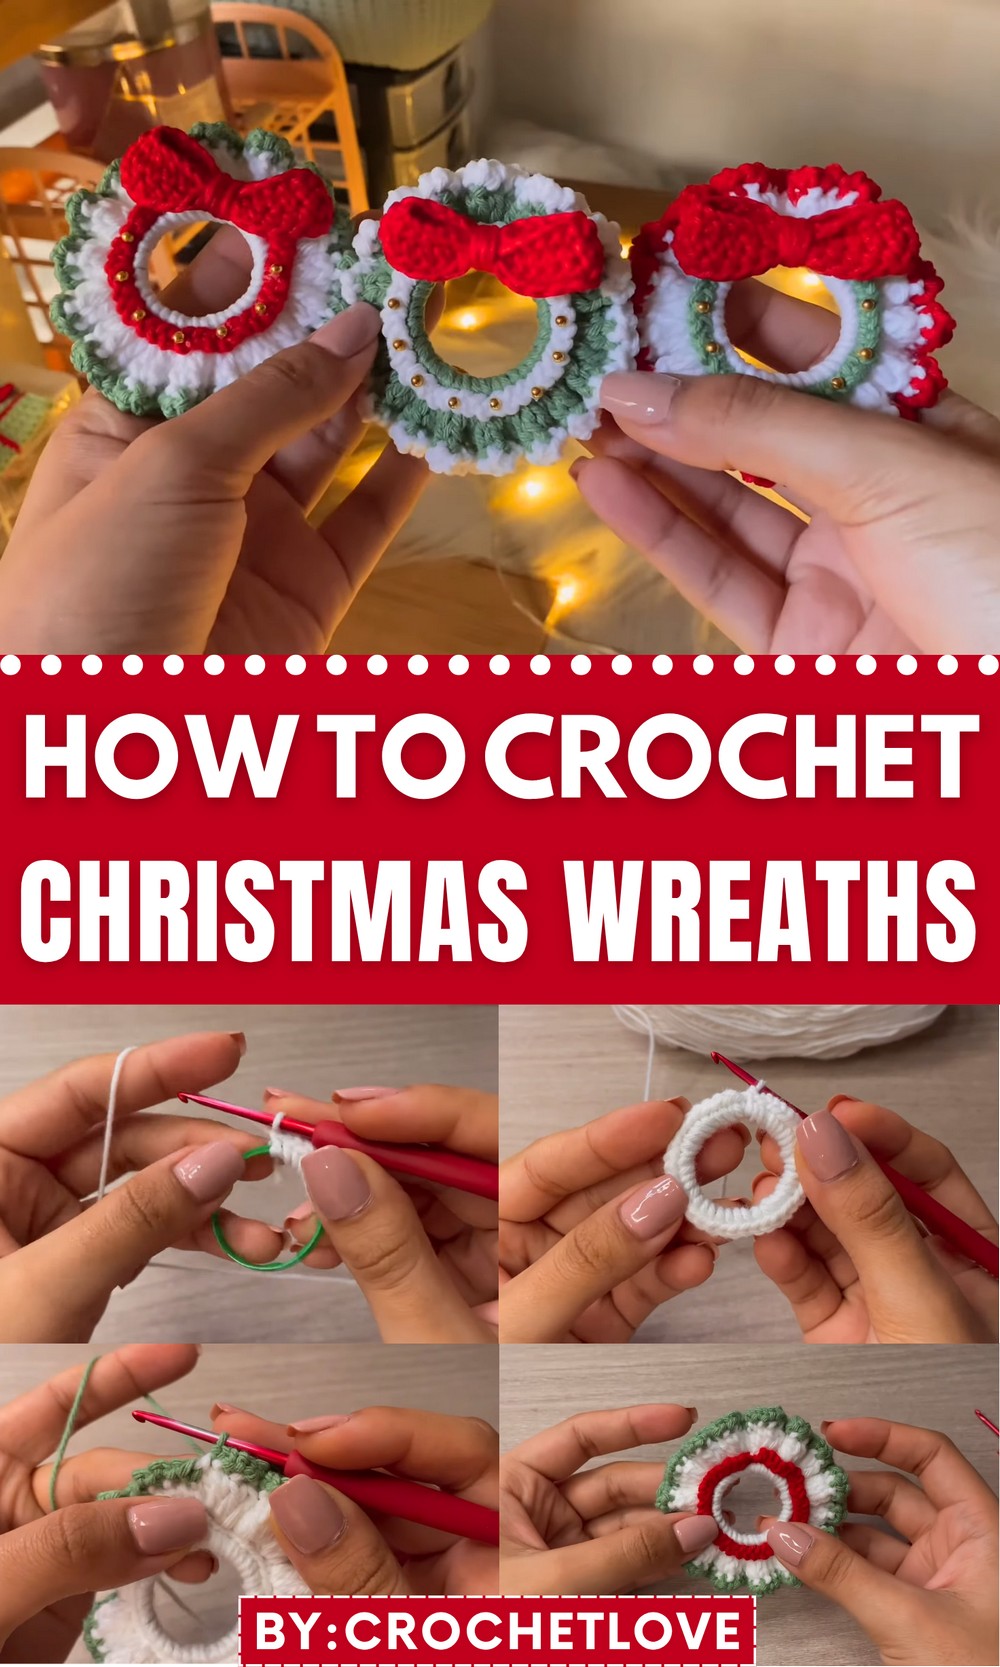
Adorn doors with cheer using this Free Crochet Christmas Wreaths Pattern, adding playful handmade charm and festive fun to every corner of your home.
Too often, holiday decorations feel mass-produced and lack the warmth of personal touch, leaving spaces cold and uninspiring. The Free Crochet Christmas Wreaths pattern changes that, transforming simple yarn into vibrant, handcrafted wreaths that bring life and charm to every room. Each wreath is versatile, perfect for hanging on doors, walls, or even serving as a festive table centerpiece, adding texture and a cozy, cheerful atmosphere.
Free Crochet Christmas Wreaths Pattern Everyone Will Admire
The layered crochet stitches give depth and dimension, creating a full, eye-catching piece while keeping it lightweight and durable. Beyond decoration, making these wreaths offers a calming, meditative experience, allowing hands to follow rhythmic motions that soothe the mind while producing tangible results.
Ideal for gifting or enhancing your own home, these crochet wreaths combine creativity, functionality, and festive charm. The Free Crochet Christmas Wreaths pattern turns ordinary yarn into stunning, handcrafted décor that spreads warmth, personality, and holiday cheer, transforming any space into a welcoming and joyful celebration.
Step-by-Step Details
Materials Needed
- Plastic bottle ring: Acts as the foundation of the crown.
- Yarn (three colors): For this tutorial, green, white, and red wool were used.
- Crochet hook: Ideally, a 2.5 mm hook is recommended.
- Wool needle: For weaving loose ends and sewing small sections.
- Half-pearls: For additional decoration.
- Scissors: To trim yarn ends.
- Cold silicone glue: For attaching the bow and embellishments.
Steps
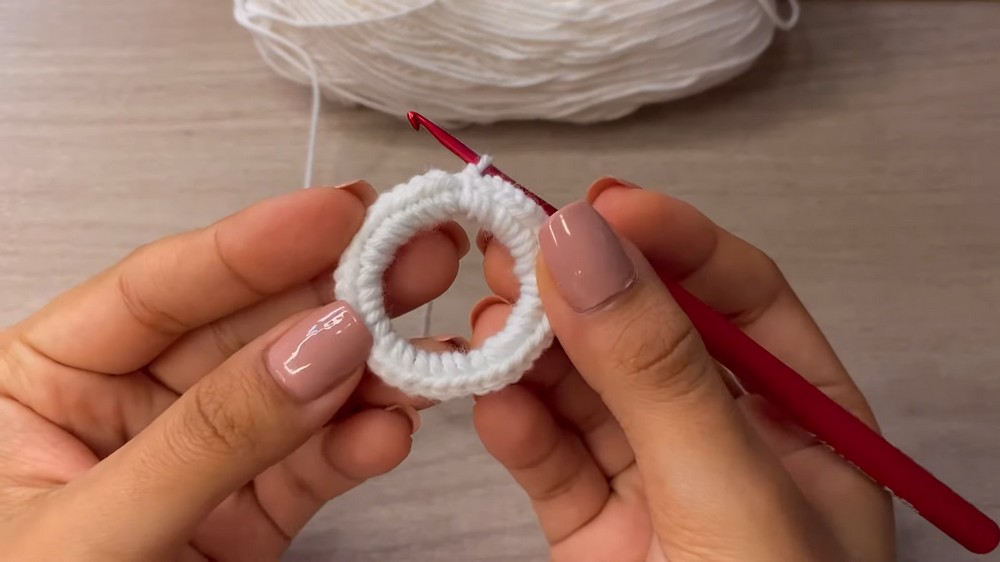
1. Preparing the Base of the Crown
- Begin with a slip knot using your chosen base color (e.g., green).
- Insert the hook into the plastic ring and make a single crochet to secure the yarn.
- Continue crocheting single crochets around the plastic ring, covering it entirely.
- Tip: Tuck in the loose end of the yarn as you work. This creates a clean outcome.

- Tip: Tuck in the loose end of the yarn as you work. This creates a clean outcome.
- Once the ring is fully covered (about 42 single crochets for this video), finish the round with a slip stitch at the first single crochet.
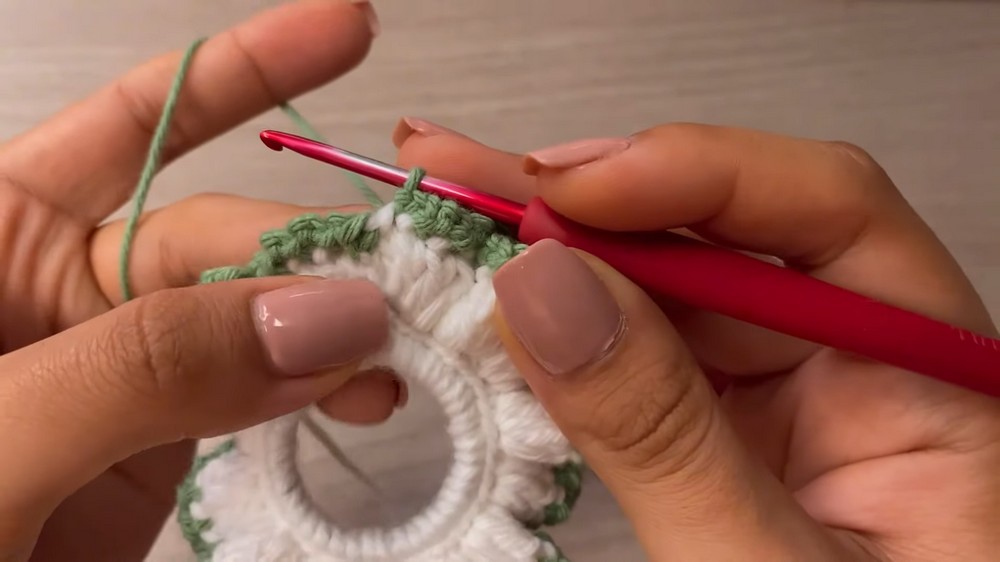
2. Adding the First Layer
- Chain 2 to start the second round.
- For this round, work increases of double crochets (2 double crochets in one stitch), stitching only in the back strand of each previous stitch.
- Continue adding double crochet increases until the round is complete.
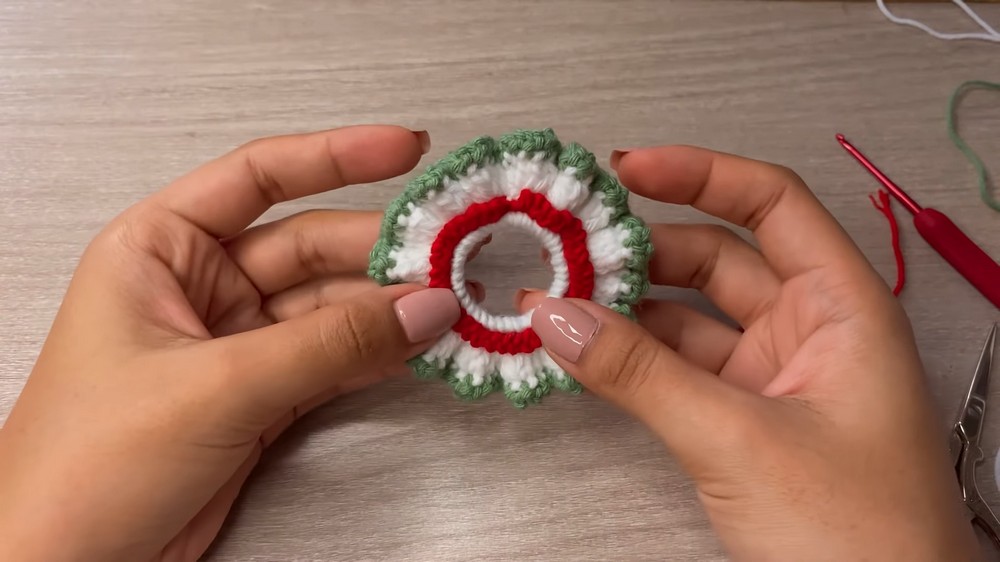
3. Adding the Decorative Border
- Introduce a new color for the border (e.g., white).
- Attach the new yarn with a slip stitch at the first double crochet of the previous round.
- Chain 2, skip to the next stitch, and make a slip stitch.
- Repeat the sequence of chain 2, slip stitch around the entire round to create a delicate decorative border.
- Close the round with a slip stitch, secure the yarn, and cut the strand.
4. Adding Additional Details
- Using the front strands left from the second round, attach a third color (e.g., red) with a slip stitch.
- Chain 1 and slip stitch into the next front strand. Repeat this sequence (chain 1, slip stitch) for added texture.
- When finished, tie off the yarn, weave in the ends with a wool needle, and trim any excess.
5. Knitting the Bow
- Using a vibrant color (e.g., red), start by chaining 25 stitches.
- Skip the first chain and work 24 single crochets across for the first row.
- Chain 1, turn your work, and knit 24 single crochets for rows 2 and 3.
- After completing the rectangle, fold it in half and close the ends with a slip stitch to form a loop.
- Pinch the center of the loop and use a long yarn strand to wrap tightly around the middle to form the bow shape.
- Secure the bow by stitching the wrapped yarn in place.

6. Assembling the Crown
- Use cold silicone to glue the bow to the crown. Place it strategically to cover any uneven section.
- Lastly, decorate the crown by gluing half-pearls or other embellishments for added elegance.
Features of the Crown
- Recyclable Base: Utilizes plastic bottle rings for a sustainable approach.
- Customizable: Choose colors to match the occasion or theme.
- Budget-Friendly: Requires minimal materials.
- Quick Completion: Suitable for last-minute craft projects.
Special Features
- Level of Difficulty: Beginner-friendly, though precision and neatness are essential for a polished look.
- Tutor’s Suggestions:
- Keep your stitches tight and even for a clean finish.
- Use contrasting colors to enhance the aesthetic appeal.
- Experiment with various decorations, such as beads or ribbons, to personalize your crowns.
- Uses: These crowns make excellent Christmas tree decorations, party favors, or even imaginative embellishments for gift wrapping.
A Helpful Tip
When creating the bow, ensure the yarn tension is even as you wrap the center. This will give you a symmetrical and professional-looking bow.
Conclusion
This crocheted crown tutorial combines the joy of handmade crafts with the satisfaction of recycling everyday materials. The result is a beautifully textured and decorated piece suitable for various uses. With only a few basic materials and a bit of time, you can create a heartfelt project that reflects the spirit of sustainability and creativity.