Brighten your home with the Free Crochet Polka Dot Granny Pattern, adding playful colors and cheerful charm to blankets, cushions, and cozy décor.
A cozy living room can transform into a hub of colorful creativity, where simple yarn becomes cheerful décor. The Free Crochet Polka Dot Granny pattern brings vibrant pops of color to any project, whether enhancing blankets, cushions, or wall hangings. Its charming polka dot details add playful texture, turning each square into a small celebration of color and form.
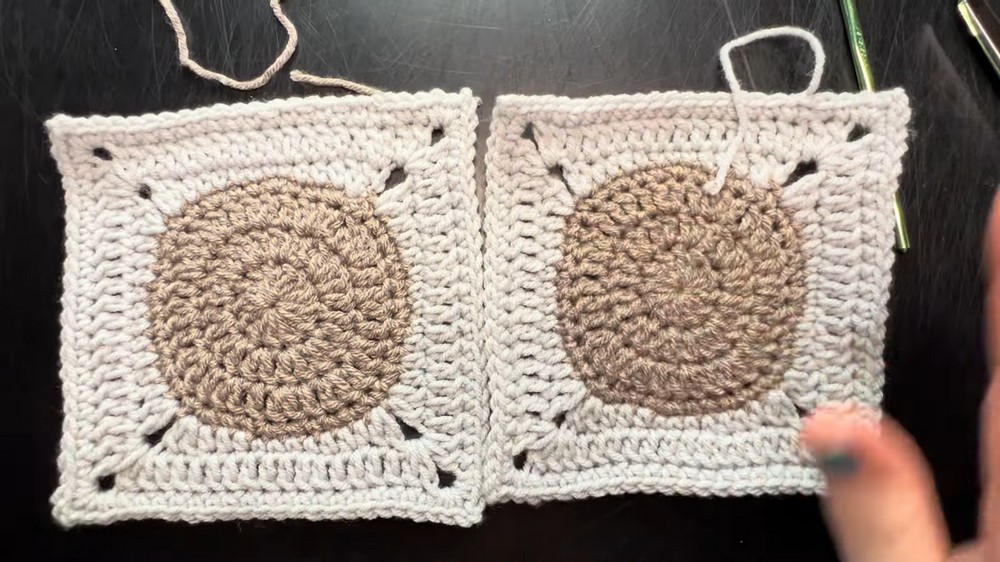
Trendy Crochet Polka Dot Granny Pattern to Upgrade Blankets
This pattern is versatile, allowing both beginners and experienced crocheters to enjoy its rhythmic and satisfying stitch sequence. Beyond its visual appeal, it encourages mindfulness and relaxation, offering a soothing rhythm as each round comes together. The modular nature makes it easy to combine multiple squares into larger pieces, supporting creativity without overwhelming complexity. Lightweight yet durable, finished projects maintain their shape and brighten any corner of the home.
Its approachable technique ensures a rewarding sense of accomplishment with every completed square, while the polka dot accents inject cheerful individuality into every creation. Ideal for gifting or personal use, this pattern balances charm with practicality, turning simple yarn into vibrant, functional art. Following the Free Crochet Polka Dot Granny pattern produces not just a decorative item, but a versatile, lively, and engaging handmade treasure that carries warmth and personality.
Materials Needed
- Yarn:
- Dollar Tree’s “Premier Just Yarn” in two contrasting colors:
- “GR” (a beige-gray mix)
- “Mist”
- Both yarns are medium, worsted-weight (4) yarn.
- Dollar Tree’s “Premier Just Yarn” in two contrasting colors:
- Crochet Hook: 5.5 mm (Boy brand recommended).
- Other Tools: Scissors for cutting yarn and a tapestry needle for weaving in ends.
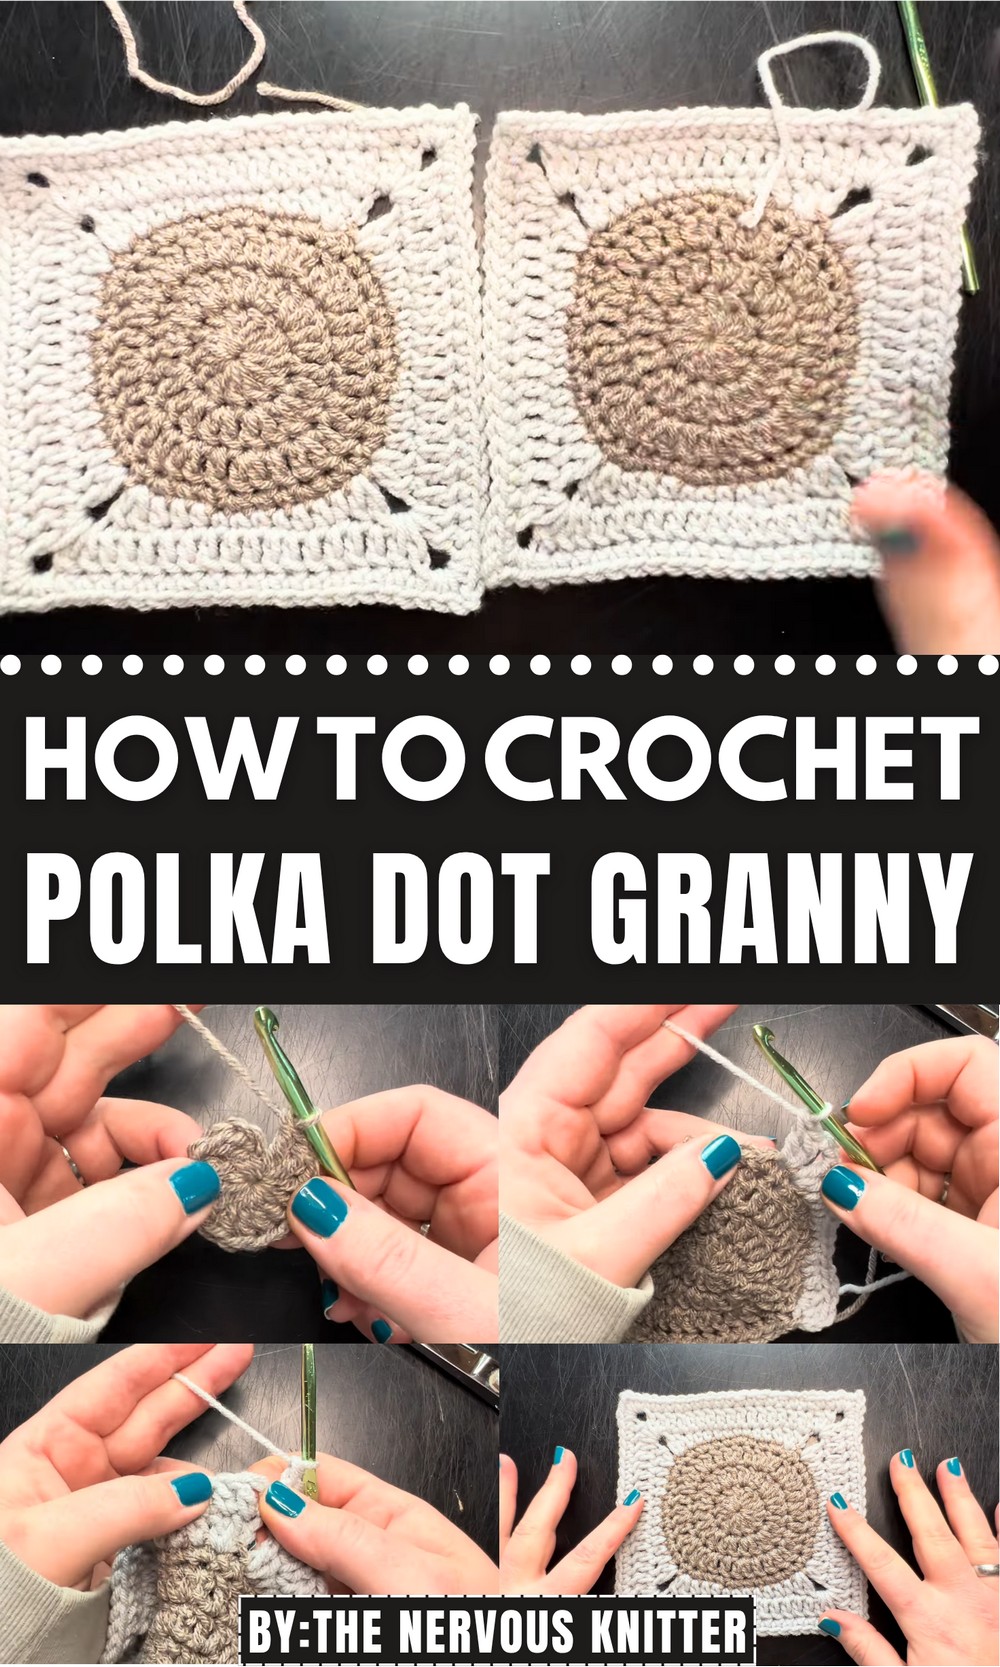
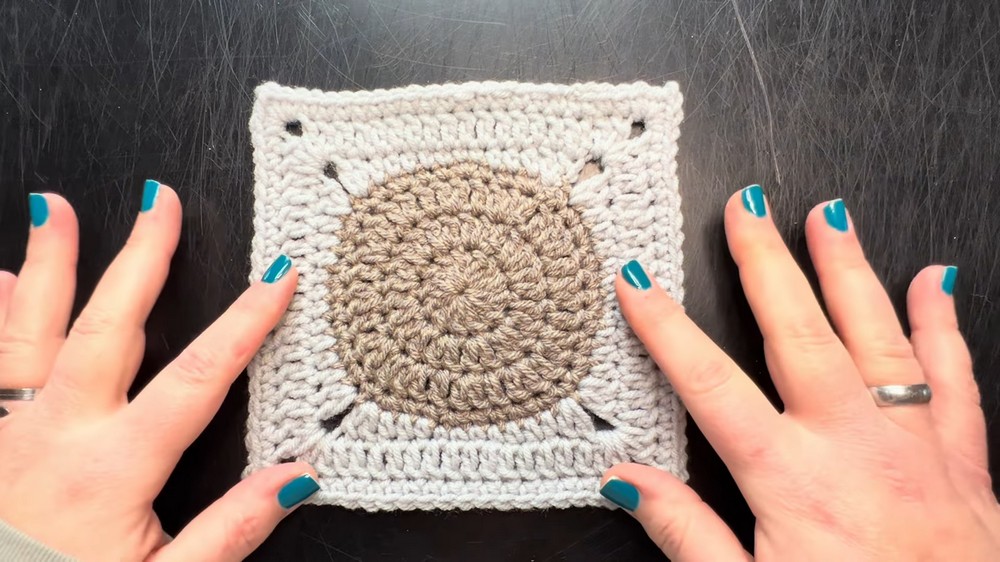
Special Features of the Polka Dot Granny Square
- Playful Polka Dot Design:
- The pattern results in a delightful granny square featuring a central polka dot design that adds texture and whimsy to any project.
- Transformative Color Change:
- A smooth transition between two contrasting yarn colors enhances the overall look of the square and highlights its design.
- Versatility in Use:
- These squares can be combined to create a variety of projects, including blankets, decorations, or customized gifts.
- Beginner-Friendly Techniques:
- Features the magic ring, double crochet, single crochet, and half-double crochet stitches, all explained step by step.
Step-by-Step Instructions
Step 1: Create the Center Circle
- Start with a magic ring: Wrap the yarn around your fingers and pull through to form a loop.
- Chain 2 (counts as the height, not a stitch).
- Work 12 double crochets into the ring.
- Close the ring by pulling the short yarn tail and slip stitch into the first double crochet.
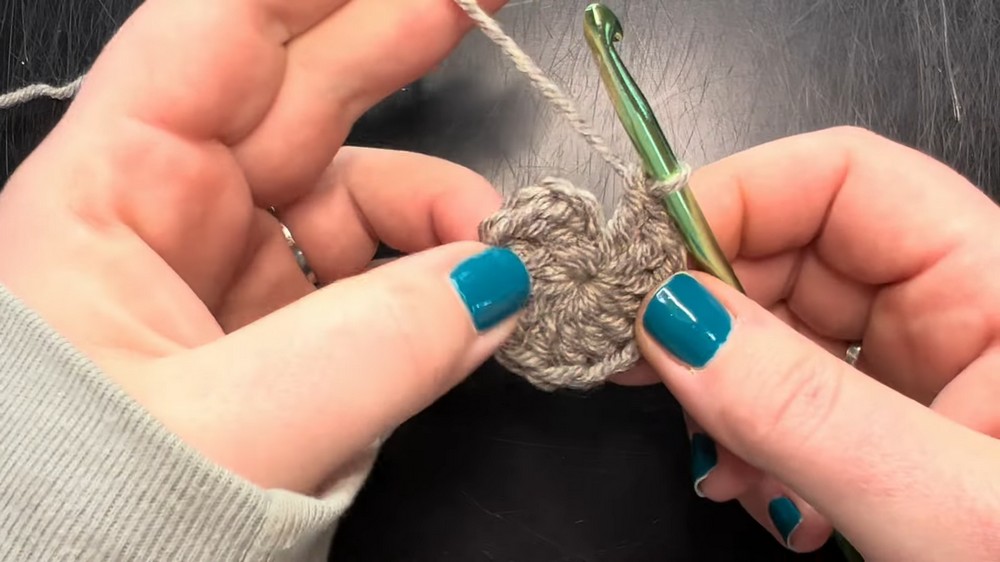
Result: A tight circular foundation with 12 stitches.
Step 2: Second Round – Increase Double Crochets
- Chain 2 for height.
- In the same joining stitch, work 2 double crochets.
- Continue placing 2 double crochets in each stitch from the previous round (total: 24 stitches at the end).
- Join the round with a slip stitch into the first double crochet.
Step 3: Third Round – Alternating Increases
- Chain 2 for height.
- Begin with an increase: 2 double crochets in the first stitch.
- In the next stitch, work 1 double crochet (standalone).
- Continue alternating between increase (2 DC in one stitch) and standalone (1 DC in one stitch) throughout the round.
 At the end, ensure you finish with a standalone. Join with a slip stitch.
- Total stitches: 36 double crochets.
Step 4: Fourth Round – Single Crochet Border
- Chain 1 for height.
- In the joining stitch, work 2 single crochets (increase).
- For the next 2 stitches, work 1 single crochet in each (standalones).
- Repeat increase → 2 standalone single crochets around the pattern.
- Final count: 48 single crochets.
- Join and change to the second color yarn at the end of this round.
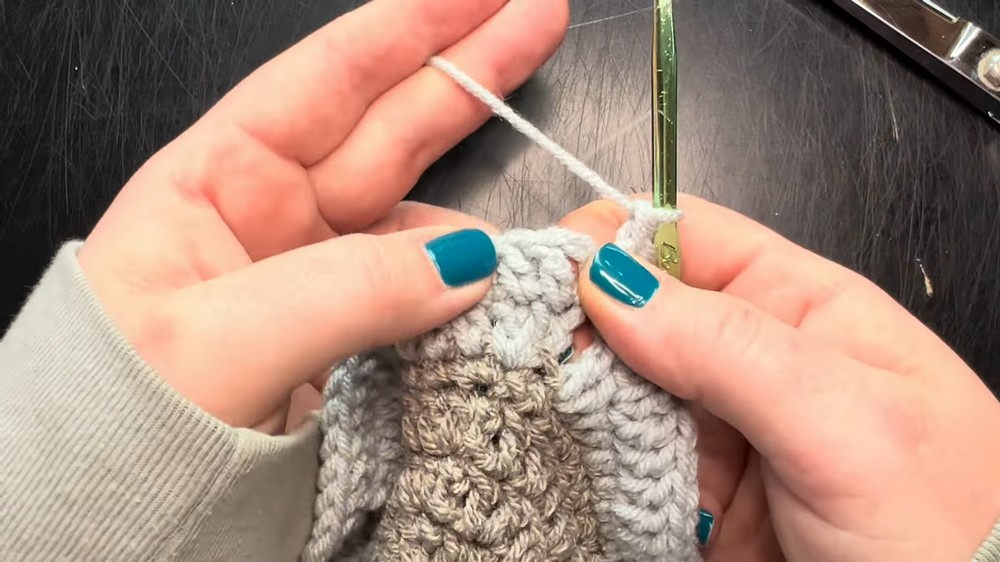
Step 5: Transforming the Circle into a Square
- Attach your new yarn and Chain 2 for height.
- In the joining stitch, work 2 double crochets.
- Work 3 half-double crochets into the next 3 stitches.
- Next, work 4 single crochets across four stitches.
- Repeat the following pattern to create sides and corners:
- Sides: 3 HDC → 4 SC → 3 HDC.
- Corners: 2 DC → Chain 2 → 2 DC.
- At the end, slip stitch to join, completing the square shape.
Step 6: Final Rounds for Finishing
- Work rounds of double crochet (one in each stitch) around the square, placing corner increases (2 DC → Chain 2 → 2 DC) in the chain-space of each corner.
- Optional: Add a round of single crochets for a sharper, more squared final look (chain 1 at the start, then SC around).
Tutor’s Suggestions
- Count Your Stitches: Charlotte emphasizes ensuring the correct number of stitches in each round to maintain the perfect shape.
- Use Stitch Markers: If frequent counting feels overwhelming, use markers to track corners and sides.
- Adjust Tension: Make sure the tension is consistent throughout to avoid uneven edges.
- Color Harmony: Experiment with complementary or contrasting colors to maximize the design’s aesthetic appeal.
Level of Difficulty
This project is beginner-friendly and suitable for those who know basic crochet stitches such as the magic ring, double crochet, single crochet, and half-double crochet. Charlotte’s instructions are clear and easy to follow, with helpful close-ups to assist visually.
Uses of the Polka Dot Granny Square
- Blankets: Join multiple squares for a cozy and stylish throw or bedspread.
- Pillows: Combine squares to create decorative cushion covers.
- Home Decor: Use as coasters, table mats, or wall hangings.
- Personalized Gifts: Customize colors for birthdays or holidays.
Conclusion
The Polka Dot Granny Square is a fun, approachable, and rewarding project that blends creativity with function. With its simple shape, playful design, and wide range of uses, it’s the perfect project for crocheters of all levels to bring a splash of color and charm into their creations.
Tip:
When changing colors, finish the slip stitch of your round with the new yarn to create a seamless transition. Tie the ends snugly and avoid weaving if preferred—it saves time and still looks polished!