Organize your crochet tools with charm using this creative and elegant free crochet needle holder pattern, blending practicality with artistic beauty.
Crochet artistry often serves as a subtle reflection of tradition and innovation interwoven into a single piece, offering utility alongside charm. The traditional crochet needle holder, a compact companion for organizing crochet hooks, needles, or tools, while showcasing an elegant aesthetic of skill. Perfect for those who adore personalized items, the crochet needle holder combines functionality with an artistic flair, making it an ideal gift for friends or a keepsake for yourself.
Crochet Needle Holder Pattern That Keeps Every Needle in Place
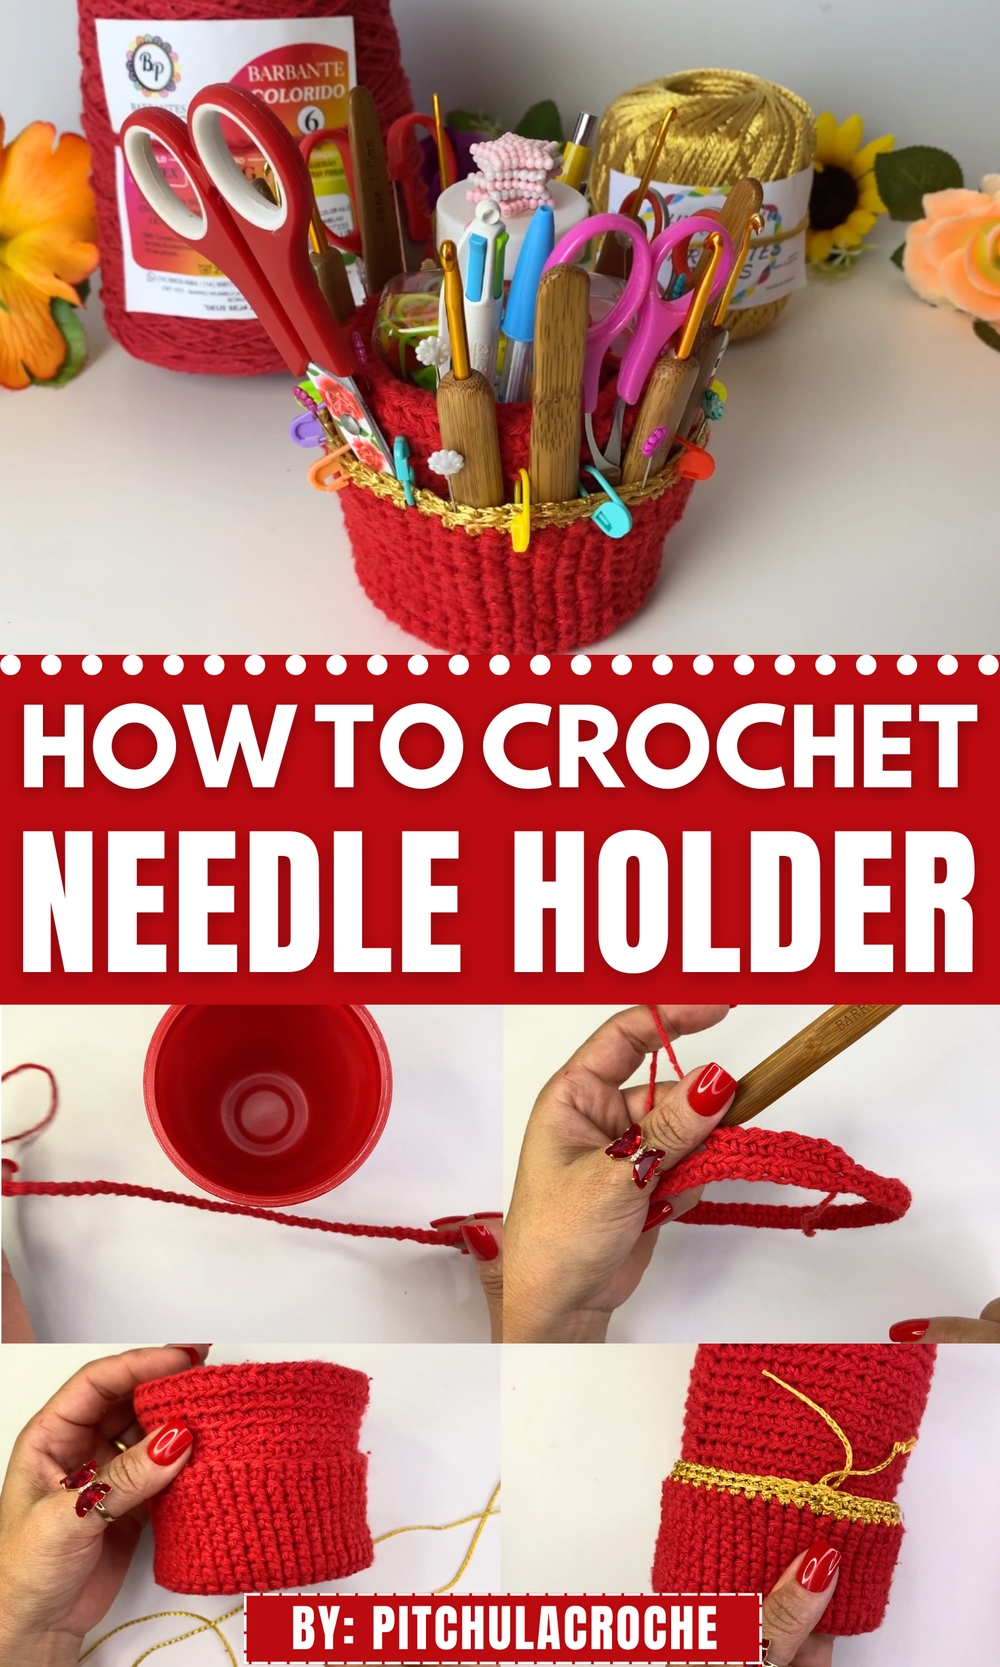
The crochet needle holder pattern ultimately becomes more than a mere container, it is a reflection of dedication, patience, and the timeless beauty of handmade utility items. With each stitch deliberately shaped, the holder represents the essence of care and thoughtfulness poured into a simple yet significant piece.
It demonstrates how small, functional everyday objects can evolve into personalized treasures, imparting a sense of pride and fulfillment upon completion. Adorn your craft tools with this charming piece that effortlessly combines practicality, beauty, and the satisfaction of crochet mastery.
Crochet Container Cover Pattern
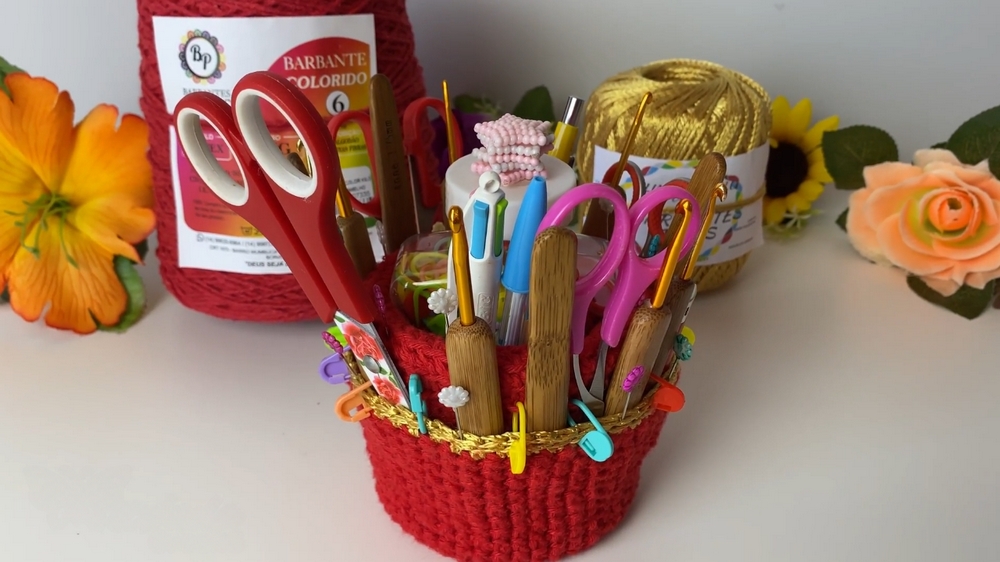
Finished Project Information
- Purpose: Crochet decorative and functional covers for containers.
- Difficulty Level: Intermediate to Advanced
- Customizable Design: Can be adjusted to fit any container, from small cylindrical pots to larger buckets.
Materials
- Yarn:
- Pires Twine 85% cotton twine, size #6 (or any medium-weight yarn).
- Color: Red is used in this pattern with an optional contrasting second color for decoration.
- Additional yarn (optional) for contrasting trims, e.g., gold polyester yarn (Analu 100% polyester in gold color).
- Hook: 4.0 mm crochet hook.
- Container:
- Example: Small tomato sauce pot, medium bucket, or any container (round, square, oval, etc.).
- Optional Items:
- Stitch markers, scissors, tapestry needle, and hot glue gun for additional decorations.
Key Abbreviations (US Crochet Terminology)
- ch: Chain
- sl st: Slip Stitch
- sc: Single Crochet
- st: Stitch
- back loop: Back loop of the stitch
- front and back loops: Both loops of the stitch.
Special Notes
- Custom Sizing: The starting chain needs to wrap snugly around the top circumference of your container. The chain count is irrelevant as long as it fits.
- Working in Rounds: The project is worked in continuous rounds unless stated otherwise.
- Amigurumi Technique: Avoid visible seams by working spirally instead of joining with slip stitches at the end of each round.
Pattern Instructions
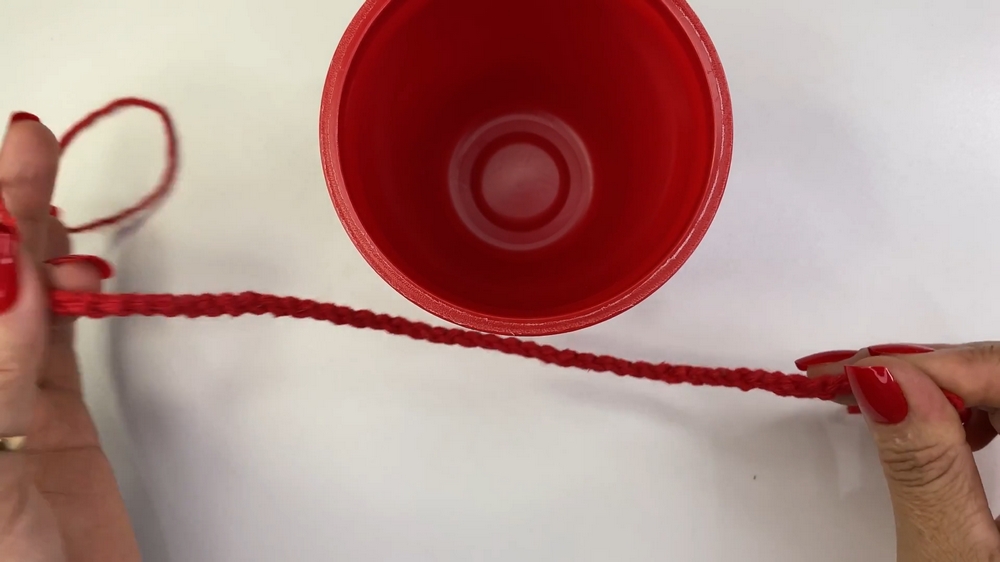
Step 1: Prepare the Base with Chains
- Using your 4.0 mm crochet hook, make a foundation chain long enough to snugly fit the top circumference of your chosen container. Ensure the chain is neither too tight nor too loose.
- Form a ring:
- Join the first and last ch with a sl st to form a ring. Be careful not to twist your chain.
- Join the first and last ch with a sl st to form a ring. Be careful not to twist your chain.
Step 2: First Round
- Start by forming the foundation row.
- Round 1: Ch 1. Work 1 sc in each chain around the entire ring. Make sure each loop is used properly.
- At the end of the round, join with a sl st in the first sc.
- Check the size: Wrap the ring around the top of your container to ensure it fits. Adjust your foundation chain if necessary before proceeding.
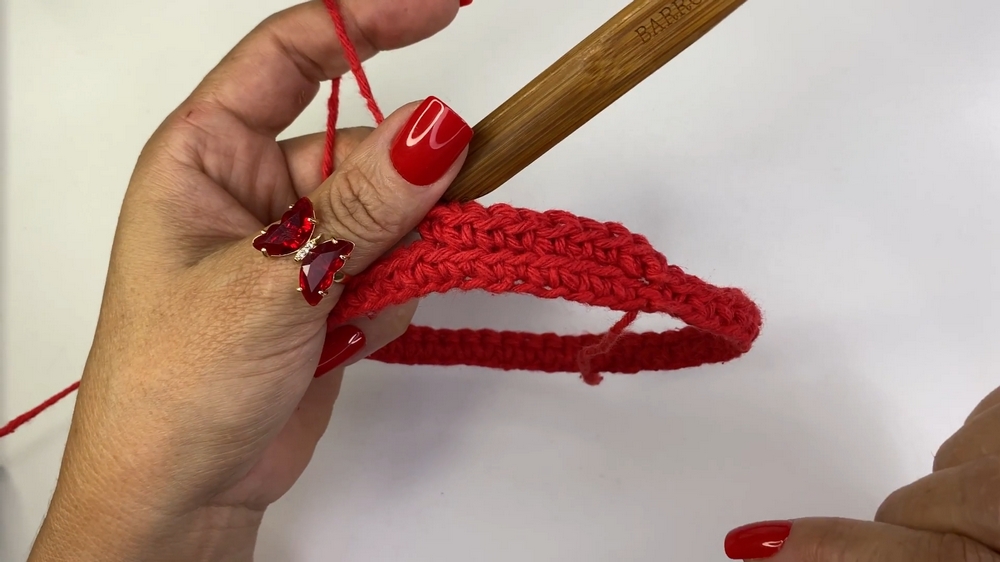
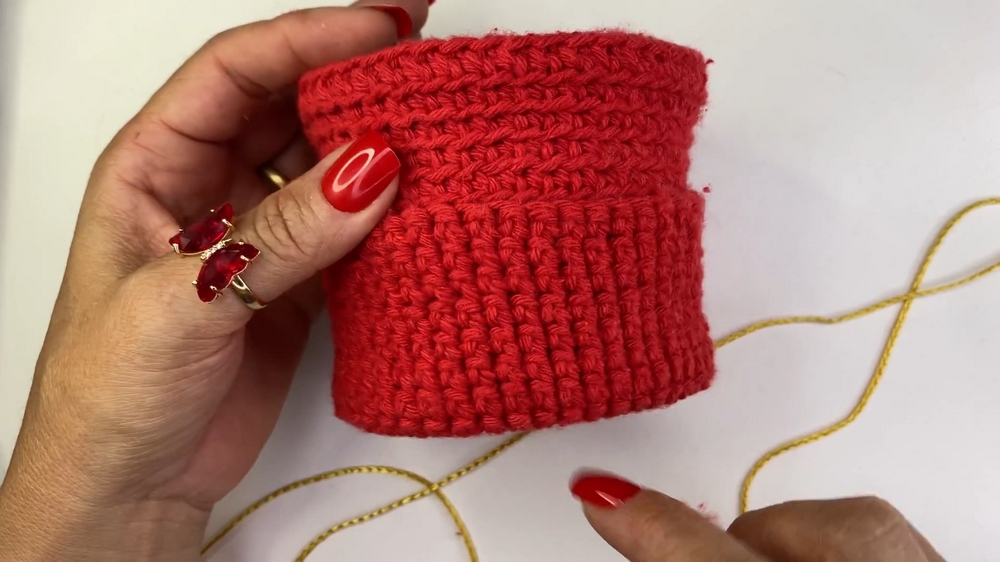
Step 3: Build the Body
- Round 2: Ch 1. Work sc in each stitch around, inserting the hook into the back loop only of each stitch to create a ribbed texture. Sl st into the first sc at the end of the round.
- Subsequent Rounds:
- Continue working sc in the back loops only to maintain the same ribbed texture.
- Repeat until the cover reaches the desired height to cover the outside of the container.
- Optional: Use stitch markers to help you identify the end of each round since the work is in continuous rounds.
Note: To create a seamless finish, you may work the piece in a spiral without joining rounds. Remove the seam using traditional Amigurumi technique of continuous sc rounds.
Step 4: Insert the Container and Adjust
- Once you have completed the required number of rounds to cover the height of your container, insert the container into the crocheted sleeve. Adjust the cover to ensure the fit is snug and aligned with the sides of the container.
- Any excess material at the bottom can be folded under for a clean finish.
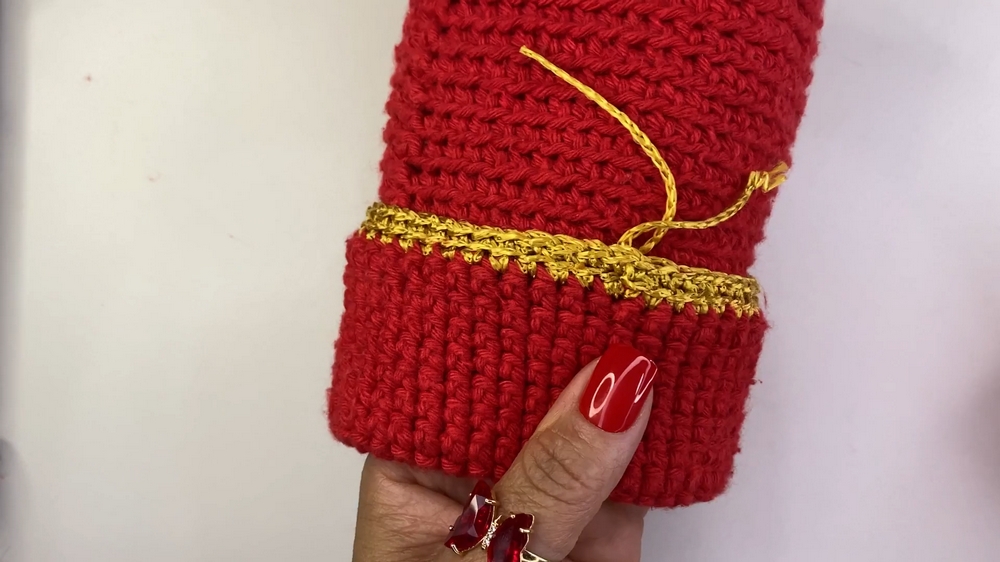
Step 5: Add a Decorative Trim
- Add a contrasting color yarn if desired for decoration:
- Attach the new yarn color by inserting the hook into a stitch on the bottom of the cover.
- Pull in the new yarn and secure it with a sl st.
- Work 1 sc in each st for 1 or 2 rounds, or until the border reaches the desired width.
- For Round 1, work into both front and back loops.
- For Round 2 (optional), work into the back loops only for added texture.
- Fasten off the yarn and weave in the ends using a tapestry needle.
Step 6: Optional Decorations
- Add More Rows:
- If desired, you may add additional rows for decorative purposes either at the top or bottom with a different color of yarn (e.g., gold thread for contrast).
- Follow the same process of working sc in each st, either with a single loop or both loops.
- Decorative Embellishments:
- Use hot glue to attach rhinestones, bows, or other embellishments as preferred.
- Handle Heavier Materials:
- If you plan to store heavy items like scissors or metal knitting needles, consider using markers or hooks to attach the bottom cover securely to the container for support.
- If you plan to store heavy items like scissors or metal knitting needles, consider using markers or hooks to attach the bottom cover securely to the container for support.
Conclusion
Congratulations on completing your crochet cachepot for trinket storage! This versatile and eco-friendly pattern allows you to give new life to any container while creating a functional and attractive storage solution. Whether used for yarn, needles, trinkets, or even pens, this crochet project combines creativity with recycling.
Pattern Correction
- Make sure you accurately measure the circumference of your container to determine the required length of your initial chain. If the cover is too loose, adjust by reducing the chain length and redo the base.
- Ensure that your gauge is consistent throughout to prevent uneven sides.
Tips
- Use Strong Yarn: If you are planning to use the container for heavier objects, choose a thicker cotton yarn or twine to ensure durability.
- Keep the Cover Tight: A snug fit will prevent slipping or loosening of the cover over time.
- Repurpose Old Containers: Experiment with different shapes and sizes of containers. Square, round, and oval-shaped containers all work with this pattern.
- Experiment with Colors: Use contrasting colors for decorative edges or patterns to give the cachepot a personalized look.