Bring whimsy to your creations with this Free Crochet Magical Witch Hat Pattern and make a charming accessory for gifts or festive fun.
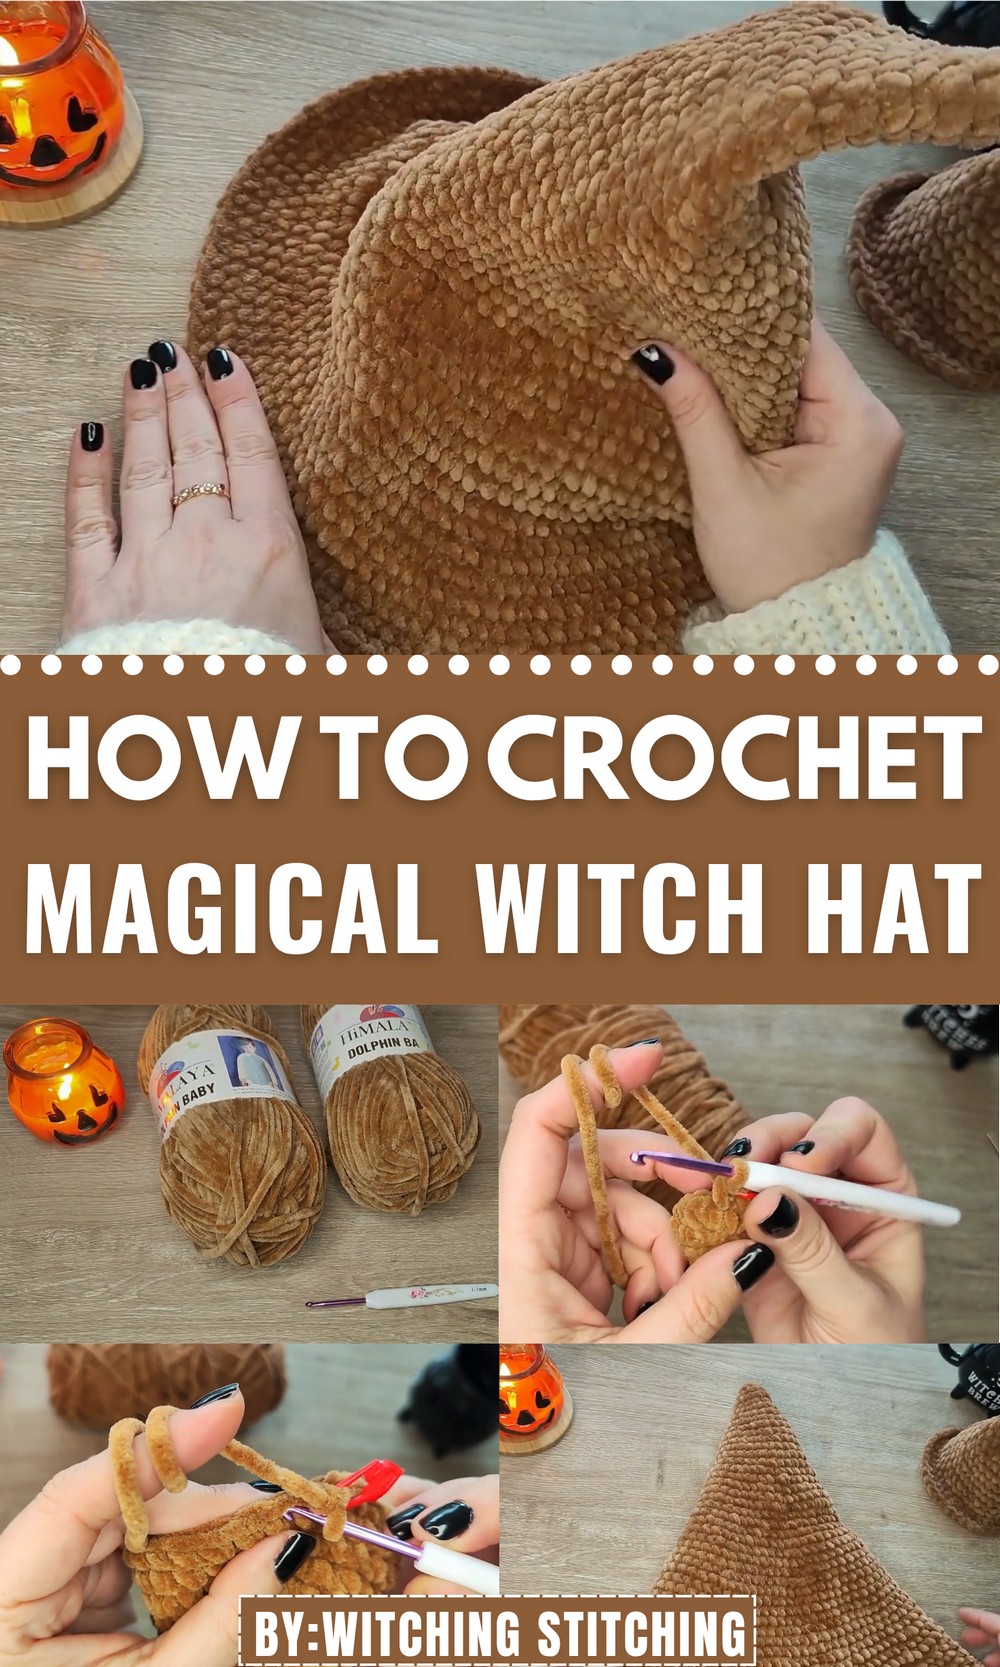
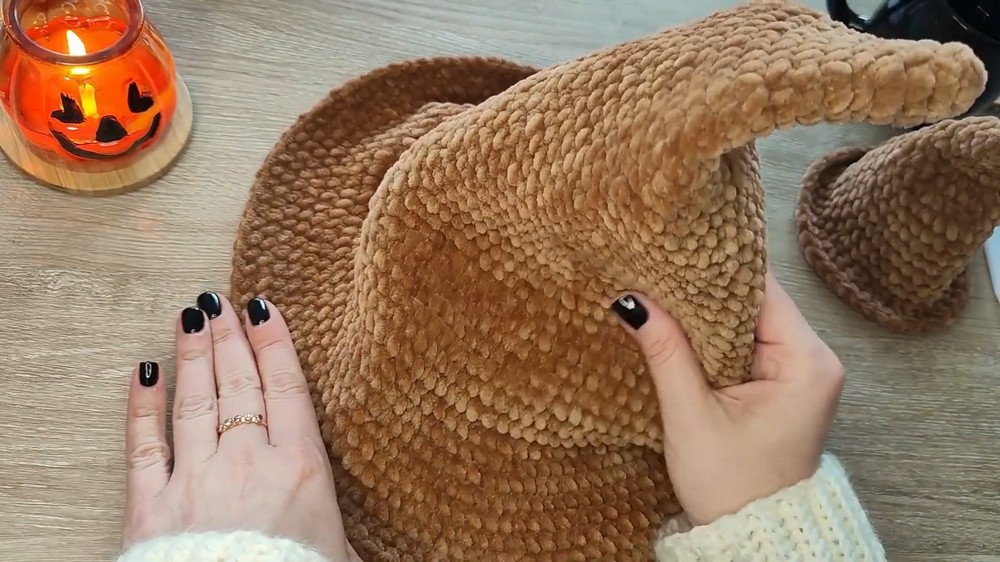
A crisp autumn evening sets the stage for playful festivities, where a pointed hat instantly adds charm and intrigue. With the Free Crochet Magical Witch Hat pattern, simple yarn transforms into a striking accessory full of character and whimsy. This pattern allows crocheters to make hats perfect for Halloween celebrations, costume events, or themed décor, each featuring detailed stitches that form a tapered silhouette topped with playful touches. Its flexible structure ensures a comfortable fit for both children and adults, while the lightweight yarn allows the hat to hold its shape without feeling heavy.
Whimsical Crochet Magical Witch Hat for Charming Decorations
Beyond its visual appeal, making the Free Crochet Magical Witch Hat pattern promotes patience, focus, and hand-eye coordination, offering a meditative and satisfying crafting experience. The project also invites personalization through vibrant colors, trims, or small embellishments, making each piece uniquely expressive.
Ideal as a playful accessory, a thoughtful gift, or a decorative accent, this pattern combines charm, practicality, and creativity. It provides a delightful way to enjoy the soothing rhythm of crochet while adding a touch of whimsical magic to costumes, seasonal displays, or imaginative play. Every finished hat is both captivating and functional, offering endless enjoyment for makers and wearers alike.
Special Features of the Witch Hat
- Beginner-Friendly: The step-by-step instructions make this a manageable project for new crocheters.
- Stylish Design: A curled brim adds charm and character, making the hat perfect for everyday wear.
- Customizable Size: The hat can be adjusted to fit snugly and comfortably, even with stretchy yarns.
- Versatile Yarn Choices: Choose any type and color of yarn to suit your personal style.
Materials Needed
- Yarn: A soft velour yarn like Dolphin Baby by Himalaya is recommended, but you can use whichever yarn you prefer. If using stretchy yarn, make the hat slightly smaller to account for stretching. For thinner yarns, consider combining two strands to add sturdiness.
- Approximate length needed: 131 yards (120 meters)
- Amount: Nearly two skeins (depends on yarn type)
- Crochet Hook: Size 3.5 mm (smaller than manufacturer-recommended size if stretchy yarn is used—this prevents gaps between stitches).
- Marker: Required for keeping track of rows.
- Scissors: For cutting the yarn neatly.
Step-by-Step Instructions
Foundation: Creating the Magic Ring
- Begin by forming a magic ring and working 6 single crochet stitches into it.
- Pull the yarn gently to close the ring. If using velour yarn, be extra careful as it can break easily.
- Join the last single crochet stitch to the first using a slip stitch.
- Place a marker to identify the beginning of your row.
Building the Cone Shape
- Row 2: Crochet 1 stitch into each of the 6 stitches from the previous row.
- Row 3: Repeat the same process as row 2—again, crochet 1 stitch into each of the 6 stitches.
- Row 4: Start increasing. Crochet 2 single crochets into each stitch (total of 12 stitches).
- Rows 5 and 6: Work without increasing. Crochet 1 single stitch into each stitch (no changes—12 stitches per row).
- Row 7: Increase again. Crochet 1 single stitch into the first stitch, then 2 single stitches into the next. Repeat the pattern throughout the row (total of 18 stitches).
- Rows 8 and 9: Continue working without any changes, with 1 single crochet in each stitch (18 stitches per row).
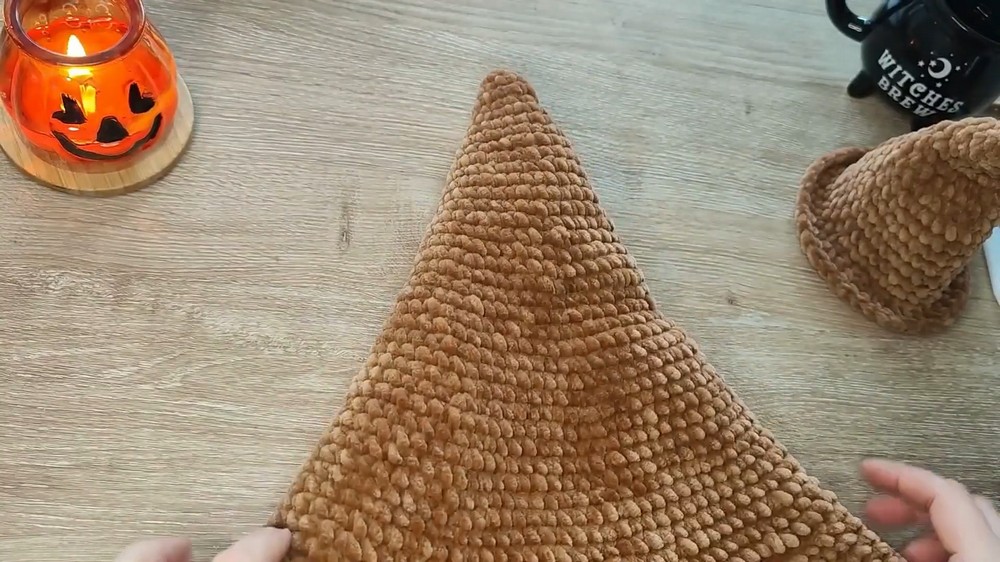
Pattern for Increases: After every increasing row, crochet two rows without changes. Keep alternating between increasing rows and regular rows until your hat reaches the desired size.
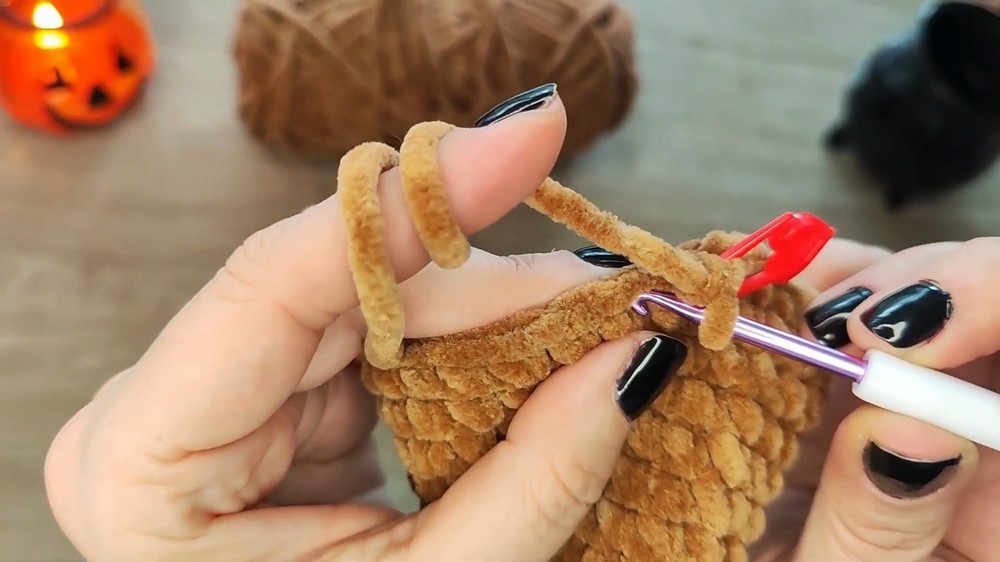
Crocheting the Brim
Once the cone of the hat is completed, you’ll begin working on the brim.
- For the first row of the brim, crochet into the front loop of each stitch only. This creates the curling effect for the brim.
- Begin a row of increases. For example, crochet 6 single crochets followed by an increase.
- The brim width is customizable:
- For a wider brim, alternate between 1 row of increases and 1 row without changes.
- For a narrower brim, alternate 1 row of increases and 2 rows without changes.
Continue this process until the brim reaches the desired width.
Tutor’s Suggestions
- Use Stretchy Yarn: Opt for soft velour yarn like Dolphin Baby for a cozy and stylish finish. However, keep in mind that stretchy yarn may expand over time, so crochet a slightly smaller hat for a snug fit.
- Adjusting Materials: If using thinner yarn, hold two strands together to make the hat stiff enough. Test your chosen yarn to determine the right size.
- Crochet Hook Selection: Using a smaller hook size than recommended for your yarn prevents gaps between stitches and ensures a dense-looking design.
- Markers: Don’t skip the marker—it’s essential for tracking the start of your rows.
Uses of the Witch Hat
This crochet witch hat serves as a playful yet elegant accessory for everyday wear, especially in the fall season when paired with autumn attire. While it’s perfect for Halloween celebrations, costumes, and themed events, its cozy fabric and stylish design make it ideal for casual outings, chilly weather walks, and imaginative play.
Conclusion
This witch hat crochet tutorial provides an easy and enjoyable way to make yourself or your loved ones a bespoke accessory with a magical flair. Combining practical tips, adjustable designs, and beginner-friendly steps, it’s a project suited for anyone looking to create something unique yet functional for their wardrobe. Not only does it showcase creativity, but it also makes for an excellent gift—adding a personalized touch to the recipient’s seasonal style.
Bonus Tip
To keep your hat looking neat and well-shaped, gently stretch it while working to prevent curling. Use a tapestry needle to weave in ends cleanly for a polished finish!