Wrap up in style with the Free Crochet Postal Cowl Pattern, a cozy handmade accessory that adds warmth, charm, and trendy winter vibes to any outfit.
Winding winds of winter bring a chill that demands both style and warmth, and few accessories satisfy this demand as effortlessly as a beautifully crocheted cowl. With its intricate texture and post-stitched charm, the crochet postal cowl serves more than just utility—it makes an elegant statement piece that turns heads wherever it’s worn. Wrapping snugly around the neck, it invites comfort while showcasing a classic knit-like appeal that adds depth to any outfit.
Chunky Crochet Postal Cowl Pattern Perfect for Cold Days

Made to ward off cold breezes, this versatile cowl enriches your wardrobe with a touch of handmade sophistication. Its plush fabric, created using post stitches, delivers an eye-catching, ribbed texture that is both practical and artistic. Perfect for layering over a winter coat or pairing with a lightweight sweater, it adds dimension while offering lasting warmth. Those who love customization will revel in the ability to craft it in various colors or yarn weights, making this adaptable for both formal wear and casual outings.

The beauty of the postal cowl lies in its simplicity balanced with elegance. Whether keeping it for yourself or gifting it to a loved one, this accessory proves that luxury can be stitched into every loop, ensuring warmth and style, all wrapped in creativity.
Materials Required
- Yarn:
- The tutor uses Lion Brand Scarfie Yarn (bulky weight #5), which is a wool-acrylic blend (78% acrylic, 22% wool). It provides warmth and a nice texture.
- Optional: You can also use a medium weight #4 yarn, but you may need to adjust the foundation chain size for proper fit.
- Crochet Hook:
- 6mm crochet hook (size J).
- Other Tools:
- Scissors.
- Tapestry needle (for weaving in ends).
Special Features of the Project
- Twisted Design: The twist adds an elegant and professional finish, making this headband look stylish from all angles.
- Textured Pattern: Post stitches (front and back) create a visually appealing ribbed texture that mimics knit designs.
- Customizable: Easily adjust the size by increasing or decreasing the foundation chain length. The project can be folded for different styles.
- Functional and Warm: Made with bulky yarn, it provides excellent warmth while remaining lightweight and soft to the touch.
Level of Difficulty
- Beginner to Intermediate:
Basic knowledge of double crochet is essential. The tutorial introduces techniques like post stitches (front and back), slip stitches, and managing a twist, but the instructions are clear and easy to follow.
Step-by-Step Instructions
Step 1: Foundation Chain
- Begin by making a slip knot on your hook.
- Crochet any number of chains depending on your desired size (even numbers are recommended to maintain the pattern).
- The tutor chains 100 stitches as an example for her headband.
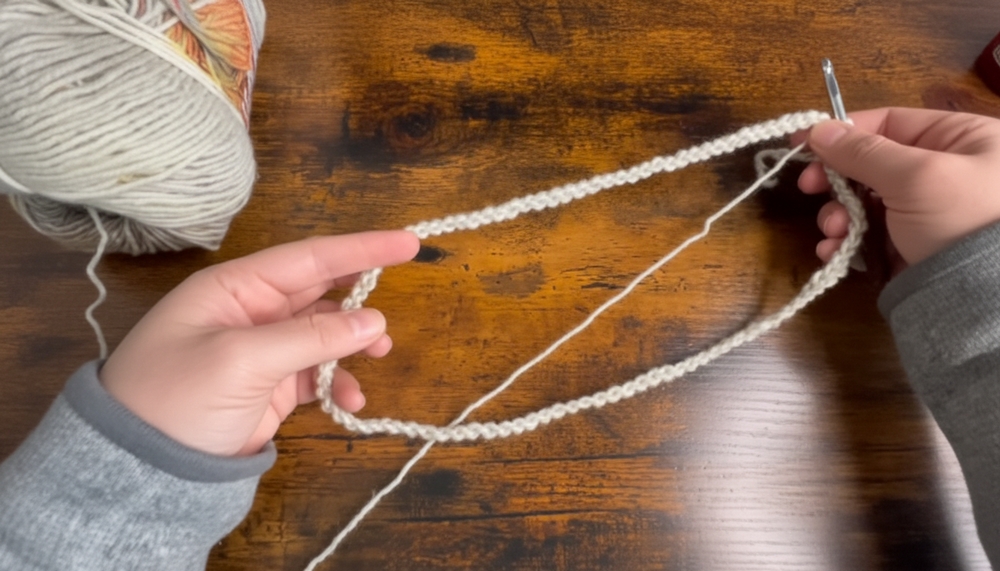
Step 2: Form a Ring
- Before joining the chain into a ring, ensure the chain is straight with no twists.
- Slip stitch into the first chain to form a circular foundation.
Step 3: Start the First Round of Stitches
- Round 1:
- Chain 1 (does not count as a stitch).
- Place 1 double crochet into the same chain stitch.
- Work 1 double crochet into every stitch around the foundation chain until you return to the starting point. Ensure you have the correct number of stitches; the tutor has 99 double crochets after the first round.
Step 4: Adding the Twist
- After completing the first round, intentionally twist the circular foundation to create the headband’s signature twisted design.
- Work a decrease stitch over two stitches to stabilize the twist:
- Yarn over, insert the hook into the first stitch and draw up a loop, yarn over and go through two loops. Repeat the same steps into the next stitch, then finish the decrease by pulling through the remaining loops.
- Yarn over, insert the hook into the first stitch and draw up a loop, yarn over and go through two loops. Repeat the same steps into the next stitch, then finish the decrease by pulling through the remaining loops.
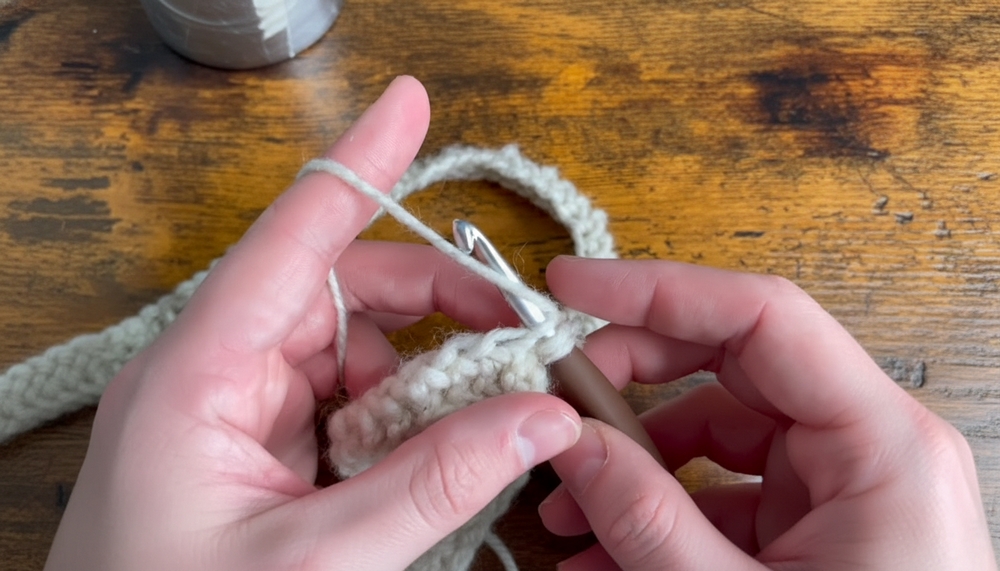
Step 5: Round 2 – Adding Texture with Post Stitches
- Chain 1, which does not count as a stitch.
- Begin alternating front post double crochets and back post double crochets:
- For a front post double crochet, yarn over, insert the hook around the front of the post, draw up a loop, and complete a double crochet.
- For a back post double crochet, yarn over, insert the hook around the back of the post, draw up a loop, and complete a double crochet.
- Repeat the front-back post alternation throughout the round. Ensure that post stitches remain aligned in subsequent rounds.

Step 6: Repeat Post Stitches
- Continue repeating the front post double and back post double crochet stitches for the number of rounds you prefer. The tutor completes 10 rounds total: 1 plain double crochet round and 9 rounds of textured post stitches.
- Maintain the twist as you work; this may require manually adjusting the piece.
Step 7: Finish the Headband
- Once you reach the desired height, slip stitch into the top of the first double crochet to join the last row.
- Fasten off your yarn and weave in the ends using a tapestry needle.

Tutor’s Suggestions
- Adjust for Yarn Weight: If using medium weight (#4) yarn instead of bulky weight (#5), increase the foundation chain length slightly to match the desired size.
- Manage Tension: Work evenly without overly tight stitches, particularly during the twist, to prevent puckering.
- Keep Post Stitches Aligned: Be mindful of aligning your front post and back post stitches from row to row for a clean, ribbed texture.
- Fold for Style: For a chunkier look, fold the headband in half before wearing, or leave it extended for a fuller width.
Uses and Benefits
- Practical Use: Keeps your ears warm and hair in place during cold weather.
- Fashion Accessory: Offers a stylish, modern look with its textured ribbed design and twist detail.
- Gift-Worthy: Quick and simple to make, this headband is perfect for gifting during the holidays or as a handmade surprise for loved ones.
- Beginner Growth: Introduces beginners to front and back post crochet stitches, which are foundational techniques for textured patterns.
Tip
To keep your twist neat and prominent, periodically adjust and flatten the headband as you crochet around. Twists may shift as you work, but gentle handling ensures a professional finish.
Conclusion
This sophisticated yet simple crochet headband combines warmth, functionality, and elegance. Following the step-by-step guidance in the video, you can master post stitches and create a beautiful accessory that looks professionally crafted. Whether you’re a beginner eager to experiment or an experienced crocheter looking for a quick project, this twisted headband is the perfect piece to add to your collection or share as a thoughtful gift!