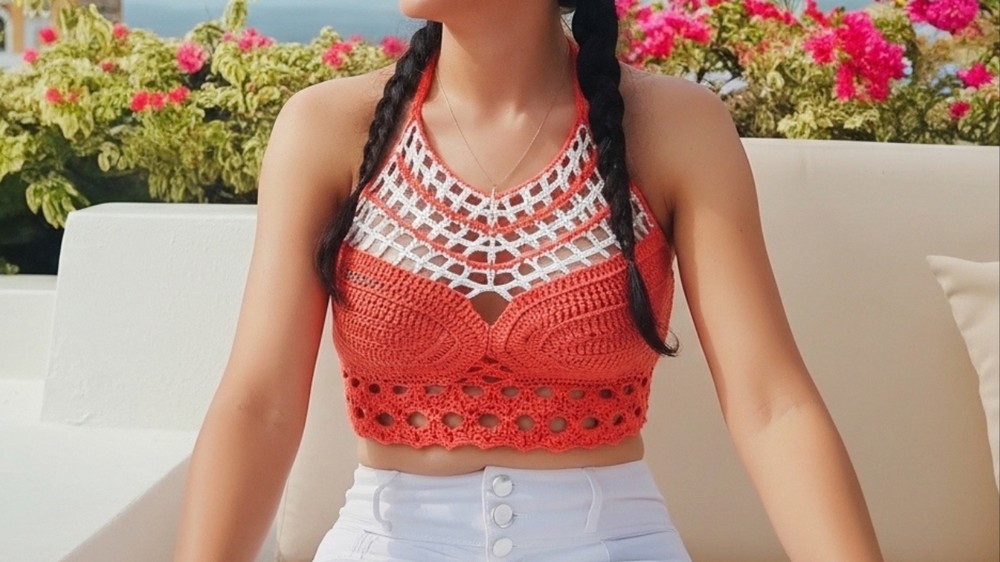
Show off your style with this crochet Bohemian top pattern that’s perfect for any occasion and effortlessly combines comfort with a trendy, laid-back vibe.
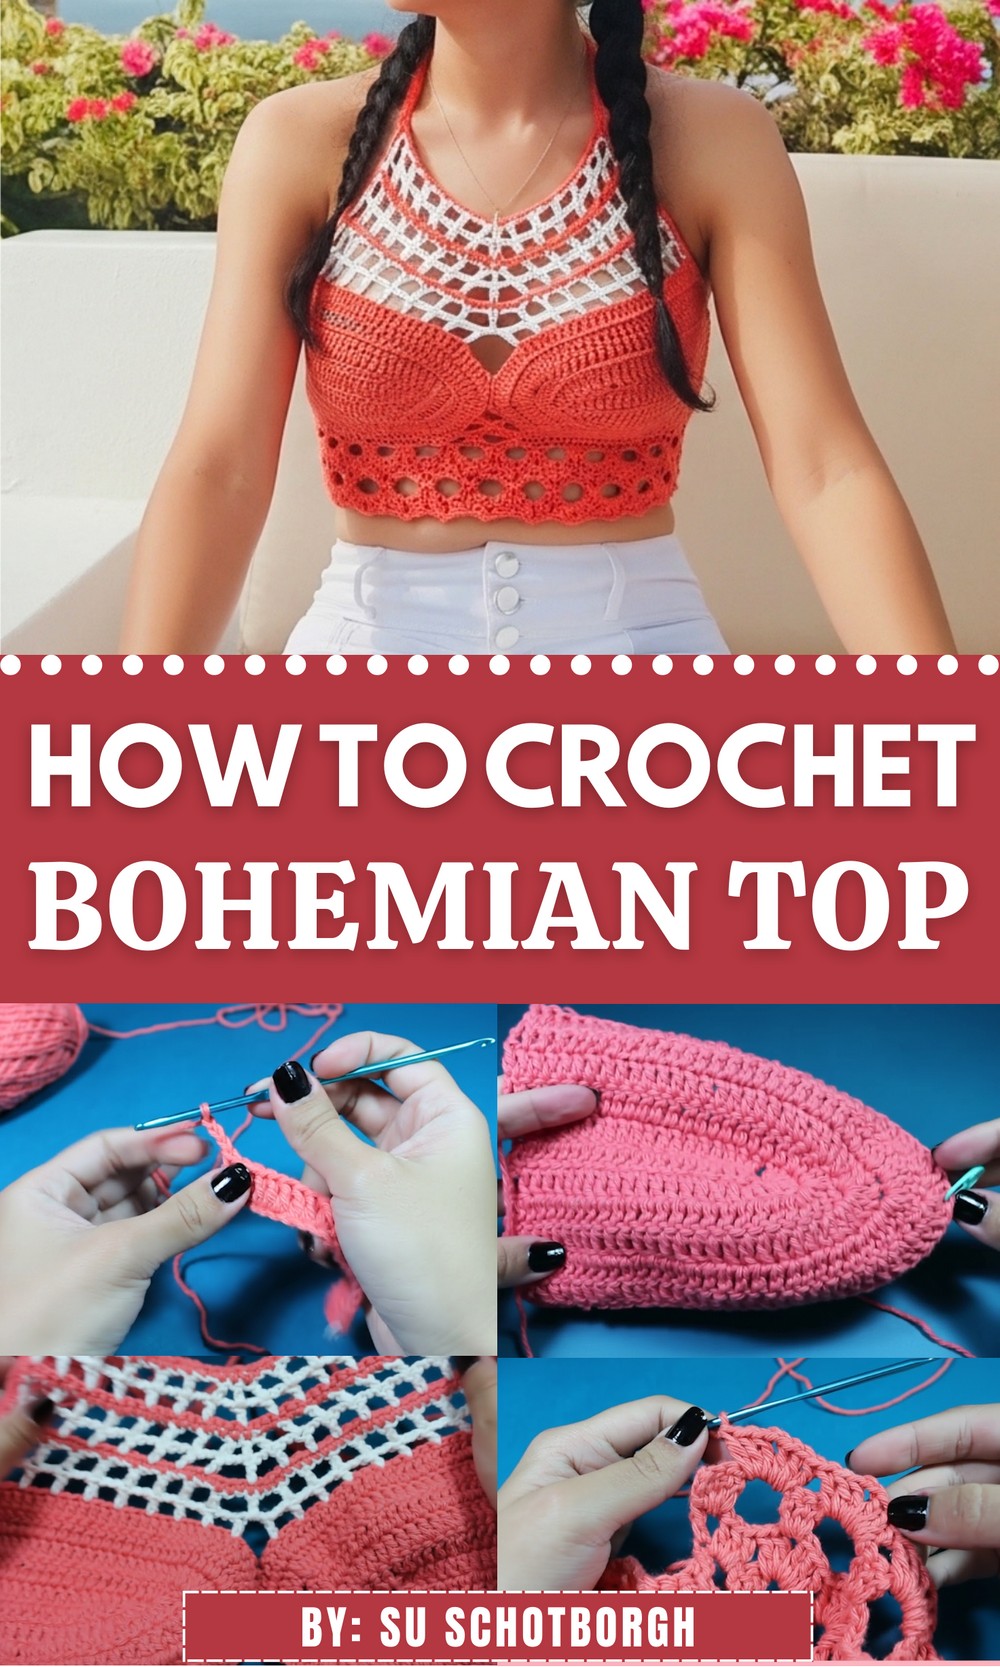
Add a touch of effortless style to your wardrobe with this free crochet Bohemian top pattern that’s perfect for any season. Light, flowy, and full of personality, this trendy top combines comfort with boho-chic vibes, making it ideal for casual outings, beach days, or layered looks for cooler weather.
Boho-Chic Crochet Top Pattern Perfect for Any Season
Its airy design allows for breathable wear, while the customizable details let you play with colors and textures to match your personal flair. Whether you’re a beginner or an experienced crocheter, this pattern offers the perfect mix of simplicity and uniqueness.
Start stitching your way to a fashionable, one-of-a-kind handmade piece!
Materials Needed
Essential Supplies
- Yarn:
- 100% Cotton Yarn in two colors (Color 1: Tangerine for coral; Color 2: Soft Ecru for white). Use a single color if you prefer an easier version.
- Amount required depends on your desired size; approximately 200–250 g total for the demonstrated size.
- Crochet Hook:
- 3.5mm (E/4) hook (this gives denser fabric to avoid transparency).
- Other Materials:
- Stitch markers for accurate placement of stitches.
- Scissors.
- Yarn needle for weaving in ends.
- Measuring tape to customize cup size and stripe length.
Skill Level
Intermediate to Advanced.
Key Abbreviations
- ch: chain
- dc: double crochet
- sc: single crochet
- sl st: slip stitch
- rep: repeat
Special Notes:
- This pattern is worked in several parts: cups, top details, bottom section, border, back panels, and straps. Follow the sequence carefully to achieve the correct structure.
- Customization: Adjust the cups and body length to suit your size and preference. Use the provided measurements to guide your adjustments.
Pattern Instructions
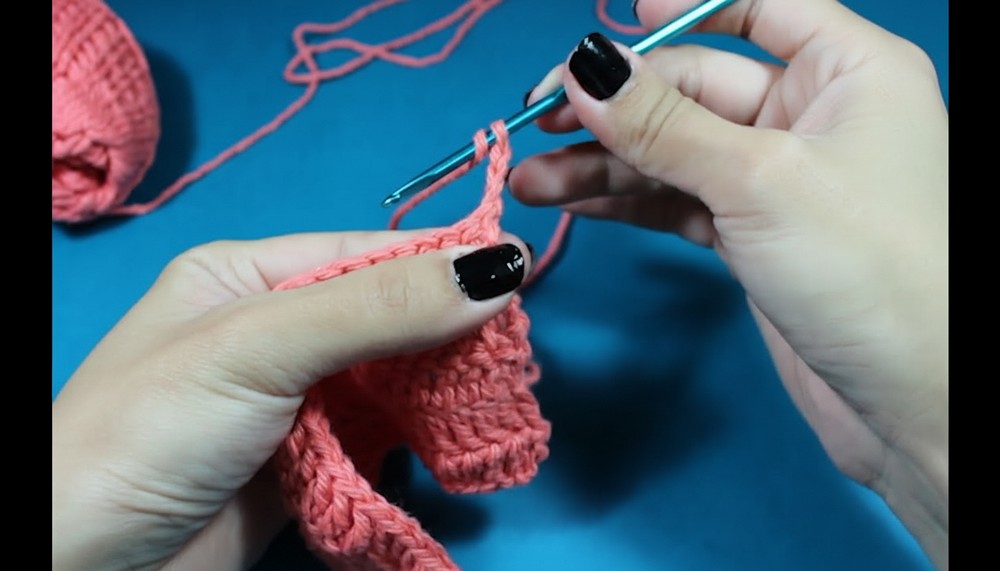
Step 1: Crochet Cups
- Measurement for Cups:
- Create a base chain that measures 12 cm (4.75 inches) or matches the dimension for your cup size. Example: For size 34C, this width is accurate.
- Use stitch markers to mark the last chain.
- Foundation Row:
- Make 3 extra ch after marking the last chain.
- Work 1 dc in the marked chain.

- Work 1 dc in each chain across the foundation chain.
- Row 2 (Shaping the Cup – Base Increases):
- Ch 3, turn. Skip the first stitch (as the chain counts as your first dc), and work dc in every stitch.
- In the penultimate stitch, work 2 dc in the same stitch.
- In the last stitch, work 5 dc in the same stitch. Mark the third dc with a stitch marker (this is your center stitch).
- Remove the marker from the foundation row. Work 2 dc in the last stitch of the previous row and continue dc in each stitch until the end of the row.
- Row 3 (Shaping the Cup – Repeating Increases):
- Ch 3, turn. Work dc in each stitch until the stitch before the marker.
- Work 2 dc in the stitch before the marker.
- Remove the marker, work 5 dc in the marked stitch, and mark the third one again.
- Work 2 dc in the next stitch and dc in each stitch until the end.
- Row 4 (Final Cup Round):
- Ch 3, turn. Work dc in each stitch, with no increases before the marker.
- Remove the marker. In the marked stitch, work 3 dc. Mark the second dc in the group of 3.
- Continue working dc in each remaining stitch until the end of the row.
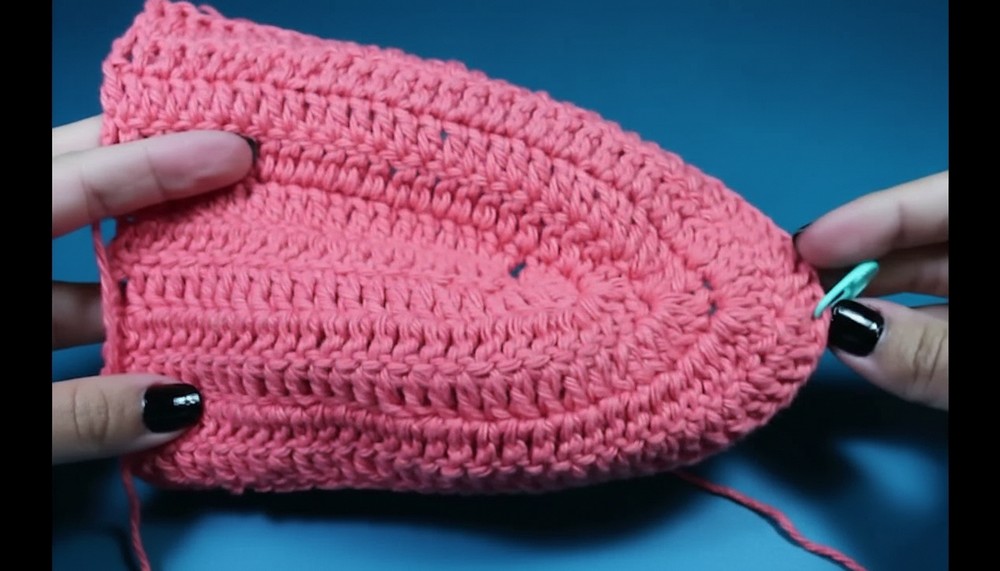
- Finish off and weave in tails.
- Repeat to create a second cup.
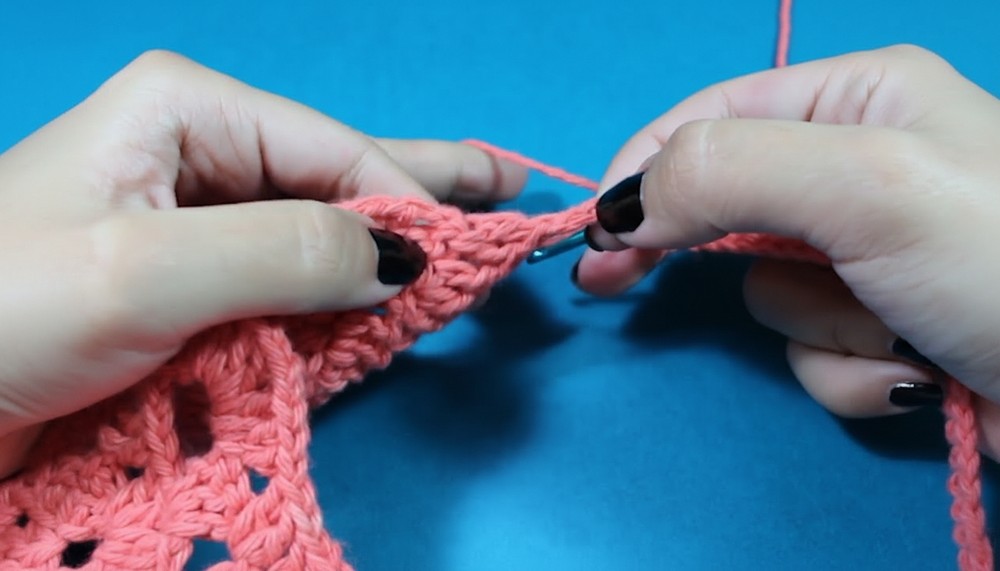
Step 2: Joining the Cups
- Place the two cups side by side, with the right sides facing up.
- Add yarn to the second stitch below the center marker on the left cup.
- Use sl st to join the cups together by working through stitches on both cups. Work 5 sl st for a secure join.
Step 3: Top Squares Pattern
- Foundation Row:
- Add Color 2 (Soft Ecru) yarn at the top corner of the cups, where desired.
- Ch 3 (counts as a dc). Then ch 2.
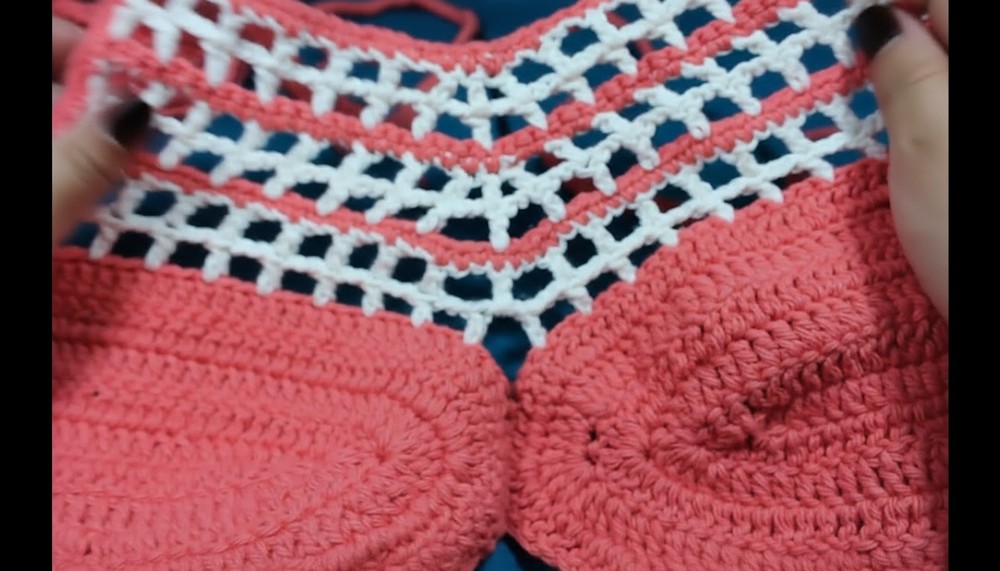
- Skip 3 stitches, work 1 dc, ch 2. Repeat across the row to create square shapes.
- Row 2:
- At the start of a new row, ch 5 (3 for dc, 2 for a ch-space).
- Continue working ch-2, dc to form a second row of squares.
- When reaching the center, leave 4–5 free stitches in each cup for a clean gap.
- Continue to complete the row and cut yarn if needed.
Step 4: Bottom Section
- Creating the Fans:
- Starting from the bottom of the joined cups, add yarn to begin.
- Work the foundation: ch 3, 2 chains (5 total), dc, and continue forming square spaces by repeating ch-3, dc where each group is separated by 3 free stitches.
- When reaching the center, work fans: 3 dc, ch-2, 3 dc in one space. Continue to form fans in each available space.
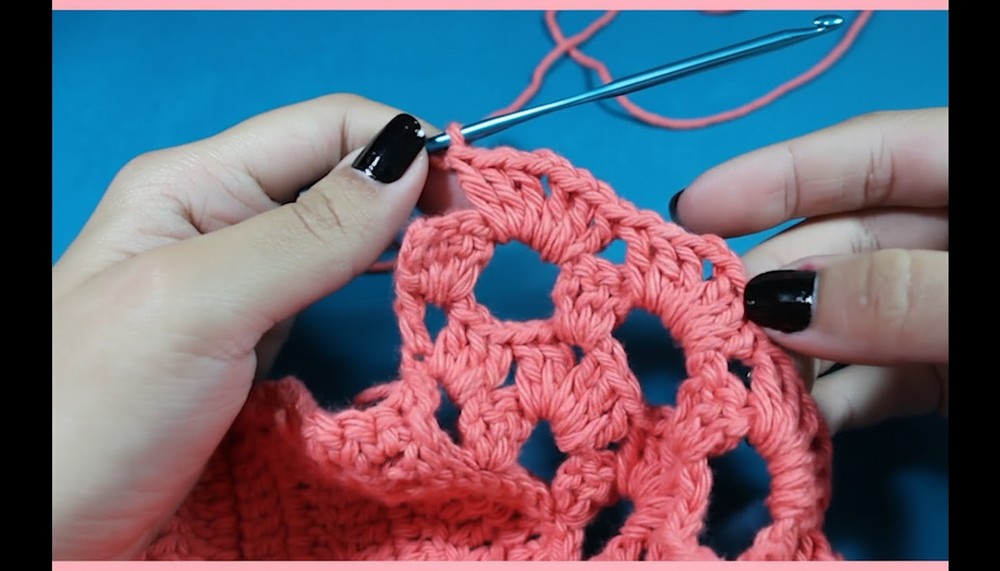
- Repeat:
- Alternate rows of squares and fans to build the desired length for the bottom. Repeat the sequence described until the top reaches your desired length.
- On the final fan row, begin by working fans in the center without spaces between them (fans will overlap slightly).
Step 5: Back Panels
- After completing the bottom, create a back strap for the top.
- Work single crochet stitches along the top’s edge to create a border.
- Add 3 to 4 rows of dc rows for a snug fit and coverage on the back.
Step 6: Straps and Tassels
- Neck Straps:
- From the top center of the cup, add yarn and ch a long tie (long enough to tie around the neck).
- For the stripe’s decorative end, make a “tassel-style finish”:
- Count 3 chains from the end and yarn over multiple times to create a cluster ending.
- Work sc stitches down the chain to reinforce it.
- Side Straps:
- Add yarn to the bottom seam and make side chains for tying the top around the waist. Work an optional sc row for reinforcement.
- Add yarn to the bottom seam and make side chains for tying the top around the waist. Work an optional sc row for reinforcement.
- Tassels (Optional):
- Cut strands of yarn in desired lengths. Use both colors for a multi-tone tassel.
- Fold the yarn in half to create a loop, and attach the tassel to each strap using a lark’s head knot.
Conclusion
This Bohemian-style crochet top blends intricate cups, tidy square motifs, and delicate fan stitches, resulting in an elegant summer top. You can easily customize cup size, row count, and strap length to suit your body and aesthetic preferences. The additional tassels add a playful charm, completing the boho look. Perfect for festivals, beaches, or casual outings, it’s a versatile piece that combines artistry with functionality.
Pattern Corrections and Tips
- Marker Placement: Use markers throughout the project to ensure correct increases and shaping for cups and fans.
- Color Changes: Use the invisible color-change technique to create smooth transitions between colors. Ensure yarn tails are worked into subsequent stitches to avoid unraveling.
- Customization Tip:
- For fuller coverage, add additional rows at the bottom section.
- Experiment with lightweight or gradient yarns to modernize the look.