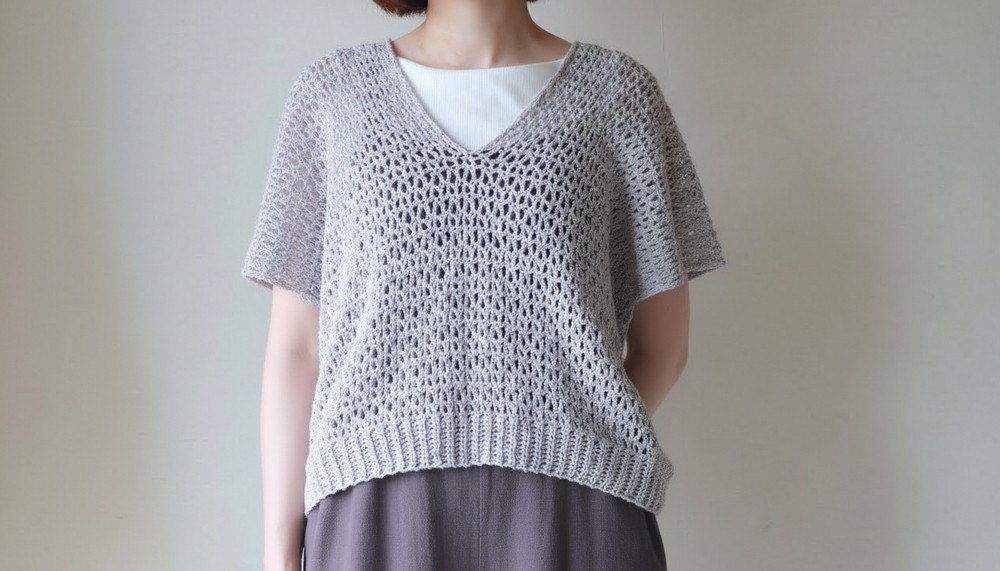
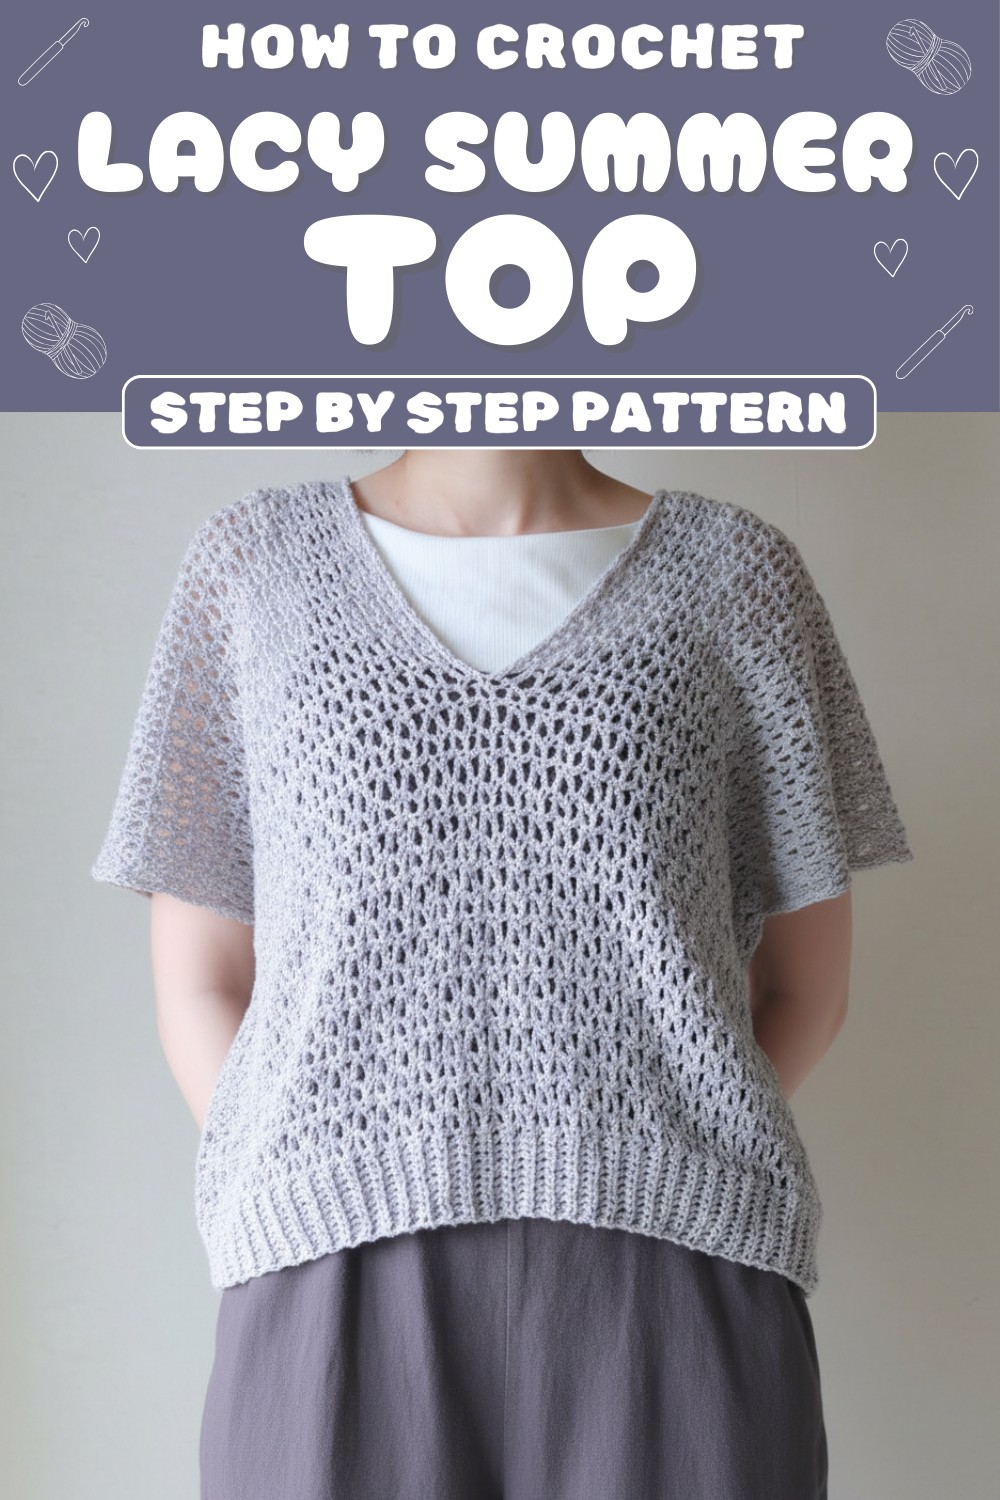
Step into summer with the Crochet Lacy Summer Top Pattern and enjoy a breezy stylish handmade top that is fun easy and perfect for sunny days.
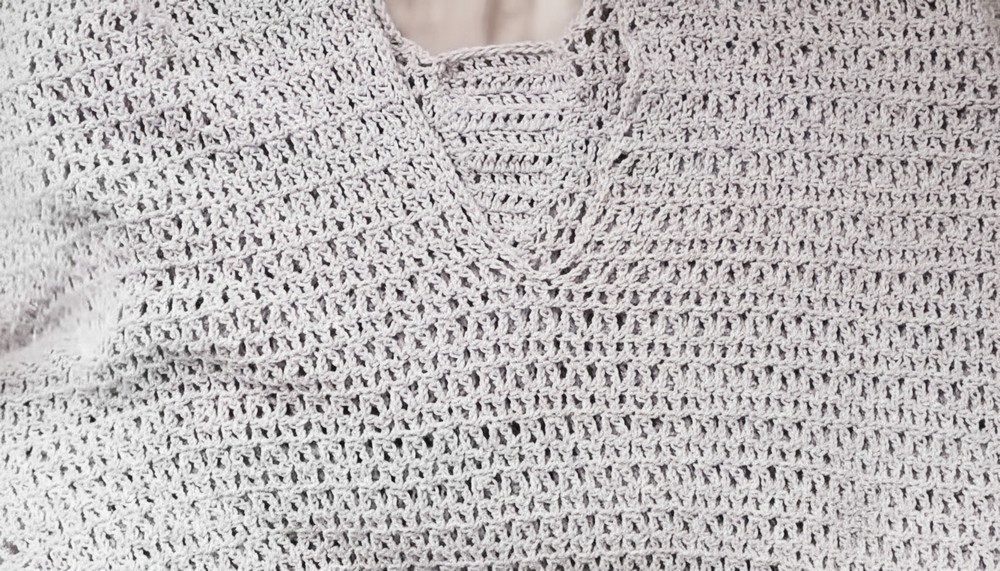
Hot sunny days call for something light, airy, and full of charm, and this handmade creation brings just that to your wardrobe. The Crochet Lacy Summer Top pattern shows a delicate, soft top made with neat stitches and open lacy designs that make it breathable, stylish, and fun to wear.

Crochet Lacy Summer Top Pattern to Stay Stylish This Season
It can be paired with shorts, skirts, or jeans for casual outings, beach trips, or even summer parties, and it also makes a thoughtful handmade gift. Its most special features are the intricate lace texture, lightweight feel, and comfortable fit, which make it unique, eye catching, and perfect for staying cool and fashionable all season.
Materials Required:
- Recycled cotton yarn (light grey used in the video, but feel free to use your desired color)
- 4mm crochet hook
- Stitch markers
- Yarn needle
- Scissors
Gauge & Measurements:
- Width: Approx. 136 cm in chain form (shrinks slightly after completion).
- Final length: About 60 cm long or as desired.
- Main body stitch count: 213 chains (193 for the pattern + 10 stitches for each hem).
- The pattern is worked in rows, creating a rectangle that is later sewn together. You can adjust size or fit by increasing or decreasing stitches in multiples of 6 + 1.
Pattern Instructions:
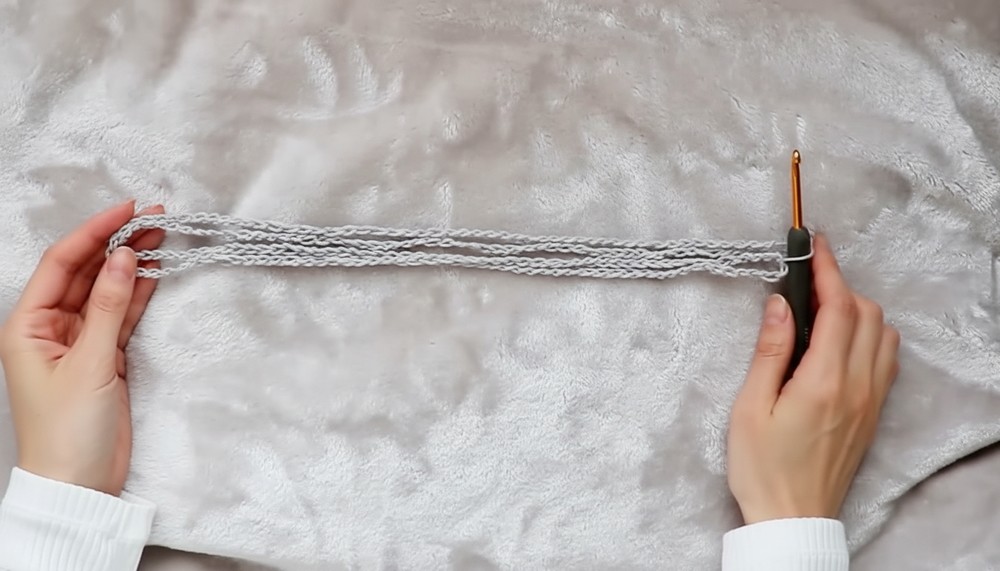
Step 1: Foundation Chain
- Create a total of 213 chains. This includes:
- 193 chains for the main body (pattern base).
- 10 chains on each side for the ribbing.
- 193 chains for the main body (pattern base).
- Ensure your chain is 136 cm in length before working, but note it will shrink slightly once completed.
Step 2: Hem Ribbing (10 Stitches)
- Begin with 10 slip stitches (dslst) to make the ribbing for the hem.
- Use back-loop-only slip stitching (slst blo) from this point forward to maintain stretch in the ribbing.
- Always chain 1 at the end of each row.
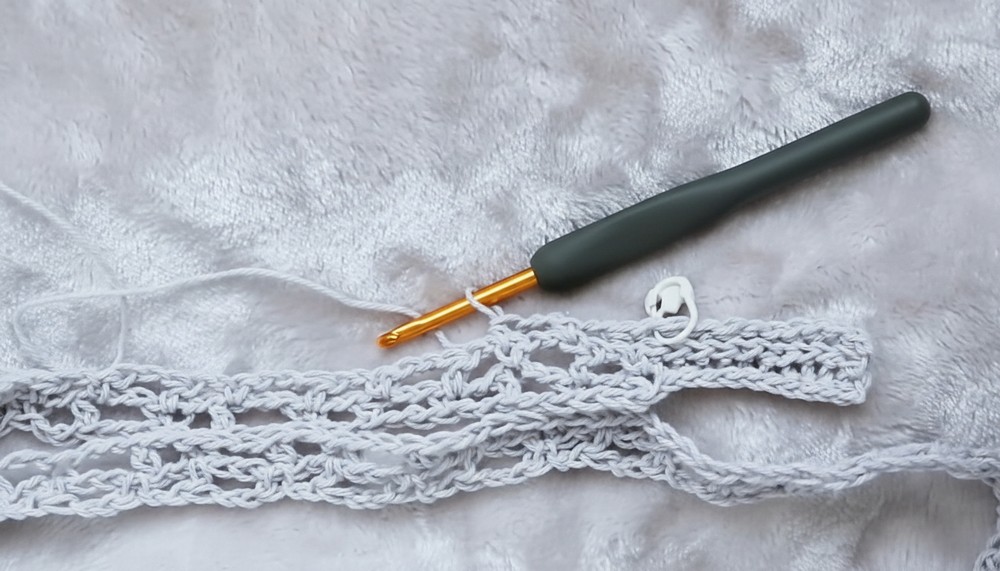
Step 3: Main Body Pattern
- After completing the ribbing on one side, start the main body pattern:
- Work hdc (half-double crochet).
- Do chain 2, skip 2 stitches, and then do sc (single crochet).
- Alternate between hdc and sc with chain-2 spaces in between to create the lace pattern.
- Repeat this rhythm for every row until 10 stitches remain.
- For the last 10 stitches in each row, use dslst for the ribbing.
- Continue the pattern until you have completed 82 rows, which form the main rectangular body.
Step 4: Create Armhole with Center Chains
- Once the body reaches 42 rows, create the armholes by adding a center chain:
- Make 89 new chains in the middle of your work to form the armholes.
- Secure the chains by continuing the pattern on the opposite side as before.
- Complete an additional 41 rows after the chain to finish the top’s length (total of 82 rows).
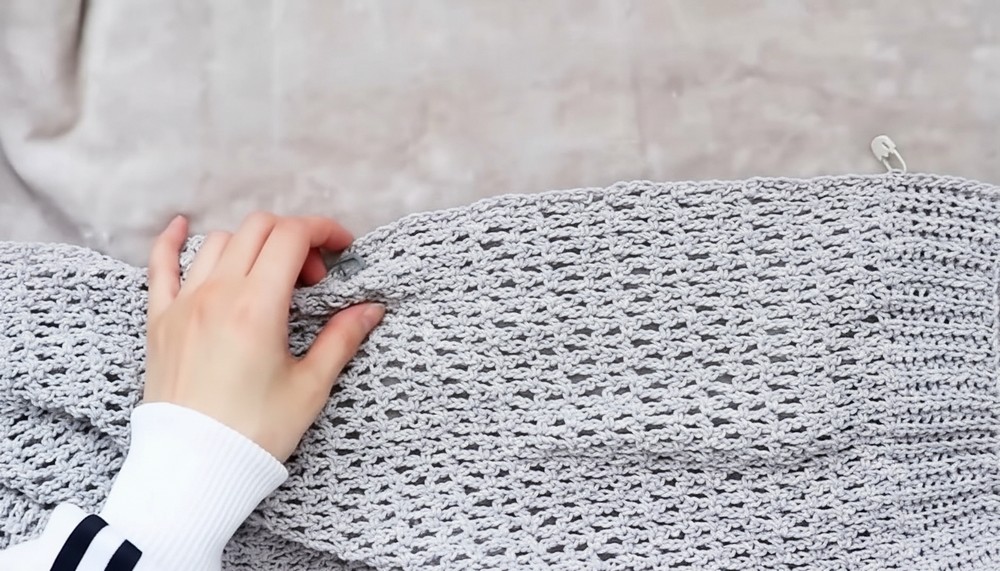
Step 5: Assembly
- Sew the sides together:
- Fold the rectangle in half.
- Use a needle to sew the side seams up to the armholes, leaving space for the arms.
- Make stitches neat and consistent for a clean finish.
- If needed, reinforce the back by creating a small triangle insert for the back neckline using 10 rows of double crochet (dc). Sew it in place.
Step 6: Edgings (Neckline & Sleeves)
- For the neckline and sleeve edges:
- Work slip stitches (slst) along the edges.
- Begin with a chain 1 to tighten and secure each round.
- Place stitch markers to ensure even edge coverage.
- Once edgings are complete, neatly finish off the threads and tuck in ends.
Tips for Success:
- Keep your chain tension consistent to avoid a tight or uneven top.
- Use a blocking technique (stretch the finished top and pin it to shape, then steam it lightly) to give the top an airy, lacy look.
- Add customization by using different textured yarns or combining two complementary yarn colors for added depth.
Conclusion:
This lacy recycled cotton top is not only eco-friendly but also stylish and versatile. Whether paired with a skirt, jeans, or used as a summer layering piece, it’s a wardrobe staple. The ribbed hem, lacy pattern, and soft stretchy finish make it unique and modern. With the ability to adjust size and color, it’s suitable for crafters of all levels.
Important Remarks:
Don’t forget to try your top on as you assemble it, especially when attaching the sides and deciding the fit. The final stretch of the material gives it a lightly fitted yet comfortable look, which is perfect for the upcoming season.
https://www.youtube.com/watch?v=Y7HnA4lIAa0