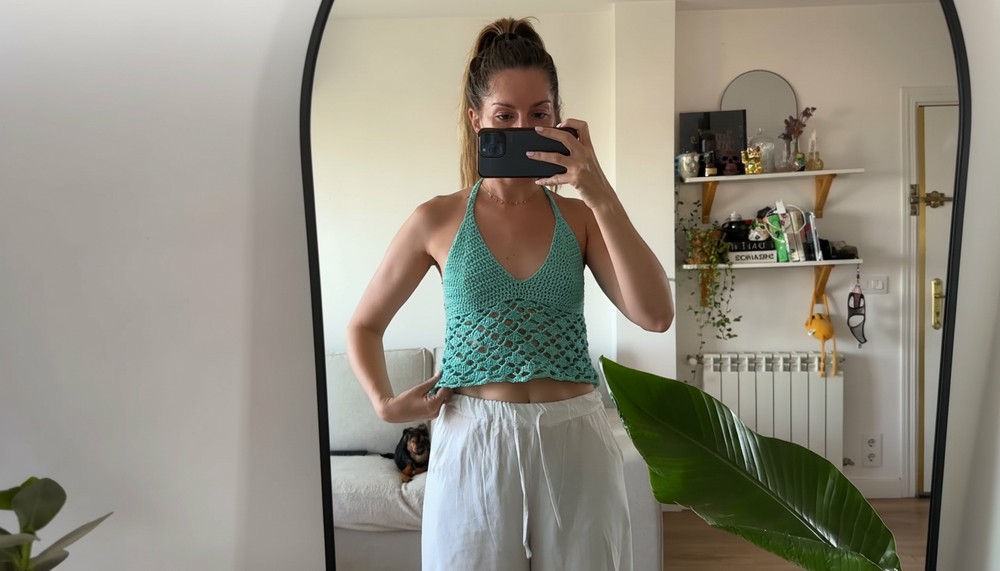
Turn heads this summer with a trendy crochet halter crop top made from this free pattern, perfect for adding style and comfort to every sunny day.
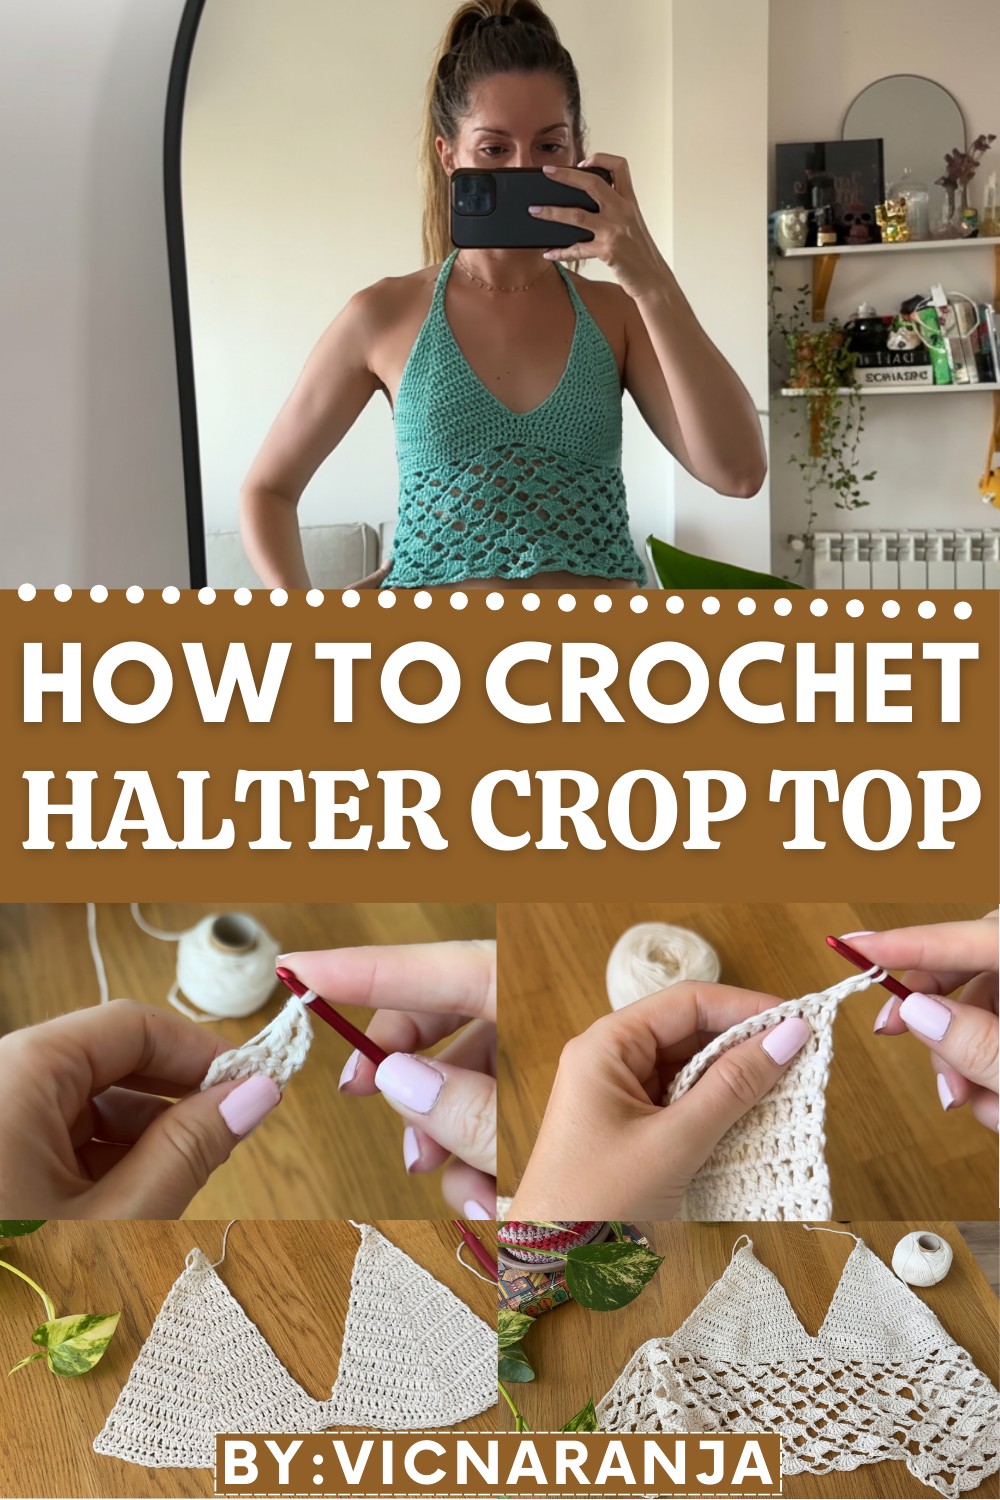
Breezy Summer Vibes Await with This Stunning Free Crochet Halter Crop Top Pattern
If you’re dreaming of the perfect beach look, we’ve got just the thing for you — a beautiful Free Crochet Halter Crop Top Pattern. This pattern is your key to creating a stylish, lightweight top that’s perfect for sunny beach days, relaxing vacations, or casual summer outings. The design is simple yet trendy, featuring soft textures, wavy patterns, and a flattering halter style that suits everyone. 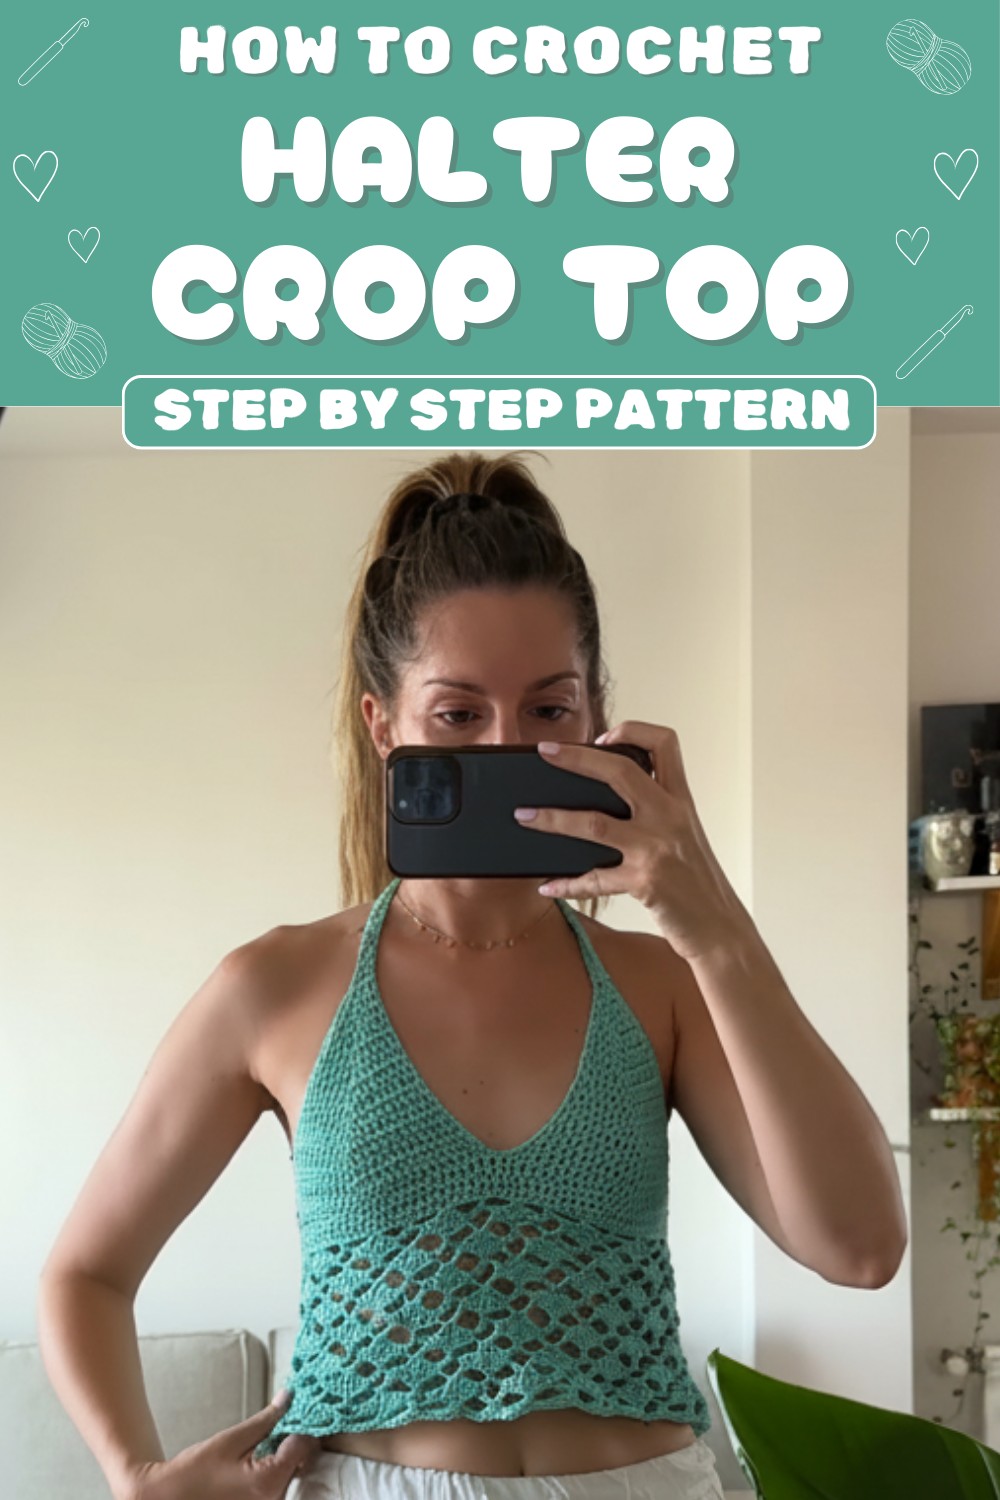
Whether you pair it with shorts, skirts, or jeans, this top adds a breezy, chic touch to your outfit. The best part? It’s beginner friendly, so anyone can crochet it with ease. Dive into this fun project and enjoy the joy of creating your own stunning beach ready outfit.
Crochet Halter Crop Top Pattern
Materials Required:
- Yarn: Cotton or similar lightweight yarn
- Option 1: 2 skeins of Atlántica by Hooket
- Option 2: 1 skein of Newancia
Note: Approximate yardage will vary based on size. Links to yarn specifications are suggested in the video; check labels for finer details.
- Hook: 3.5 mm crochet hook
- Tapestry Needle: For weaving in ends.
- Scissors: For cutting yarn.
Gauge:
Gauge plays a crucial role in adjusting the size of the finished top. Use the ribbing and the main pattern to ensure your stitches are consistent:
- 10 cm x 10 cm = 16 stitches x 22 rows of double crochet (US terminology).
Adjust hook size if necessary to meet gauge.
Finished Size:
For this pattern, the sample fits a size Small (S) with the following approximate measurements:
- Cup Width: Made for a size S, but can be scaled for larger or smaller sizes by increasing or decreasing rows.
- Top Width: With both cups and back panels together, the final width is about 112 stitches + 1 for size S.
Customizations for other sizes are discussed in the tips section below.
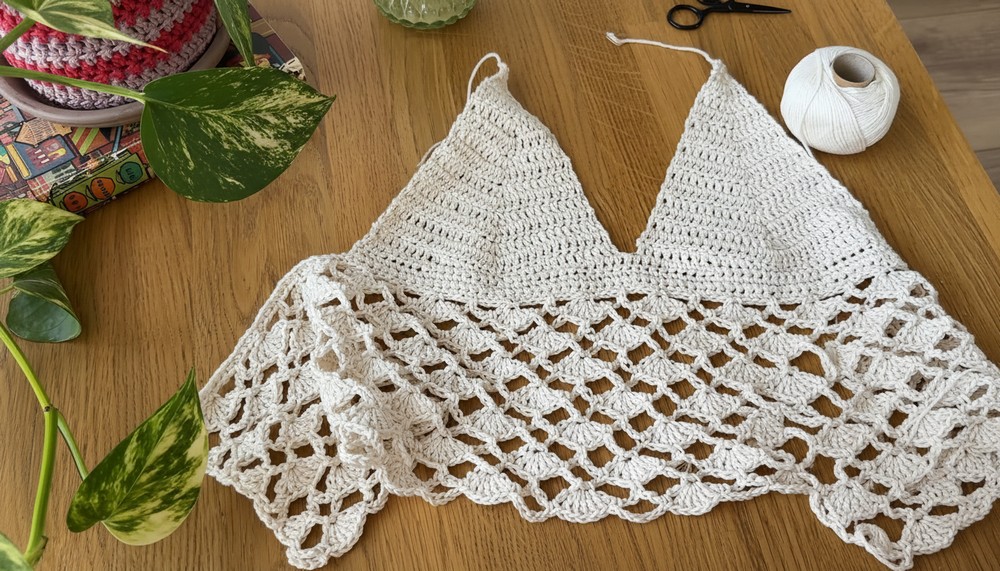
Pattern Overview:
This pattern features cups for the bust, panels for the back, and intricate wavy designs resembling “olas (waves)” near the hemline. Straps tie at the back for a snug fit, with additional shoulder straps for a perfect finish.
Step by Step Instructions:
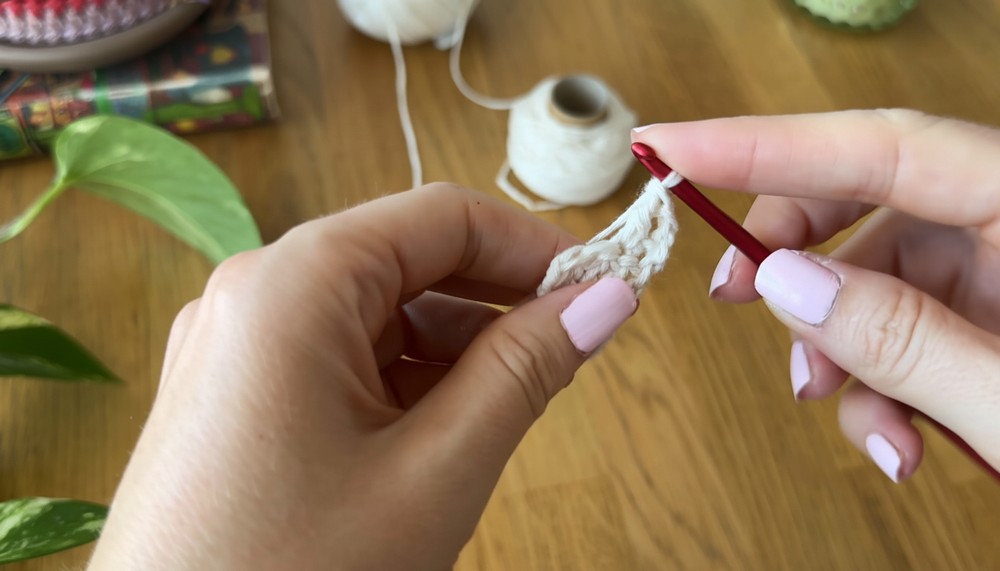
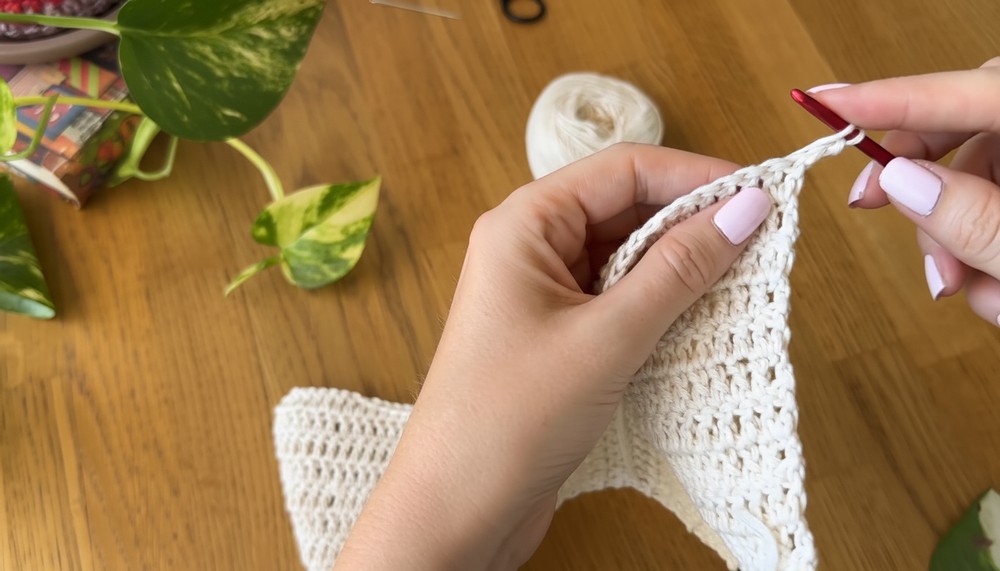
Creating the Cups:
- Foundation Chain:
Start with a slip knot, then chain 3 base chains. - Row 1:
- Add 2 extra chains (these act as the “turning chains”).
- Work 1 double crochet (dc) into the 4th chain from the hook.
- Crochet another dc in the next chain.
- You now have 3 stitches in this row (2 dcs + turning chain counts as 1 dc).
- Rows 2 Onward (Increasing the Cup):
- Start with 2 turning chains, then turn your work.
- Add 3 dcs in the first stitch to increase at the start of each row.
- Work 1 dc in each middle stitch.
- End the row by placing 1 dc in the final stitch to stabilize.
- Continue this pattern of increases until your cup size fits appropriately. For a size S, stop at 15 rows, giving a total of 31 stitches.
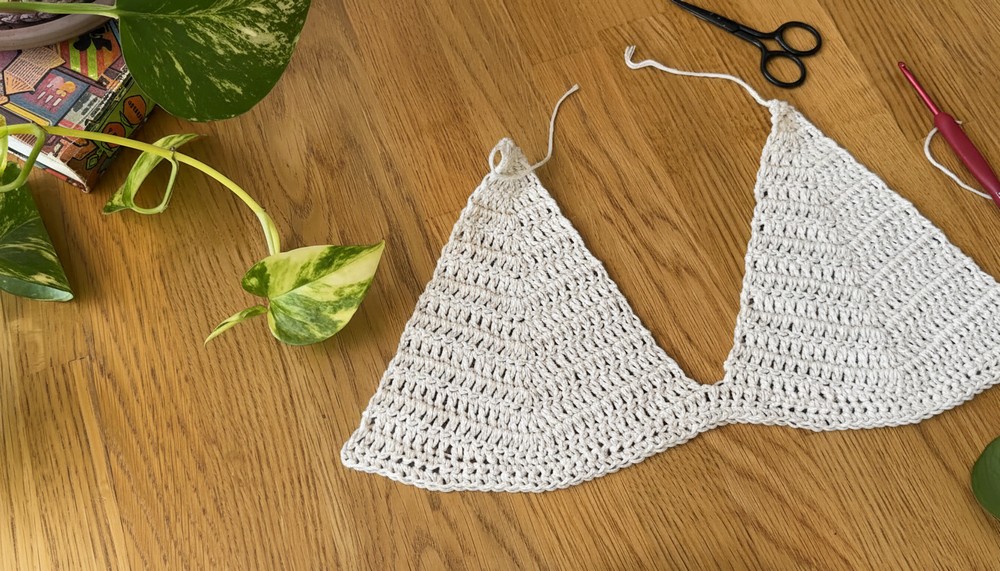
- Repeat for the Second Cup:
Follow the above steps to create an identical cup. You will have two individual cups.
Joining the Cups:
- Take one of the cups and work 7 dc along the edge, then add an additional 8th dc.
- Work 4 half double crochets (hdc) to round the edges.
- Transition to the center of the cup by working 7 single crochets (sc) along the central edge.
- Repeat the pattern in reverse to complete the second half of the cup:
- 4 hdc → 8 dc.
- Add a chain between the two cups to connect them for the main body. Count the stitches:
- (31 stitches on the first cup + 31 stitches on the second cup + 1 central connecting chain = 63 stitches).
- (31 stitches on the first cup + 31 stitches on the second cup + 1 central connecting chain = 63 stitches).
Main Body:
The following rows focus on expanding the design to form your top:
- Row 1: Add two chains and turn your work. Expand the width of your top by adding 1 dc in every stitch across. Continue this until the desired drop from the cups is achieved.
- Wave Stitch Pattern (Starts After Row 15):
- Work a row adaptation using arcs and “conchas” (shells).
- Foundation: Ensure the total stitch count is a multiple of 4 + 1.
- Detailed instructions:
- Work 5 chains (counts as an arc).
- Skip 3 stitches, then make 1 sc in the 4th stitch.
- Continue the sequence of arcs (5 chains) and sc.
- In every alternate row, replace certain arcs with conchas by working 5 dcs in the same stitch.
Creating the Straps:
- Back Straps:
- For ties, chain 75 stitches (or adjust for your preferred length).
- Work slip stitches (sl st) across the chain to create a clean edge.
- Attach securely at the back panel corners.
- Neck Straps:
- Position your yarn at the top corners of each cup.
- Chain long enough straps for tying comfortably around the neck.
Finishing and Edges:
- Use sc or sl st along all edges to give a polished finish to the top.
- Weave in all loose ends using the tapestry needle and trim the excess yarn.
Customization Ideas:
- Cup Size Adjustments: For larger sizes, continue the increases for additional rows in the cup. Ensure equal rows for both cups.
- Back Panel Adjustments: Add more chains to either side to accommodate wider measurements.
- Yarn Variation: Consider using variegated or gradient yarn for a unique, colorful look.
- Hemline Play: Experiment with deeper wave patterns by increasing stitch heights in the “conchas.”
Conclusion:
Once you’ve completed your Crochet Top Olas, you should have a flattering and stylish garment perfect for summer days out or casual gatherings. The combination of cups, wave inspired stitches, and adjustable straps gives you a trendy and chic look that’s sure to turn heads.
Helpful Tips:
- Ensure you frequently measure your top against your body to perfect the fit.
- If you are unfamiliar with any stitches, consider practicing them on a swatch before incorporating them into your work.
Enjoy your new crochet project and wear it proudly. Let your personality shine through by customizing it and making it uniquely yours.