Give your space a cozy upgrade with this free crochet bow cushion pattern that designs a cute and stylish cushion with ease.
Try This Free Crochet Bow Cushion Pattern That’s Extra Cute
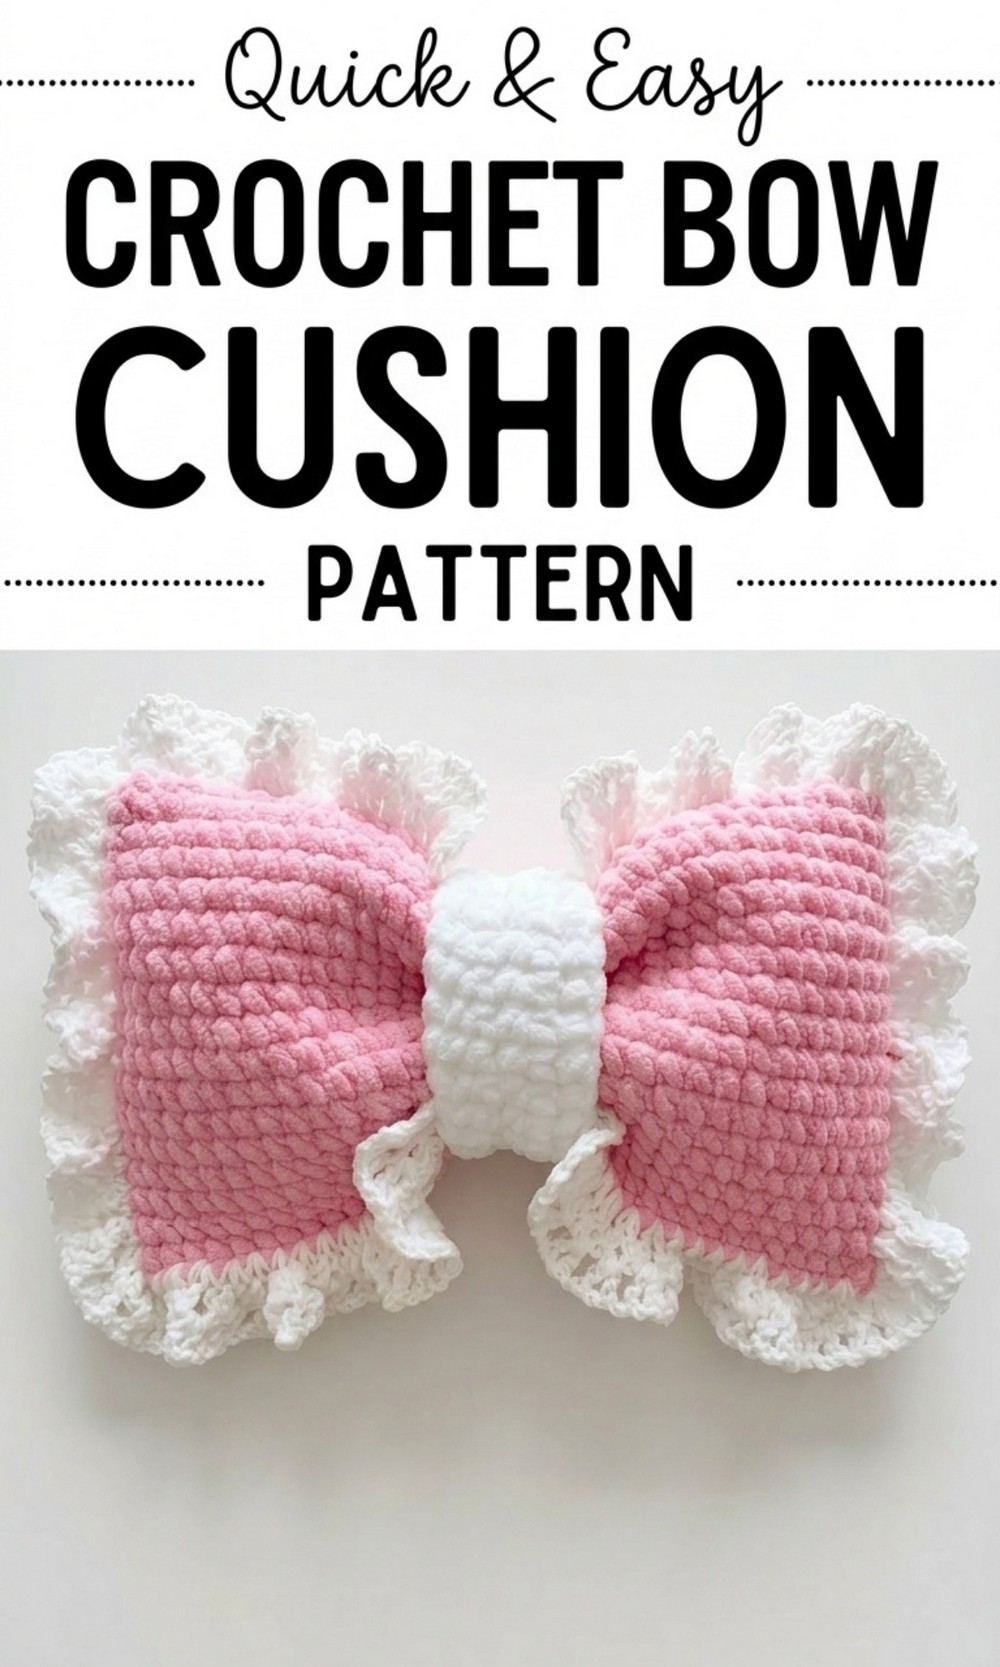
Fall in love with the Free Crochet Bow Cushion Pattern, a project that’s as fun to make as it is adorable to use. This beautiful bow shaped cushion adds charm and warmth to any room, instantly making your bed, sofa, or chair look stylish and cozy. Its soft texture, created with plush Chanel yarn and accented with milk cotton yarn, makes it irresistibly snuggly and luxurious.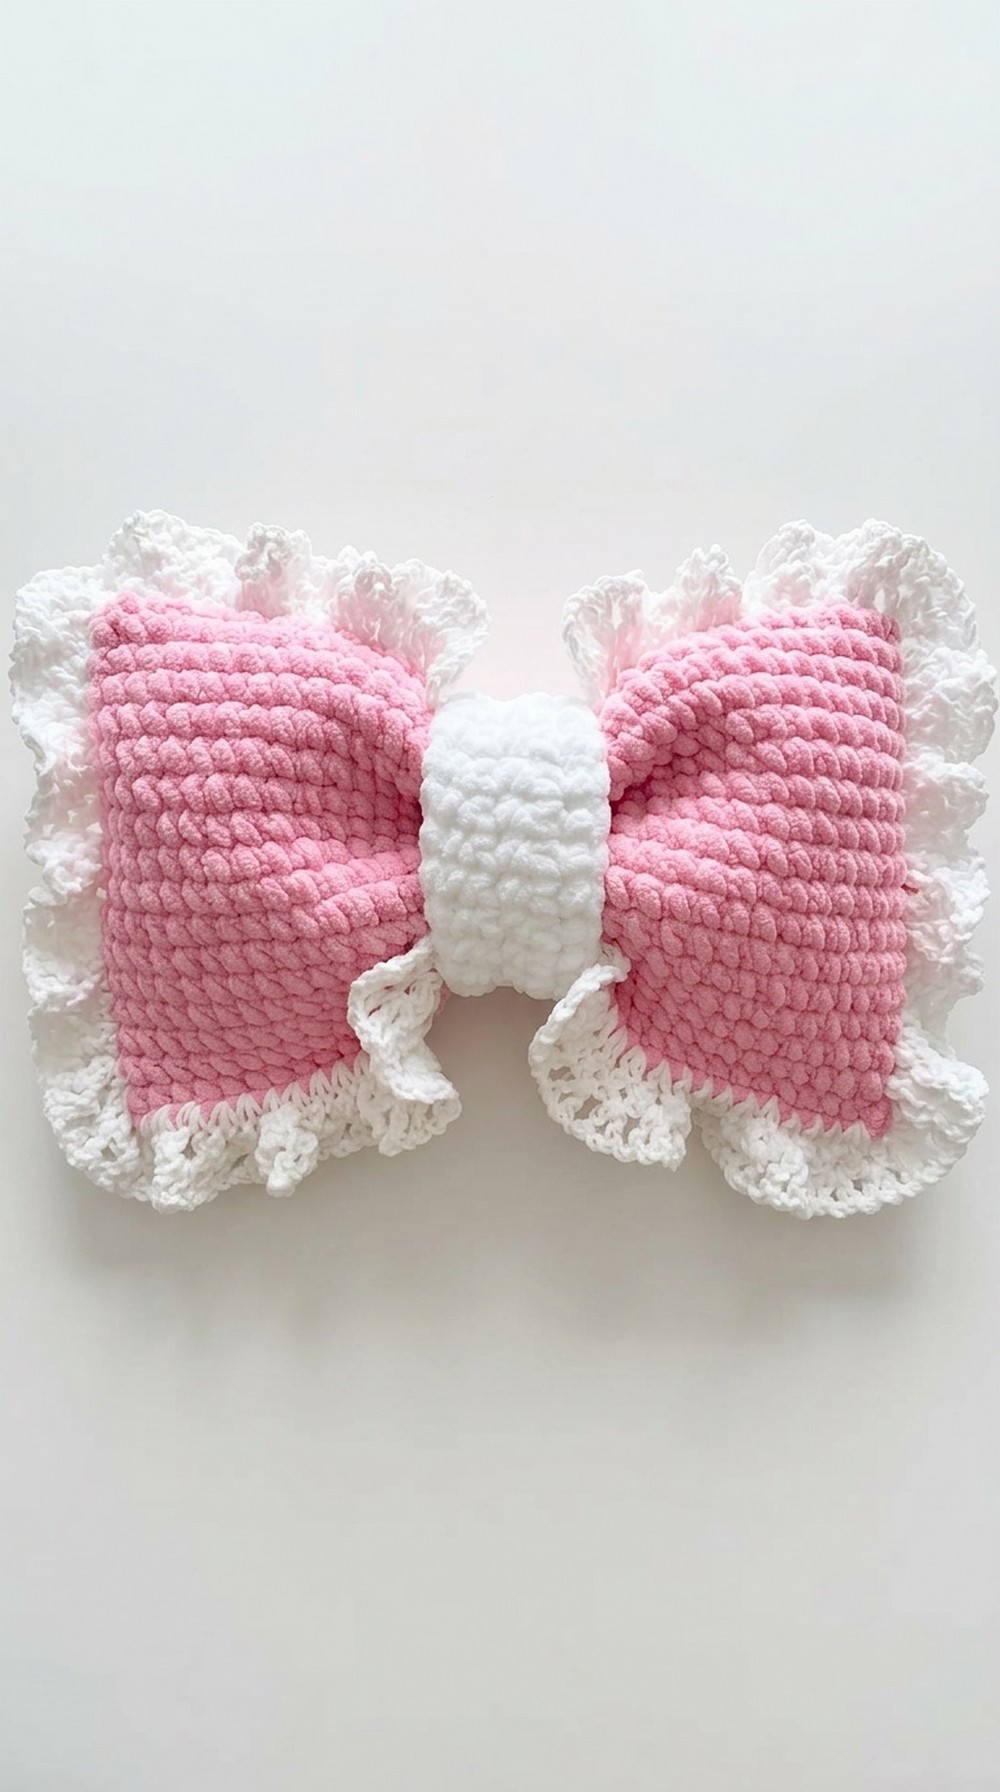
The unique bow design stands out and brings a playful yet elegant vibe to your space. You can customize it with your favorite colors, making it a fun gift or a perfect decor piece for your home. Let your creativity shine with this cute and cozy project.
Crochet Bow Cushion Pattern
Materials Needed
- Yarn:
- Chanel yarn for the bow (pink)
- Milk cotton yarn for edging and tying (white) or any yarn with a weight of 3
- Hook: 8 mm crochet hook
- Stuffing: Polyfill or fiberfill for stuffing the cushion
- Tapestry needle: For sewing and hiding yarn tails
- Scissors: To cut yarn
- Stitch markers: To mark the beginning of each round
Special Techniques and Abbreviations
- Slip Knot: The starting knot to begin the crochet work.
- Chain (ch): Yarn over, pull through the loop on the hook.
- Single Crochet (sc): Insert hook, yarn over, pull up a loop, yarn over, and pull through both loops on the hook.
- Double Crochet (dc): Yarn over, insert hook, yarn over, pull up a loop, yarn over, pull through two loops, yarn over, pull through the last two loops.
- Increase: Work two stitches into one stitch to increase the size of the row/round.
- Slip Stitch (sl st): Insert hook, yarn over, pull through both the stitch and the loop on the hook.
- Turning Chain: A chain made at the end of a round or row to prepare for the next row.
Pattern Instructions
Step 1: Creating the Pillow Base
1. Start the Base:
- Make a slip knot with Chanel yarn (pink).
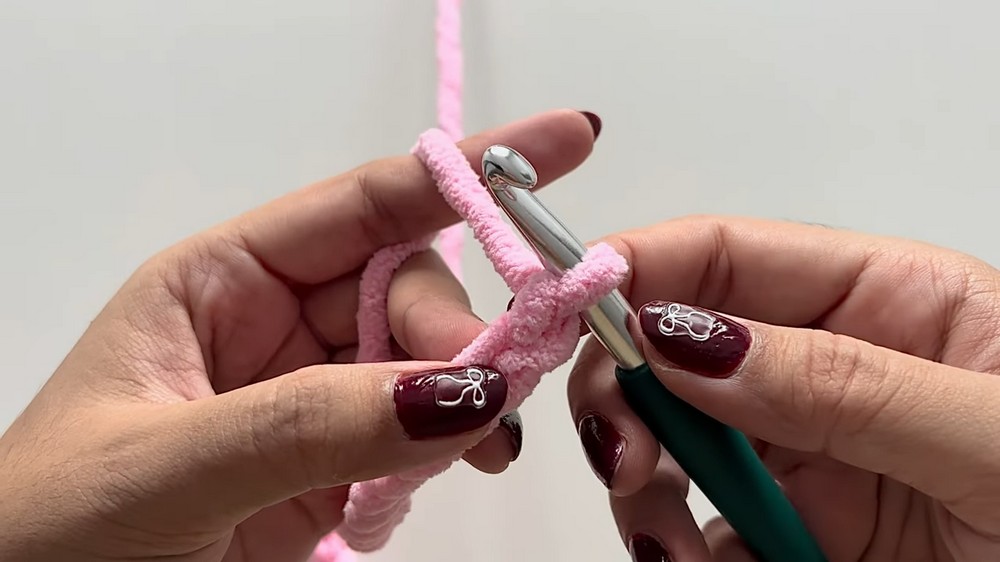
- Chain 35 to create the foundation chain.
2. Row 1 (Base Shell):
- Starting from the second ch from the hook, work 33 sc, one in each chain.
- At the last chain, work 3 sc to turn the corner of the base.
- Continue working along the other side of the foundation chain:
- Make 32 sc, one in each chain.
- At the starting end stitch, increase by crocheting 2 sc in the last stitch of the row.
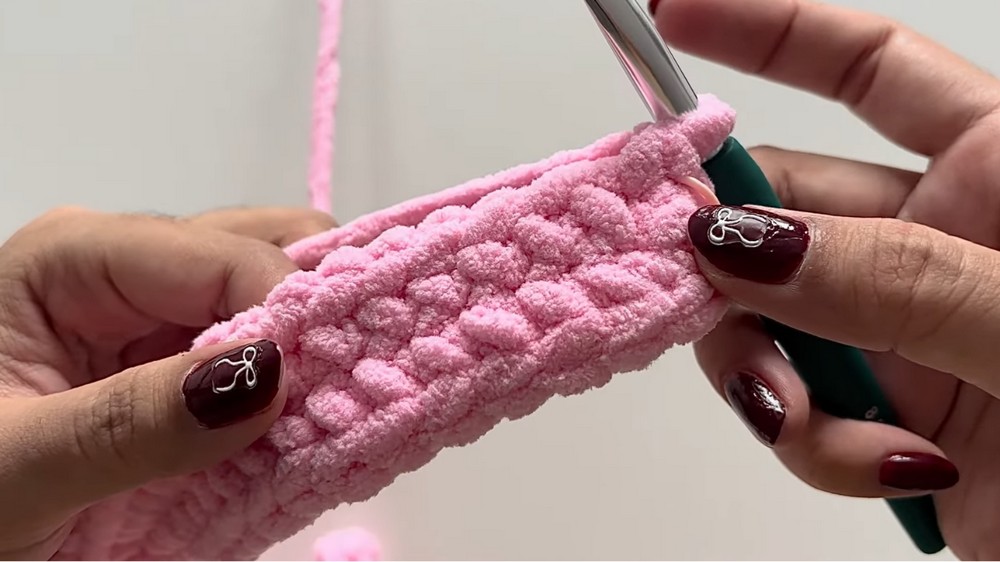
3. Rounds 2–16 (Shaping the Base):
- Continue crocheting 1 sc in each stitch around the piece for a total of 16 rounds. Mark the first stitch of each round with a stitch marker.
- Adjust the number of rounds if you want a taller bow; the height should ideally equal half of the width of the cushion.
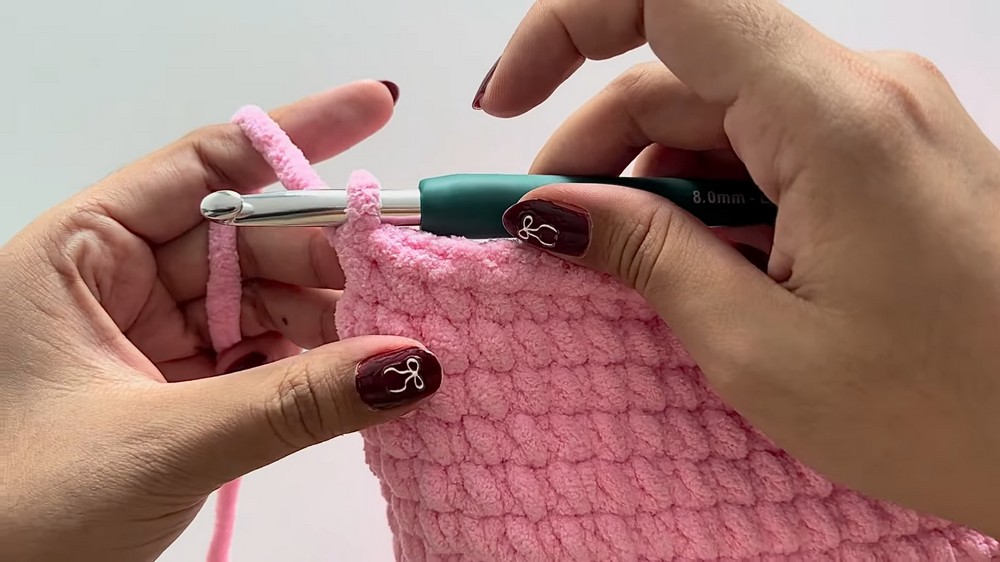
Step 2: Closing the Pillow Base
1. Close the Round:
- Remove the stitch marker and align the first and last stitches of the round. Insert the hook through both stitches, yarn over, pull through, and make 35 sc to close.
2. Filling and Shaping:
- Fill one side of the pillow with fiberfill. Do not overstuff, as the excess stuffing may distort the shape.
- Leave the middle portion of the pillow unstuffed, as it will be folded later to form the bow.
3. Finalizing the Closure:
- Once the stuffing is evenly distributed, continue crocheting the remaining stitches to completely close the pillow.
- After finishing the round, make 1 ch, leave a long tail for sewing, and cut the yarn.
Step 3: Sewing the Middle of the Pillow
1. Mark the Middle:
- Flatten the pillow, leaving the unstuffed part in the middle. Use a stitch marker or your fingers to identify the center of the piece.
2. Stitch the Middle:
- With the long yarn tail and a needle, sew 2–3 stitches across the middle to secure the shape. Ensure the fiberfill remains in place on both sides without stuffing the middle portion.
3. Secure the Yarn Tail:
- Tie the yarn securely with a double knot or triple tie, and hide the remaining yarn tail with the needle.
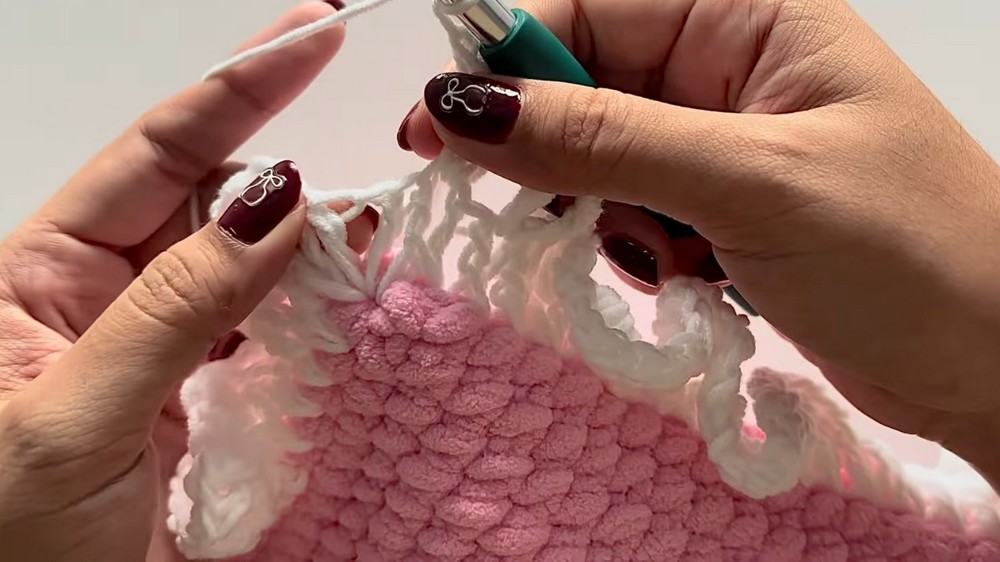
Step 4: Adding an Edging
1. Start the Edging:
- Use white milk cotton yarn for the edging. Insert the hook into the marked stitch, pull up a loop, and chain 3.
2. Double Crochet Pattern:
- Work (1 dc, ch 1, 1 dc) into the same stitch.
- For each subsequent stitch, work (1 dc, ch 1, 1 dc) until the end of the side. At the corners, make an extra (1 dc, ch 1, 1 dc) to maintain the shape.
3. Shorter Sides:
- For the shorter sides, insert the hook into the rows and continue the same pattern (1 dc, ch 1, 1 dc) for a total of 15 times along each edge. Adjust if necessary to maintain even spacing.
4. Join the Edging Rounds:
- Once the first round of edging is complete, join with a sl st.
- For the second round, make (1 dc, ch 1, 1 dc) in the spaces between the double crochets of the previous round.
5. Finishing the Edging:
- Continue this pattern around the entire border until you reach the starting stitch again. Join with a sl st, chain 1, and then cut the yarn.
- Use the needle to hide the remaining yarn tails.
Step 5: Adding the Middle Tie
1. Create the Middle Strip:
- With Chanel yarn, make a slip knot and chain 24 for the tie.
- Work 23 sc across the chain, starting from the second ch from the hook. After each row, ch 1 and turn.
- Repeat this for a total of 5 rows.
2. Add the Strip:
- Wrap the strip around the unstuffed middle section of the bow.
- Hold tightly and sew the ends of the strip together using a yarn needle. Double tie and hide the yarn tails securely.
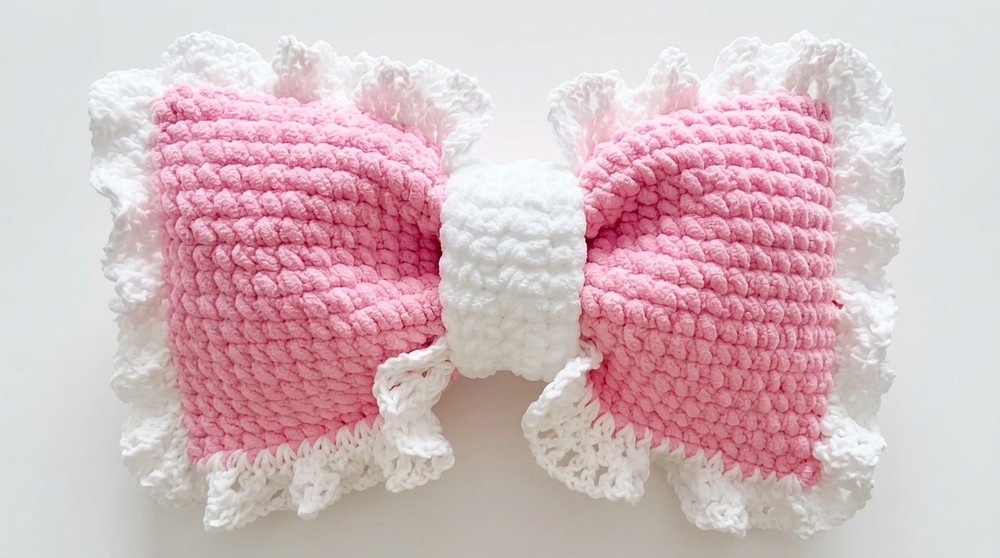
Finishing the Bow Cushion
- Final Adjustments:
- Fluff the stuffed sides and adjust the bow for symmetry.
- Pull the edges of the double crochet edging to create a neat and uniform finish.
- Cleaning Up:
- Ensure all the yarn tail ends are securely hidden within the pillow.
- If needed, block the cushion lightly to achieve a smoother shape.
Final Words
Congratulations on finishing your aesthetic bow cushion, This cute project combines a simple design with a touch of elegance, making it a delightful piece of handmade art. Whether it’s for home decor or as a gift, this cushion is sure to impress.
Tips for Maintaining Your Crochet Cushion
- Washing: Handwash gently using mild detergent and cold water. Avoid machine washing to prevent damage or stretching.
- Storage: Keep the cushion in a cool, dry place to avoid moisture or dust buildup.
- Shape Maintenance: After washing, reshape the cushion gently and allow it to dry completely before use.