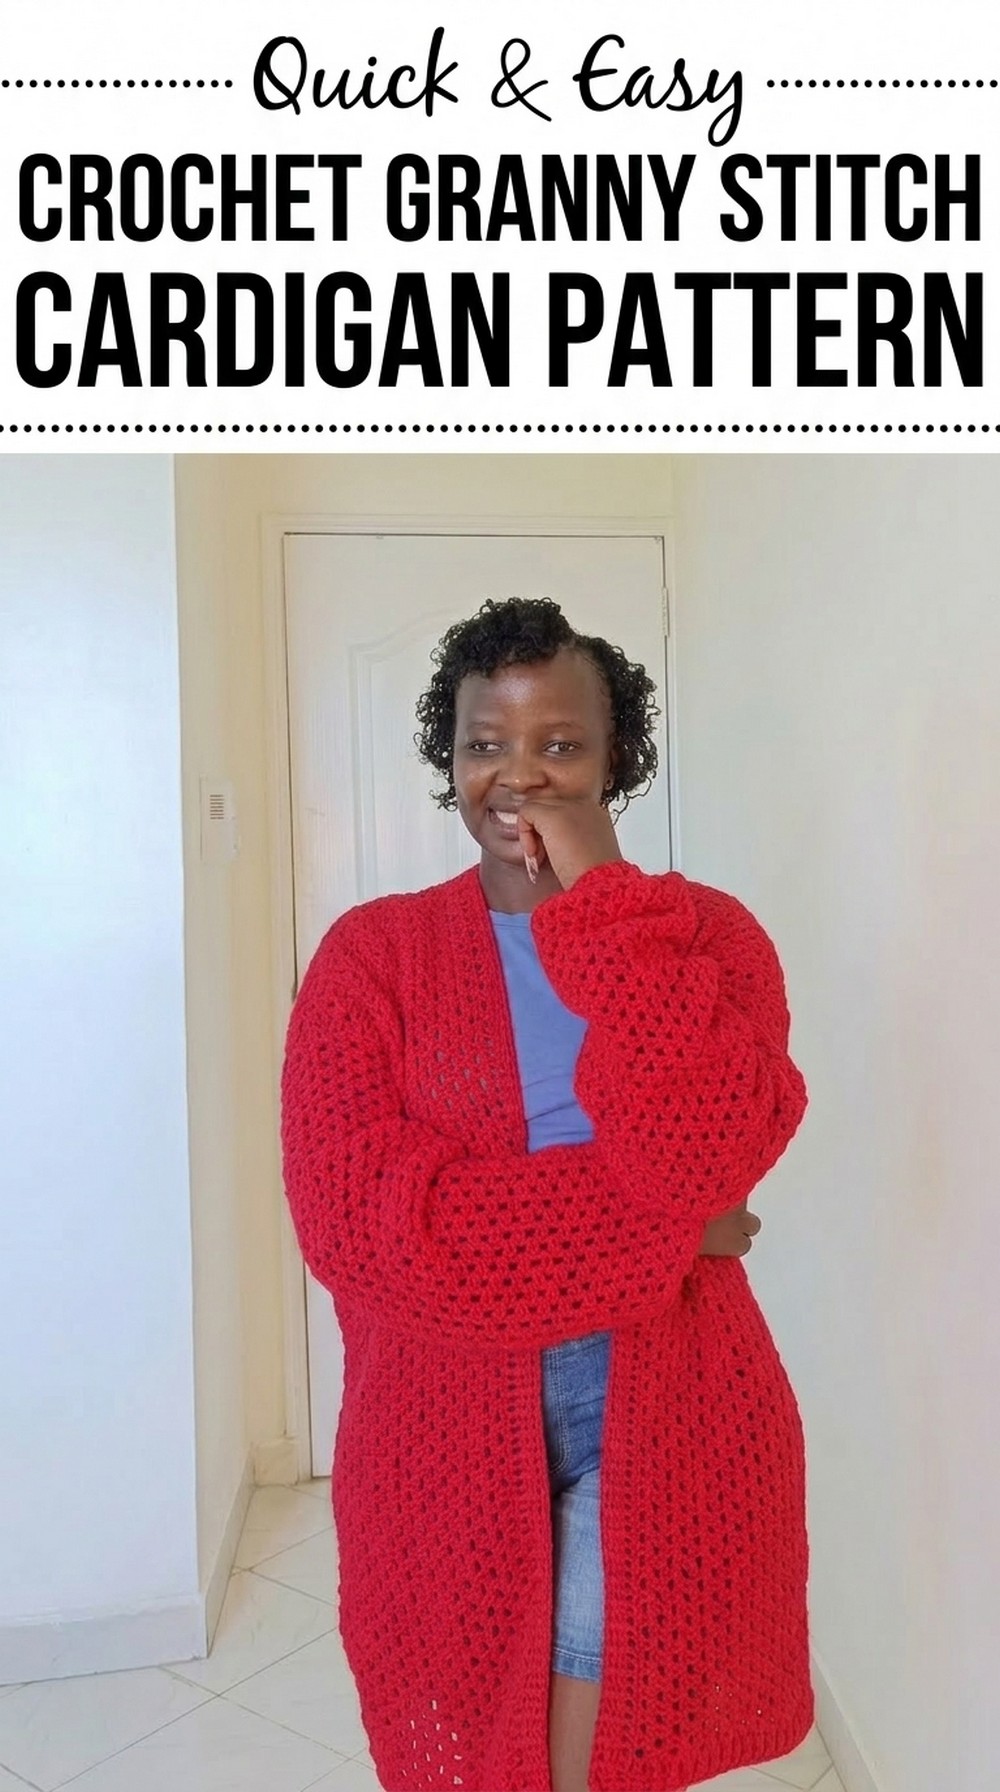
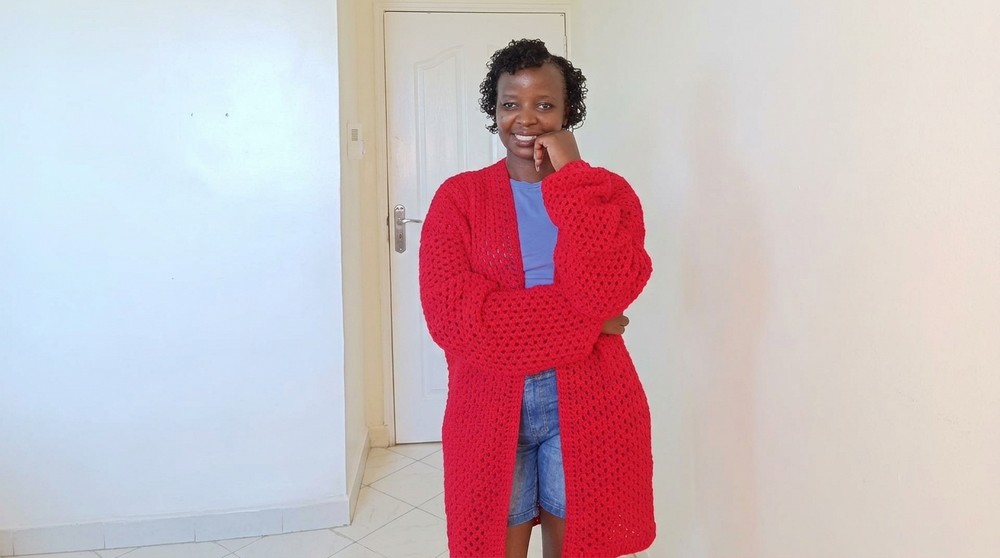
Stay cozy and stylish with the Crochet Granny Stitch Cardigan Pattern, perfect for everyday wear, casual outings, and adding a touch of handmade charm.
Cool mornings and crisp evenings often call for a cozy layer that’s both practical and stylish. The Crochet Granny Stitch Cardigan pattern is an easy-to-follow guide for creating a handmade cardigan using classic granny stitch motifs. This cardigan is ideal for casual outings, layering over dresses or jeans, or keeping warm during indoor activities without feeling bulky.
Simple Free Crochet Granny Stitch Cardigan Pattern
You can customize its length, sleeve style, and color combinations, making it a versatile addition to any wardrobe. Using this pattern also helps improve essential crochet skills like joining motifs, working in rows, and maintaining consistent tension. Beyond technique, the finished cardigan provides lightweight warmth, comfort, and a timeless, handcrafted appeal that can be worn throughout the year. Whether for personal use or as a thoughtful gift, this granny stitch cardigan combines functionality with the joy of creating something uniquely yours.
Crochet Granny Stitch Cardigan Pattern
Skill Level
Intermediate
This project requires knowledge of basic stitches, working rows and spaces, shaping with reductions, and seaming panels together. Ribbing and finishing techniques are included, which require consistent attention to detail.
Finished Size and Adjustability
- Size: Medium-Large (customizable for other sizes with directions provided).
- Length: 34 inches, measured without stretching. Adding the bottom ribbing increases the total length to 36 inches.
- Width and Sleeve Length: Easily adjustable with row and chain count modifications.
Materials
- Yarn:
- Medium-weight acrylic yarn (e.g., Winter King, 50g balls).
- Approx. 600g (12 balls of 50g yarn) for a medium/large cardigan. Adjust for other sizes.
- Recommended color: Festive Red, or choose your desired holiday color.
- Hook:
- 4.5 mm crochet hook.
- Accessories:
- Measuring Tape: For precise dimensioning.
- Yarn/Darning Needle: For sewing panels and weaving in ends.
- Stitch Markers: At least 3 stitch markers (for marking center points, rows, and armholes).
- Scissors.
Key Abbreviations (US Terminology)
- sl st: Slip Stitch
- ch: Chain
- sc: Single Crochet
- dc: Double Crochet
- st(s): Stitch(es)
- yo: Yarn Over
- BLO: Back Loop Only
Special Techniques
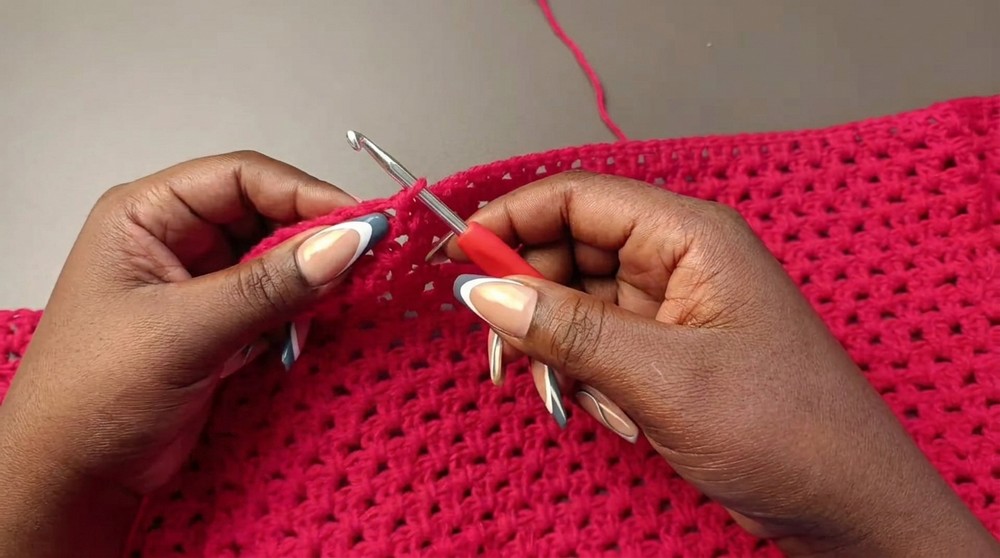
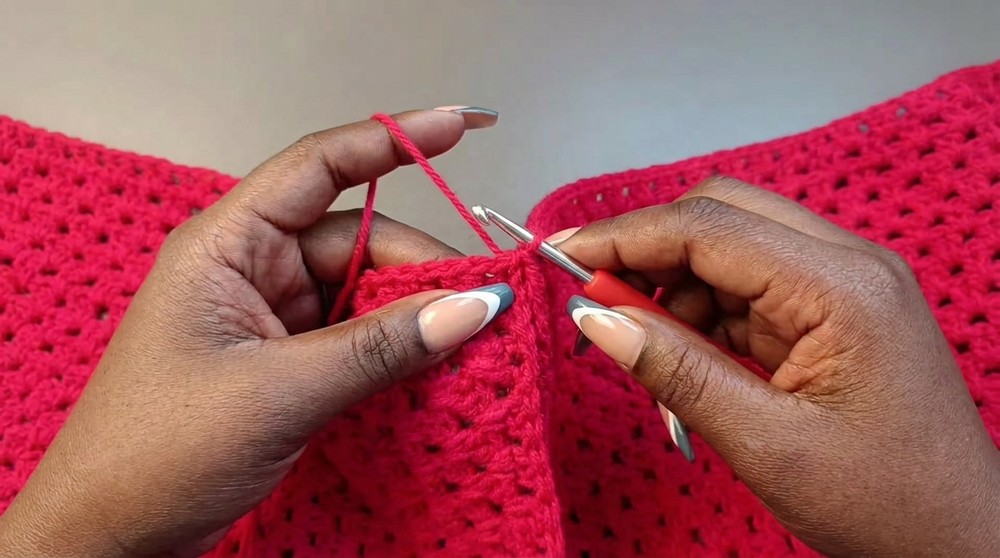
- Granny Stitch Variation: Two double crochets worked into a single space, alternating rows with slight variations at the edges.
- Ribbing: Worked with alternating front post and back post double crochet for sleeves, bottom edges, and neckline.
- Panel Assembly: Seamlessly join the panels and sleeves for a polished look using a darning needle or single crochet.
Step-by-Step Instructions
Panel Construction (Front and Back Combined)
Step 1: Foundation Chain
- Slip Knot: Begin with a slip knot on your hook.
- Chain Length: Create a chain equal to double the desired length of the cardigan (front + back combined).
- Example: For a 34-inch length, chain approximately 180 chains (adjust for your size). Ensure the chain count is a multiple of 2.
- Measure Chain: Without stretching, confirm the chain matches the length; slightly stretched, it should reach your desired double-length measurement.
Step 2: Row 1 (Single Crochet Foundation)
- Turn Work: Skip the first chain from the hook and insert your hook into the second chain.
- Single Crochet: Work 1 sc into each chain across.
- At the end of the row, the st count will decrease by one, becoming an odd number. Example: 179 sc for 180 chains.
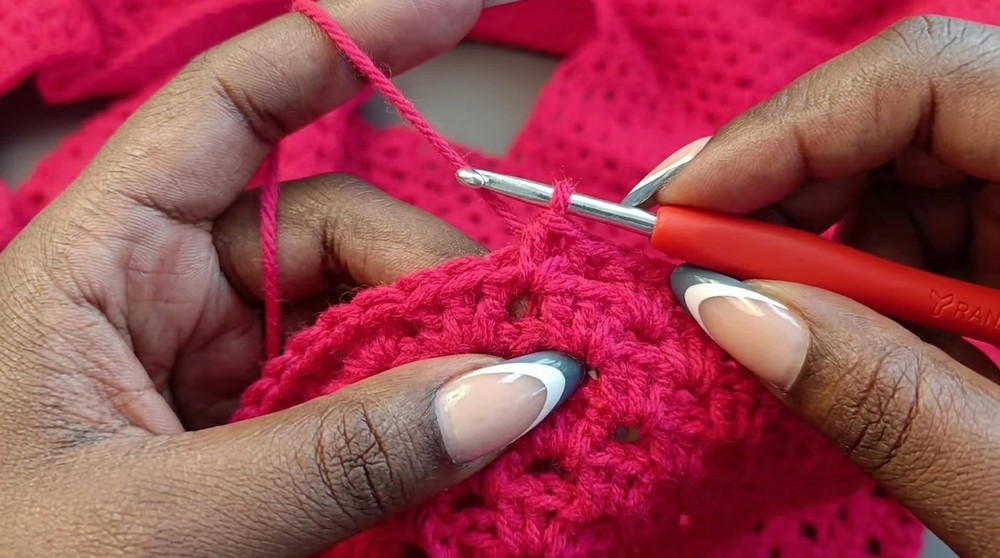
Step 3: Row 2 (Double Crochet Clusters)
- Ch 3 (counts as a dc), turn work.
- Cluster Stitches:
- Work 2 dc into the same stitch as the ch 3.
- Skip next stitch, then work 2 dc into the following stitch (this creates a cluster).
- Repeat: Skip 1 stitch, 2 dc into the next stitch across the row.
- At the end, place 2 dc into the final stitch.
Step 4: Pattern Repeat (Rows 3–21)
- Row 3 (Offset Clusters):
- Ch 3, turn work.
- Skip the first two dc and work 2 dc into the space between clusters from the previous row.
- Work 2 dc into each gap between the clusters across.
- Finish Row: Place 1 dc in space between the last two dc of the row.
- Row 4 (Cluster Start):
- Ch 3, turn.
- At the row start: Work 1 dc into the first space.
- Work 2 dc clusters into each gap across.
- Repeat Rows 3 and 4 alternately until you reach 21 rows total for a medium-large size (or adjust for width preferences).
Extension for Back Panel
Step 5: Creating a Back Neckline Extension
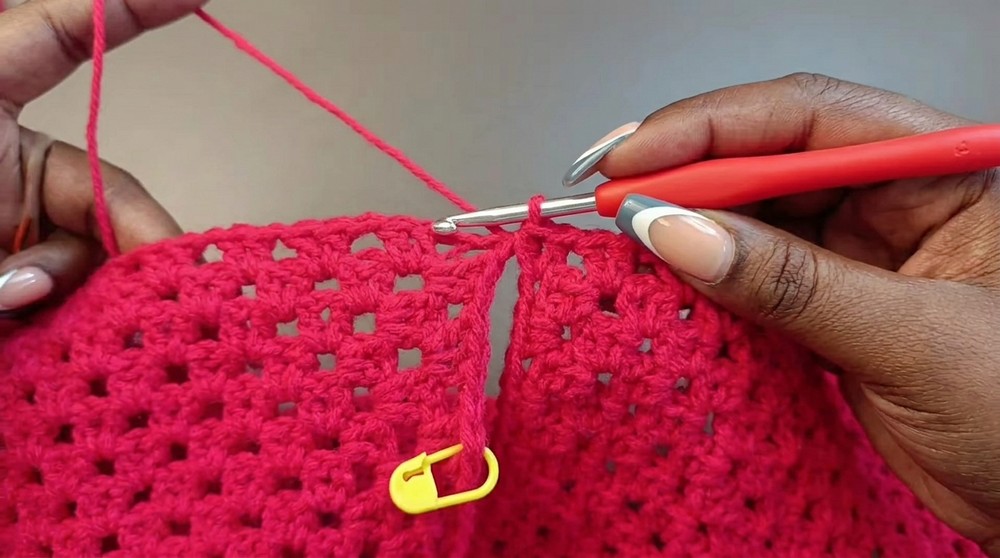
- Mark Center: Using stitch markers, mark the middle stitch of the panel.
- Half Panel Work:
- After completing 21 rows, leave one front panel aside.
- On the second panel, continue working only one half of the panel width beyond the marker for 6 additional rows, forming the back neckline section.
- Finish: Fasten off after the extra rows on one half.
Panel Assembly
Step 6: Joining the Panels
- Align Panels: Place the panels side by side.
- The back neckline extension connects at the center back.
- Front and back edges should align on each side.
- Seam Shoulders:
- Use a darning needle to sew each shoulder seam, working exactly across the width of half the back panel (up to the neckline markers).
- Sew Sides:
- Single crochet/sew along the sides of the panels, leaving 8–9 inches for the armholes.
Sleeves
Step 7: Constructing Sleeves
- Foundation Chain:
- Chain the starting length equal to your desired sleeve length, ensuring it is an even number (e.g., 68 chains for 21 inches).
- Work Rows: Follow Rows 1–3 and the repeat pattern of 2 dc clusters to create the sleeve length.
- Adjustments:
- For a tapered sleeve, reduce stitches at the wrist using 2 dc together techniques near the last few rows, as described under “Shaping.”
- Ribbing: Add front and back post ribbing (6 rows of ribbing recommended).
Step 8: Attaching Sleeves
- Align the sleeve midline to the shoulder seam and sew the sleeve edge into the armhole opening.
- Seam the inner sleeve starting from the wrist up to the armhole.
Finishing Ribbing
Step 9: Bottom and Front Ribbing
- Bottom Ribbing:
- Attach yarn to the bottom edge and work 2 dc into every row edge across.
- Add 6 rows of front/back post ribbing for texture.
- Front and Neckline Ribbing:
- Attach yarn at one front lower corner.
- Work evenly up the front edge, around the neckline, and back down the other front edge.
- Follow the ribbing pattern, adjusting the number of rows as needed.
Final Words and Tips
Congratulations on completing your Christmas Cardigan! This cozy festive piece is an excellent addition to your winter wardrobe with its beautiful texture and timeless design.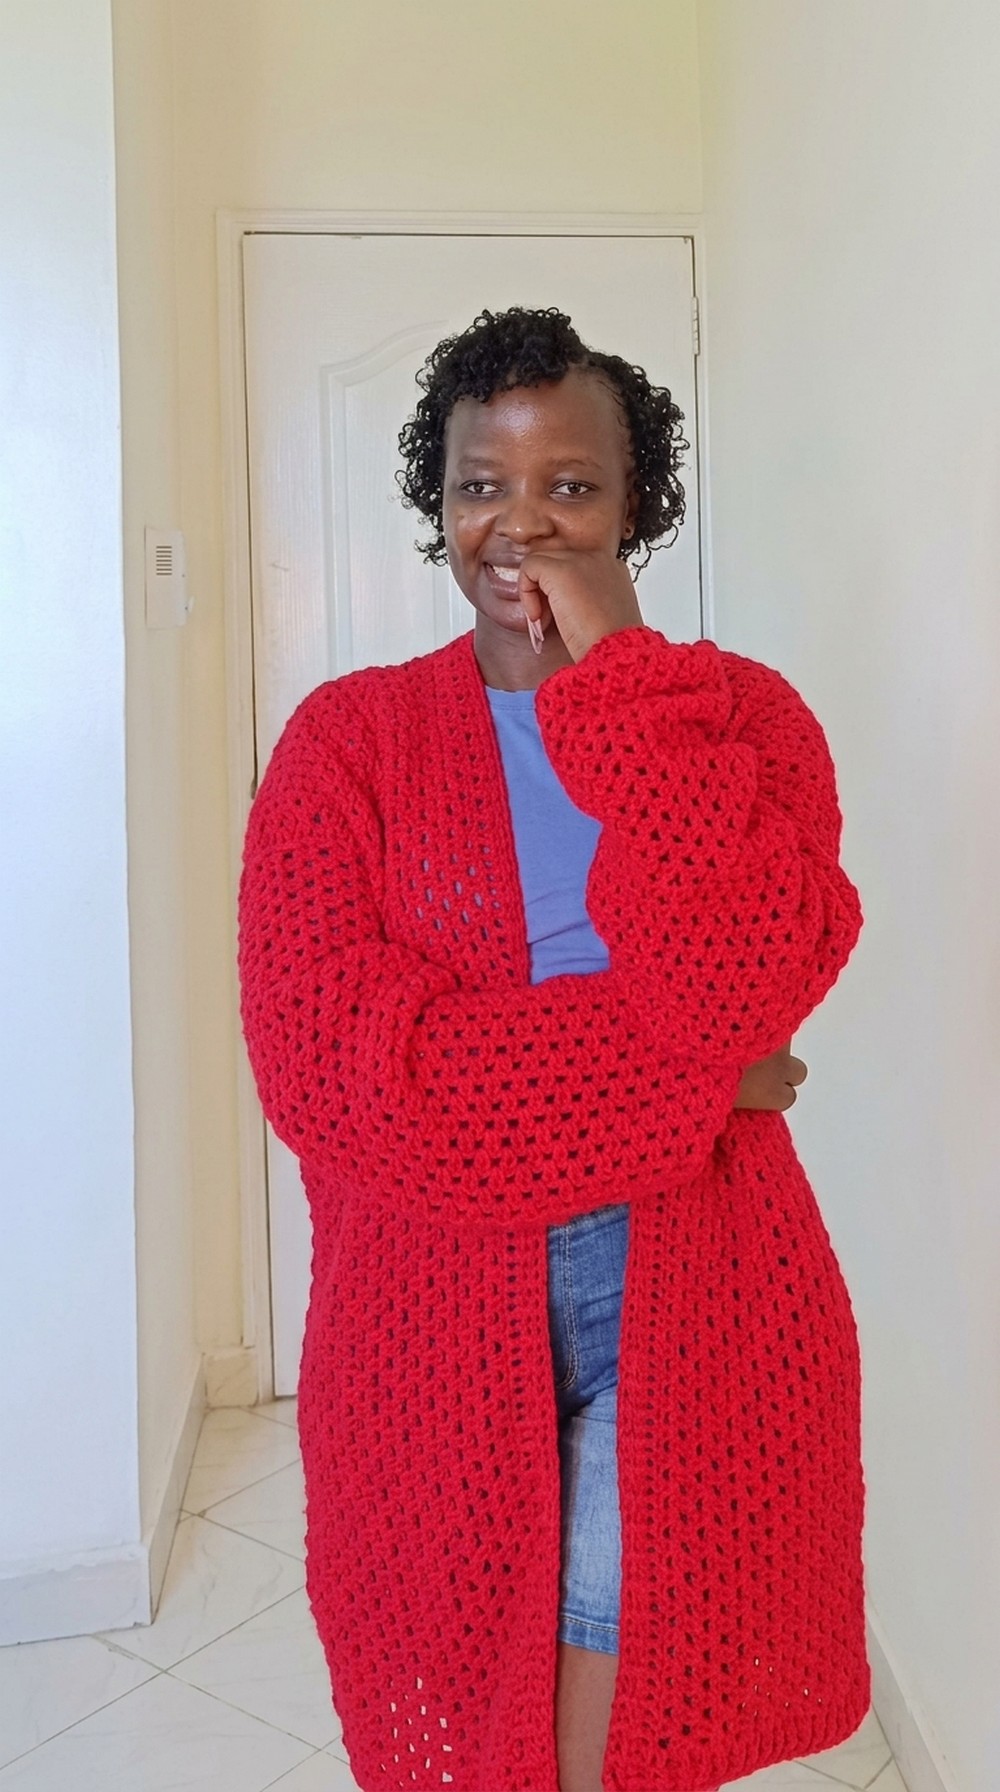
Suggestions
- Use glittery or metallic yarn for an extra festive look.
- To personalize further, add embroidered accents, buttons, or a tie belt.
Tips to Maintain the Cardigan
- Washing: Handwash or use a delicate cycle to preserve the cardigan’s shape.
- Blocking: For the cleanest finish, block all panels before assembling to ensure uniform dimensions.
- Storage: Avoid hanging, as the cardigan may stretch over time. Instead, store folded in a cool, dry space.