Learn to make a stylish and practical crochet phone bag with this beginner friendly pattern, ideal for carrying your phone and small essentials.
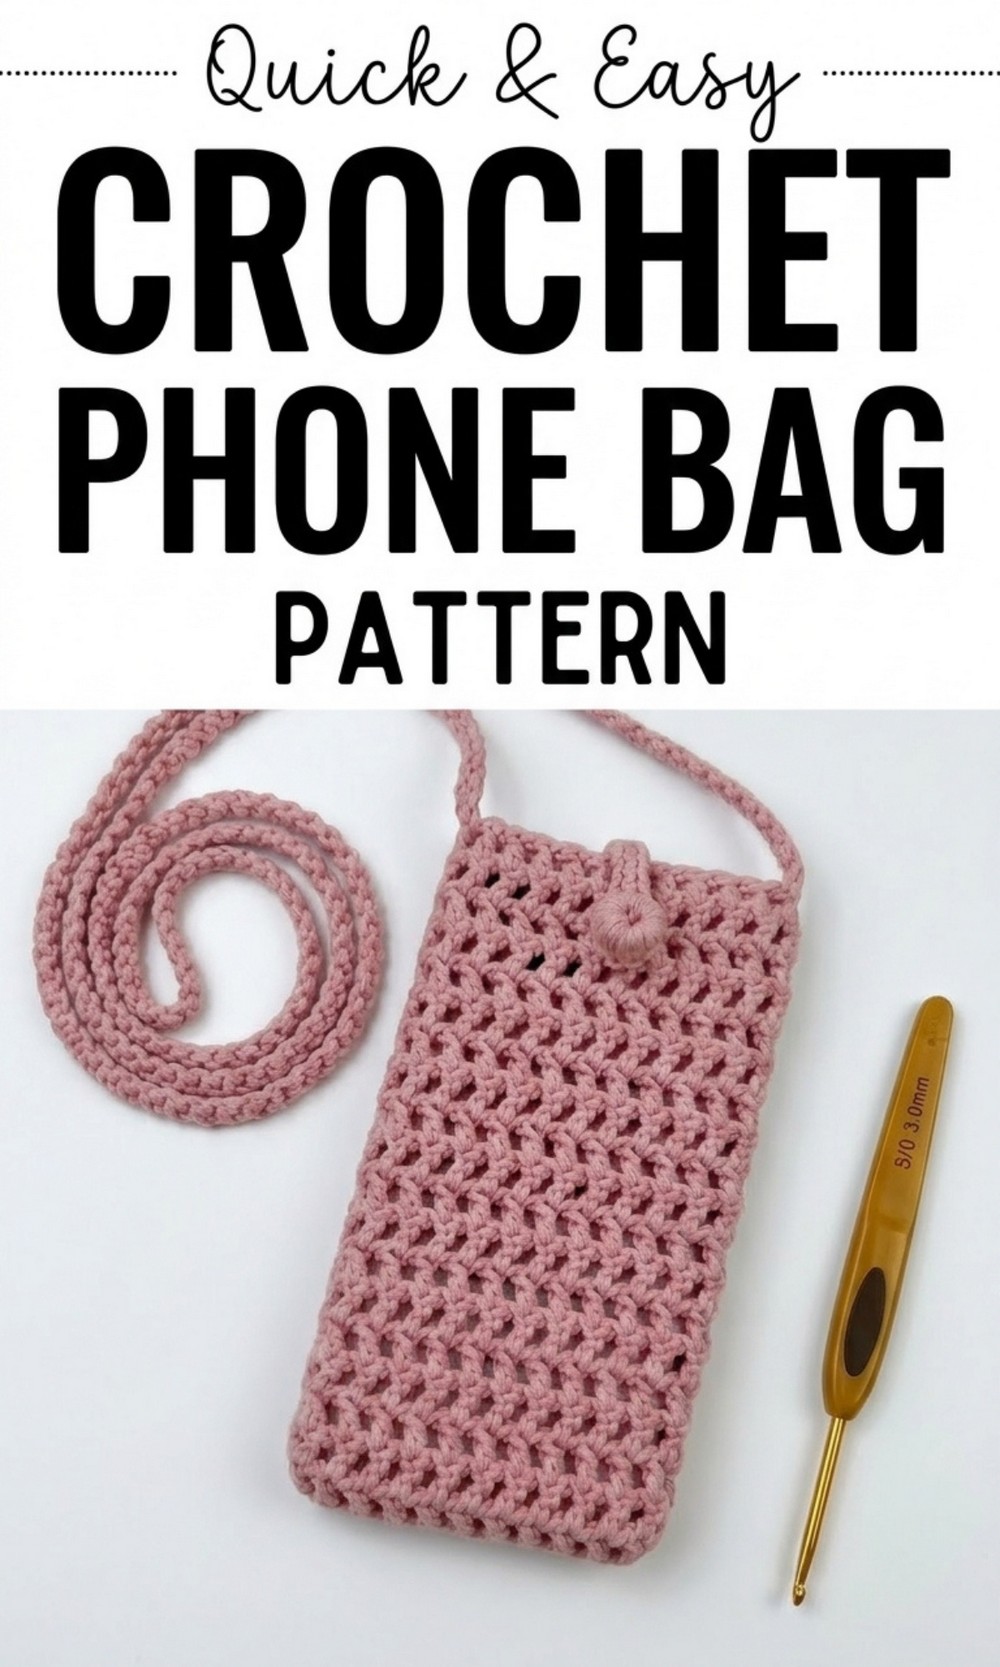
Trendy Free Crochet Phone Bag Pattern That’s Both Cute and Useful
If you’re looking for a fun and simple project, this free crochet phone bag pattern is perfect for you. It’s easy to make, even if you’re a beginner, and the result is a stylish and handy bag to keep your phone safe. The bag is designed to be cute, lightweight, and compact, making it ideal for carrying your essentials like your phone, keys, or small items. You can customize the strap length to wear it crossbody, over the shoulder, or as a handheld purse.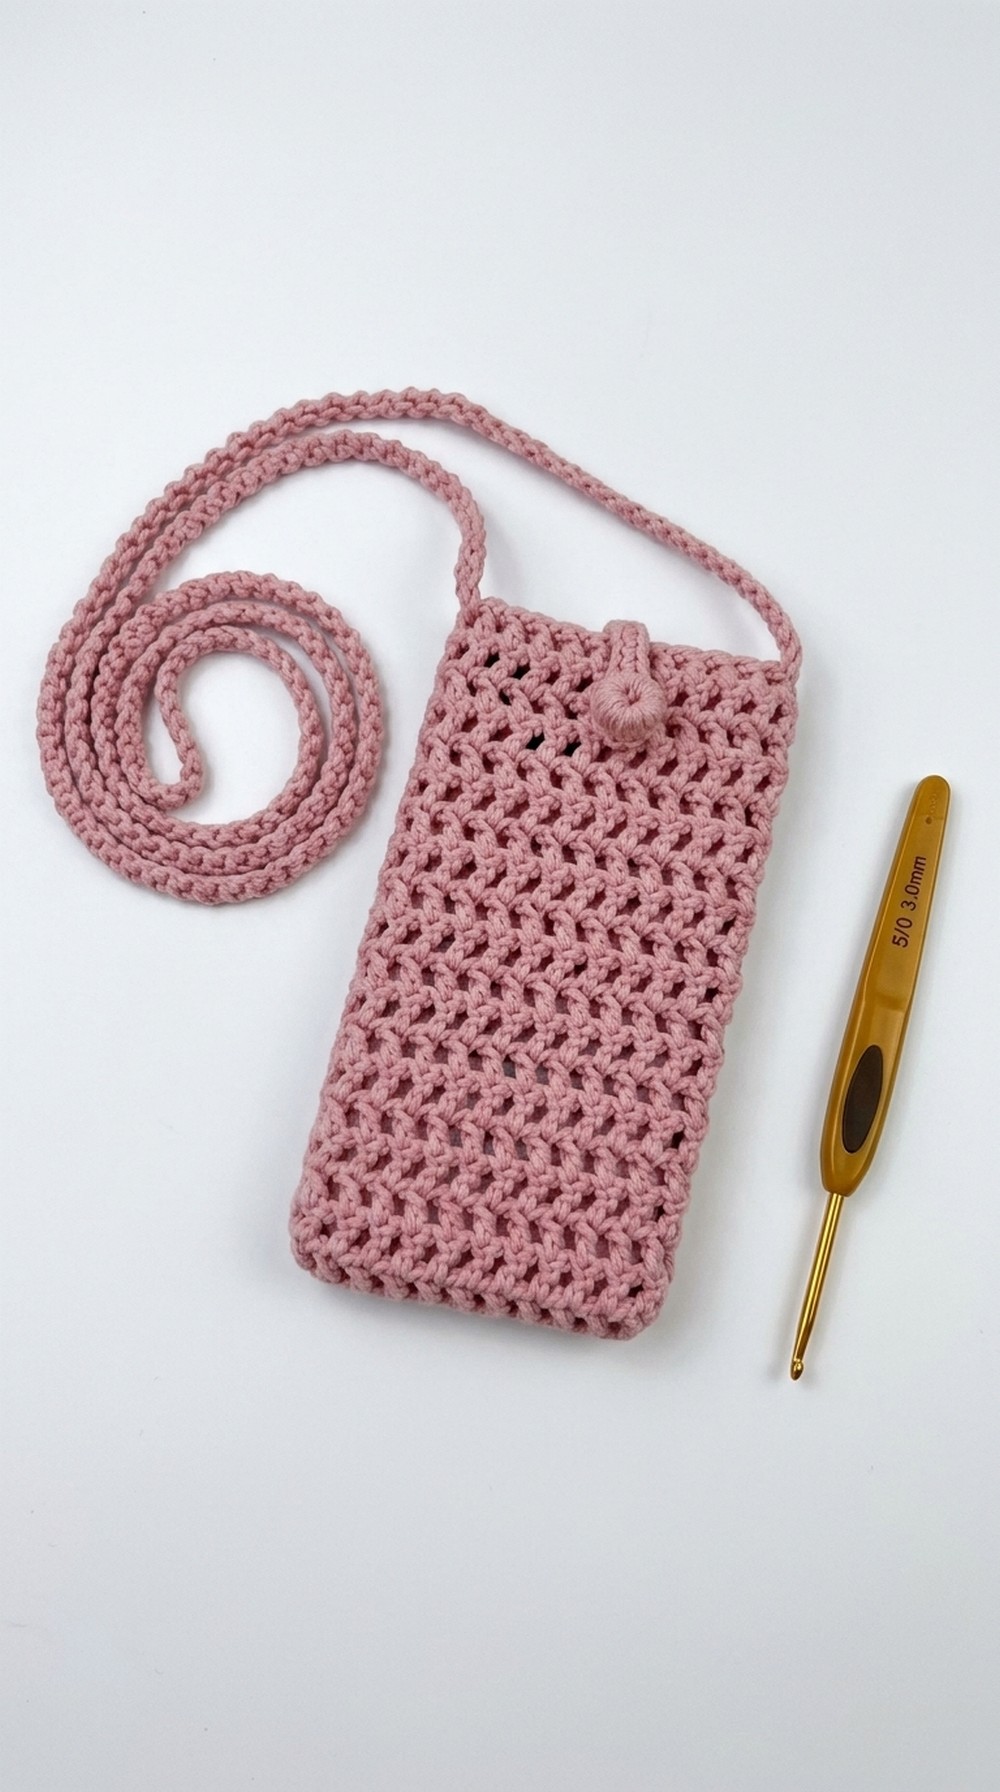
This bag is also great for everyday use because it’s functional and looks beautiful with any outfit. You can make it in any color to match your style, and the process doesn’t take much time. Whether you want to use it yourself or gift it to someone, this crochet phone bag is practical, adorable, and easy to create.
Cute Crochet Phone Bag Pattern
Materials Needed
- Yarn: Milk Cotton Yarn, 5 ply
- Hook Size: 3 mm crochet hook
- Tools:
- A pair of scissors
- Stitch markers
- Yarn needle
- Optional: Measuring tape (to resize or confirm strap length)
Gauge (Optional)
For 10 cm x 10 cm:
Using a 3 mm hook and 5 ply Milk Cotton Yarn, work in double crochet stitches. Adjust tension if the size does not match.
Finished Size
- Length: Adjustable (based on your phone size)
- Strap: Customizable, starting from 100 cm or longer.
Special Techniques
- Slip Knot
- Chain (ch)
- Single Crochet (sc)
- Double Crochet (dc)
- Slip Stitch (sl st)
Step by Step Pattern Instructions
Bag Body: Foundation & First Row
- Start with the foundation chains:
Make a slip knot, then chain 25 chains.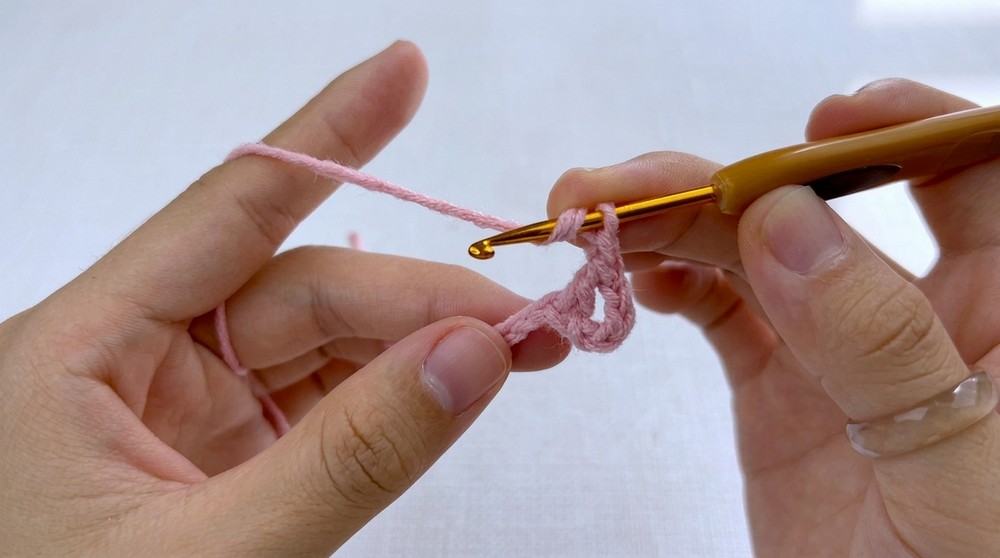
- Row 1:
- Skip 4 chains from the hook.
- Work 1 double crochet (dc) into the 5th chain.
- Chain 1 (ch 1), skip 1 chain, and work 1 dc into the next chain.
- Repeat the sequence (ch 1, skip 1, dc in the next chain) until you reach the last chain.
- Use a stitch marker to mark the second chain for the slip stitch point.
- At the last chain, chain 1, and make 3 double crochets (dc) in the same chain (to create the curve for the base).
- Work across the other side by crocheting 1 dc in each chain. Chain 1, skip 1 chain, dc in the next stitch. Repeat.
- When you reach the starting point, end with a slip stitch at the marked chain.
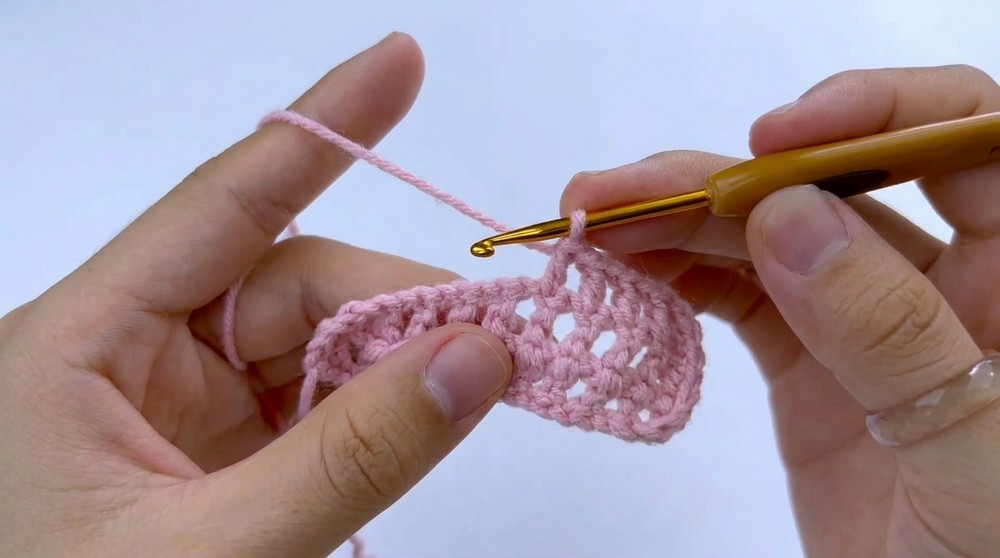
Subsequent Rows: Building the Bag Body
- Row 2:
- Chain up 3. Use the stitch marker to mark the second chain in this row.
- Turn your work, and skip the first chain 1 space.
- Work a double crochet (dc) into the next dc stitch. Chain 1, skip 1 chain, and repeat the sequence (dc in next dc, ch 1). End with a slip stitch in the marked chain.
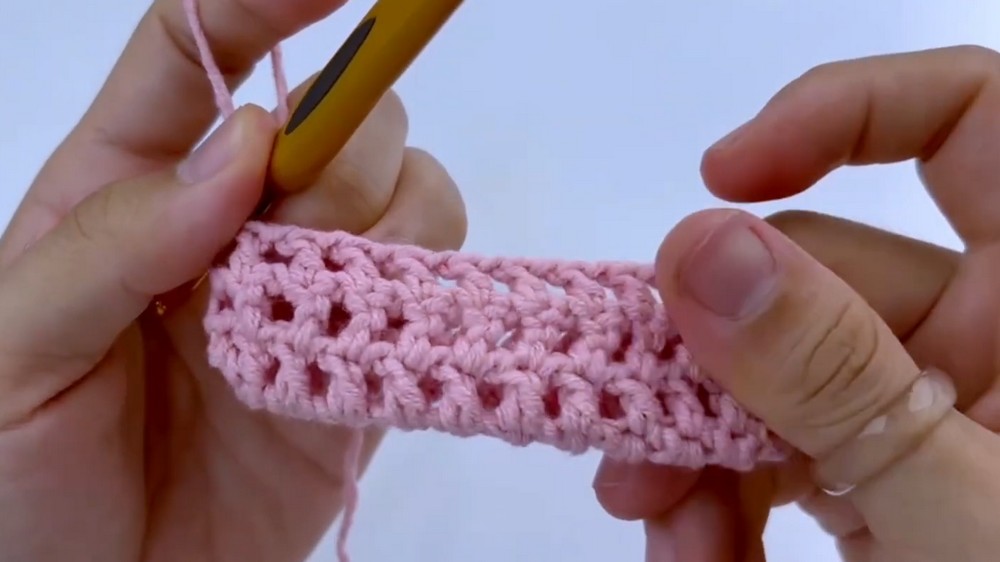
- Rows 3 to 19:
Continue the same process as Row 2. These rows will build the height of the bag. Chain up 3 at the start of each row, skipping chain 1 spaces, and work into double crochets with chain 1 gaps. End each row with a slip stitch, as before.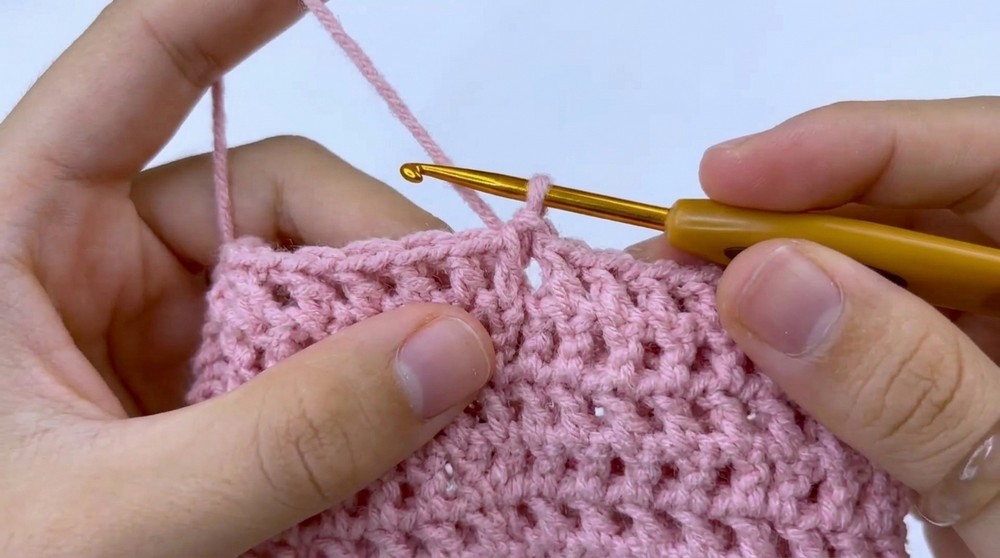
Strap Creation
- Foundation:
- Chain 1 and make 1 single crochet (sc).
- Use your finger to hold the yarn and create a loop by chaining 1. Insert your hook into the finger loop and work a single crochet (sc).
- Length:
- Repeat the above process, crocheting loops and creating an extended single crochet strap. Continue this process until the strap reaches around 100 cm or more, based on your preference.
- Finishing the Strap:
- Cut the yarn, leaving a long tail. Use the yarn needle to secure the tail and weave it in.
- Attach the strap to the bag’s sides by tying the ends securely.
Bag Closure
- Creating the Loop:
- On Row 3 of the bag body, attach the yarn with a slip stitch.
- Chain 20 chains, then skip 9 chains.
- Work single crochets (sc) into the remaining chains and slip stitch to the starting point.
- Decorative Button:
- Make a slip knot and chain 6 chains.
- Join with a slip stitch to the first chain to create a circle.
- Chain 1 and work single crochets (sc) into the circle.
- Complete the round with a slip stitch.
- Use the tail of the yarn to close the hole at the center and sew it onto the bag’s front, completing the closure.
Tips for Success
- Measuring Your Phone:
Adjust the foundation chain and rows to ensure the bag fits your specific phone size. Add or reduce rows to make it larger or smaller as needed. - Strap Styling:
You can customize the strap length to wear it as a crossbody bag or a short handle purse. Work longer chains or additional single crochets to achieve the desired length. - Adding Color:
Use different yarn colors to create a striped or gradient design for a unique flair.
Customization Ideas
- Add embellishments like small crochet flowers or tassels.
- Crochet a small inner pocket to hold coins or keys inside the bag.
- Use thicker yarn for a sturdier version or lighter weight yarn for a daintier look.
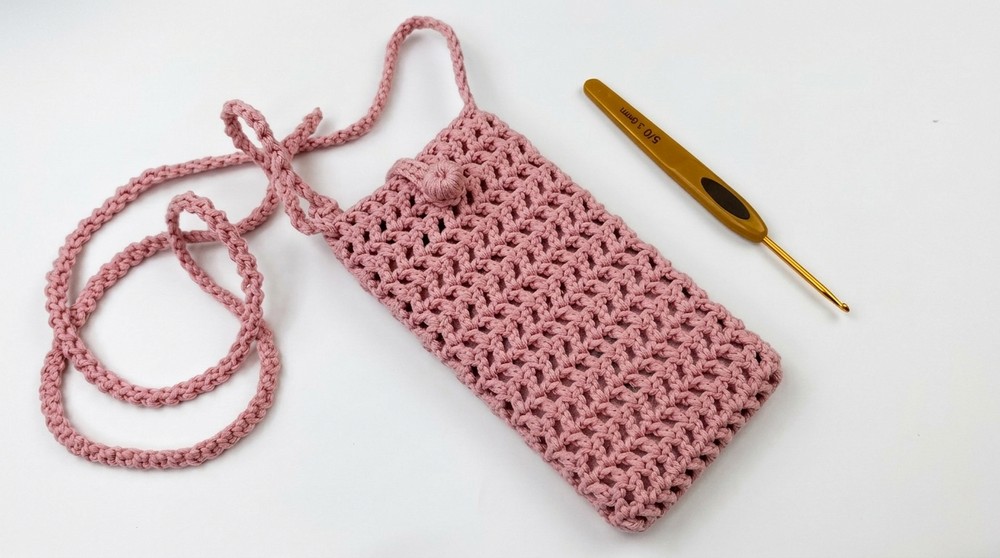
Conclusion & Final Remarks
Congratulations, Your handmade cellphone bag is finished. This versatile accessory is perfect for carrying your phone and other small essentials, such as keys, cash, or makeup. Its stylish yet functional design makes it suitable for any occasion. Whether you choose to keep it for yourself or gift it to someone special, this project is sure to bring joy.