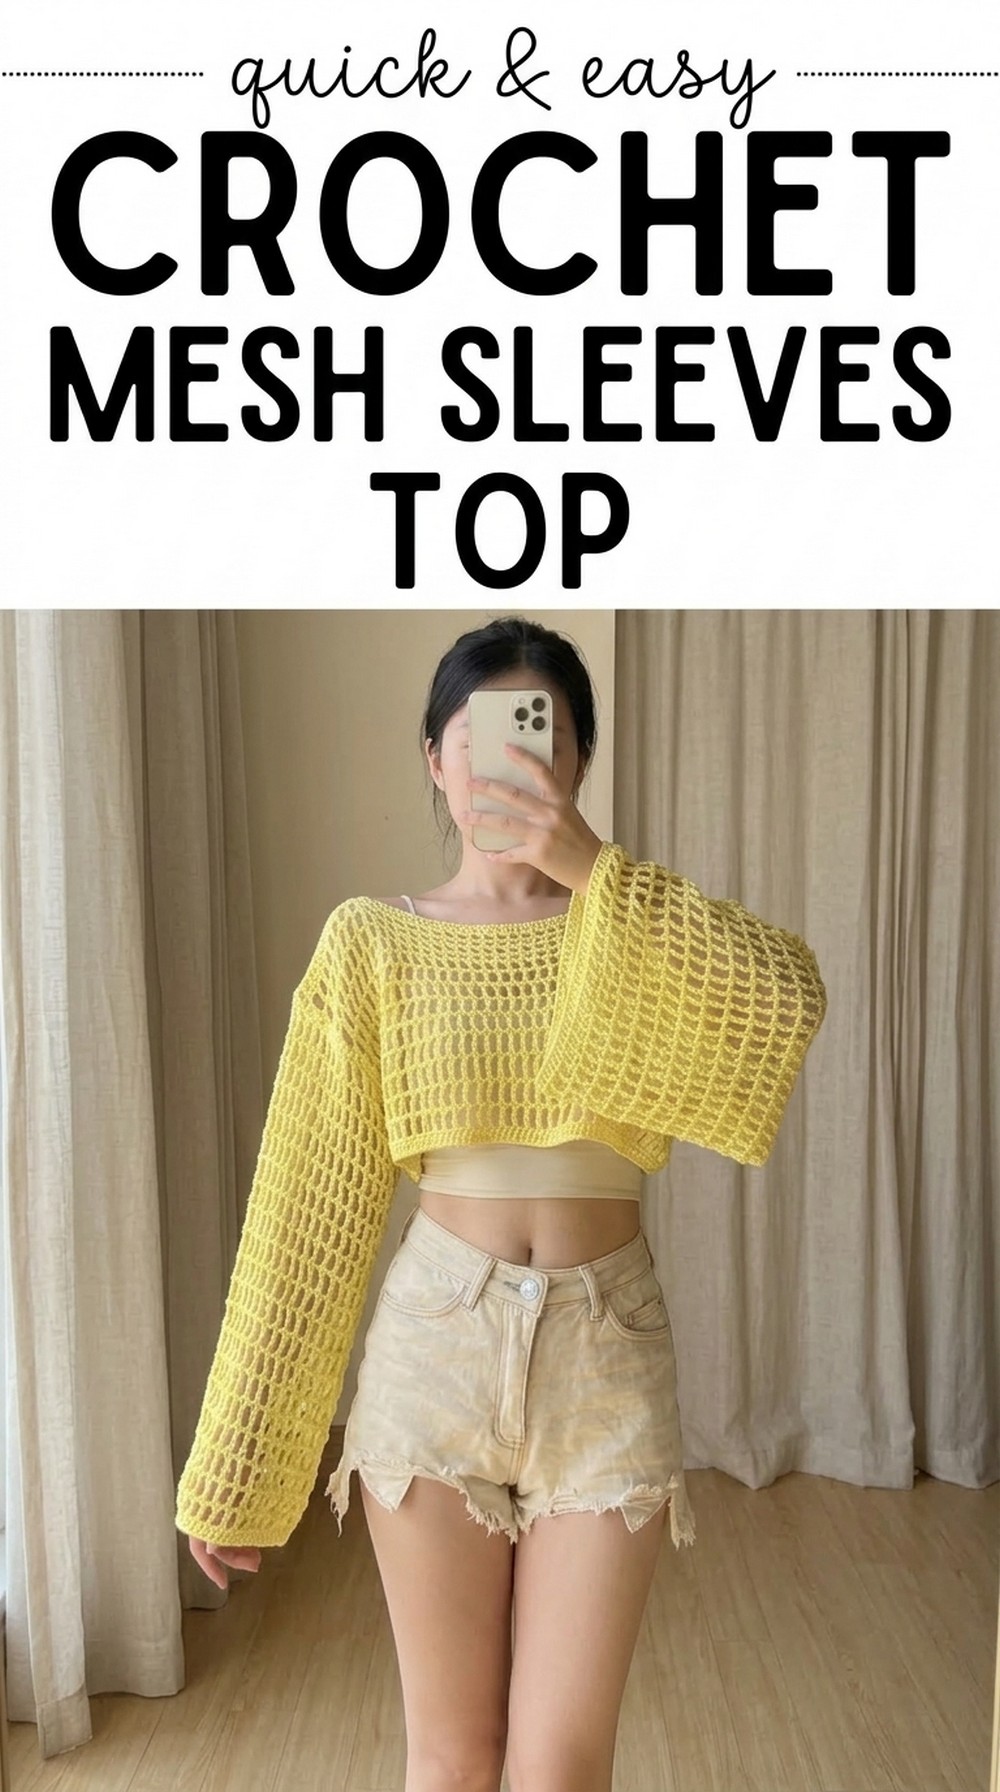
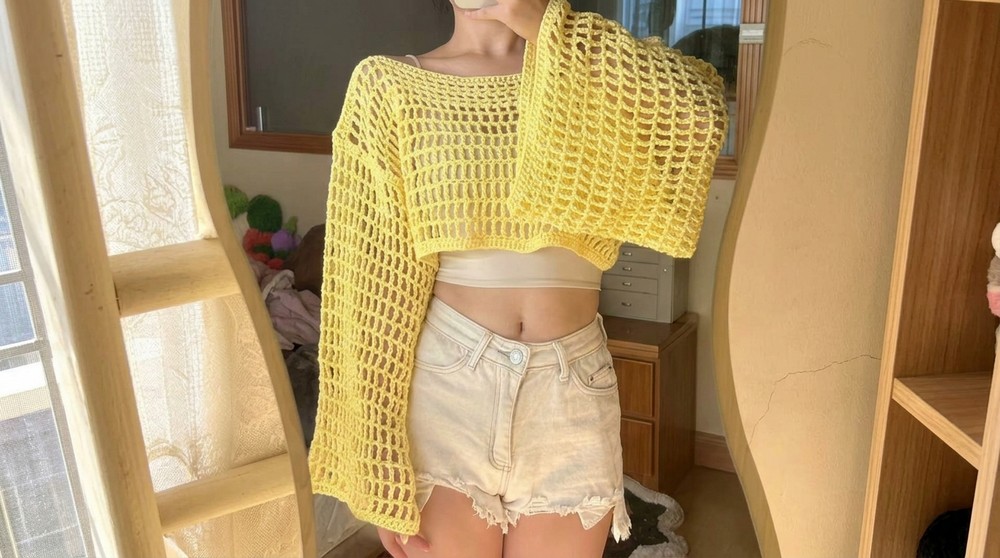
Get the Perfect Summer Layer with a Free Crochet Mesh Sleeves Top Pattern
You can create something truly special with this unique pattern – a crochet top that’s perfect for layering and elevating your everyday outfits. Whether you’re dressing up for an event or simply adding a cozy yet stylish touch to your wardrobe, this design has you covered.
Its light and breathable mesh design makes it ideal for all seasons, and the Free Crochet Mesh Sleeves Top Pattern ensures you can build it with ease. The soft flow of the sleeves adds charm and grace to the overall look, making it a standout piece. 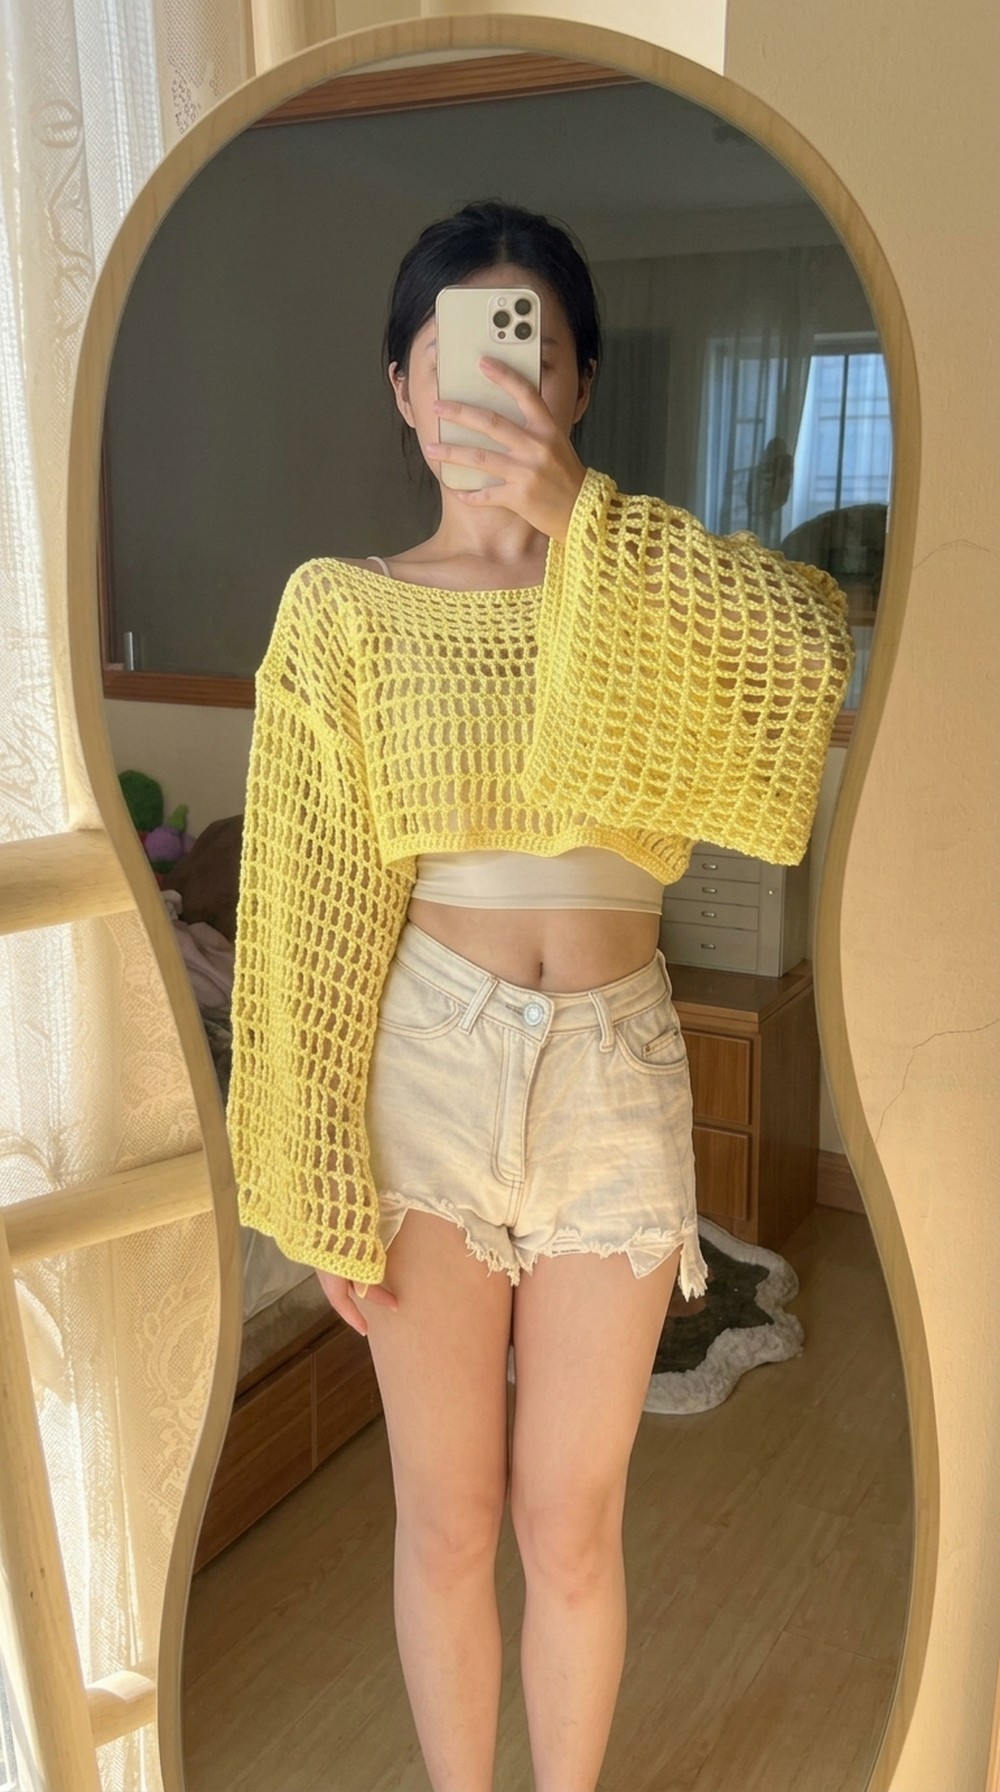
This pattern is fun for beginners and customizable so you can choose colors and styles that match your personality. It’s an exciting way to explore your creativity while making something beautiful and practical.
Bright Crochet Mesh Sleeves Top Pattern
Materials Needed
- Yarn: 6 balls of 50g soft cotton yarn (approximately 300g total).
- Crochet Hook: Hook size of your choice (adjust based on yarn thickness and desired size).
- Stitch Markers: To help keep track of chains and progress.
- Scissors: For cutting yarn.
- Darning Needle: For weaving in the yarn ends at the end of the project.
Gauge
- Gauge varies depending on your choice of yarn and hook size.
- To ensure the proper fit, check your gauge by completing round one of the pattern. The chain length should wrap comfortably around your body or desired section.
Finished Size
- The pattern as written is designed for a bust size of 85–100 cm.
- Adjustments can be made for different measurements by increasing/decreasing chains or changing your hook/yarn size.
Additional Tips
- Custom Sizing: If you want to alter the size, you can use a smaller/bigger crochet hook or thinner/thicker yarn.
- To check sizing, try on the chain after completing round one. Adjust by adding/removing 8–10 chains for every 5 cm increase or decrease in width.
- Mesh Stitch Adjustment: Modifying the size might alter the size of the mesh squares slightly, but the overall design will remain visually appealing.
- Loose Chains: Ensure your foundation chain is loose so it doesn’t tighten and distort the shrug’s fit.
- Weaving in Ends: Use the darning needle to weave in yarn tails cleanly for a professional finish.
Pattern Instructions
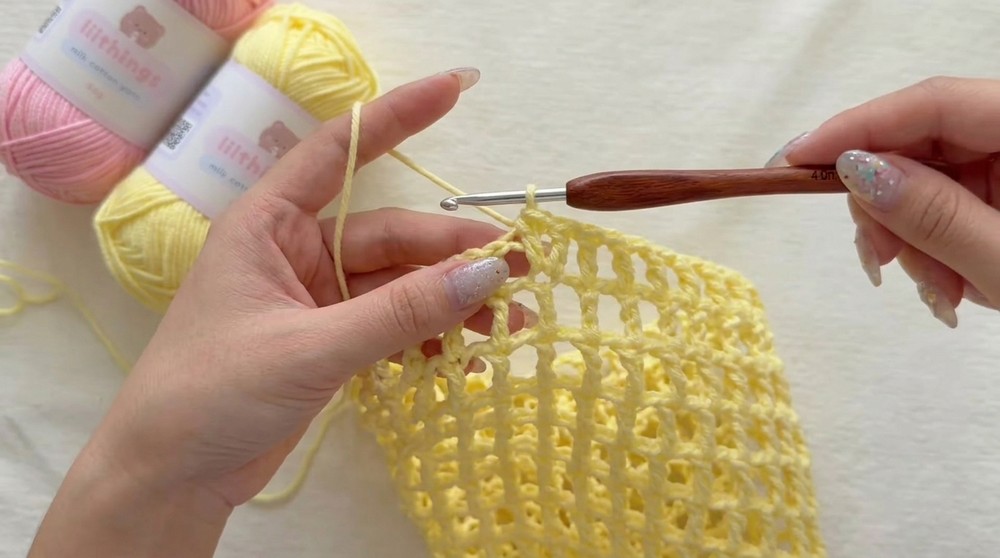
Foundation Chain & Round One
- Start with a Slip Knot:
- Wrap the yarn around two fingers to create a loop.
- Insert your thumb to pull the yarn tail through the loop to form the slip knot.
- Chain 156 Foundation Chains:
- Yarn over and pull through the loop on the hook to form your first chain.
- Repeat until you have 156 chains.
- Keep chains slightly loose for flexibility. Use stitch markers every 10 or 20 chains to track your count.
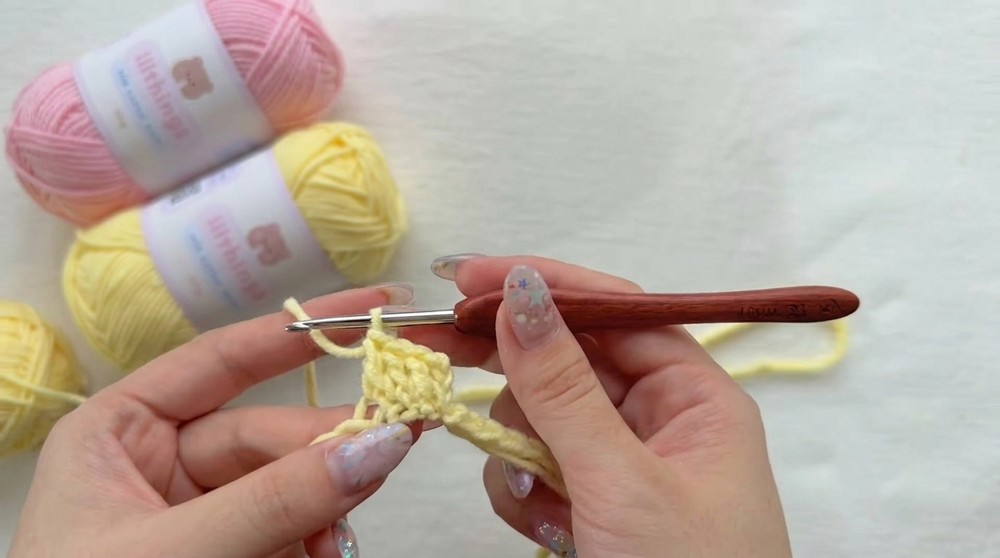
- Connect Chains to Form a Circle:
- Slide the chain onto your left finger to ensure it isn’t twisted.
- Insert the hook into the first chain, yarn over, and pull through to form a slip stitch.
- Round One:
- Chain 3 (counts as the first double crochet).
- Work one double crochet into each chain around.
- Once back to the start, slip stitch into the top of the chain 3.
- Important: Check to ensure the circle is not twisted before moving to round two.
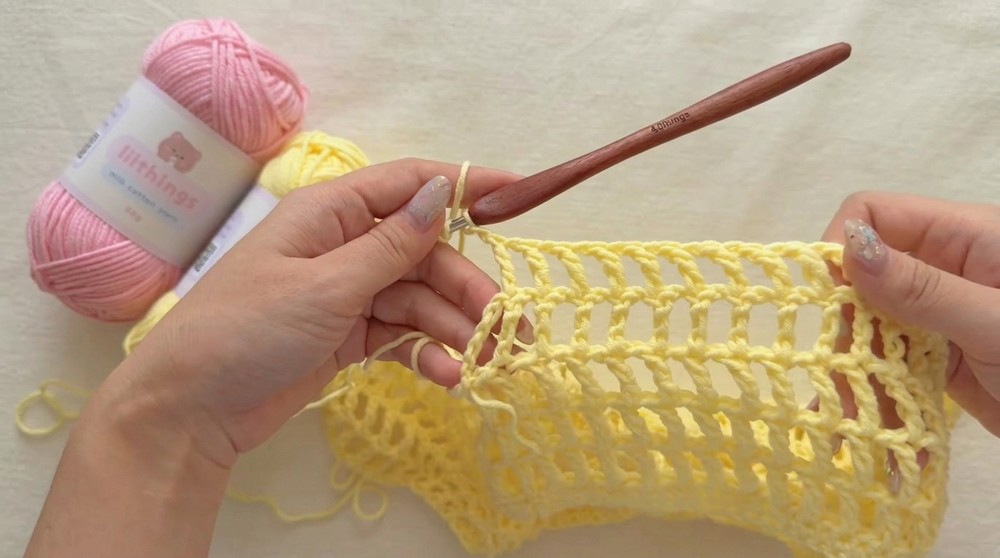
Rounds Two to Four
- Starting Mesh Pattern:
- Chain 6 (counts as triple crochet + chain 1 gap).
- Skip the next stitch, and create a triple crochet in the second stitch.
- Chain 1, skip a stitch, and work another triple crochet into the second stitch.
- Repeat this process around the entire row.
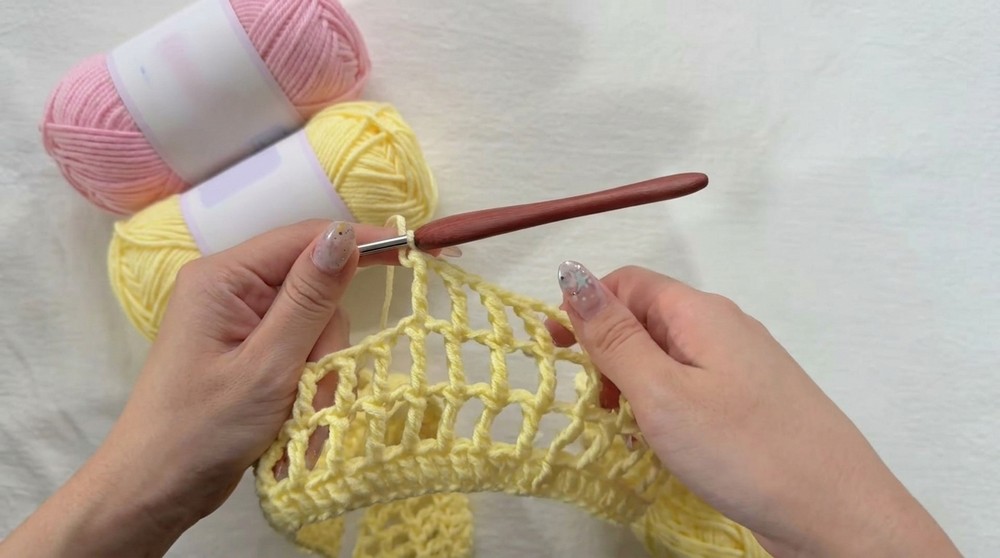
- End of Round:
- After your last triple crochet, chain 1 and slip stitch into the 5th chain of the starting chain 6 to close the round.
- Repeat for Two Additional Rounds:
- Chain 6 to begin each round. Continue working a triple crochet in the top of the previous triple crochet with a chain 1 gap in between.
Rounds Five to Fourteen
- Divide for Front and Back Panels (Round 5):
- Work up to 39 triple crochets (including chains).
- Stop at halfway, chain 6 to begin the next row and turn your work. Note: Rows are now worked across instead of in continuous rounds.
- Decreasing for the Front Panel:
- Add shorter stitches (yarning over fewer times) in the middle of the rows to form a U shaped neckline at the collar.
- Begin with triple crochets, transition to half double and double crochets as instructed in the transcription.
- Repeat for several rows, further decreasing stitches to refine the neckline.
- Complete the Back Panel:
- Attach the yarn to the right corner of the back section and repeat the mesh stitch for 10 rows without decreases or additional shaping.
- Attach the yarn to the right corner of the back section and repeat the mesh stitch for 10 rows without decreases or additional shaping.
Neckline Finishing (Round Fifteen to Sixteen)
- Front Neckline:
- From the last row of the back panel, chain 3 and add a row of double crochets across.
- Attach to the corresponding front panel using slip stitches to create the shoulder seam.
- Shoulder Join:
- Align the front and back pieces, counting 16 stitches for each shoulder.
- Use slip stitches to join the front and back panels along the 16 stitches.
Sleeves
- Attach Yarn:
- Begin at the underarm, working double crochets evenly around to form a base row for the sleeve.
- Mesh Stitch for Sleeves:
- Chain 6 to start and follow the same technique for the mesh pattern.
- Adjust the sleeve length as needed. For reference, the creator completed 19 mesh stitch rounds.
- Cuff Edging:
- End the sleeve with a few rows of double crochet to form a finished cuff.
- Repeat for the Second Sleeve.
Special Techniques
- Triple Crochet (Treble Stitch):
- Yarn over twice before inserting the hook. This creates a taller stitch compared to double crochet.
- Decreasing with Shorter Stitches:
- For smoother neckline shaping, create a half finished stitch by pulling through all loops together.
- For smoother neckline shaping, create a half finished stitch by pulling through all loops together.
Customization Ideas
- Color Variations:
- Use gradient yarns or multiple colors for a unique look.
- Adjust Fit:
- Experiment with larger or smaller hooks for a tighter or looser mesh.
- Sleeve Styling:
- Add flared or puffed sleeves for a bolder aesthetic.
Conclusion and Final Remarks
Upon completing the shrug, you will have created a lightweight and stylish layering piece that is perfect for any occasion. The mesh stitch creates an airy and comfortable fit, while the neckline shaping ensures a flattering silhouette. Don’t forget to block your finished garment for a neat and polished look. Enjoy crocheting, and wear your handmade shrug with pride.
Final Look
The shrug features:
- Textured mesh stitch for an eye catching design.
- Soft drape ideal for casual or semi formal outfits.
- Comfortable fit with adjustable sizing options.