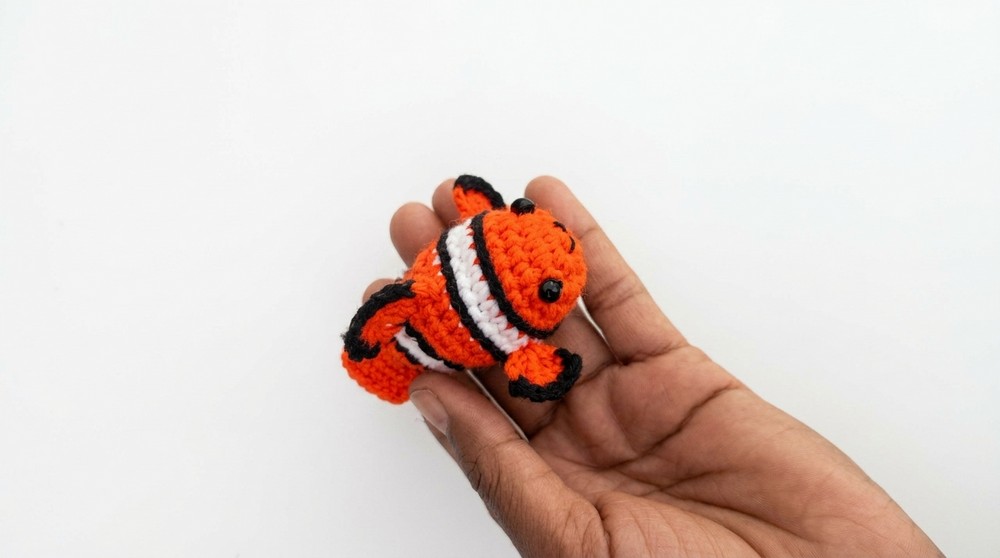
Decorate your daily items with this simple crochet fish keychain pattern—a colorful and playful accessory that makes carrying keys or bags more fun.
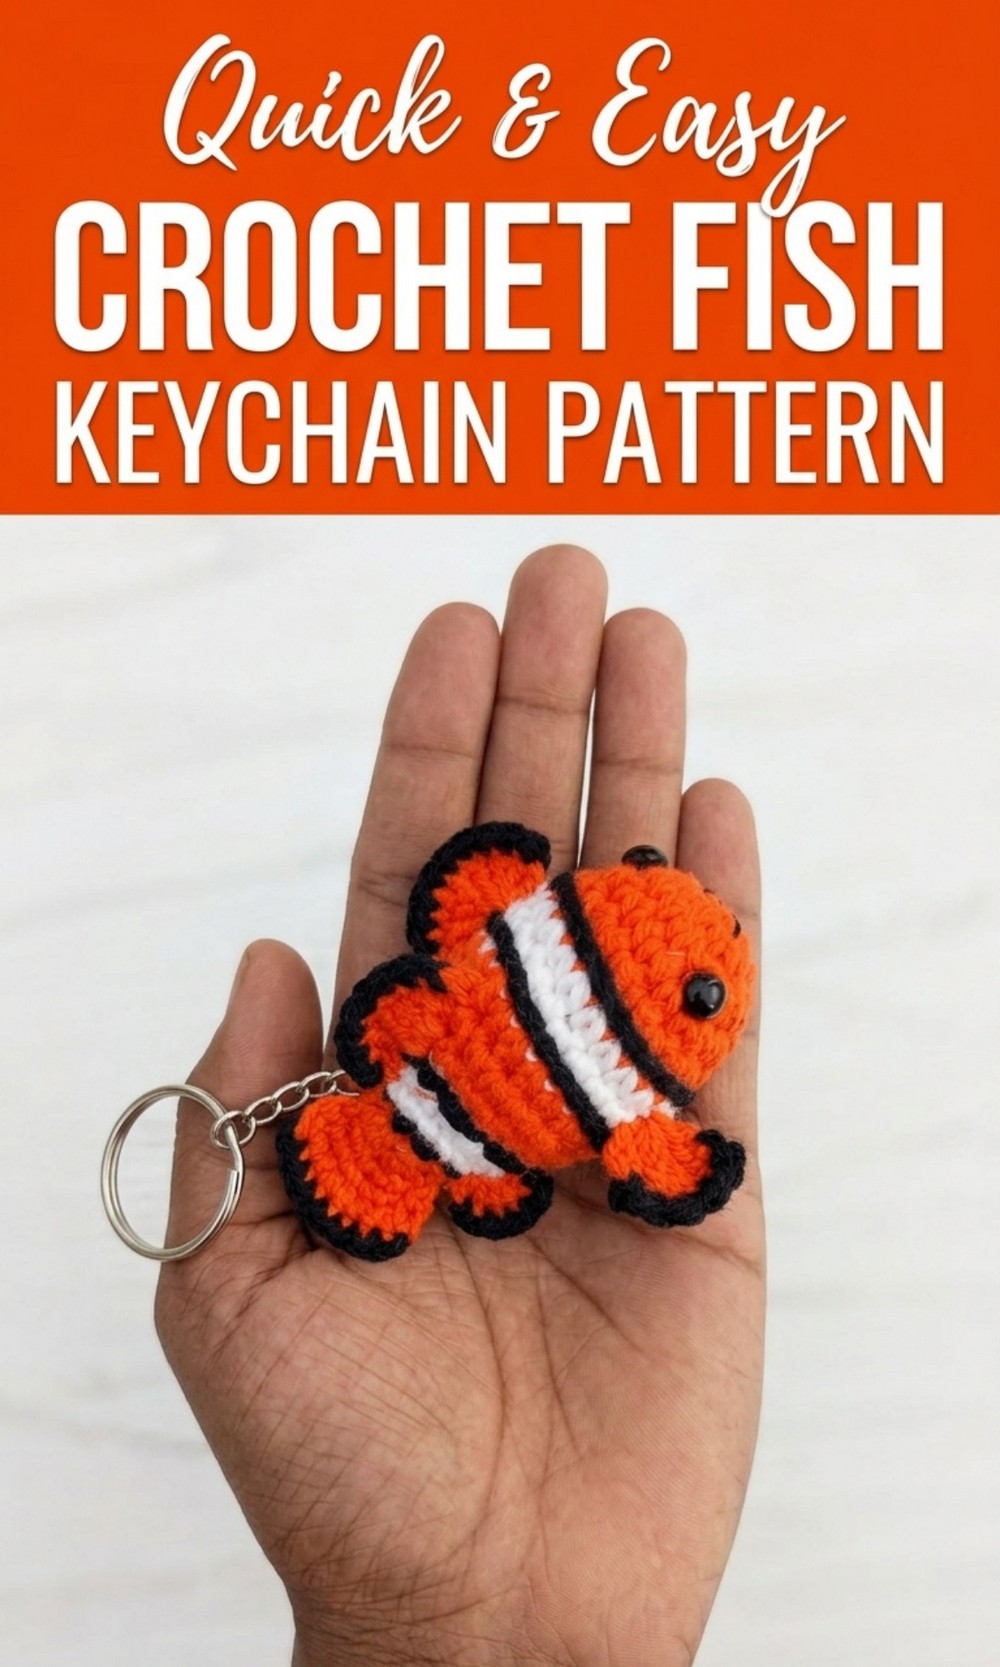
Make This Free Crochet Fish Keychain Pattern for Marine Themed Events
Think about turning simple yarn into a cheerful fish that fits perfectly in your pocket. This Free Crochet Fish Keychain is a small, colorful friend you can make with easy loops and stitches. It’s soft, squishy, and shaped like a tiny fish with a cute tail and little fins that make it look playful and full of life. Its bright colors bring a fun splash of charm wherever it goes.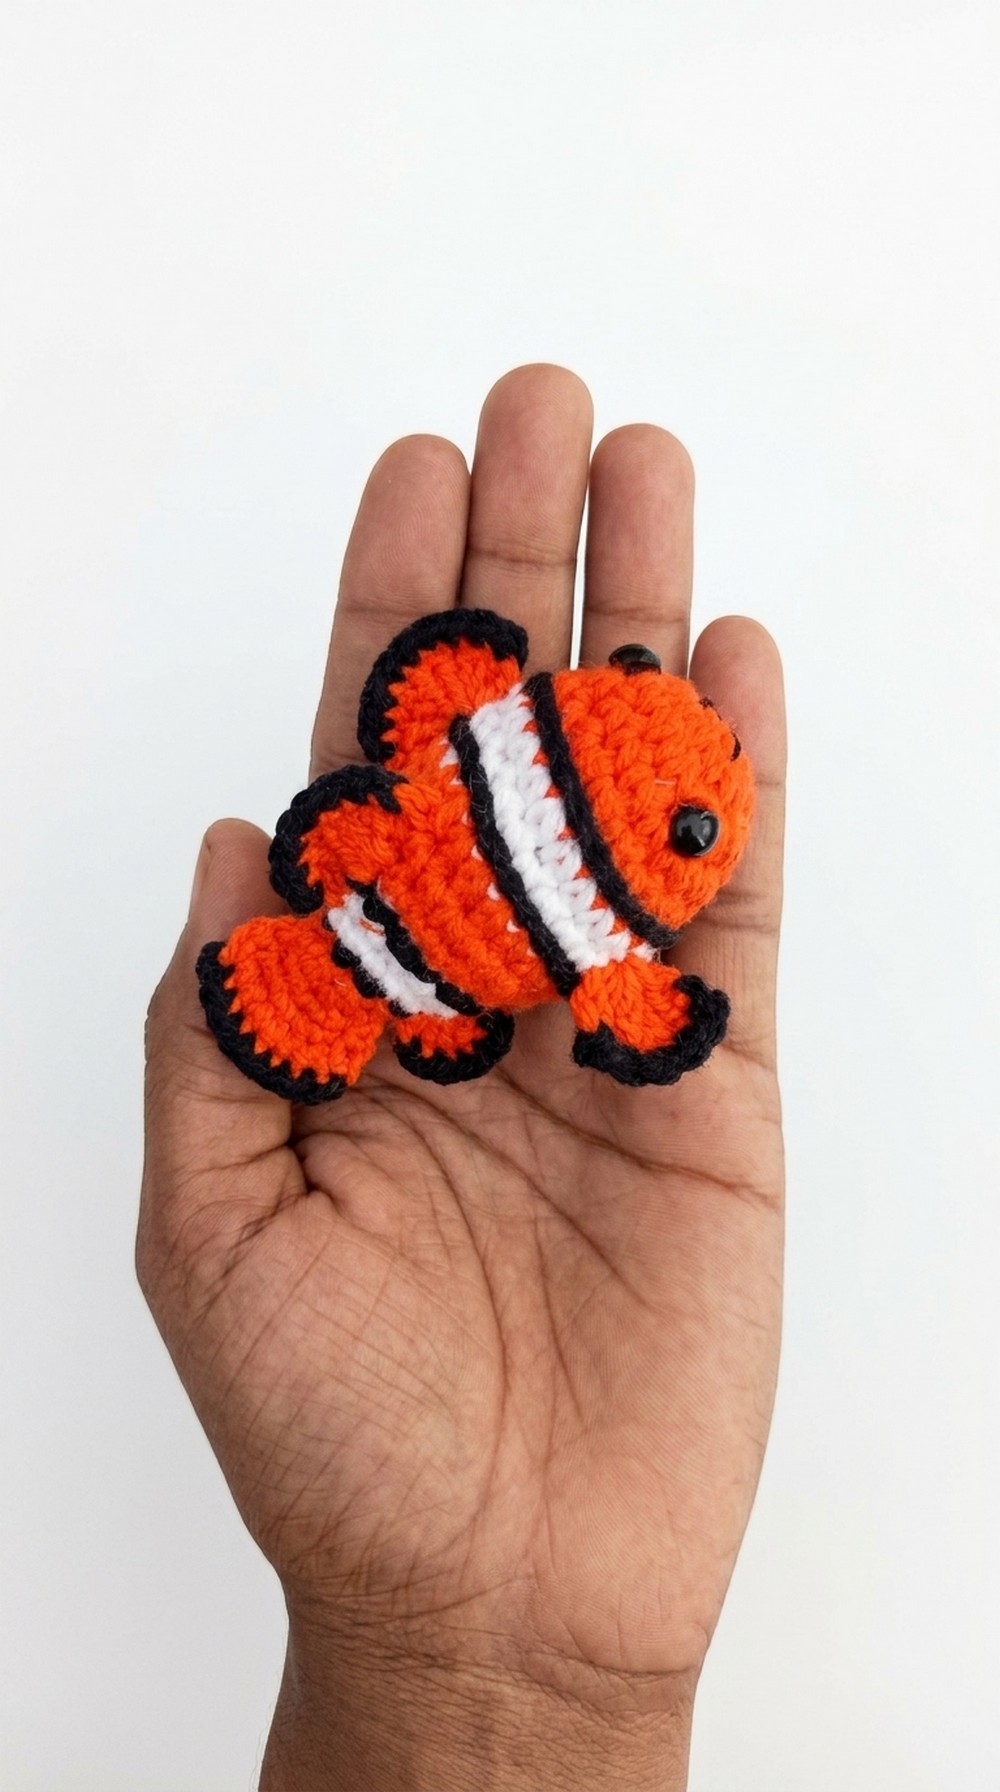 This keychain isn’t just for holding keys—it’s perfect for decorating backpacks, zippers, or even gifting to someone who loves ocean themed accessories. It’s lightweight and easy to carry, with a strong metal ring that keeps everything safe while looking stylish.
Bright Crochet Fish Keychain Pattern
Materials Required
- Yarn Weight:
- Light weight cotton or acrylic yarn in the following colors:
- Main body: Orang
- Detailing: Black and White
- Fins/Tail: Colors of your choice
- Light weight cotton or acrylic yarn in the following colors:
- Hook Size:
- 2.5 mm or 3 mm crochet hook (adjust hook size if using different yarn weights).
- Stuffing:
- Fiberfill or cotton stuffing for plump shape.
- Keychain Ring:
- Metal keychain loop or hook to attach the fish.
- Accessories:
- Safety eyes or beads (6 mm or smaller).
- Tapestry needle for sewing.
- Stitch markers (optional).
- Scissors.
Gauge
Gauge is not critical for this project as it is an amigurumi design. However, keep stitches tight to ensure stuffing remains concealed. A standard tension will produce a keychain approximately 2 to 3 inches long.
Finished Size
Approximately 2–3.5 inches (5–9 cm) depending on yarn, hook size, and stuffing.
Pattern Instructions
Abbreviations
- MR: Magic Ring
- Ch: Chain
- Sc: Single Crochet
- Inc: Increase (2 sc in 1 stitch)
- Dec: Decrease (crochet 2 stitches together)
- Sl st: Slip Stitch
- St/sts: Stitch/Stitches
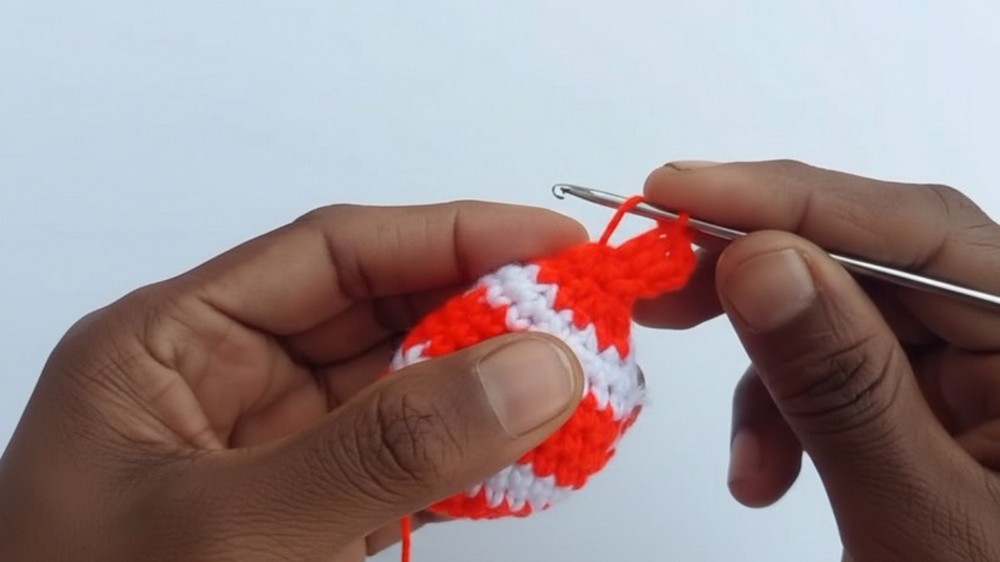
Foundation: Base of Fish (Rounds)
Round 1:
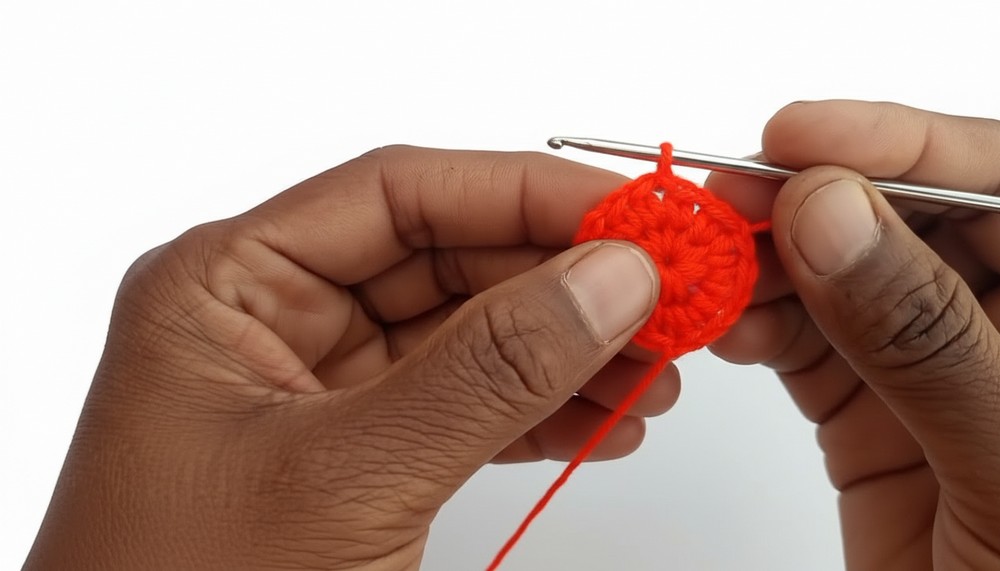
- Begin with a magic ring (MR).
- Work 6 sc into the MR. Tighten the loop securely. (6 sts)
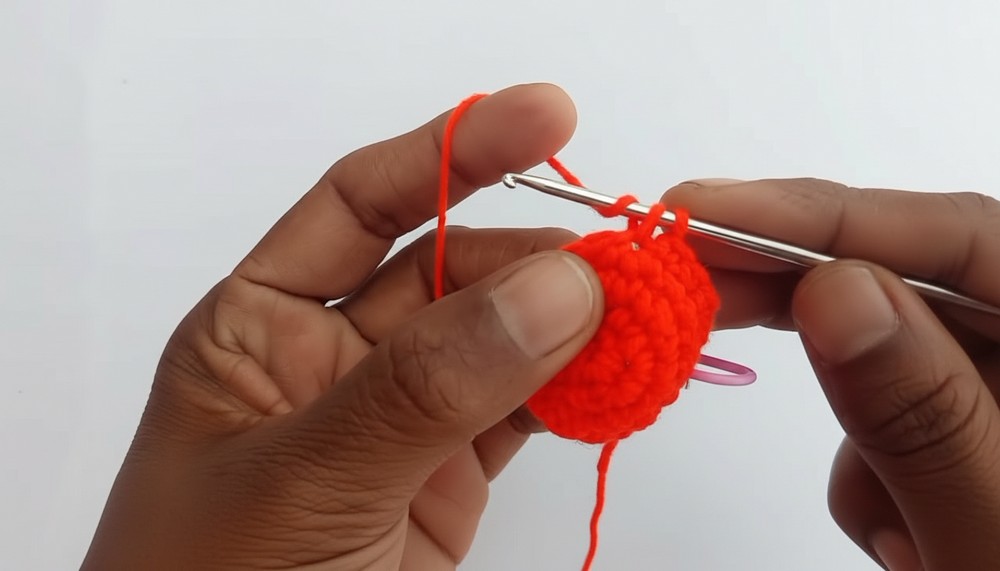
Round 2:
- Ch 1. Inc in every stitch around (2 sc per stitch). (12 sts)
Round 3:
- Ch 1. Sc in the first st, Inc in the next. Repeat around to increase uniformly. (18 sts)
Round 4:
- Ch 1. Sc in 2 sts, Inc in next. Repeat around to expand shaping. (24 sts)
Rounds 5 – 8:
- Ch 1. Sc in each stitch around. Work evenly without increasing. (24 sts per round).
Shaping the Fish Body
Round 9:
- Ch 1. Sc in 3 sts, Inc in the next. Repeat around. (30 sts)
Rounds 10 – 12:
- Ch 1. Sc in each stitch around uniformly. Maintain stitch count. (30 sts per round).
Decrease Phase (Shaping the Tail):
Round 13:
- Ch 1. Sc 4, Dec. Repeat around. (24 sts)
Round 14:
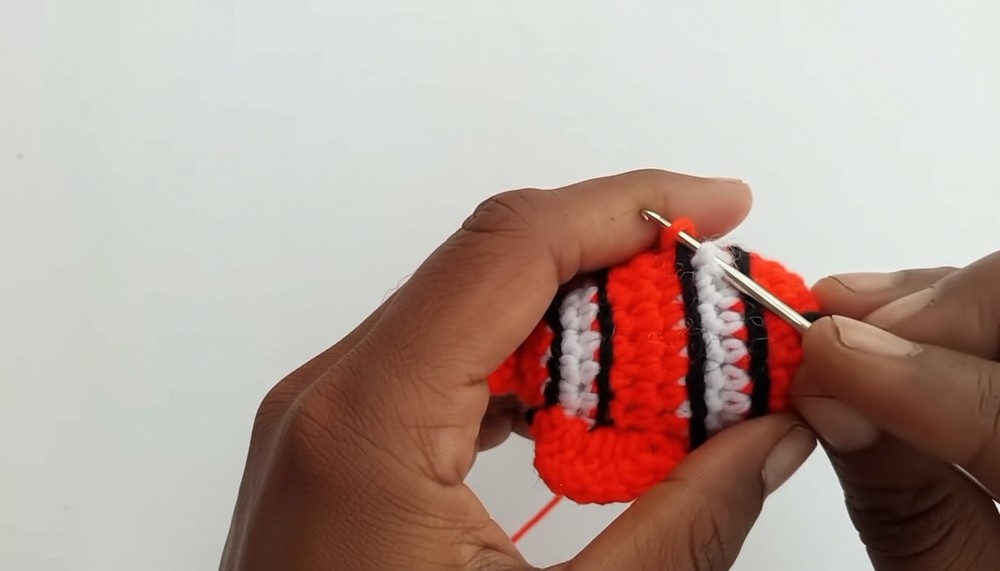
- Ch 1. Switch to white yarn (or desired tail color).
- Sc in each stitch around uniformly. (24 sts)
Rounds 15 – 17:
- Ch 1. Sc in every stitch. Work evenly to lengthen the fish body. (24 sts per round).
Round 18:
- Ch 1. Sc 3, Dec. Repeat around. (18 sts)
Round 19:
- Ch 1. Sc 2, Dec. Repeat around. (12 sts)
Round 20:
- Ch 1. Dec. Repeat around. (6 sts)
Tail Development
For the fish tail, we will create fan-shaped crochet stitches.
- Switch to desired yarn for tail color.
- In the next stitch, work the following sequence:
- 1 sl st, 5 double crochet (dc) in same stitch, sl st to finish.
- Repeat this sequence to create a symmetrical, curved tail shape.
Fins:
- On the sides of the body, locate Round 6–9 for fin placement.
- Use double crochet (dc):
- Work 3 double crochets (dc) in consecutive stitches to form a slight curve.
- Sl st to finish and secure.
Eyes and Additional Features:
- Attach safety eyes or sew beads between Rounds 5–8 of the fish’s head. Ensure they are evenly spaced.
- With black yarn, embroider additional details around the eyes, such as lashes or a small smile.
Stuffing and Closing
- Stuff the fish body firmly with fiberfill to preserve its playful shape.
- Thread a tapestry needle and pick up front loops from the final round to close the opening. Pull tight and secure with a knot.
- Weave in all loose ends using the needle.
Keychain Attachment
- Insert the keychain ring into the top (Round 3–5) of the fish body using a tapestry needle or hook.
- Loop and secure the ring tightly to ensure durability.
Customization Ideas
- Creative Color Patterns:
Create stripes, ombre effects, or polka dots using yarn changes in earlier rounds. This adds personality to the fish. - Glow-in-the-Dark Yarn:
Use glow-in-the-dark yarn for a playful twist. Ideal for kids’ keychains or nighttime appeal. - Accessories:
Add tiny bubbles or seaweed details using small crochet elements.
Special Techniques
- Invisible Decreases:
Use front loops only when decreasing to minimize visible gaps. - Tail Symmetry:
Ensure tail stitches mirror one another for a balanced look.
Tips for Enhanced Crocheting Experience
- Consistency: Maintain uniform stitch tension to ensure a smooth surface.
- Markers: Use stitch markers to avoid losing track during rounds.
- Assembly Care: Double check symmetry before attaching fins, tail, and eyes.
Conclusion
Congratulations! You’ve completed your own Crochet Fish Keychain. This versatile pattern allows for endless customization options, from yarn colors to facial details. It’s perfect as a gift, accessory, or personal keepsake.
Important Final Remarks
- If gifting, ensure safety eyes are securely fastened to avoid choking risks.
- Regularly check stitch counts to maintain consistent shaping.
- Experiment with yarn weights and textures for a personalized touch!