Learn how to create a beautiful crochet flower bouquet with this detailed pattern, perfect for crocheting unique and personalized floral arrangements.

Pretty Free Crochet Flower Bouquet Pattern You’ll Adore Forever
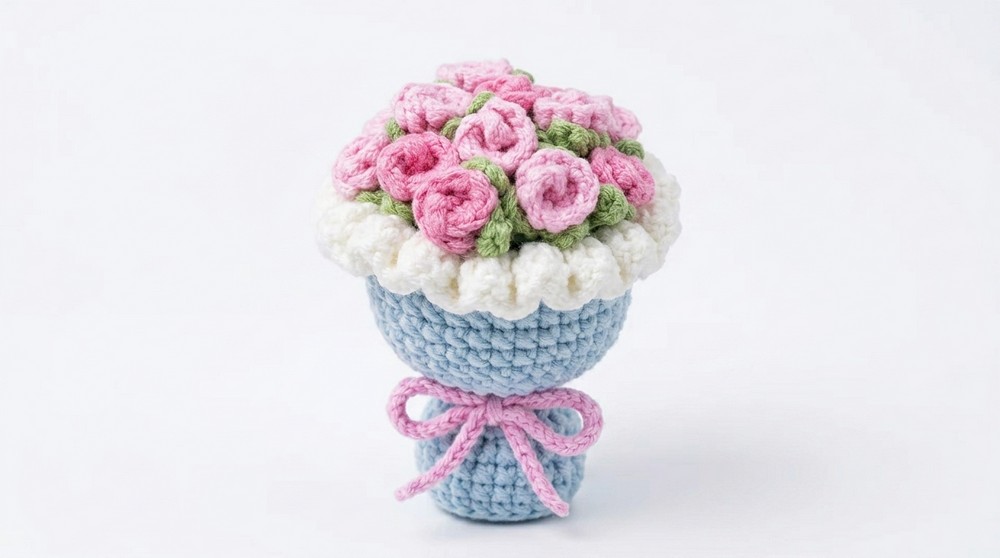
A crochet flower bouquet is a wonderful way to create a beautiful handmade gift or decoration without spending a lot of money. With a free crochet pattern, anyone can make this lovely bouquet using simple materials like soft cotton yarn and a small crochet hook. The bouquet is colorful, lightweight, and resembles real blooms, making it perfect for celebrations, weddings, or home décor.
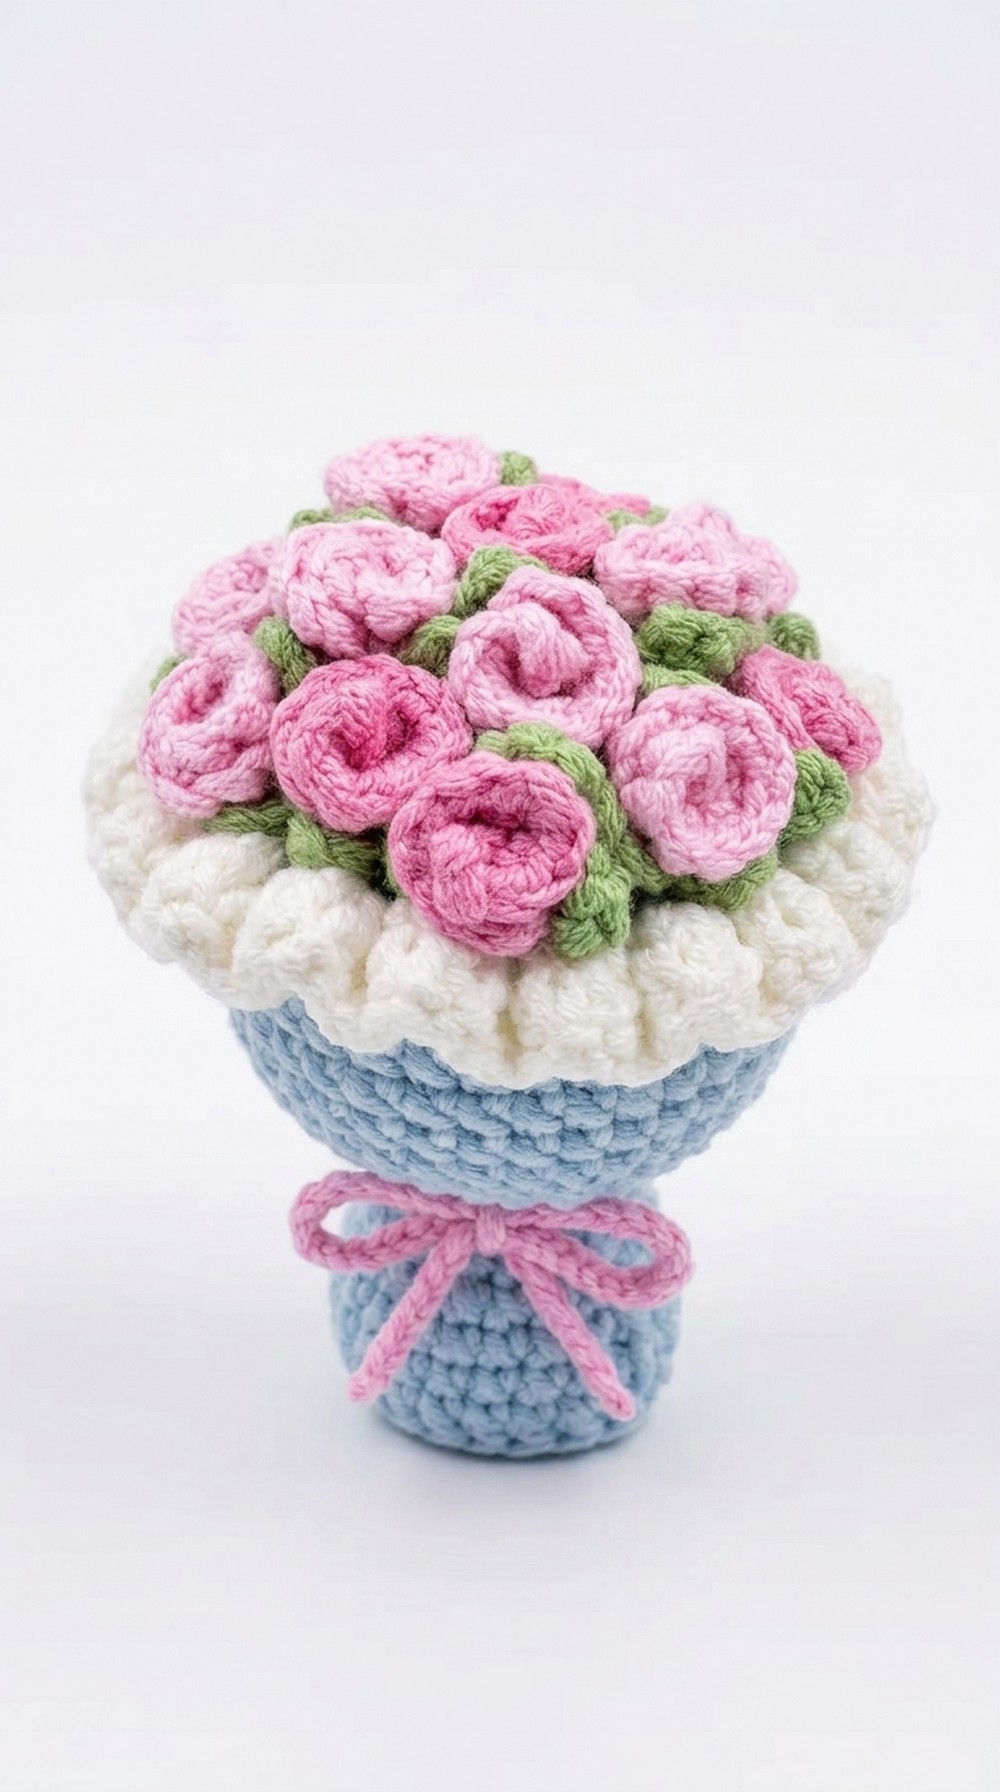 Each flower and leaf is crocheted step by step, starting with a magic ring for the base and adding petals and lace edging for a delicate finish. You can adjust the number of flowers to create a bouquet that suits your style.
Its detailed design and soft texture make it unique and enjoyable to crochet. This free pattern provides easy instructions, helping you create a bouquet that is pretty and full of love. Start crocheting today and bring handmade beauty to your space.
Cheerful Crochet Flower Bouquets Pattern
Materials Needed
- Yarn: Four ply cotton yarn (choose vibrant or pastel colors for flowers and green for leaves).
- Hook: 2mm crochet hook.
- Additional Tools: Stitch markers, scissors, yarn needle, and optional glue for flower assembly.
- Stuffing: Fiberfill or cotton for stuffing (if needed).
Special Techniques Used
- Magic Ring: A technique to create a center circle for crocheting in the round.
- Standing Stitch: Used at the start of each round for clean transitions (doesn’t count as a stitch).
- Single Crochet (sc): Basic crochet stitch for compact work.
- Increase: Two single crochets in one stitch.
- Decrease: Single crochet worked through the front loops of two stitches to reduce stitch count.
- Double Crochet (dc): A taller stitch used for lacework and petals.
- Back Loop Only (blo): Used to create structural elements.
Step by Step Pattern
Base Flower Body
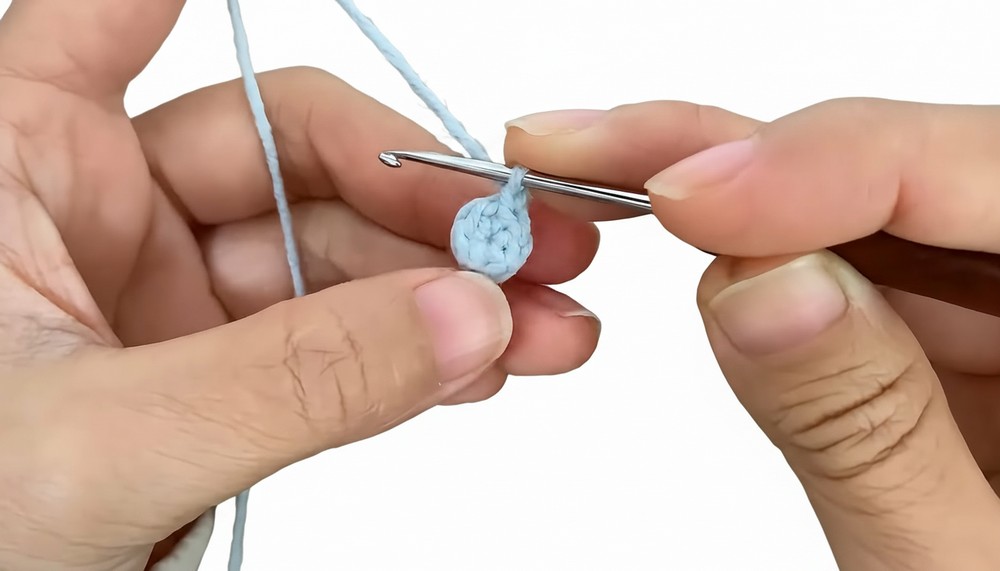
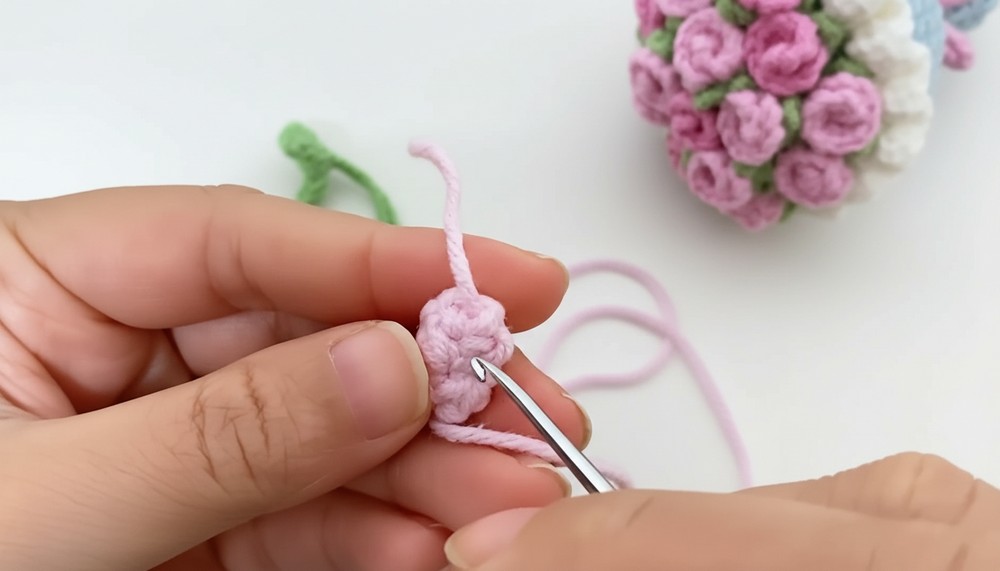
- Start with a Magic Ring:
- Create a magic ring and make 6 single crochets (sc). Tighten the magic ring.
- Slip stitch into the first stitch to close the round.
- Round 2 (Increase Round):
- Make 6 increases (two single crochets in each stitch). Total: 12 sc.
- Make 6 increases (two single crochets in each stitch). Total: 12 sc.
- Round 3 (Mixed Round):
- Alternate 1 single crochet, 1 increase. Repeat for 6 groups. Total: 18 sc.
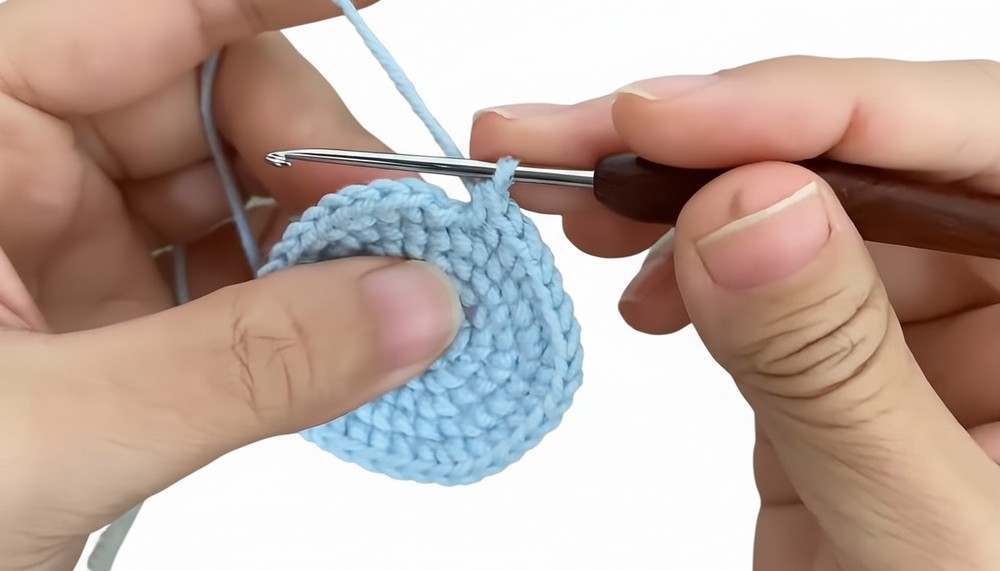
- Round 4:
- Alternate 2 single crochets, 1 increase. Repeat for 6 groups. Total: 24 sc.
- Round 5:
- Alternate 3 single crochets, 1 increase. Repeat for 6 groups. Total: 30 sc.
- Round 6:
- Alternate 4 single crochets, 1 increase. Repeat for 6 groups. Total: 36 sc.
- Alternate 4 single crochets, 1 increase. Repeat for 6 groups. Total: 36 sc.
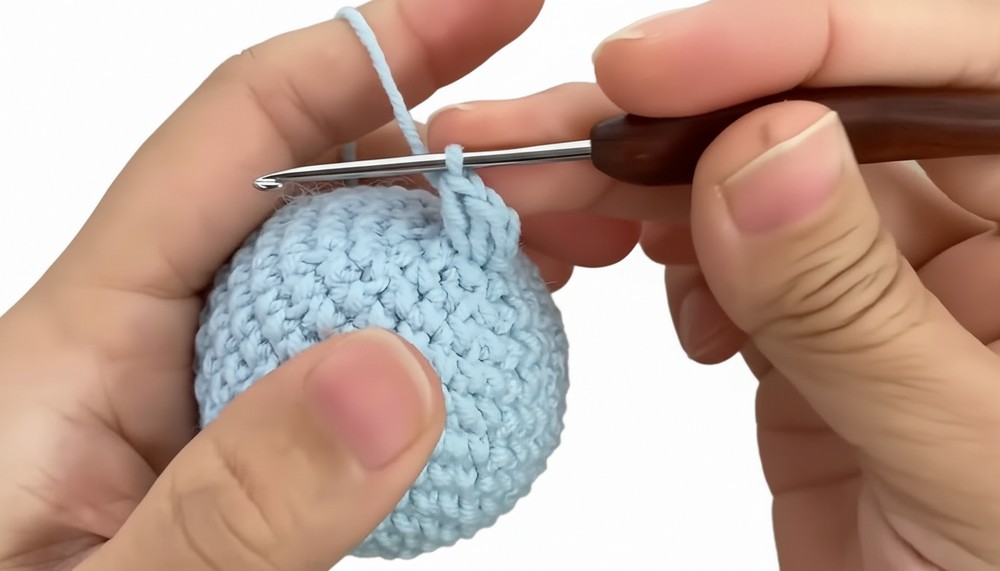
- Round 7:
- Crochet 36 single crochets in back loops only of the previous round.
- Rounds 8–12:
- Work 36 single crochets per round (no increases or decreases).
Flower Shaping (Decreasing Rounds)
- Rounds 13–16 (Decreases):
- Round 13: Repeat 2 single crochets, 1 decrease. Total: 30 sc.
- Round 14: Repeat 3 single crochets, 1 decrease. Total: 24 sc.
- Round 15: Repeat 1 single crochet, 1 decrease. Total: 18 sc.
- Round 16: Repeat 1 decrease for 6 groups. Total: 12 sc.
- Final Round:
- Make 6 decreases to close the flower base.
Petal Formation (Ruffles and Lace)
- Round 17 (Petals):
- Into each of the last 6 stitches, crochet 3 double crochets. Total: 18 dc.
- Rounds 18–19:
- Crochet 18 double crochets evenly around (no increases or decreases).
- Lace Edging:
- Work double crochets alternating between front loops and back loops from Round 7.
- Slip stitch into the first stitch to close each round.
Leaves
- Foundation:
- Start with a chain of 4.
- Start crocheting backwards in third chain:
- Make 1 single crochet, 1 half double crochet, and 1 single crochet in the first chain.
- Leaf Tip:
- Chain 3, make 1 single crochet in the 2nd chain, 1 half double crochet in the first chain, and return to the starting point.
- Chain 3, make 1 single crochet in the 2nd chain, 1 half double crochet in the first chain, and return to the starting point.
- Leaf Repeat:
- Work the same steps to create the opposite leaf tip.
- Slip stitch into the start and fasten off.
Mini Flower Assembly
- Roll flower petals into a spiral and place on top of the leaf edges.
- Attachment:
- Option 1: Glue the flower onto the leaf.
- Option 2: Sew using yarn tails:
- Thread the long yarn through the flower base and leaf center.
- Stitch securely, weaving in the ends.
Finishing the Project
- Use scissors to trim excess yarn ends.
- Arrange multiple leaves and flowers to form a bouquet or decoration.
- For compact arrangements, aim for 14 flowers with 14 leaves.
Final Words
This handheld mini flower crochet pattern is a delightful project for beginners and experts alike. Its versatility allows you to customize colors and sizes for various uses, such as hair accessories, brooches, or home décor. With patience and careful attention to the steps, you can create stunning flowers that showcase your creativity and skills.
Tips to Maintain the Pattern
- Gauge Consistency: Keep a consistent tension to ensure symmetrical flowers.
- Yarn Selection: Choose soft cotton yarn for a clean texture.
- Practice Techniques: Familiarize yourself with the magic ring and stitch variations before starting.
- Customization: Modify petal and lace colors for unique designs.
- Storage: Store finished flowers and materials in a clean, dry space.
Crocheting these mini flowers is not just a craft but a fun way to brighten your day and create handmade items with love.