From shopping trips to school days, this T-shirt yarn bag pattern helps you create a trendy and lasting bag for all your favorite things.
Prepare to Stun with This Free Crochet T-Shirt Yarn Bag Pattern
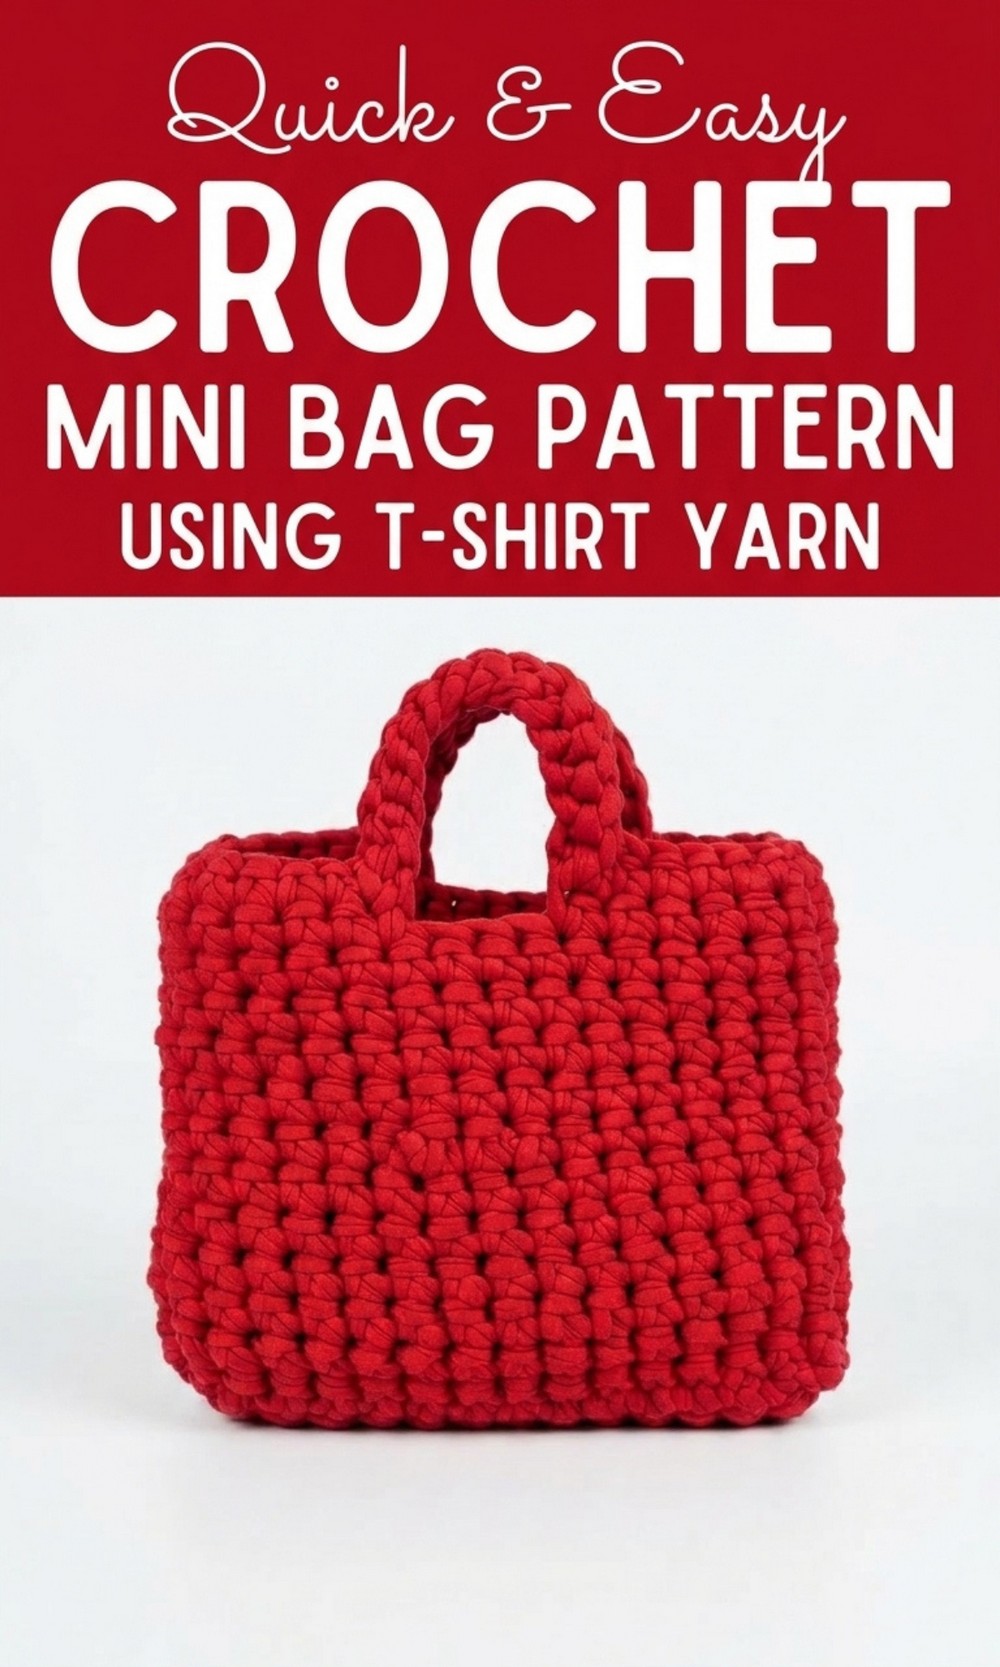
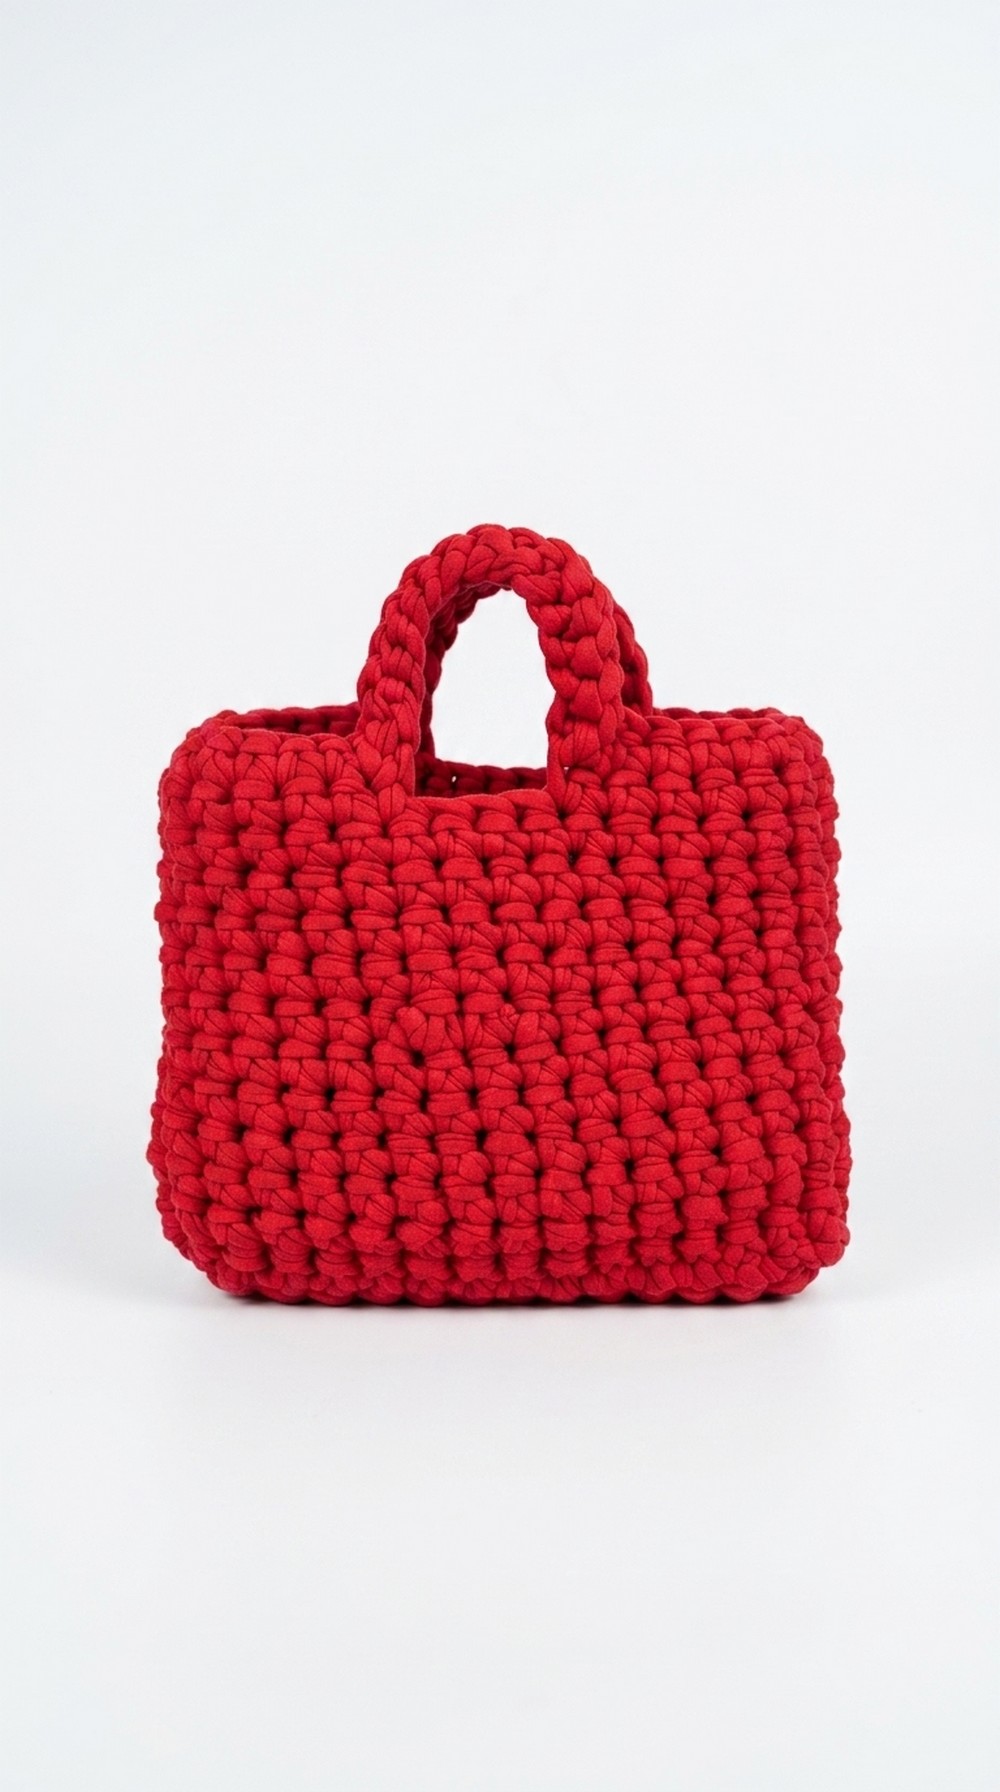
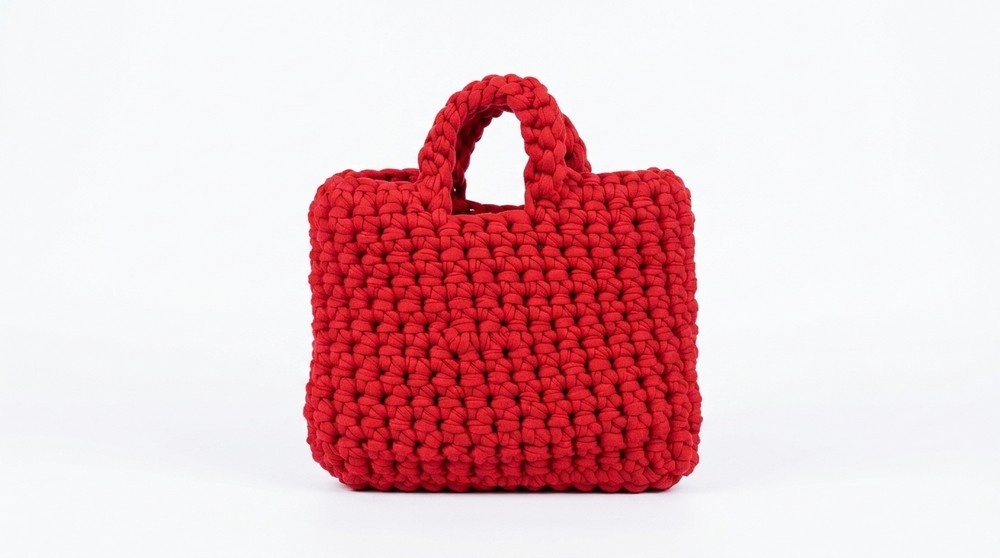
Make your own stylish bag that’s both strong and practical for all your favorite things. This lovely accessory stands out with its modern and clean look, made from thick, soft stuff that feels amazing in your hands. Using this Free Crochet T-Shirt Yarn Bag Pattern, you can put together a sturdy and useful piece that’s perfect for everyday use.
The chunky stitches give the bag an elegant feel, while the solid bottom and thick handles ensure it’s comfortable to carry all day long. Whether you use it for shopping or holding your school books, this handmade bag is perfect for adding a special touch to your outings.
 What makes it special is the recycled yarn, letting you create something beautiful and eco-friendly. Plus, it’s quick to finish—just one afternoon, and you’ll have a durable bag that matches your style.
Stunning Crochet T-Shirt Yarn Bag Pattern
Finished Size
The finished size will depend on the yarn thickness, hook size, and the number of chains and rows you create. This pattern, designed with a chain of 15 and 10 rows for the body, will result in a small bag approximately 7 inches in width and 5 inches in height. Note that you can customize the size of your bag (see “Customization Ideas” below).
Necessary Materials
- T-Shirt Yarn: Approximately 100-150 grams in Baby Red Color
- Note: T-shirt yarn can vary in thickness, stretch, and texture. Use a medium-width t-shirt yarn that is comfortable to work with.
- Hook Size: 9 mm (or adjust depending on your yarn thickness).
- Tapestry Needle: For weaving in ends.
- Measuring Tape: To confirm your width and gauge.
- Scissors: Sharp scissors to cut yarn cleanly.
Gauge
Gauge is not strictly required for this pattern; however, it will affect the final size of your bag. The following gauge is provided as a reference based on the 9 mm hook and standard medium-thick t-shirt yarn:
- 4 single crochets = 2 inches
- 4 rows = 2.5 inches
Special Techniques
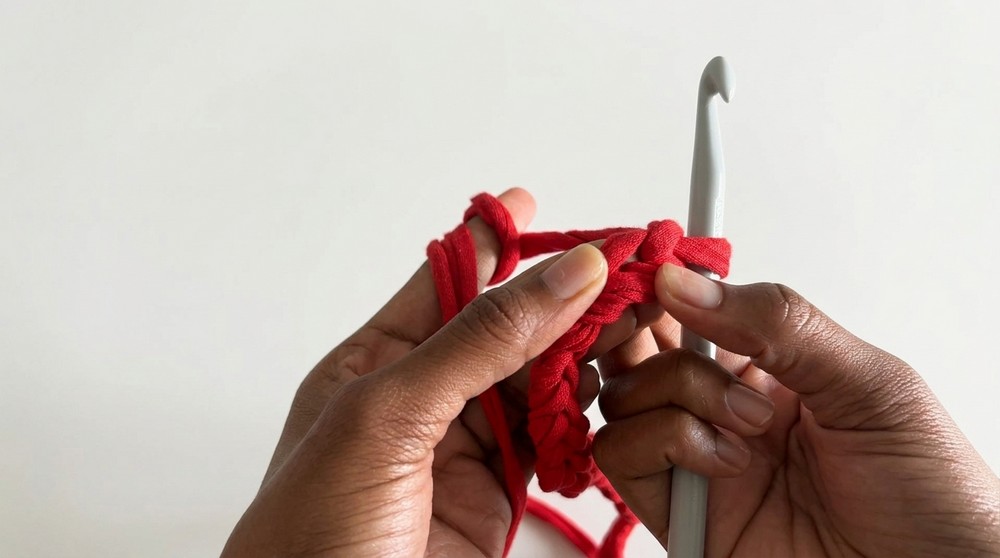
- Slip Knot: The beginning knot is placed on your hook.
- Chain Stitch (ch): The foundation stitch for rows.
- Single Crochet (sc): Insert hook, yarn over, pull through, yarn over again, and pull through both loops on the hook.
- Slip Stitch (sl st): Insert hook, yarn over, pull through both loops on hook.
- Back Loop Only (BLO): Work only in the back loop of each stitch to create texture.
Pattern Instructions
Base of the Bag
- Make a Slip Knot: Leave a tail for weaving later.
- Foundation Chain (Ch 15): This chain length determines the width of the bag. Add more chains for a wider bag or reduce the chain count for a smaller one.
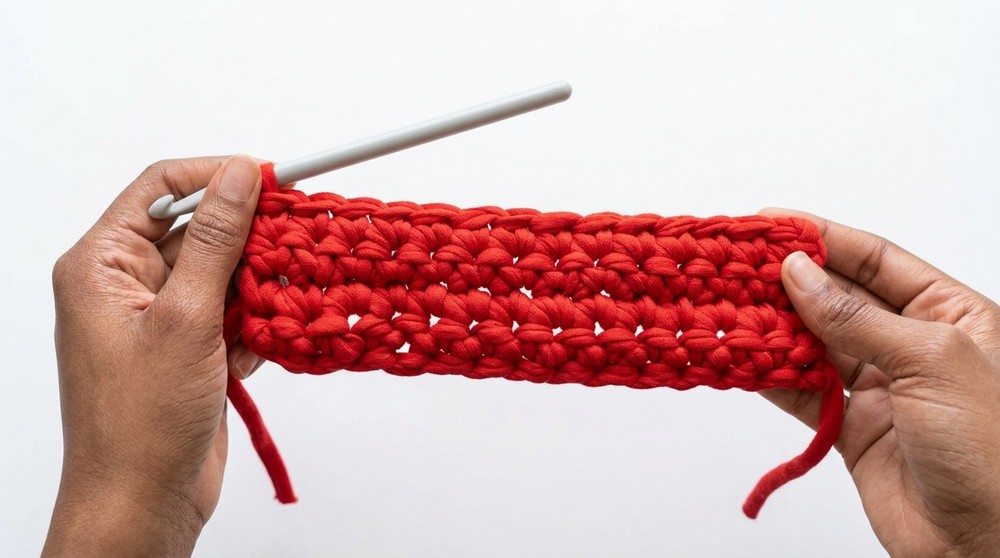
- Row 1:
- Skip the first chain from the hook.
- Work 1 sc into the second chain from the hook and in each chain across (14 sc total).
- Ch 1, turn your work.
- Skip the first chain from the hook.
- Rows 2–4:
- Work 1 sc in each stitch across, ch 1 at the end of each row, and turn.
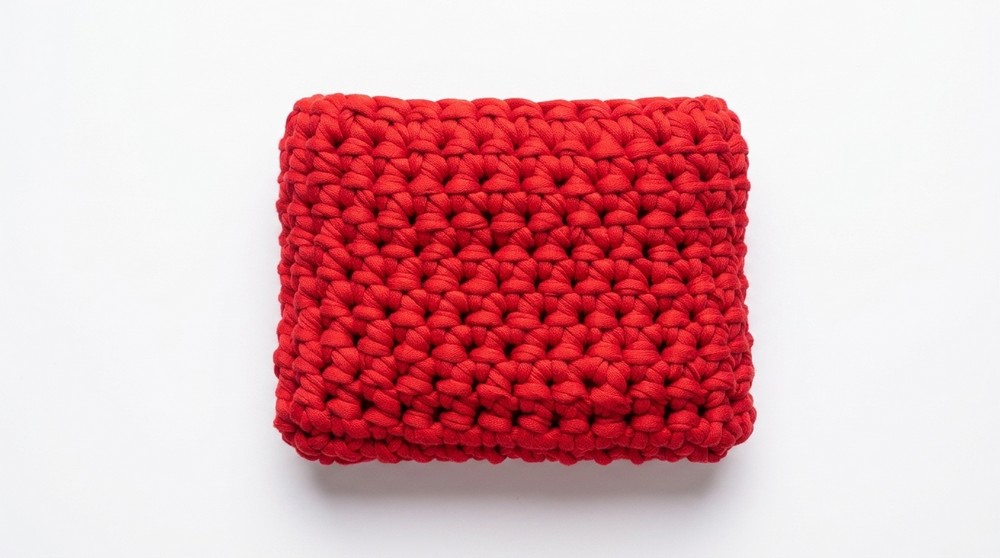
- After Row 4, you should have a rectangular base for your bag.
Crocheting Around the Base
- Without fastening off, begin crocheting around the base:
- Work 1 sc into the side stitches along the shorter edge of the base.
- When you reach the opposite long edge (the foundation chain), work 1 sc into each chain.
- Continue along the second short edge, working 1 sc into each stitch.
- When you’ve completed the round, slip stitch into the first sc of the round to join.
Creating the Bag Body
- Back Loop Only Round:
- Ch 1 and begin working 1 sc in the back loop only of each stitch around to create a subtle raised edge for the bag.
- Use a stitch marker to mark the beginning of the round.
- Regular Single Crochet Rows:
- After completing the round in BLO, continue working 1 sc in both loops of each stitch.
- Repeat this for as many rounds as necessary to achieve your desired bag height (e.g., 10 rows).
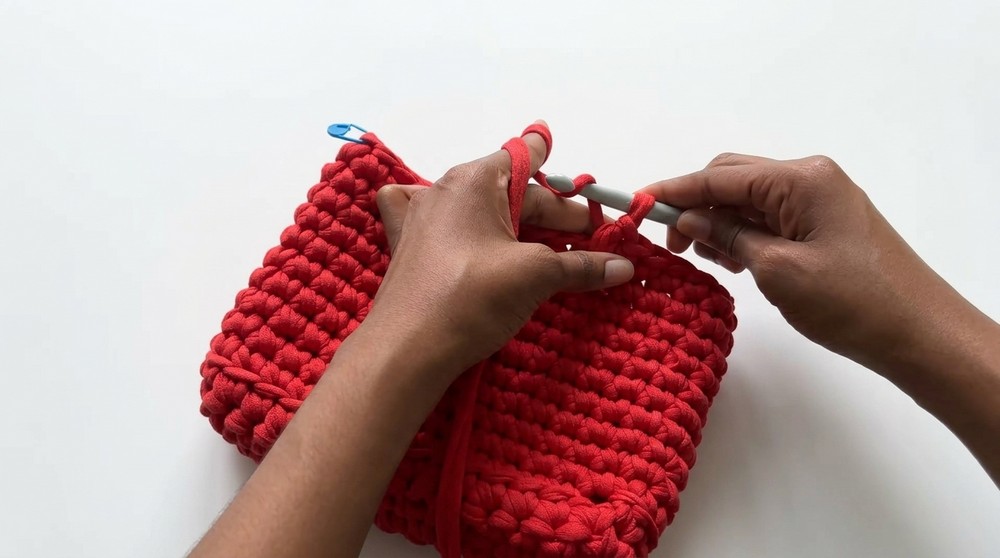
Handles
- After achieving your desired bag height, begin working the handles:
- Place stitch markers at 7 stitches from each side (or adjust as preferred).
- Starting at one stitch marker, work 7 sc.
- Chain 15 (or desired handle length), ensuring the chain is not twisted.
- Skip 7 stitches and attach the chain with a sc at the next marked point.
- Continue crocheting until you reach the next stitch marker.
- Repeat the process for the second handle.
Reinforcing the Handles
- To stabilize the handles:
- Work sl st across each chain of the handles for both sides.
- Continue working sc along the bag edges between the handles for a secure finish.
Finishing Touches
- Fasten Off:
- After completing the handles and ensuring all edges are secure, fasten off the yarn.
- Leave a long tail to weave in securely using the tapestry needle.
- Weave in Ends:
- Use your tapestry needle to weave the loose ends into the stitches.
- Trim any excess yarn neatly.
Tips and Customization Ideas
- Customize the Size: Adjust the foundation chain or the number of rows to make larger or smaller bags.
- Add Colors: Use different colors of t-shirt yarn for stripes or color-block effects.
- Decorate: Add tassels, buttons, or small appliques to personalize your bag.
- Sturdy Handles: Use a smaller hook to make tighter stitches for the handle chains, increasing their stability.
- Lining Option: Add a fabric lining with a sewing needle and thread for a polished look.
Conclusion
This Chunky Mini Bag is a versatile and stylish project that allows for endless customization. Whether you use it as a casual carry-all or a unique gift, this handmade item is sure to impress. With thick t-shirt yarn and a simple pattern, it’s easy to complete, even for beginners.
Important Remarks: The 3D textured look of this bag creates a modern style, while the sturdy t shirt yarn ensures durability. Remember to take your time and enjoy the process of bringing this crochet piece to life.