Stitch an adorable handmade hair accessories with this crochet scrunchie pattern, perfect for girls’ hair and designed to be both simple and creatively fun to make.
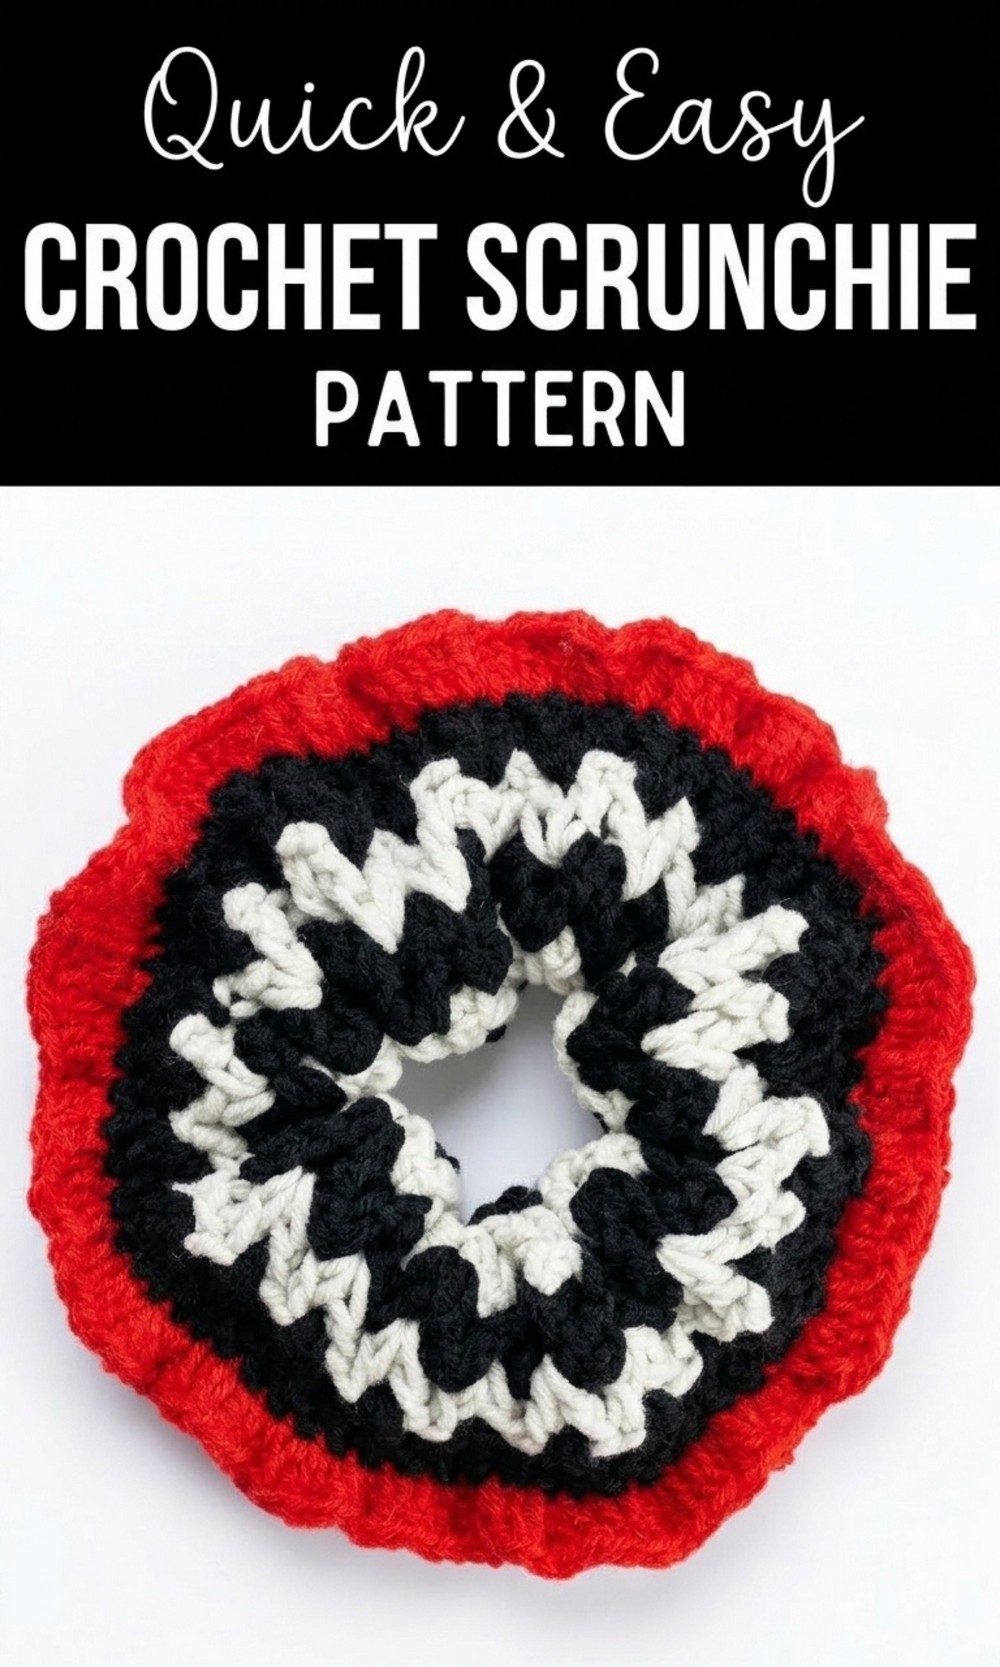
Transform Yarn into Magic with This Free Crochet Scrunchie Pattern
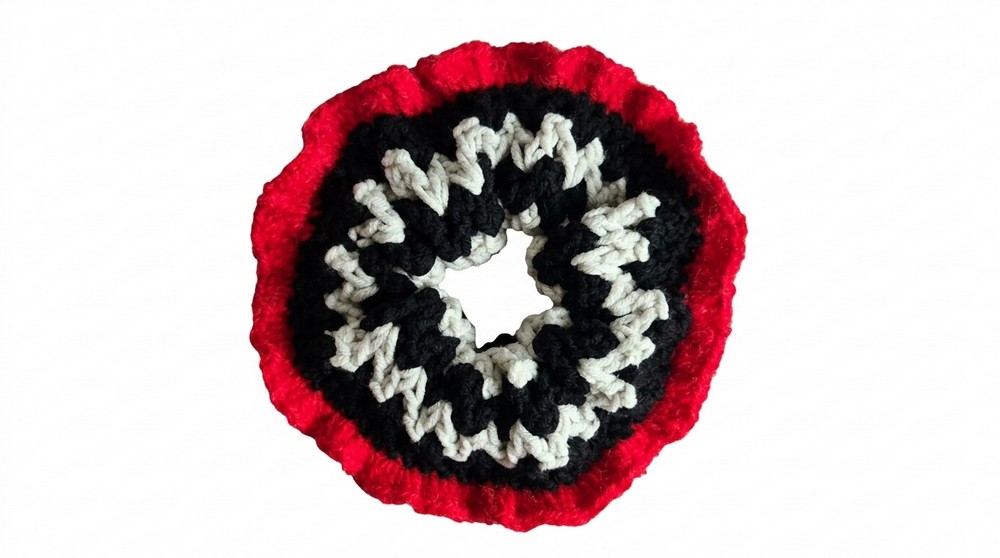
Hook up a stylish free crochet scrunchie to match any outfit and add a touch of creativity to your hair. This scrunchie is not just practical but also super fun to make. With a simple crochet pattern, you can create a soft, ruffled, and colorful hair tie that is perfect for any occasion. Whether it’s to add a pop of color to your casual look or to match a festive outfit, this scrunchie is the perfect choice. It’s easy to customize with different yarn colors and textures, making your scrunchie truly one of a kind. Plus, it’s reusable, washable, and gentle on your hair.
This free pattern is beginner friendly, so anyone can crochet their own accessory with ease. It’s a fun way to crochet something beautiful while expressing your unique style. Why wait? Start making your very own scrunchie today.
Vivid Crochet Scrunchie Pattern
Materials Needed
To ensure the best outcome, gather the following materials:
- Yarn: 2 balls of yarn in different colors (60% cotton and 40% acrylic suggested). You can use a yarn labeled “mohair look” or regular mohair.
- Hair tie: Regular elastic hair tie.
- Crochet hooks: 3.5 mm and 2.5 mm.
- Scissors.
- Yarn needle (optional, for sewing).
Gauge
Not specifically stated, but ensure the chain wraps comfortably around the hair tie for an optimal fit. Adjust hook size or tension as needed.
Finished Size
The final scrunchie’s size depends on adjustments to the chain length and number of rows. Following this guide produces a scrunchie approximately 12–15 cm in diameter.
Pattern Introduction
This crochet scrunchie pattern uses a simple V stitch and finishes with optional double crochet ruffles for added texture. The design is adaptable to your preferred scrunchie size and style.
Pattern Instructions
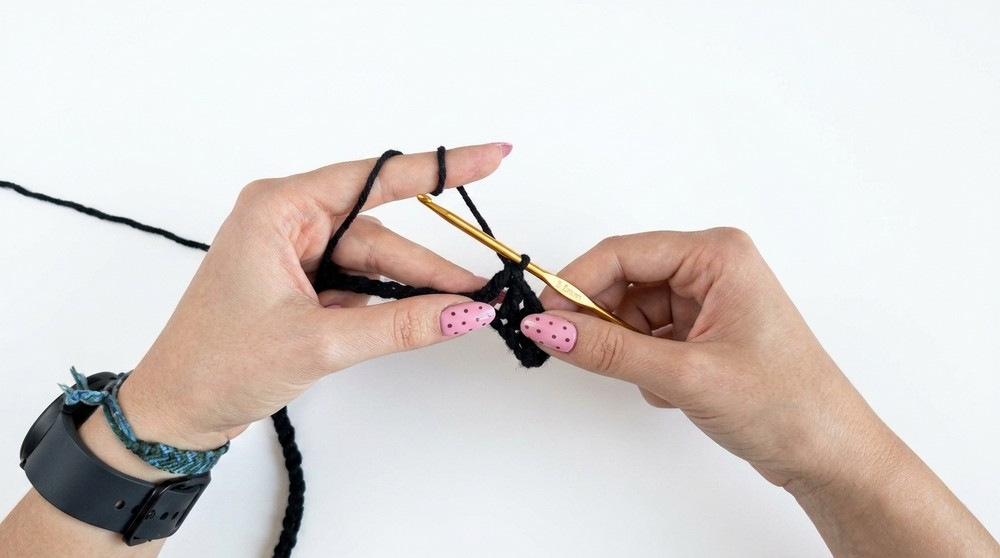
Step 1: Prepare the Foundation Chain
- Measure your hair tie.
- Example: If your hair tie is 13 cm, you’ll double that length to create the foundation chain. This ensures proper elasticity and coverage.
- Using the 3.5 mm crochet hook, create a foundation chain that is twice the length of your hair tie.
- For a 13 cm hair tie, chain approximately 24 cm long. Measure as you chain for accuracy.
- For a 13 cm hair tie, chain approximately 24 cm long. Measure as you chain for accuracy.
Step 2: Start the First Row (V stitches)
- Count the stitches: Add 2 to your chain for turning. (e.g., for a 24 cm chain, add 2 extra chains.)
- Work into the 4th chain from the hook.
- V Stitch: [(1 Double Crochet, Chain 1, 1 Double Crochet)] in the same chain space.
- Skip 1 chain, then repeat the V stitch into the next chain. Continue this pattern until the end of the row.
- For the last chain: Work 1 Double Crochet only. This will create a neat edge.
Step 3: Change Yarn Color
- At the end of the row, leave your last double crochet unfinished.
- Select your second color yarn, insert it through the two loops on the hook, and pull tight to secure.
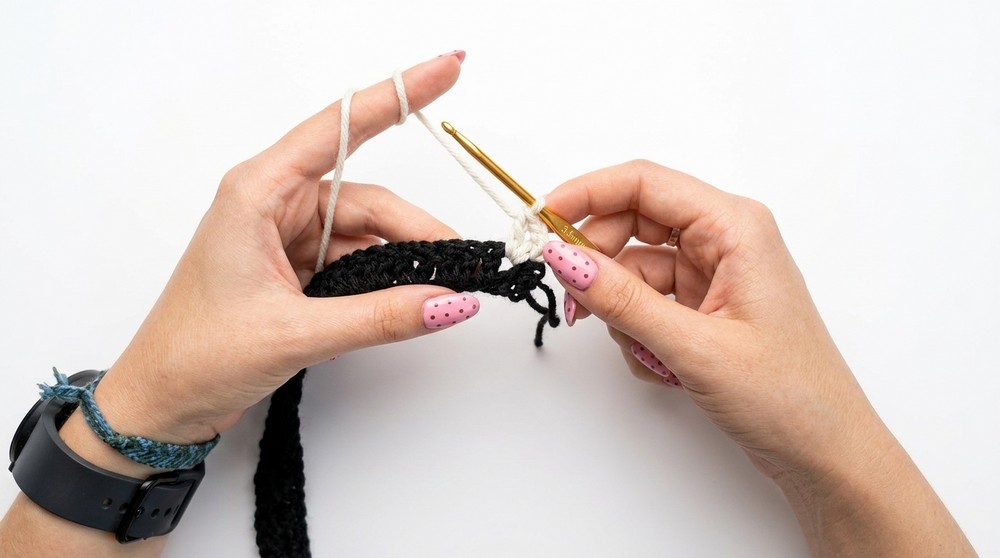
- Cut the initial yarn, leaving a small tail, and tie a double knot to secure the color change. Tuck loose ends as needed.
Step 4: Work the Second and Subsequent Rows
- Chain 2, then turn your work.
- Repeat the V stitch pattern, working [(1 Double Crochet, Chain 1, 1 Double Crochet)] into the Chain 1 spaces of the V stitch from the previous row.
- At the end of each row: Work 1 Double Crochet into the top of the turning chain.

- Repeat this process, alternating yarn colors after every row, until your scrunchie reaches the desired number of rows.
- Example: Complete 5 additional rows for a scrunchie with moderate thickness.
Step 5: Sewing the Scrunchie Edges
- Cut your yarn, leaving a long tail.
- Using a yarn needle or your crochet hook, sew the first row and the last row together, aligning your stitches carefully to maintain consistency.
- Double check to ensure the seam is smooth and secure.
Step 6: Attach the Hair Tie
- Insert your elastic hair tie into your crocheted “tube.”
- Adjust the hair tie to sit evenly along the scrunchie base.
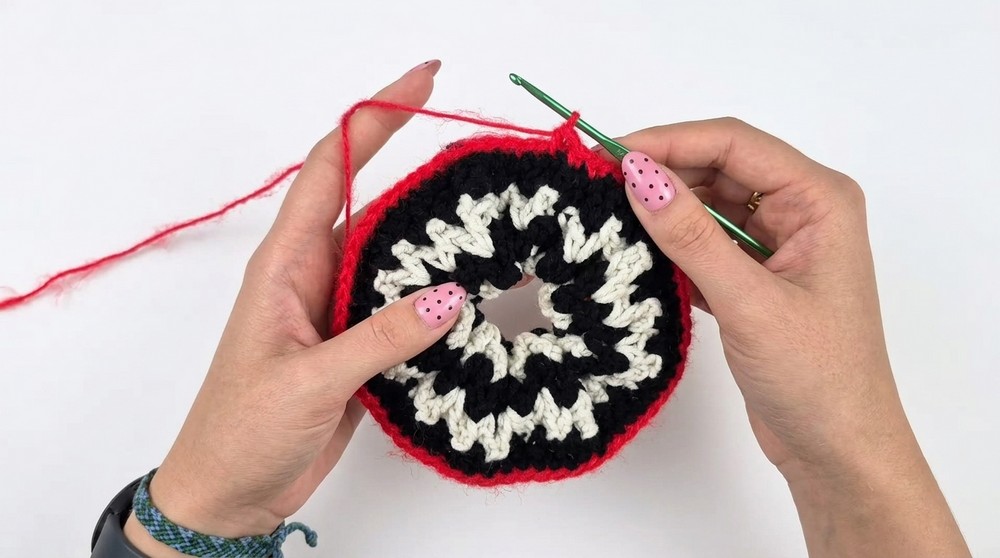
Step 7: Closing the Scrunchie
- Using a 2.5 mm hook and a thin mohair yarn, close the scrunchie by crocheting along the edges.
- Work Single Crochets into both edges to join them.
Optional Ruffled Edge
- If desired, add a ruffled edge for a decorative touch. Work 3 Double Crochets in every Single Crochet space along the edge.
- For extra fullness, add a second row of ruffles by repeating the same process.
Finishing Touches
- Secure and tuck in all loose yarn ends carefully inside the scrunchie.
- Trim any excess to maintain a neat final look.
- Adjust the scrunchie to ensure the ruffled edge is evenly distributed.
Tips for Success
- Tension: Maintain consistent tension throughout to ensure a smooth and seamless result.
- Customization: Experiment with different yarn colors or add beads for a more decorative scrunchie.
- Right Side/Wrong Side: Decide which side of the scrunchie you want to be visible before sewing.
Conclusion
This crochet scrunchie with mohair ruffles combines function with style, making it a versatile and fun accessory. Adjust colors, stitch density, or edge details to suit your taste while keeping the core structure intact. Follow these instructions step by step to achieve a polished, charming scrunchie that adds flair to everyday hairstyling.