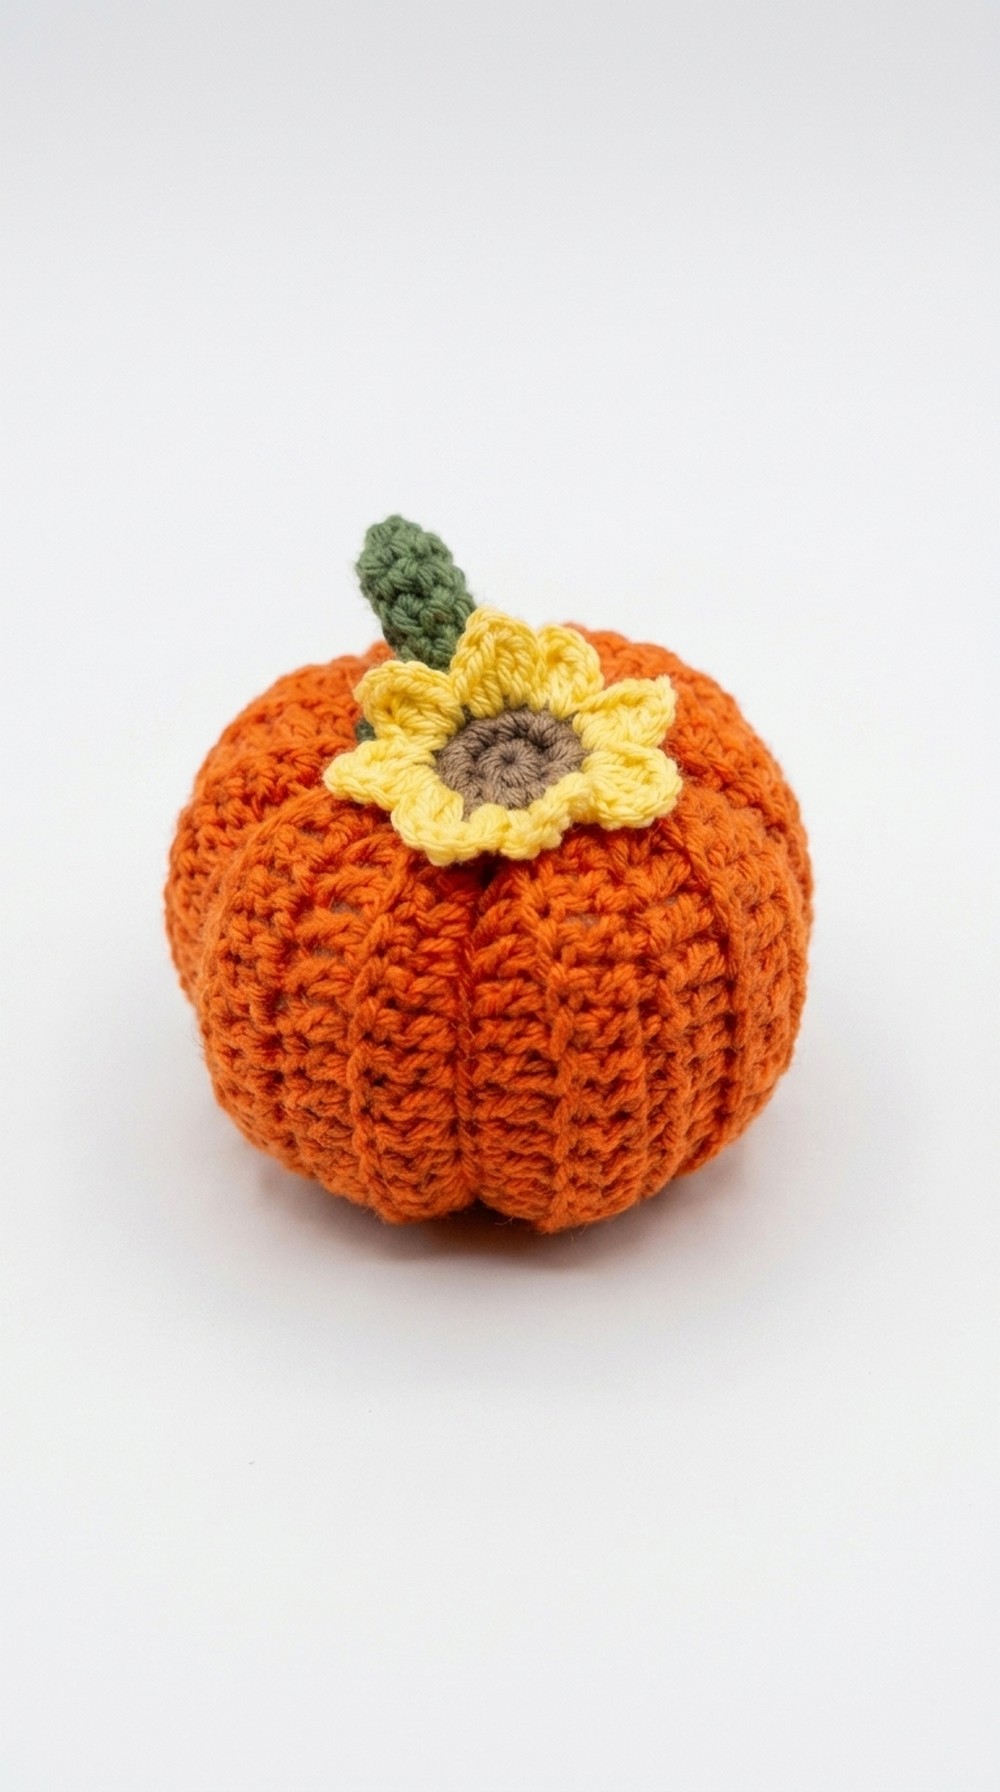
Make a vibrant Free Crochet Pumpkin with a Sunflower Pattern using this creative design, perfect for adding autumnal flair to your seasonal decorations.

Decorate Your Home with a Free Crochet Pumpkin with a Sunflower Pattern
Bring joy to your day by crocheting a soft, bouncy orange pumpkin with a sunny yellow flower blooming right on top. This delightful project feels like it’s straight out of a magical fairytale, offering a squishy treasure you can hold, hug, and admire anytime. With this Free Crochet Pumpkin with a Sunflower Pattern, you can create a whimsical masterpiece that’s simple yet so charming.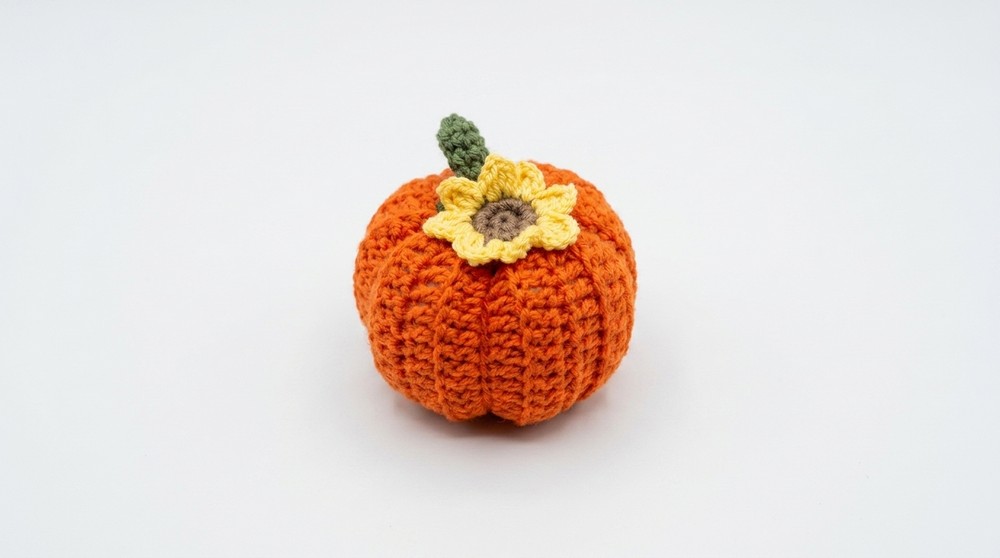 The pumpkin’s perfectly round shape and the sunflower’s bright, elegant petals make this piece stand. Its soft texture and vibrant colors will instantly brighten up any room, bringing warmth and happiness wherever you place it.
Whether it’s a sweet handmade gift for loved ones or a cute lucky charm on your desk, this unique project combines two beloved plants into one magical plush that will last forever. It’s a joyful way to display your creativity and crochet something truly special.
Cute Crochet Pumpkin with a Sunflower Pattern
Materials Needed
- Yarn:
- Cotton yarn in multiple colors: orange (for the pumpkin), green (for the stem), yellow (for the petals), and brown (for the sunflower’s center).
- Stuffing:
- Synthetic filling for the pumpkin (fiberfill or similar).
- Crochet Hook:
- 3 mm crochet hook.
- Additional Tools:
- Scissors.
- Yarn needle (for sewing and finishing).
- Stitch marker.
- Cold glue (optional, for attaching components).
Pumpkin Body Pattern
1. Foundation Chain:
- Begin with a slip knot and leave a medium length tail (~8 to 10 inches for sewing later).
- Chain 22 stitches.
2. First Row (Base Setup):
- Skip the last chain closest to the hook.
- Crochet the following sequence:
- 1 slip stitch into the next chain.
- 1 single crochet into the next stitch.
- 1 half double crochet (HDC).
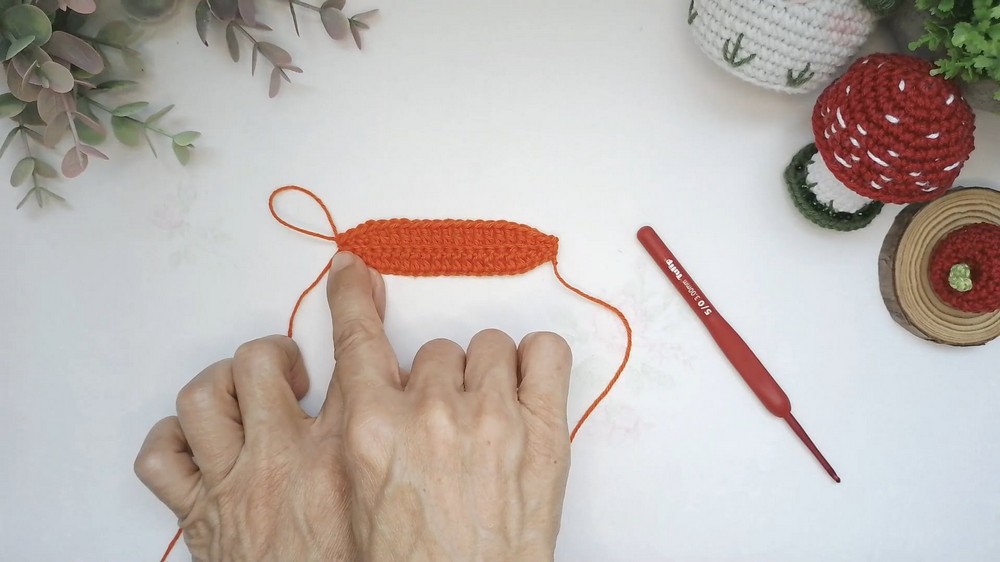
- Create 15 double crochets (DC) over the next 15 chains.
- Finish the last two stitches as follows:
- 1 half double crochet.
- 1 single crochet.
- End the row with a slip stitch in the final stitch.
3. Subsequent Rows:
- For all rows: Work into the back loops only to create texture. Repeat the same sequence:
- Start each row with a slip stitch, single crochet, half double crochet, then 15 double crochets, ending with a half double crochet, single crochet, and slip stitch.
- Start each row with a slip stitch, single crochet, half double crochet, then 15 double crochets, ending with a half double crochet, single crochet, and slip stitch.
- Work 20 rows in total, mimicking the pattern above.
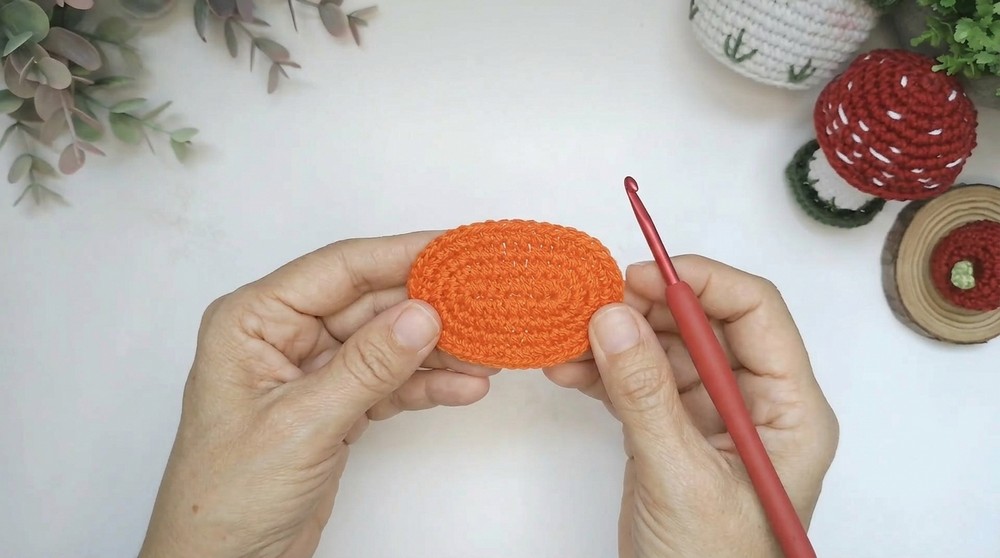
4. Closing the Pumpkin Body:
- Once the panel is complete, fold it horizontally, bringing both edges together.
- Using a yarn needle and the long tail you started with, sew the edges together with a whip stitch.
5. Shaping the Pumpkin:
- Thread a needle with the long yarn tail.
- Weave the needle around the top edge of the cylinder (the opening) and pull tight to gather it into a closed end. Fasten securely.
- Repeat the same procedure for the bottom edge of the cylinder but leave a small opening to stuff.
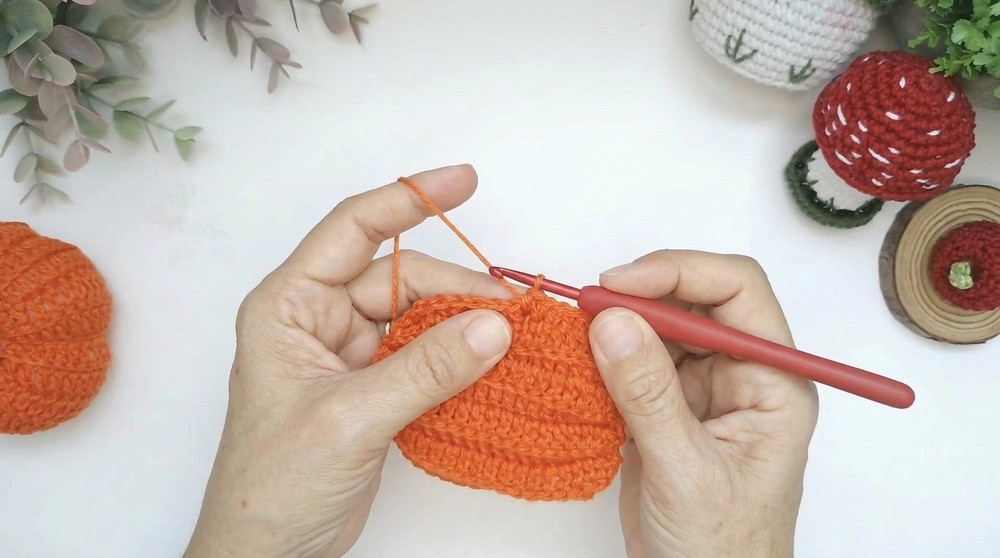
6. Stuffing the Pumpkin:
- Use synthetic fiberfill and stuff the pumpkin to your desired firmness. Ensure you do not overstuff to maintain a round shape.
7. Creating Pumpkin Sections:
- Use thread or yarn (preferably orange) and wrap it around the pumpkin vertically from top to bottom, creating lines or sections (like a pumpkin’s natural grooves). Pull lightly to give the pumpkin a realistic shape. Tie the yarn securely on the bottom to lock the shaping in place.
Pumpkin Stem Pattern
1. Starting the Stem:
- Start with a magic ring and crochet 5 single crochets (SC) into the ring. Pull the ring tight.
- Work in continuous rounds (spiral crochet) without a slip stitch at the end of each round.
2. Creating the Length:
- Crochet 5 SC per row for 8 rounds. Use a stitch marker to keep track of rounds.
- Invert the piece for easier stitching.
3. Widening the Stem Base:
- Round 9: Work 2 SC into each stitch (10 SC total).
- Round 10: Work 1 SC, then an increase (2 SC in one stitch) repeating across the round (15 SC total).
4. Adding Finishing Details to the Stem:
- Chain 2 stitches, skip one, and work slip stitches in the back loops of every stitch in the round to create a decorative edge.
- Fasten off and leave a short tail, as you will attach the stem using glue.
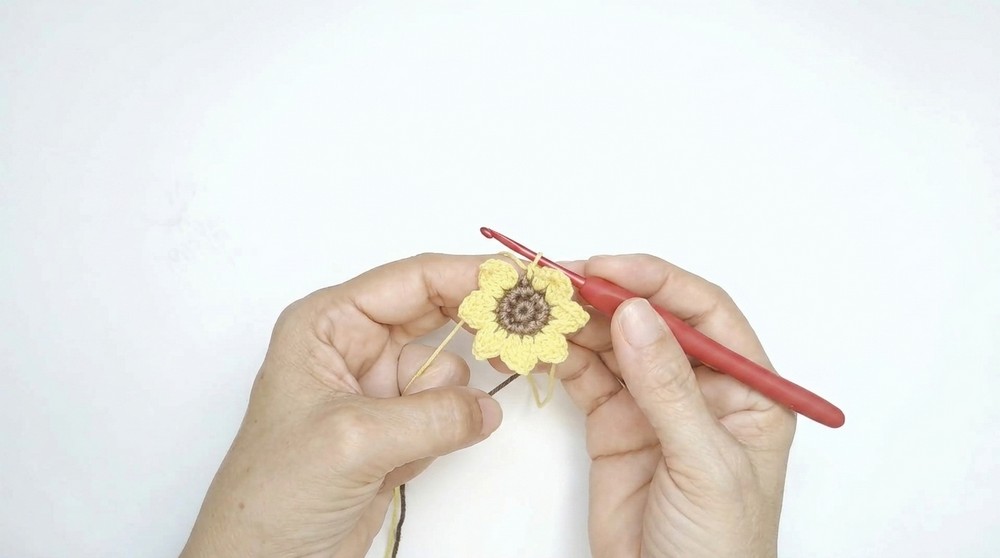
Sunflower Decoration
Sunflower Center:
- Start with a magic ring using brown yarn.
- Crochet 8 SC into the magic ring and pull it tightly to close.
- Work 1 increase (2 SC) in every stitch of the next round to create 16 SC total.
- Fasten off the brown yarn.
Sunflower Petals:
- Using yellow yarn, attach it to any stitch of the sunflower center.
- Crochet the following sequence for each petal:
- Ch 1, make a half double crochet in the same stitch.
- In the same stitch, make 1 double crochet.
- Ch 2 and move to the next stitch. Crochet 1 double crochet and 1 half double crochet.
- Chain 1 and slip stitch into the next stitch.
- Repeat the sequence in every stitch to create 8 petals.
- Fasten off, leaving a small tail for finishing.
Assembling the Pumpkin
- Attach the Stem:
- Apply a small amount of cold glue to the base of the stem.
- Carefully place it on top of the pumpkin, ensuring it is centered. Press down gently and let it dry completely.
- Alternatively, use a yarn needle to sew the stem onto the pumpkin for extra security.
- Attach the Sunflower:
- Using glue, add a small drop to the back of the sunflower and fix it next to the stem on the pumpkin. Press down gently until secure.
- If preferred, sew the sunflower in place using the tail of yellow or brown yarn.
Finishing
- Ensure all loose threads are tucked into the pumpkin using a yarn needle.
- Trim any excess ends.
- Allow glued elements to dry completely before handling.
Final Words and Tips
- Care for Your Creation:
- Keep your crochet pumpkin away from moisture to prevent yarn distortion.
- If your pumpkin gathers dust, gently pat it with a clean, dry cloth.
- Customizations:
- Experiment with different yarn colors for a unique and personalized look. For example, make pastel pumpkins for spring or bold colors for Halloween.
- Add multiple sunflowers or leaves for extra character.
- Suggestions:
- Practice creating the grooves with a sample pumpkin first. The more defined the grooves, the more realistic your pumpkin will look.
- Use higher quality yarn to achieve even stitches and vibrant colors.
This charming pumpkin and sunflower decoration is perfect for fall décor or as a gift. Enjoy creating your cozy and unique crochet masterpiece.