Surprise your family with a stunning bunch of yarn flowers by following this Free Crochet Flower Bouquet Pattern that show you how to finish a very pretty and unique handmade treasure.
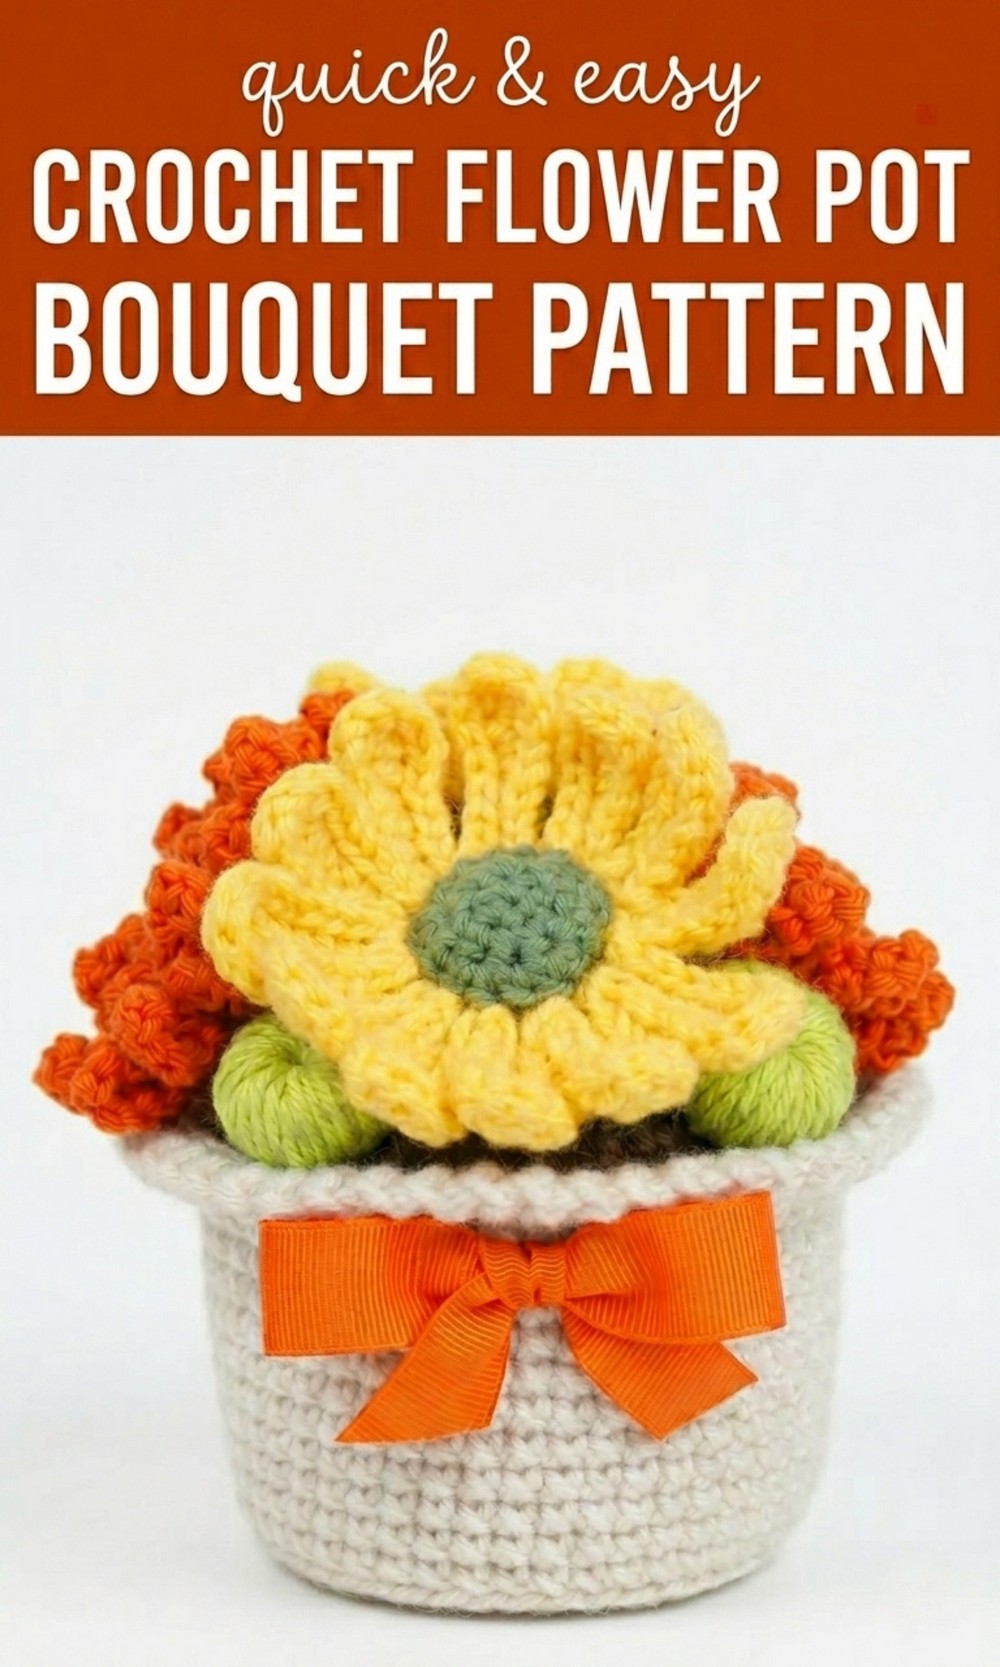
Bring Color into Your Home with a Free Crochet Flower Bouquet Pattern
A crochet flower bouquet is a creative and beautiful decoration that brings everlasting charm to any space. This handmade flower arrangement stays colorful and fresh forever, making it a delightful choice for adding beauty to your home or gifting someone special. With a Free Crochet Flower Bouquet Pattern, crocheting your own bouquet is simple and fun, even for beginners.
The design features vibrant colors like red, white, orange and green, creating an eye catching and unique look. It is lightweight, durable, and perfect for use as a centerpiece, shelf décor, or a long lasting keepsake. What makes it truly special is its timeless appeal and customization—you can choose colors and shapes to match your personal style.  Using just some yarn, a crochet hook, and basic materials, you can transform this pattern into a stunning piece that spreads joy and creativity.
Crochet Flower Bouquet Pattern
Materials Needed:
- Yarn:
- Acrylic yarn in multiple colors (earthy tones for the pot and flowers). Avoid mercerized cotton as it lacks firmness for flower petals.
- Crochet Hook:
- Size 2.5 mm crochet hook.
- Tools:
- Yarn needle (lanera).
- Scissors.
- Stitch markers.
- Filling for the Pot:
- Synthetic cotton stuffing.
- A small plastic lid or equivalent form for stability.
- Optional: Rice or small stones for added weight (inside a plastic bag).
- Other Materials:
- Wooden sticks or craft wires for stems.
- Cold silicone adhesive/glue.
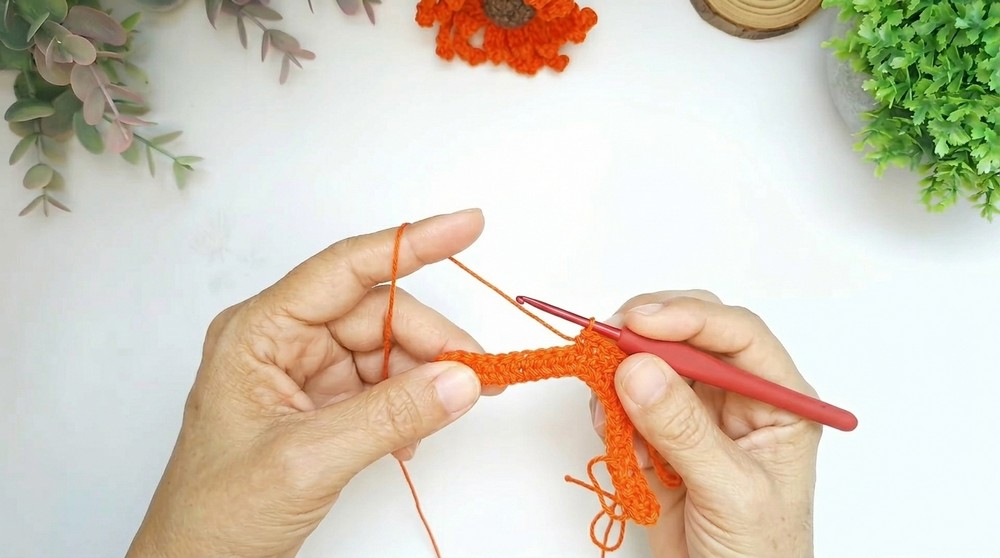
Step by Step Instructions:
Pot Base:
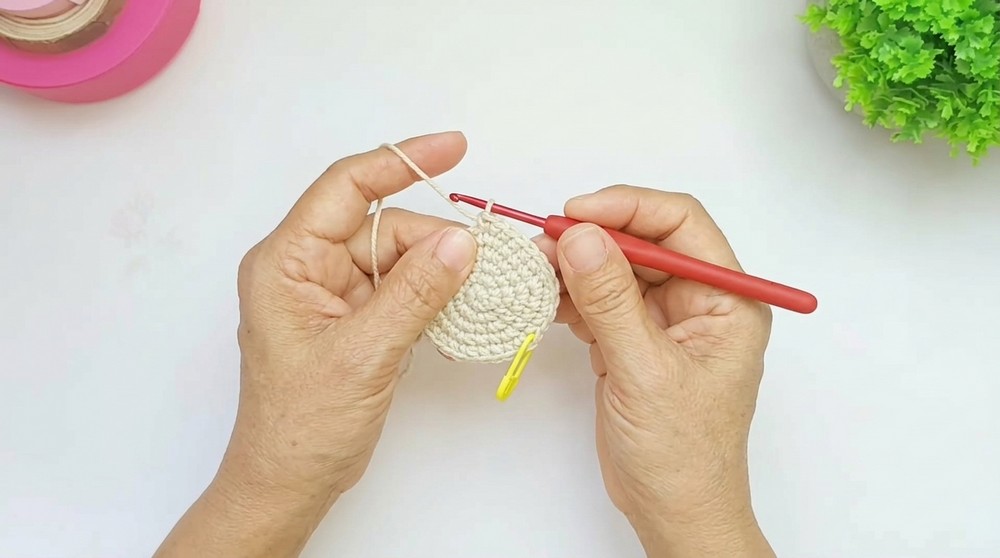
- Create the base:
- Start with a magic ring.
- Pull through and secure with one chain stitch.
- Crochet 6 single crochet (SC) into the ring. Tighten the ring by pulling the tail.
- Increase rounds:
- Round 2: Crochet 2 SC into each stitch (6 increases). Total: 12 stitches. Mark the first stitch.
- Round 3: Crochet 1 SC, then an increase (2 SC in the next stitch). Repeat for the round. Total: 18 stitches.
- Round 4: Crochet 2 SC, then an increase. Repeat the sequence. Total: 24 stitches.
- Round 5: Crochet 3 SC, then an increase. Repeat. Total: 30 stitches.
- Round 6: Crochet 4 SC, then an increase. Repeat. Total: 36 stitches.
- Round 7: Crochet 5 SC, then an increase. Repeat. Total: 42 stitches.
- Round 8: Crochet 6 SC, then an increase. Repeat. Total: 48 stitches.
- Round 9: Crochet 7 SC, then an increase. Repeat. Total: 54 stitches.
- Round 2: Crochet 2 SC into each stitch (6 increases). Total: 12 stitches. Mark the first stitch.
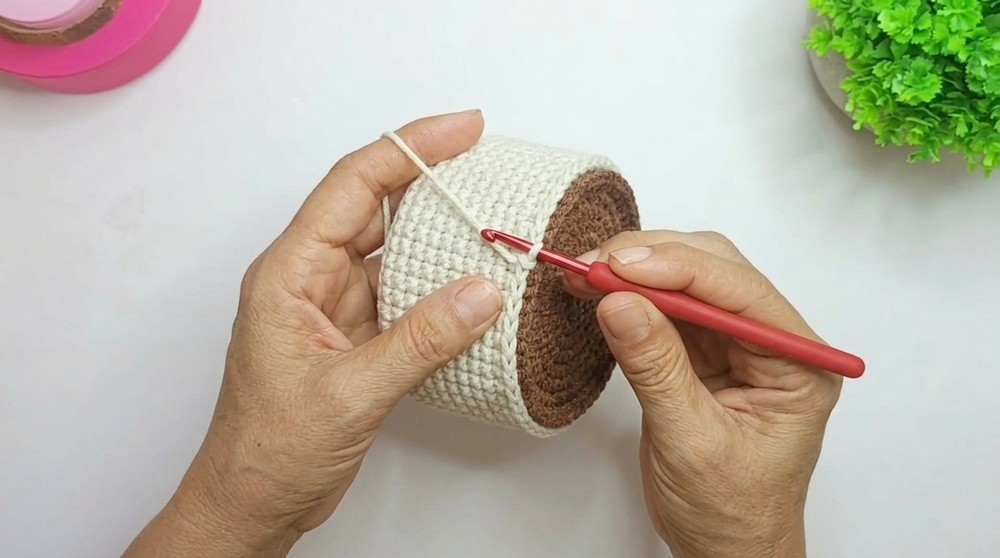
- Pot height:
- Round 10: Work 54 SC into back loops only (called BLO). This will create a defined edge for the pot’s shape.
- Next 9 rounds: Crochet 54 SC regularly in each stitch to build the pot’s height. Total height should be 10 rounds.
- Optional stability enhancements:
- Place a plastic lid or cut out cardboard at the base for stability.
- Add weight using rice or small pebbles sealed within a plastic bag inside the pot.
- Stuff and secure:
- Fill the pot with synthetic cotton, ensuring firmness. Evenly distribute the stuffing to maintain symmetry.
“Earth” for the Pot:
- Repeat the base:
Follow the same instructions for the pot base using brown yarn. Ensure the final diameter matches the pot opening (54 stitches). - Finishing:
- Join the earth with the pot using single crochet stitches around the edges. Work 1 SC for every pair of stitches from the earth and pot, tightly securing the two layers together.
Flowers:
Crochet Daisy/Margarita:
- Base:
- Start with 27 chains.
- Work the stem:
- Skip the first 3 chains and crochet 24 double crochet (DC), one per stitch.
- First row petals:
- Create 12 petals by repeating:
- Chain 10, skip 3 chains, and crochet: 2 DC, 2 half double crochet (HDC), 2 single crochet (SC), and 1 slip stitch (SLST) in the next chain.
- To move to the next petal: SLST into the back loop of the next stitch. Repeat.
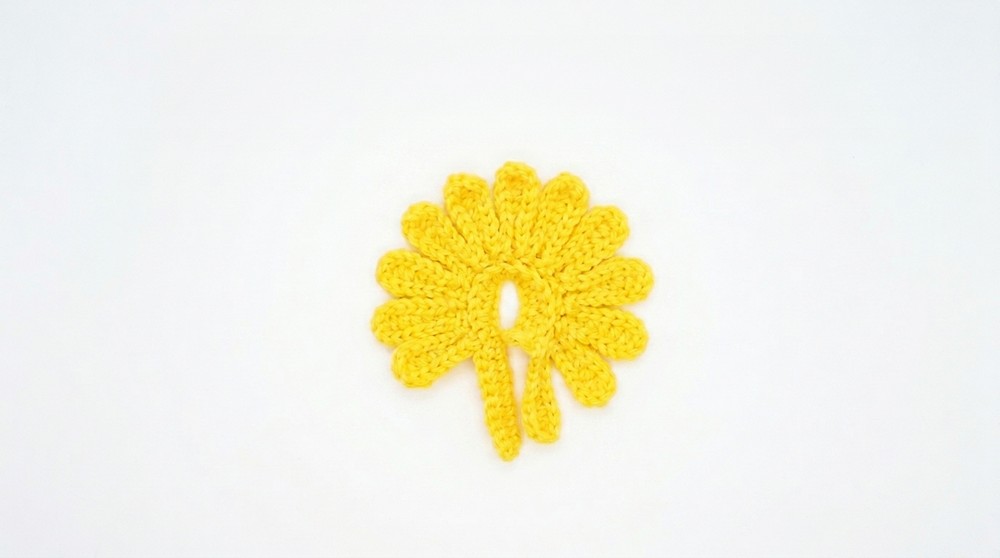
- Create 12 petals by repeating:
- Final row petals:
- Work pointed edges on all petals using SLST along the edge. This helps the petals curl naturally.
Crochet Larger Flower (Dynamic Appearance):
- Base:
- Begin with 27 chains.
- Stem:
- Skip 3 chains and crochet 24 DC as done for the daisy.
- Petal rows:
- Row 1: 12 short petals (each with 6 chains and SC worked back along 5 stitches).
- Row 2: 12 larger petals (each with 8 chains and SC worked back along 7 stitches).
- Attach each petal with SLST in the back loop of the next stitch.
Bud/Caps:
- Wind yarn tightly around your finger, creating 15 loops.
- Crochet SC stitches around the loops until there’s no gap visible. Seal by sewing the top tightly.
Assembling the Flowers:
- Stem assembly:
- Use wooden sticks or craft wire as stems. Wrap green yarn around them for a natural finish. Use glue to hold yarn in place.
- Attach flowers:
- Glue flower bases onto stems. Ensure petals nest harmoniously around the stick.
- Center the flowers:
- Crochet small circular pieces as flower centers (magic ring, 6 SC, increase to 12 SC). Attach them in the middle of each flower using glue.
- Cap flower stems:
- Crochet small green caps for the base of each flower to complete the realistic look. Attach with glue.
Final Touches:
Decorate the pot with additional items such as a ribbon or bow at the center. Secure the stems into the pot firmly. Adjust petals and stems for positioning and symmetry.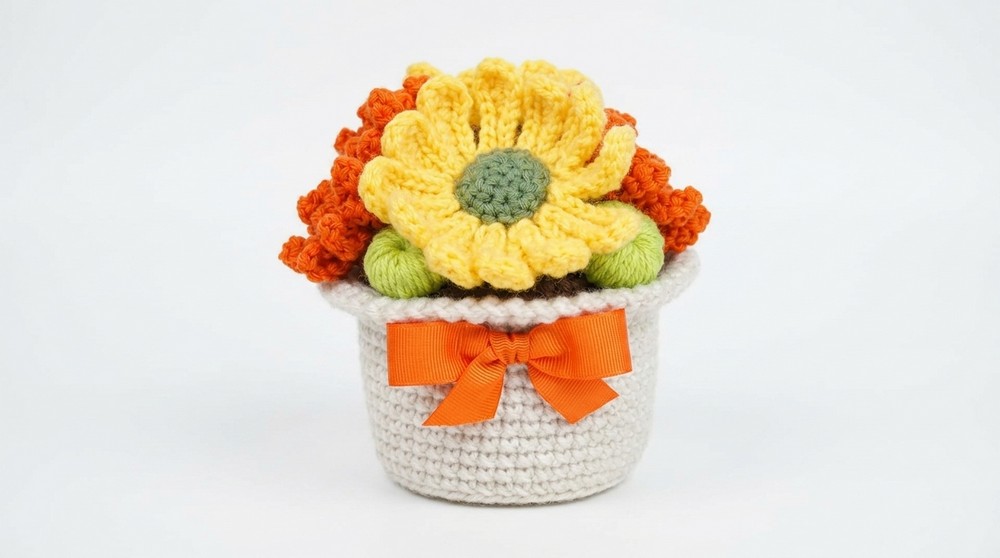
Finishing:
- Secure loose ends: Make sure all threads are hidden inside the pieces. Use a needle to weave in or trim excessive yarn.
- Inspect: Ensure stability in flowers and pot. Adjust any uneven petals or filling inside the pot.
Tips to Maintain Your Crochet Pot:
- Cleaning: Since acrylic yarn is washable, gently hand wash if needed. Avoid excessive moisture on the weighted components inside the pot.
- Storage: Keep the pot upright to prevent flowers from bending or warping.
- Reuse: Consider replacing flower stems or reusing the pot for seasonal designs.
Final Words:
Congratulations, You’ve created a stunning autumn themed flower pot that can serve as décor for your home or a thoughtful handmade gift. By carefully following these instructions, you’re sure to produce a piece that showcases your crochet skills and creativity.