
Add a cozy handmade touch to your keys or gifts this season with a charming Crochet Pumpkin Keychain using this easy and fun step-by-step tutorial.
Have you ever seen a tiny pumpkin that fits right on your keys? The Crochet Pumpkin Keychain is a small, soft, and bright orange pumpkin that can hang on your bag or keys. Márcia Souza Crochê made this cute little pumpkin to bring some fun and color to everyday things.
Cute Crochet Pumpkin Keychain Free Pattern with A Spooky Touch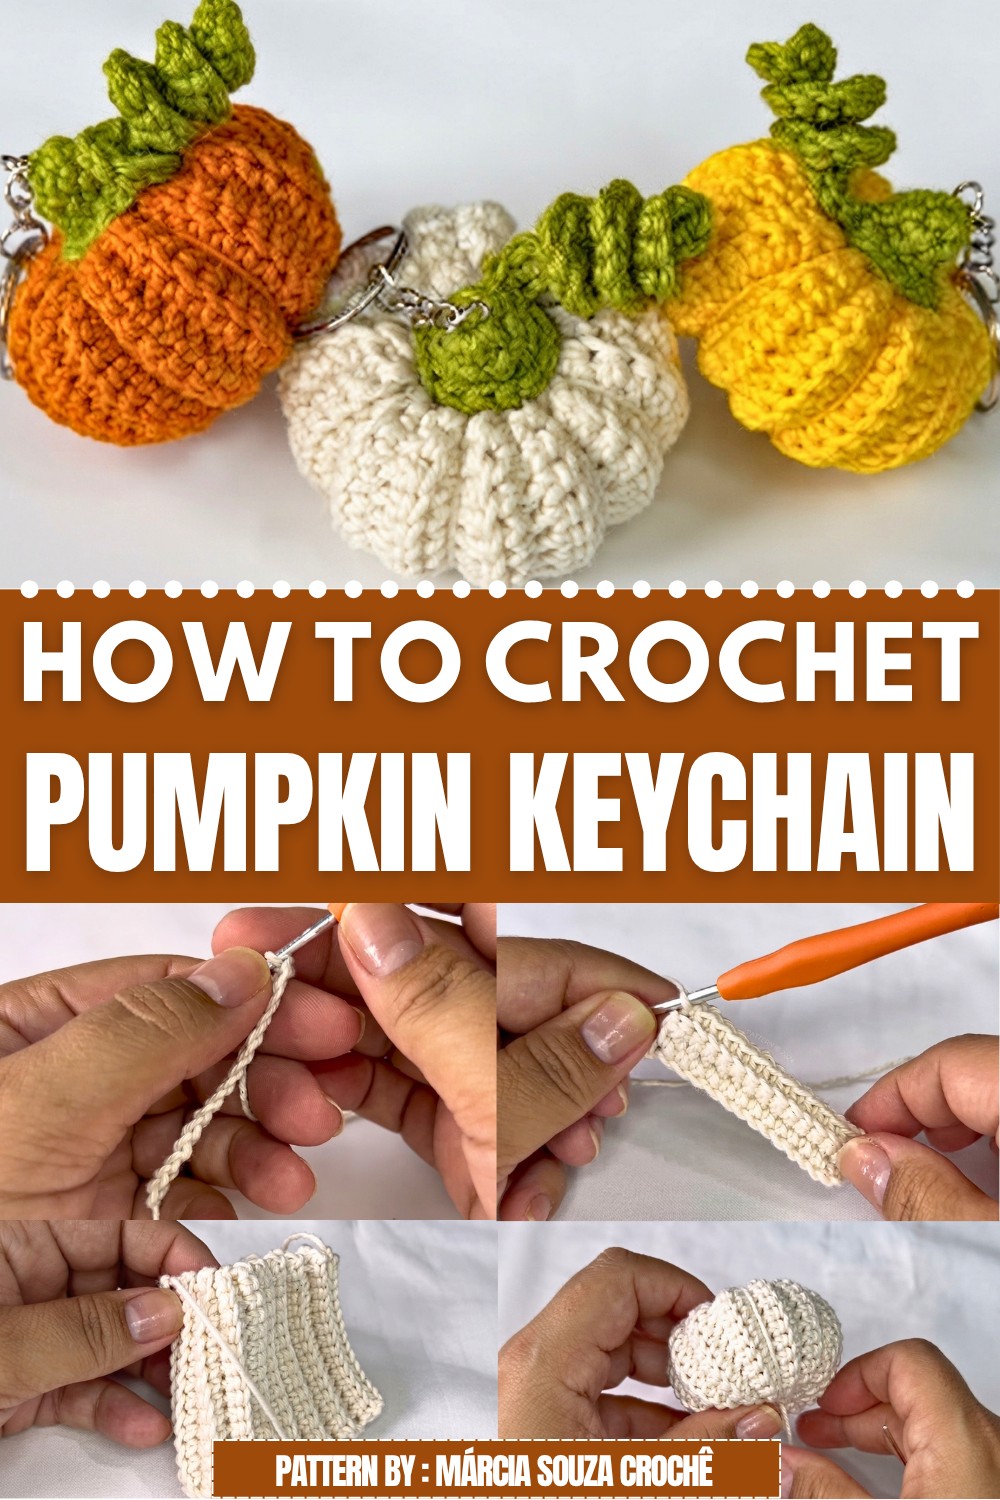

This little pumpkin looks very sweet and cozy. You can attach it to your backpack or use it as a special gift for someone. It’s small but very noticeable, adding a warm touch to your stuff. The Crochet Pumpkin Keychain shows the happy and calm feeling of fall in a simple way.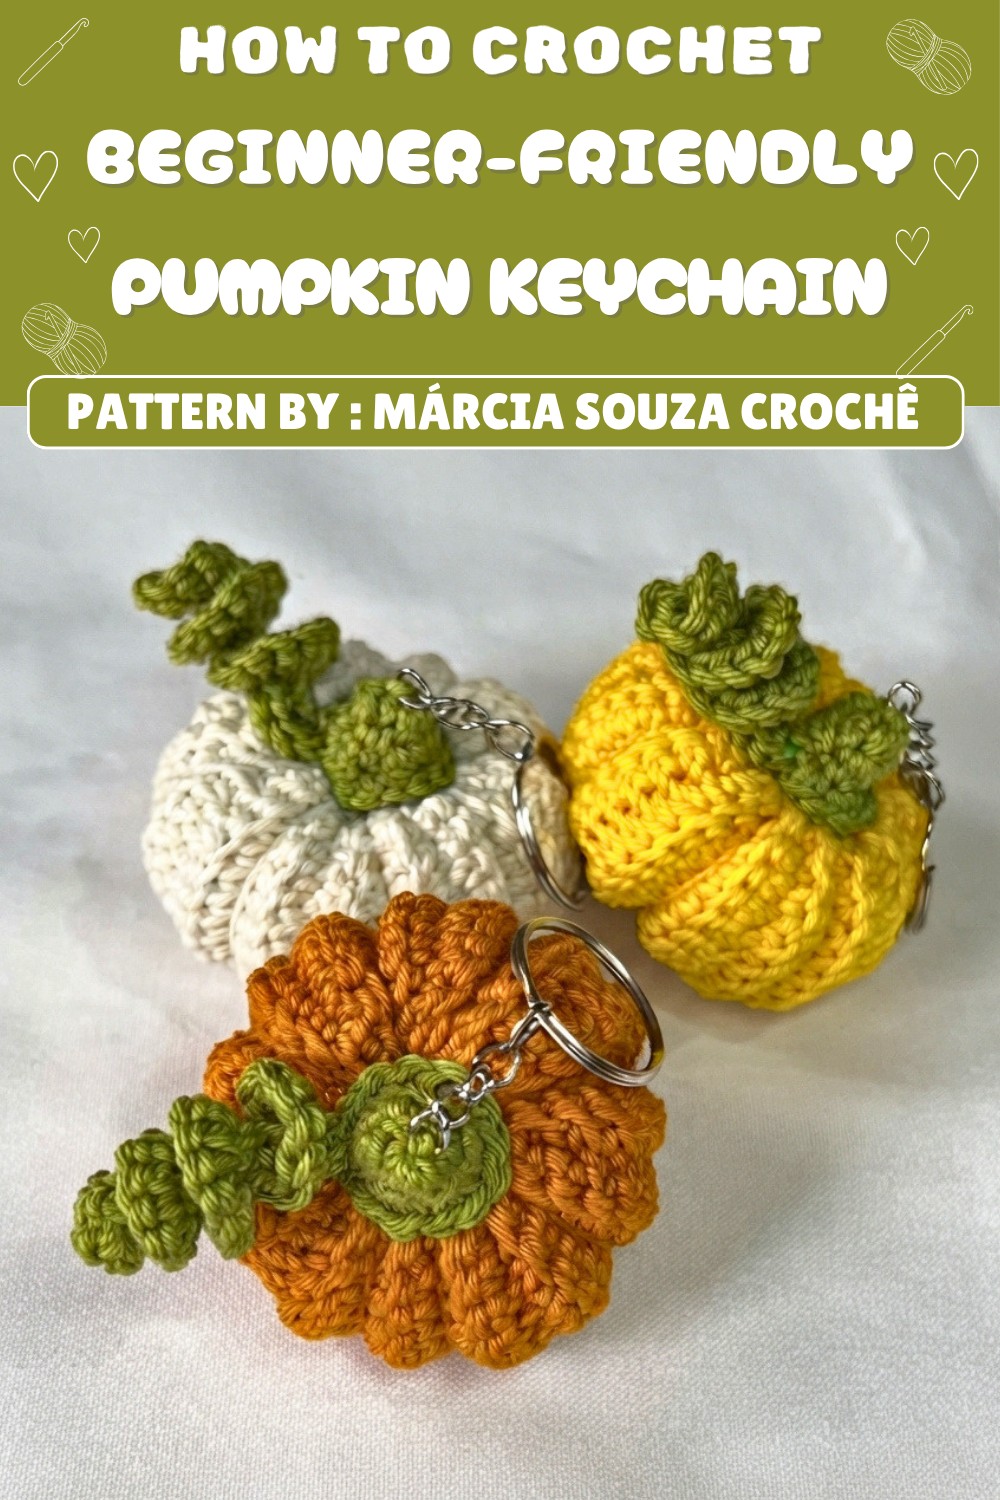
This project is easy to follow for all skill levels. Even kids can enjoy doing it because the steps are simple and clear. It is a fun way to have a small pumpkin decoration that stays with you all year.
To have this tiny pumpkin keychain, check out the free pattern made by Márcia Souza Crochê. This easy and lovely Crochet Pumpkin Keychain will brighten your day and your keys with a little touch of fall.
Pumpkin Keychain Crochet Pattern
A pumpkin keychain embodies charm for autumn, back-to-school, or Halloween, and makes a quick, cost-effective project using minimal yarn. This version uses simple stitches to create a three-dimensional pumpkin that is sturdy, soft, and perfectly sized for key rings, backpacks, or holiday gifts. The project features crisp ridges, a rounded shape, and whimsical curly accents. You’ll learn how to achieve texture with back loop stitches, seamless finishes, decorative details, and solid assembly—all in one bite-sized project.
Pattern Basic Points
Key Features
- Worked in rows, then seamed into a tube: Uses back loop only single crochet for a defined ribbing effect.
- Shape gathered at both ends: Results in a rounded, pumpkin shape ideal for stuffing.
- Includes an amigurumi-style stem and a curly tendril: These complete the pumpkin’s whimsical look.
- Keychain-ready handle: Provides a sturdy loop for attaching hardware.
- Decorative on both sides: With optional additional leaves or accent pieces.
Special Notes
- Count your stitches carefully at the end of each row to ensure symmetry.
- Consistency in tension creates even ridges, which are essential for the pumpkin look.
- Use a tapestry needle to create both tight gathers and ridges, and to secure pieces without gaps.
- Do not overfill your pumpkin; a small amount of stuffing maintains the intended appearance and avoids stretching the stitches.
- Use glue or sew on the handle and accents for secure, lasting construction.
Skill Level
Beginner
All required stitches are basic (chains, single crochet, slip stitch), although some sewing and gathering are required for final assembly.
Materials
- Amigurumi or worsted-weight yarn in orange, green, and additional colors as desired
- 3.0 mm crochet hook
- Tapestry needle
- Small scissors
- Polyester stuffing (fiberfill, fabric scraps, or yarn leftovers)
- Small keychain hardware (split ring or lobster clasp)
- Ribbon (optional, for added decoration)
- Fabric glue (recommended for a tidy finish)
- Metric tape or ruler
- Stitch marker (optional for curly stem/leaf)
Measurements / Sizing
- Pumpkin width (after stuffed): 6.5 cm
- Pumpkin height (including stem and handle): 4.5 cm
- Flat rectangle before sewing: 6 cm by 13 cm
- Weight: 16–18 g (varies with how much stuffing is used)
Gauge
- Gauge is not critical for this project, but the sample swatch (15 chs and 30 rows) yields a 6 x 13 cm rectangle using a 3.0 mm hook and amigurumi yarn.
Stitch Abbreviations
- ch = chain
- sc = single crochet
- sl st = slip stitch
- st(s) = stitch(es)
- BLO = back loop only
Special Stitches
- Back Loop Only (BLO) Single Crochet: Insert hook in the back loop of the stitch only, then complete as for normal sc.
- Magic Ring: Form a loop with yarn, insert hook, pull up a loop, ch 1, and work specified stitches into the ring, then tighten.
Detailed Pattern Instructions
Pumpkin Body
Base Rectangle
- Using pumpkin color, make a slip knot and ch 15.
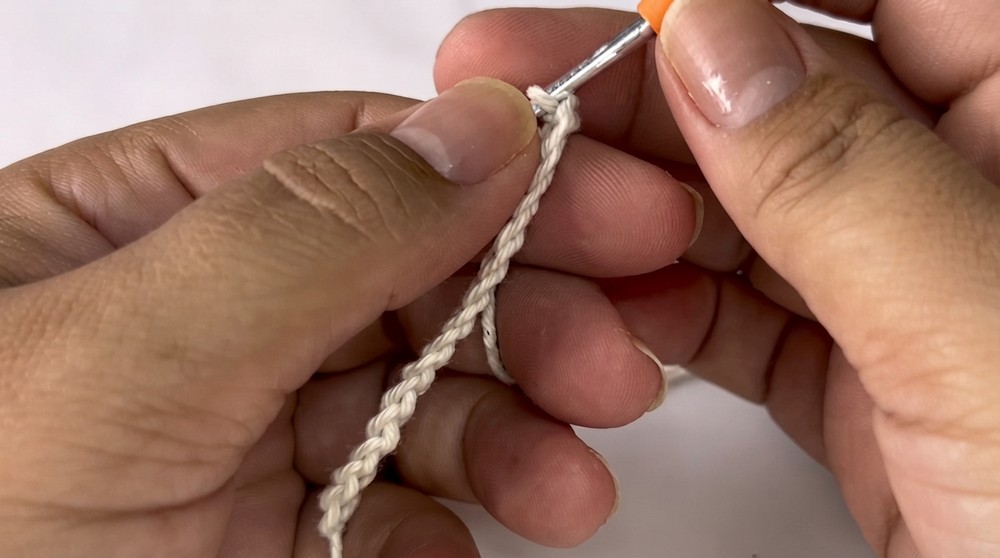
- Row 1: Starting in 2nd ch from hook, sc in each ch across (14 sc).
- Row 2: Ch 1, turn. Sc BLO in each st across (14 sc).
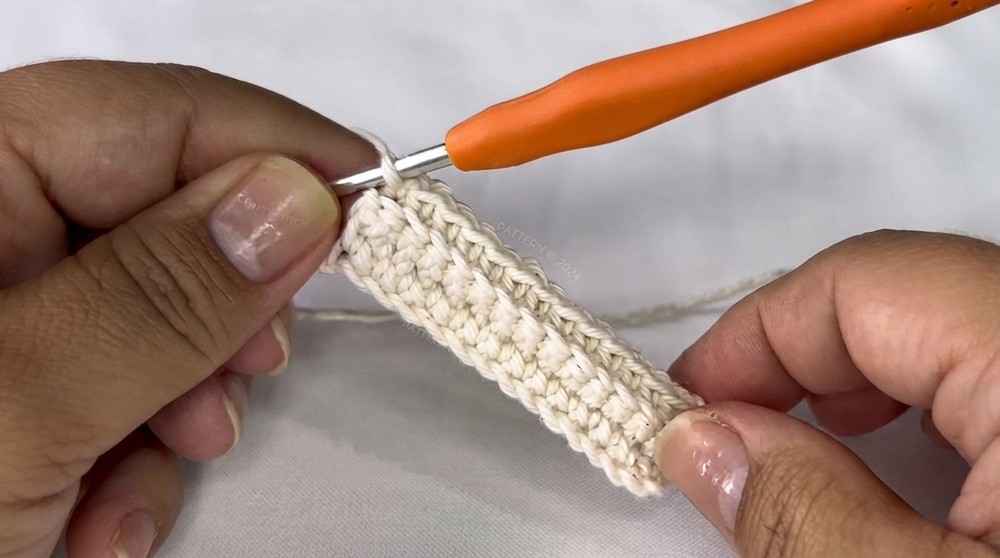
- Repeat Row 2 for a total of 30 rows (or until rectangle measures about 13 cm long and 6 cm wide).
Seaming the Tube
- After last row, ch 1, fold the rectangle so short sides meet.
- Working through the BLO of both the last and first rows, sl st across (14 sl st) to close the tube.
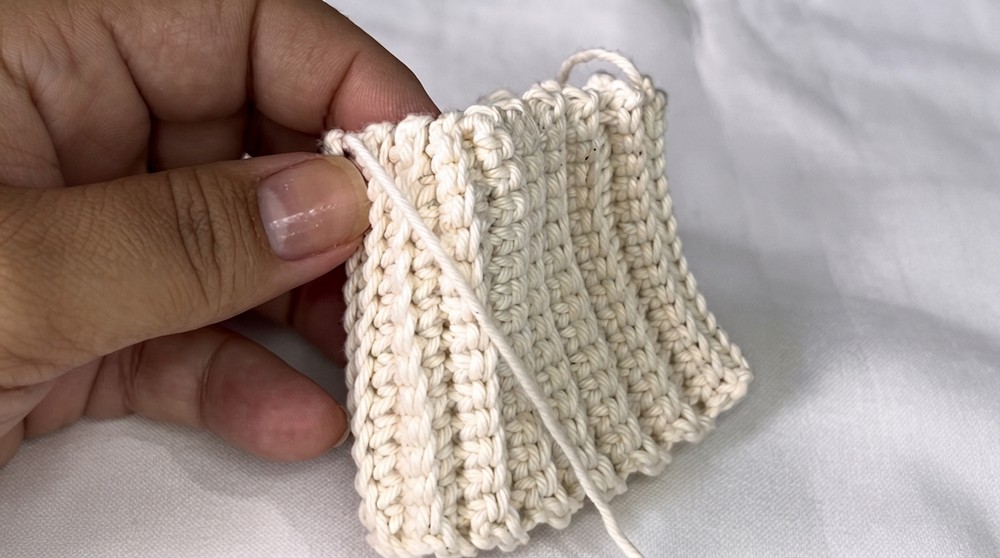
- Leave a long tail for gathering and seaming.
Gathering One End
- Thread tapestry needle with end tail.
- Weave needle through the top of each ridge (“little hills”) around the edge.
- Draw yarn tightly to gather; pass needle back and forth until hole is securely closed.
- Tie a knot to secure. Do not trim yarn; leave tail inside.
Stuffing & Gathering Other End
- Turn tube right side out if needed.
- Stuff pumpkin lightly and evenly.
- With a new length of yarn, repeat gathering process on the open end.
- Pull tight, then pass needle across several times; knot and weave in ends.
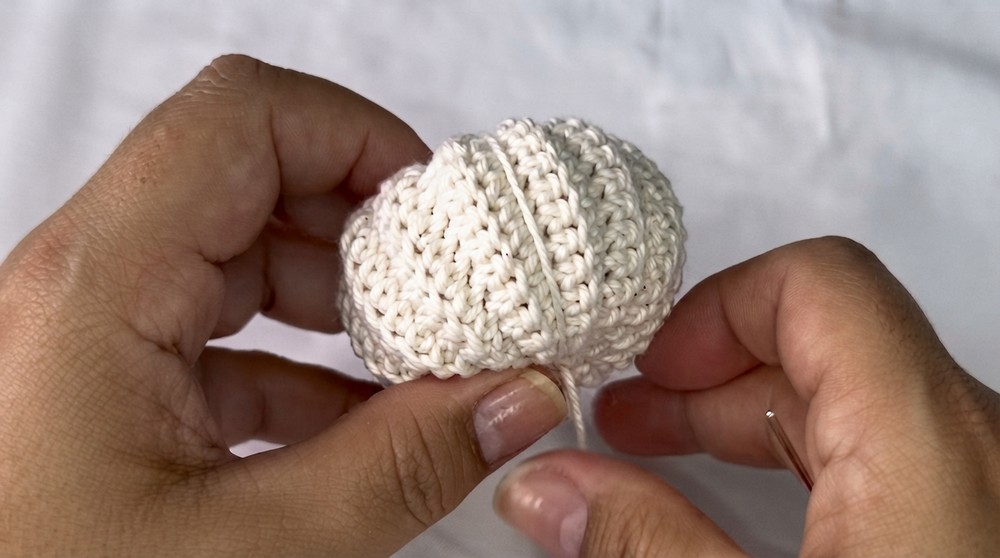
- At this stage, the pumpkin may look bumpy on top/bottom, but this will be concealed by the stem or leaf.
Forming the Pumpkin Segments
- Using one of the long yarn tails, pass needle from bottom through the center to top, then back down at a segment location.
- Pull slightly to form a ridge; repeat this process evenly spaced around the pumpkin (about 5-8 ridges, as desired).
- Knot ends securely and weave in.
Stem and Leaf Accents
For the Flat Leaf (for one end):
- With green yarn, work a magic ring.
- Ch 1. 6 sc in ring. Pull tight to close.
- Sl st in first sc to close round.
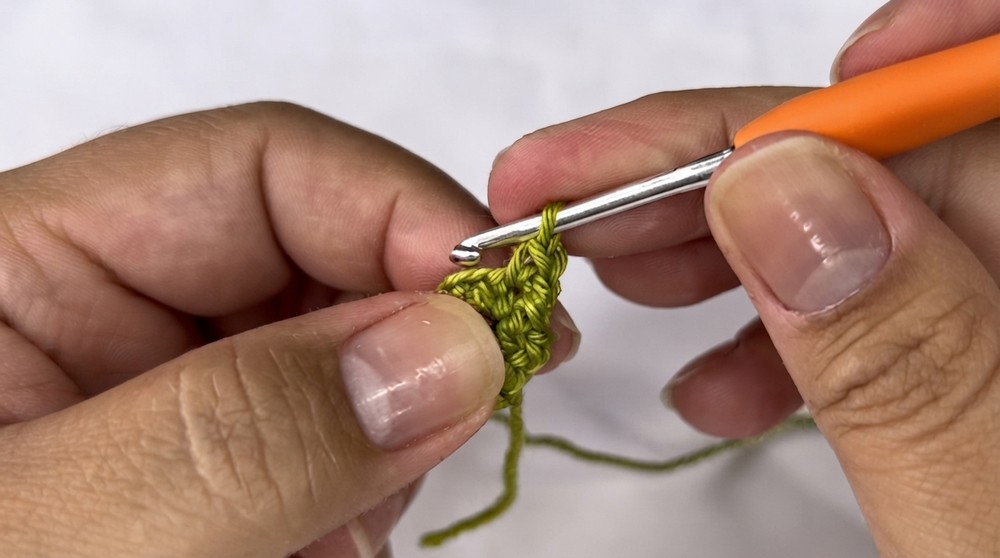
- Ch 1. 2 sc in each st (12 sc). Sl st to first sc.
- Fasten off, leaving a tail for sewing or gluing to the pumpkin. Hide starting tail inside.
For the Pumpkin Stem + Curly Tendril:
- With green yarn, create a magic ring.
- Ch 1, 6 sc in ring. Tighten to close.
- Sl st to first sc.
- Ch 1, work 6 sc in each st around (no increase). (6 sc)
- Repeat for three rounds total (stem can be lengthened with additional rounds).
- On final round, increase in each st by working 2 sc in each (12 sc) if a wider base is preferred.
- Sl st to first sc. Fasten off, leaving a long tail.
For the Curly Tendril:
- With green yarn, ch 15.
- Beginning in second ch from hook, 3 sc in each ch all the way back (creates a tight twist).
- Fasten off, leaving a long tail to sew to stem or pumpkin.
Assembly & Finished Size
- Attach stem and/or leaf using fabric glue or by sewing.
- Optionally, include ribbon at the stem or base.
- Attach curly tendril to the stem or pumpkin (sew or glue).
- Use long tail of curly tendril to secure the keychain hardware (through final stitches for secure hold).
- Hide any remaining ends by threading into the body of the pumpkin.
- The finished pumpkin is dense, springy, and measures approximately 6.5 cm wide by 4.5 cm tall (including stem).
Conclusion
This pumpkin keychain project embraces clean construction, playful details, and a classic ribbed texture achieved with simple back loop stitches. The pattern is easily adapted for different sizes and colors, and can include extra embellishments like leaves, ribbons, and curly tendrils. Versatile and quick to complete, this pattern is suitable for gifts, festive market sales, or personal accessories. Thoughtfully placed seams and solid attachments ensure the keychain stands up to daily use while providing a cheerful, handmade touch to any set of keys, bag, or holiday basket. Each crocheting step, from seaming to accenting, fosters foundational amigurumi and finishing skills, while producing a delightful finished accessory that charms across the seasons.