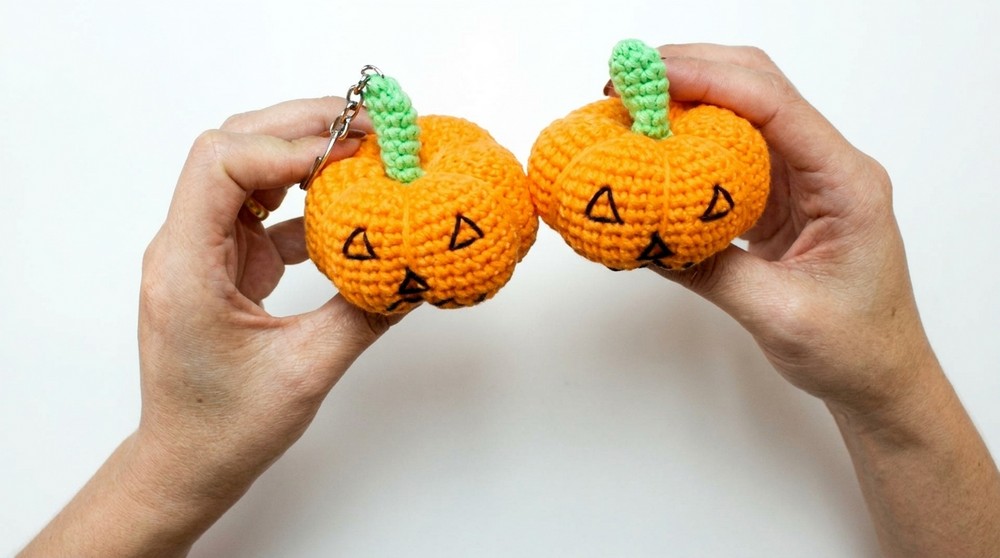
Hook a cute autumn treasure using this easy free crochet pumpkin keychain pattern to make a soft and squishy accessory that looks great on your bag.
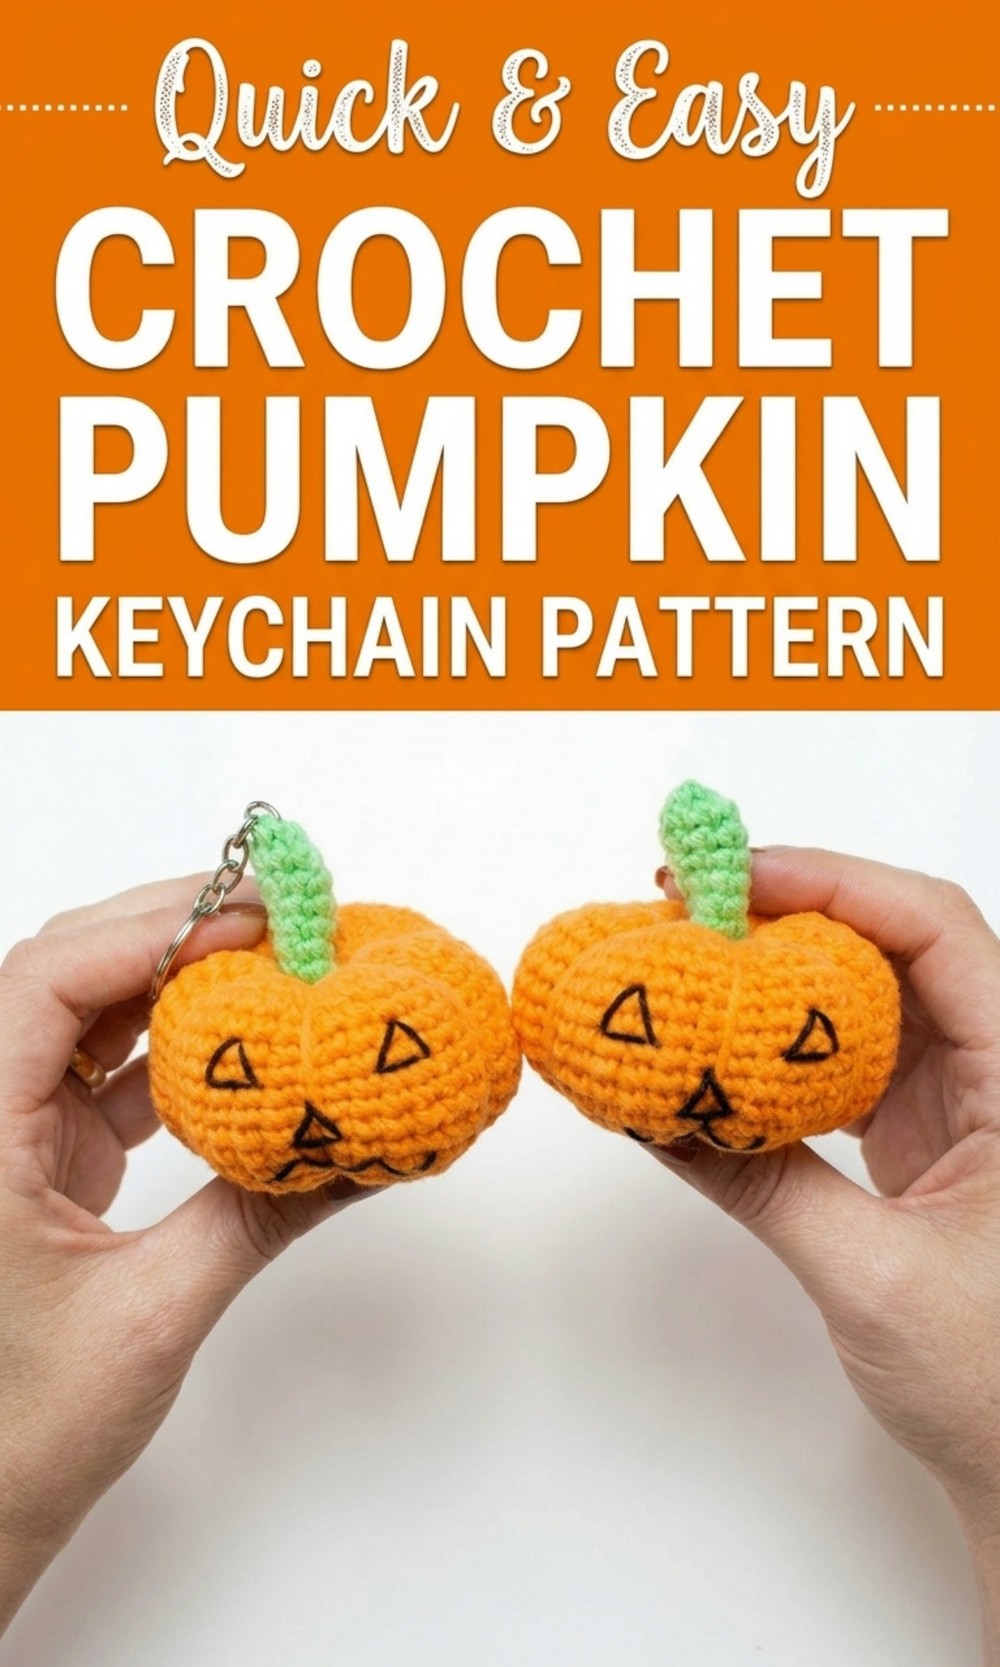
Quick and Fun Free Crochet Pumpkin Keychain for Spooky Season
Turn your yarn and hook into a cozy fall treasure with this Free Crochet Pumpkin Keychain Pattern. This tiny pumpkin is packed with autumn vibes, featuring a soft, squishy body with deep ridges and a cute little stem that looks just like a real pumpkin. The bright, warm colors make it stand out, giving it a high end, handmade charm that feels straight out of a boutique shop.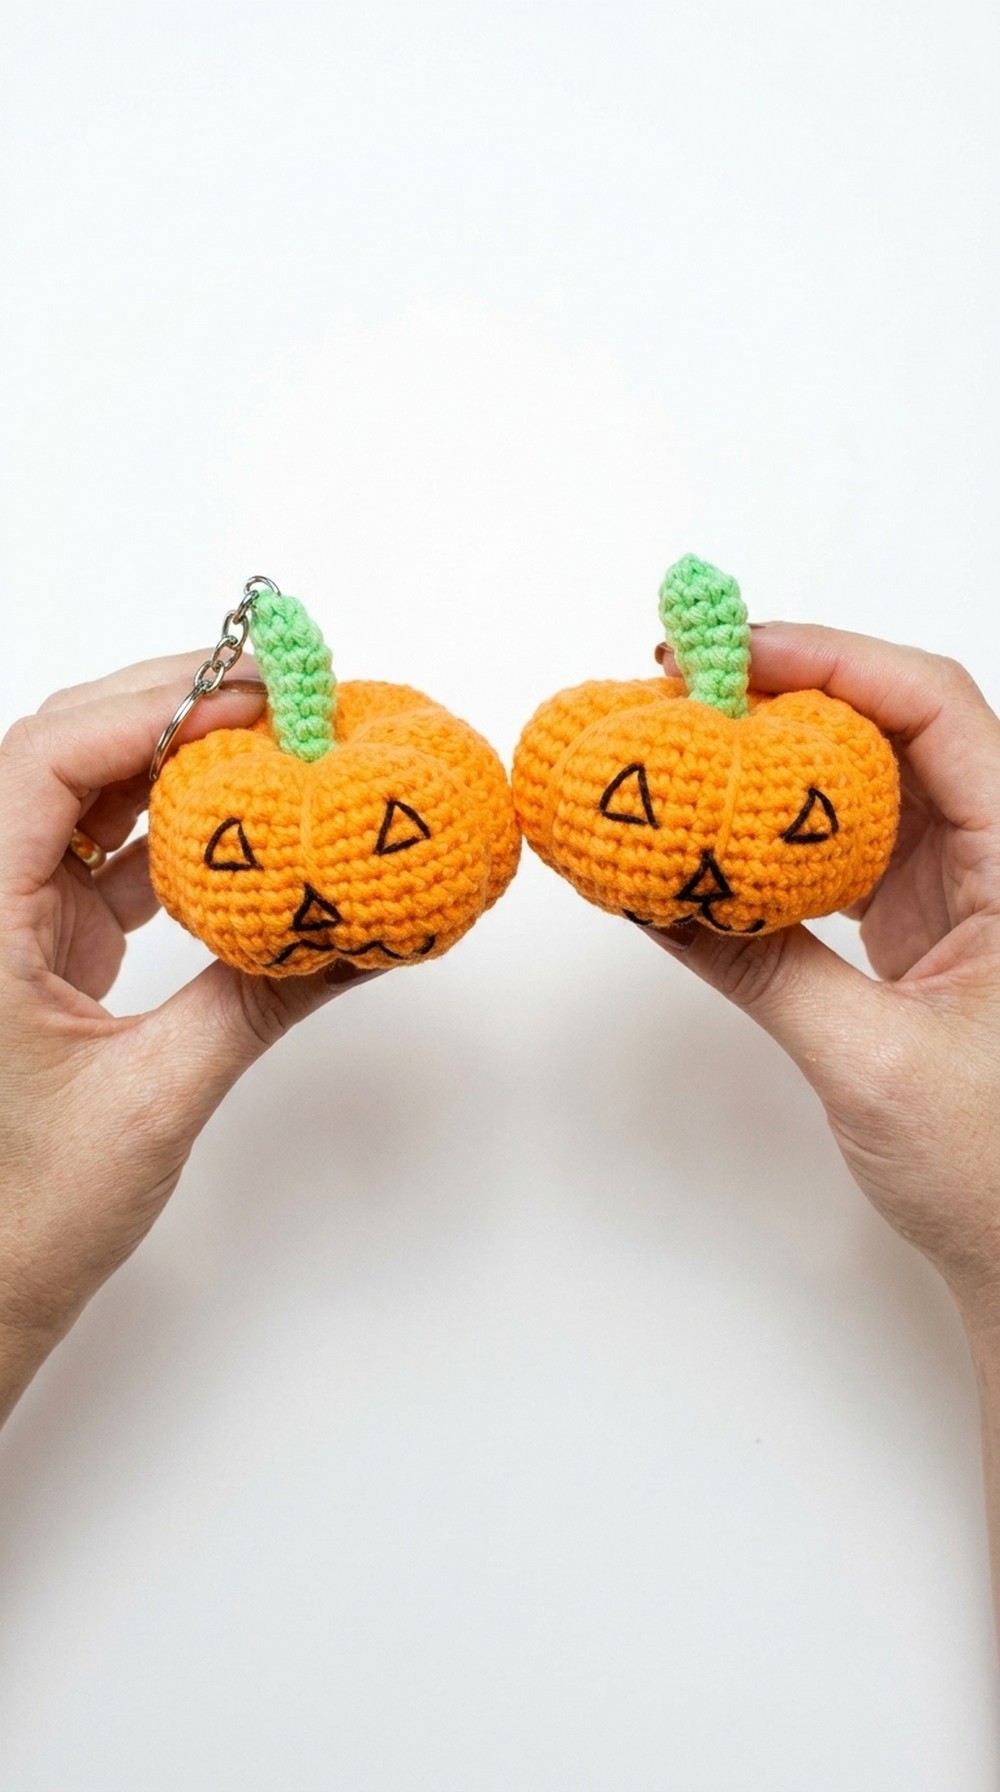 The lightweight design makes it perfect to carry on your keys, backpack, or handbag, while the strong metal ring keeps everything secure in style. This pumpkin is more than just a keychain; it’s a fun little way to spread fall warmth wherever you go. Bring a splash of seasonal joy into your everyday routine with this sweet little pumpkin.
Bright Crochet Pumpkin Keychain Pattern
Materials Required:
- Yarns:
- Pingouin Balloon Yarn
- Orange (Color Code: 4288), 58% cotton, 42% acrylic — 300 meters (Tex: 333)
- Green (Color Code: 8648), 58% cotton, 42% acrylic — 300 meters (Tex: 333)
- Camila Fashion Yarn (Black): For embroidery (face details).
- Pingouin Balloon Yarn
- Crochet Hook: 2.5 mm.
- Tapestry Needle: For weaving in ends and embroidery details.
- Polyester Fiber Stuffing: To stuff the pumpkin.
- Keychain Ring with Chain
- Jewelry Pliers: For attaching the keychain.
- Scissors
- Stitch Marker: Optional, helps track rounds during crocheting.
Special Techniques:
- Magic Ring: This technique creates a tight, adjustable loop to start crochet circles. Wrap the yarn around your fingers and secure with a slip knot.
- Invisible Decrease: Instead of pulling through all loops, pick up only the front loops of two stitches to decrease invisibly.
- Working in Continuous Rounds: Do not join at the end of the round; use a stitch marker to track the first stitch of each round.
Pattern Instructions:
Pumpkin Body (Orange Yarn)
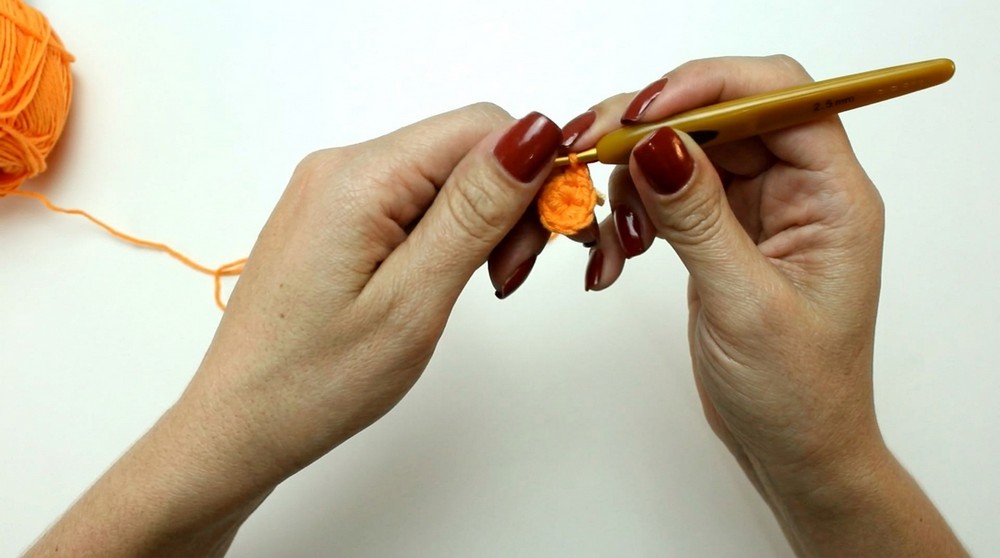
- Round 1 (Magic Ring):
- Start with a magic ring and crochet 8 single crochet (SC) stitches into the loop (8 stitches).
- Pull the ring to close tightly.
- Round 2:
- Crochet 2 SC in each stitch around (increase in all stitches). You will now have 16 stitches.
- Round 3:
- Work 1 SC, then 1 increase (2 SC in the next stitch). Repeat this pattern until the end of the round. You will now have 24 stitches.
- Work 1 SC, then 1 increase (2 SC in the next stitch). Repeat this pattern until the end of the round. You will now have 24 stitches.
- Round 4:
- Work 2 SC, then 1 increase. Repeat around. You will now have 32 stitches.
- Round 5:
- Work 3 SC, then 1 increase. Repeat around. You will now have 40 stitches.
- Rounds 6–15:
- Crochet 40 SC around (1 SC in each stitch) for 10 rounds to create the height of the pumpkin.
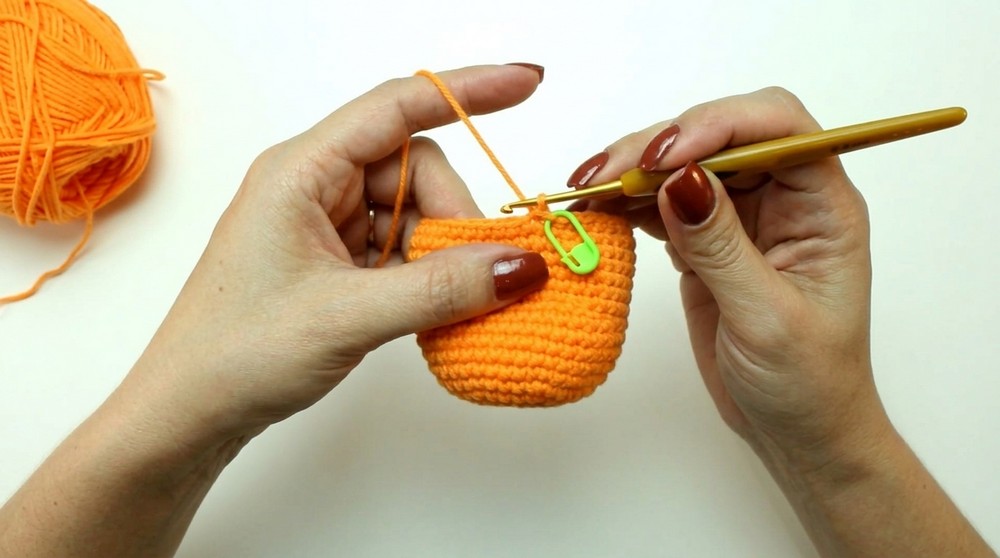
- Begin Decreasing:
- Round 16: Work 3 SC, 1 decrease (invisible) around. You will now have 32 stitches.
- Round 17: Work 2 SC, 1 decrease (invisible) around. You will now have 24 stitches.
- Round 18: Work 1 SC, 1 decrease (invisible) around. You will now have 16 stitches.
- Round 19: Work decrease in every stitch around. You will now have only 8 stitches.
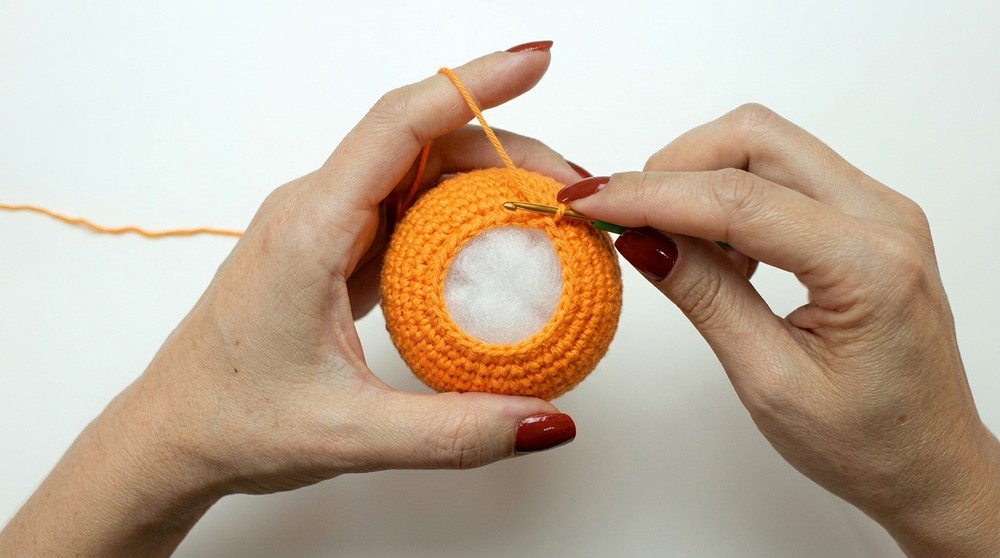
- Stuff the Pumpkin:
- Firmly stuff the body with polyester fiber filling. Ensure the pumpkin is evenly filled and maintains its shape.
- Firmly stuff the body with polyester fiber filling. Ensure the pumpkin is evenly filled and maintains its shape.
Shaping the Pumpkin Segments (Creating Grooves):
- Once the pumpkin is stuffed and closed off, cut the yarn, leaving a long tail. Thread this tail through a tapestry needle.
- Insert the needle at the closing point on the top of the pumpkin and bring it down to the center of the magic ring (bottom of the pumpkin). Pull tightly to create a groove.
- Decide the number of grooves you want. For 6 grooves, divide the pumpkin into 6 equal sections:
- Example for 40 stitches: divide them as close as possible into 6 even parts (around 6–7 stitches per groove).
- Continue pulling the thread from the bottom to the top of the pumpkin, anchoring the yarn and traveling to each section to create the grooves.
- Ensure even spacing between each groove. Adjust and tighten the yarn if needed.
- Tie off the yarn securely and hide the ends inside the pumpkin.
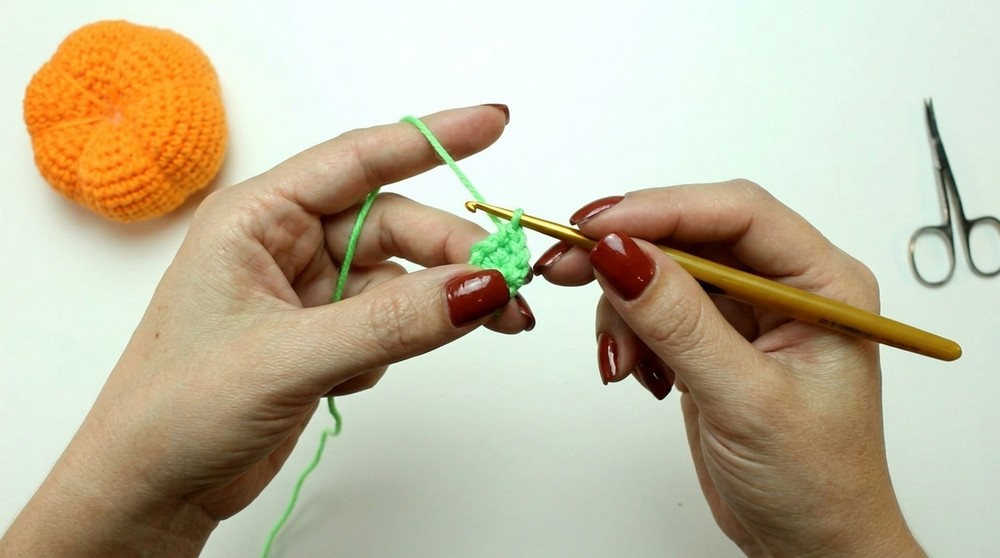
Pumpkin Stem (Green Yarn):
- Round 1 (Magic Ring):
- Start with a magic ring and crochet 8 SC into the loop. Pull tight to close.
- Rounds 2–7:
- Work 8 SC (1 SC into each stitch).
- You will not increase; just work the rounds evenly to create the stem height.
- Finish Off:
- Slip stitch into the next stitch and leave a long tail for sewing.
- Position the stem at the pumpkin’s top center, and use the long tail to sew it securely in place.
- Weave in excess yarn.
Face Embroidery (Black Yarn):
- Eyes:
- Position the eyes on the pumpkin body, centering them on adjacent grooves.
- Count 6–7 rows down from the stem and embroider triangles using your black yarn. Each triangle should span 2 stitches at the base.
- Secure the yarn knot inside the pumpkin to keep it hidden.
- Nose:
- Place the nose directly under the space between the eyes. Use black yarn to create a smaller triangle, spanning one stitch at the base and tapering to a point.
- Mouth:
- Start 1 row below the tip of the nose. Create a zigzag shape to mimic the traditional Jack-o-Lantern mouth, moving horizontally between grooves while alternating between 1 row below and 1 row above the line of the nose.
- Finalizing the Embroidery:
- Secure the thread after forming the facial features and tuck in all loose ends.
- Secure the thread after forming the facial features and tuck in all loose ends.
Keychain Attachment:
- Take your keychain ring and chain.
- Use jewelry pliers to open the small jump ring on the chain.
- Attach the jump ring securely to the pumpkin by inserting it through one of the body stitches at the top center, near the stem.
- Close the jump ring tightly using the pliers.
Final Touches:
- Adjust the pumpkin grooves if needed.
- Ensure the stuffing is firm and holding the shape well.
- Inspect all stitches and ends to make sure they are tucked in securely.
Final Words & Tips:
- Pattern Customization:
Experiment with the size by increasing or decreasing the number of rounds before and after shaping. Use different yarn colors for a unique look. - Finishing Quality:
Ensure all embroidery yarn ends and loose threads are hidden inside the pumpkin for a clean and polished finish. - Care:
Spot clean with a damp cloth and avoid soaking in water to maintain the yarn’s texture and shape.