Show off a dazzling Crochet Diamond Style Top Pattern that’s playful, easy to make, and perfect for adding sparkle, charm, and handmade flair to your wardrobe.
Lightweight yet eye-catching, this stylish top is perfect for those who love unique and creative outfits. Designed with a beautiful diamond-style pattern, it combines elegance and comfort in one piece. The intricate crochet details make this top stand out, giving it a luxurious and artistic appearance that catches everyone’s attention.
Reasons to Love the Diamond-Style Design
The diamond crochet pattern creates a flattering and symmetrical look, making it suitable for both casual wear and special occasions. Made using soft and breathable yarn, it’s comfortable to wear during warm seasons or as a stylish layer in cooler months. Available in any color to suit your taste, this top pairs wonderfully with jeans, skirts, or even over dresses for a layered look. Its handmade charm makes it more than just clothing—it’s a work of art that reflects your creative style!

Materials Needed
- Yarn: Medium-weight yarn (~200g, recommended soft acrylic or cotton).
- Hook: 4.0 mm (or size suitable for your yarn).
- Optional: Stitch markers, tapestry needle, scissors, measuring tape.
Skill Level
Intermediate – familiarity with basic stitches and working in rounds is required.
Key Abbreviations (US Terminology)
- ch – Chain
- sl st – Slip Stitch
- dc – Double Crochet
- st – Stitch
- sp – Space
Pattern Instructions
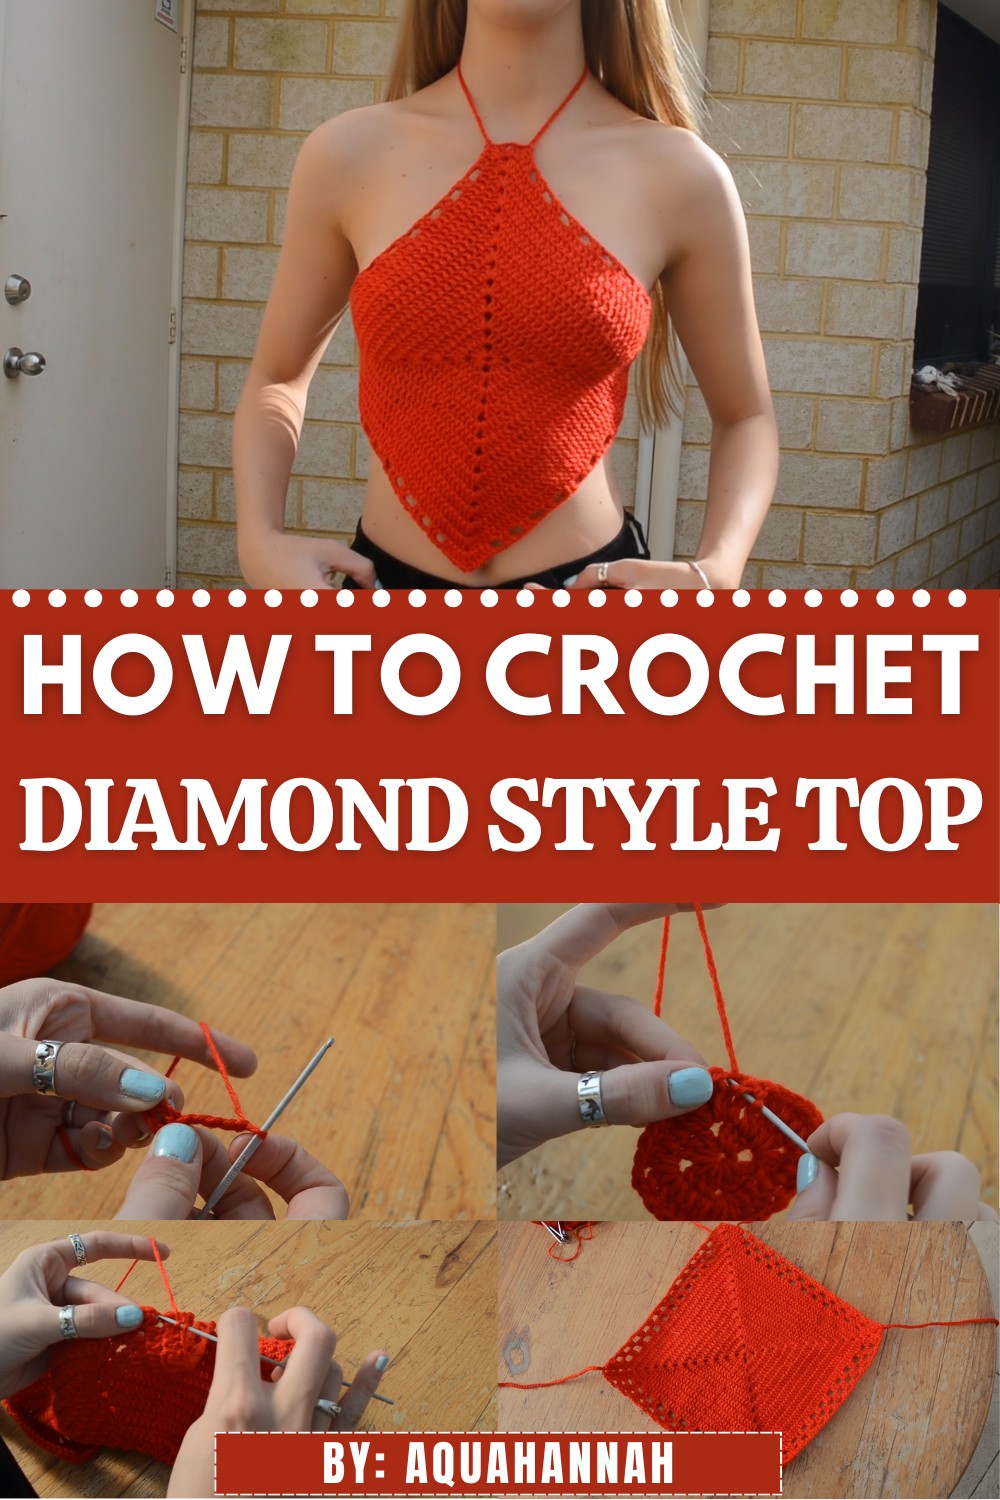
Step 1: Foundation Ring
- Ch 4, then join with a sl st into the first chain to create a loop.
Step 2: Row 1 – Begin the Square
- Ch 5 (counts as 1 dc + ch 2).
- Work 3 dc into the center of the ring.
- Ch 2, then work another set of 3 dc into the ring.
- Repeat ch 2, 3 dc twice more.
- End with ch 2, 2 dc, then sl st into the 3rd ch of the starting ch 5. This completes the square’s base.
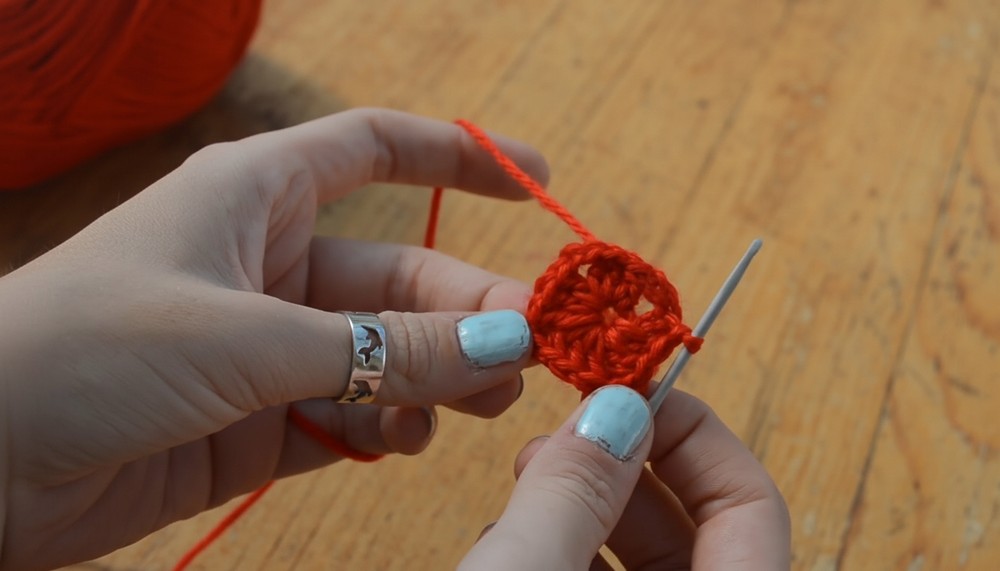
Step 3: Row 2 – Define Corners
- Ch 3 (counts as 1 dc).
- In the first corner sp, work 2 dc, ch 2, 2 dc to create the corner.
- Work dc into each of the next 3 st across the edge.
- At the next corner sp, repeat 2 dc, ch 2, 2 dc.
- Continue this sequence around the square, working corners with 2 dc, ch 2, 2 dc, and edges with dc in each st.
- End with 2 dc in the last corner and sl st into the 3rd ch of the starting ch 3.
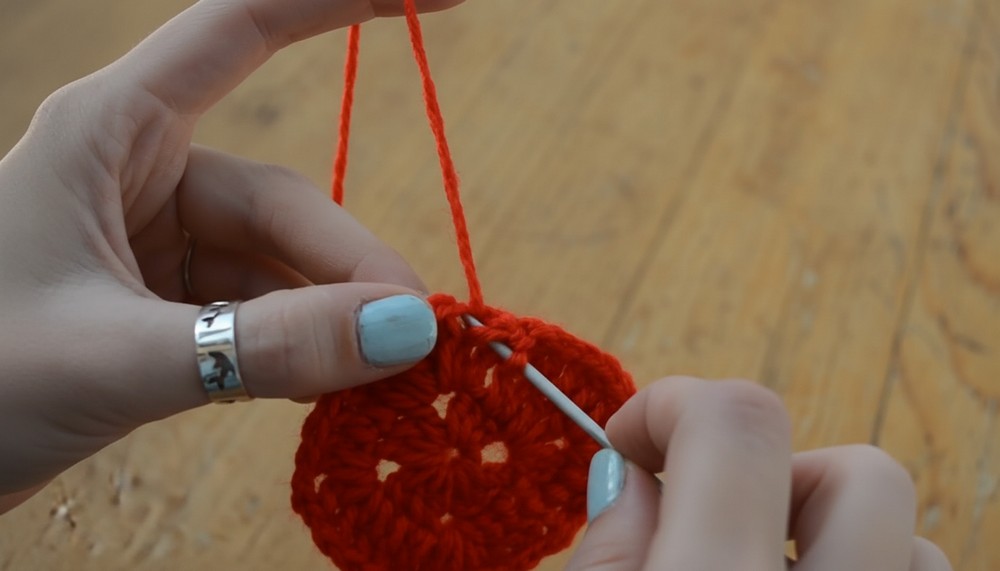
Step 4: Extend the Square (Row 3 onwards)
- Ch 3, then dc into each stitch along the edge.
- At each corner, always work 2 dc, ch 2, 2 dc into the corner space.
- Repeat this pattern for as many rows as necessary until the square fits as a diamond shape over your chest.
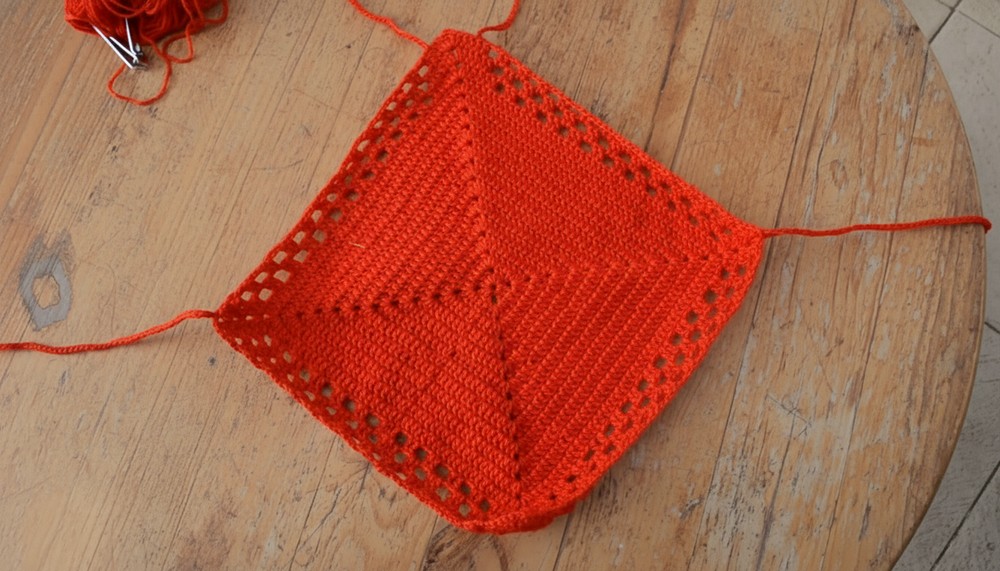
Step 5: Add Detailing
- For the V-stitch rows:
- Ch 3, work dc into the next st, then ch 2, skip 2 st, and work 2 dc in the next two stitches.
- Continue the sequence of ch 2, skip 2 st, 2 dc in next 2 st around the edges.
- For corners, work 2 dc, ch 2, 2 dc as usual.
- Adjust each row to maintain symmetry as the number of stitches increases.
- Add 1 or 2 detail rows depending on your preference.
Step 6: Adding Straps
- Count the number of stitches needed for the desired strap placement and mark them on each side of the square.
- For each strap:
- Attach the yarn at the starting point.
- Ch desired length (depending on fit), then connect with sl st to the corresponding end on the back.
- Repeat for all straps.
FAQs
- Can I adjust the size?
Yes, add more rows to the square base or adjust the strap length. For different chest sizes, increase the foundation square row count. - What other yarn types can I use?
Cotton yarn works well for breathability, while acrylic adds flexibility.
Pattern Corrections
- Check each row’s alignment to maintain the square’s symmetry.
- Ensure corners are consistent with 2 dc, ch 2, 2 dc in every corner space.
Tips for Success
- Block your finished square before adding straps to ensure the corners and edges are sharp.
- If you’re new to positioning straps, use stitch markers to hold placement before attaching.
Conclusion
This square-motif crop top is a versatile and stylish addition to any wardrobe. Its timeless textures, created using the waffle stitch and V-stitch detailing, make it suitable for any occasion—especially summer outings. By using adjustable straps and customizable sizing, this pattern ensures a comfortable fit for everyone.
Super Cute Crochet Diamond Style Top Pattern bursting with Magic

Special Notes
- The pattern begins with a square and is worked in continuous rounds to create the base.
- You can adjust the size by increasing or decreasing the number of rounds before shaping details and straps.
- Stitch markers are helpful in marking corners when working square motifs.