Stitch a delightful crochet mini wallet that’s compact, easy to carry, and perfect for organizing your favorite small essentials with flair and fun.
A small, handy wallet can make a big difference in staying organized every day. This mini wallet fits perfectly in your hand or pocket, making it easy to carry coins, cards, or tiny treasures without any bulk. Its soft texture and neat stitches give it a cozy and inviting look that adds a touch of charm wherever it goes. Bright colors and simple shape make it both practical and stylish, perfect for quick trips or keeping essentials close.
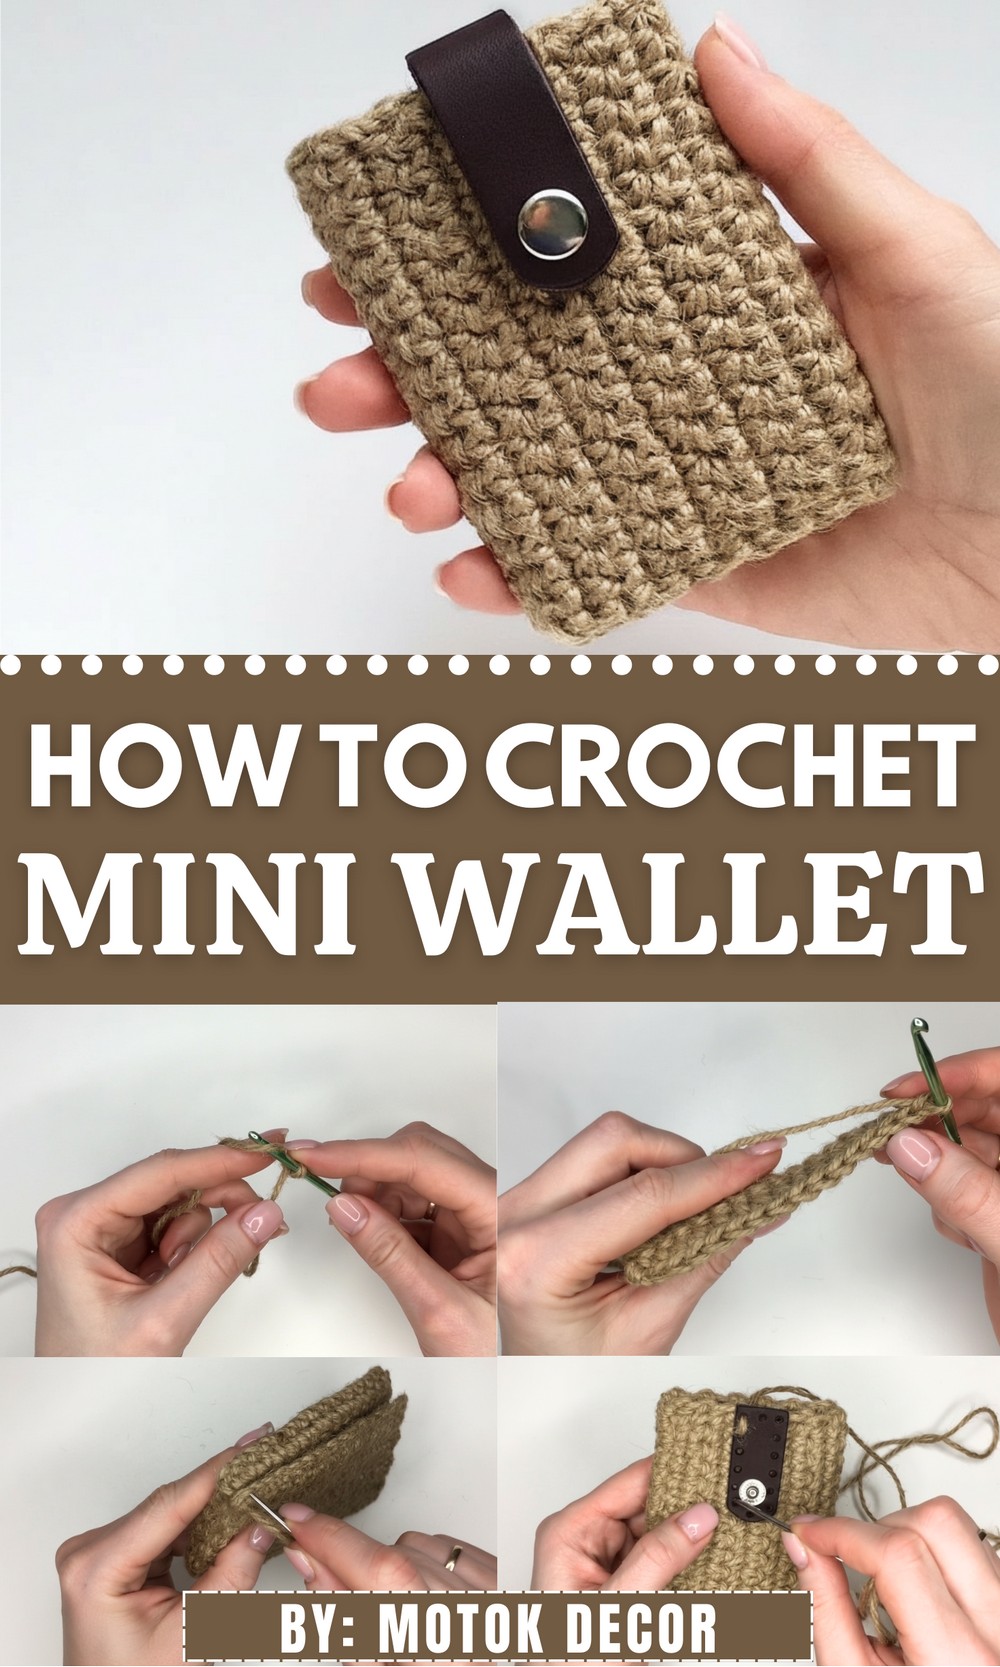
Colorful Crochet Mini Wallet Pattern for Daily Use
Using this mini wallet helps avoid the frustration of searching through larger bags, saving time and effort. It’s easy to handle, and its compact size means it’s always ready when needed. This little accessory brings a mix of convenience and warmth to daily life, making organization feel simple and pleasant. It’s a cheerful way to keep small items safe while adding a bit of personality to your routine.
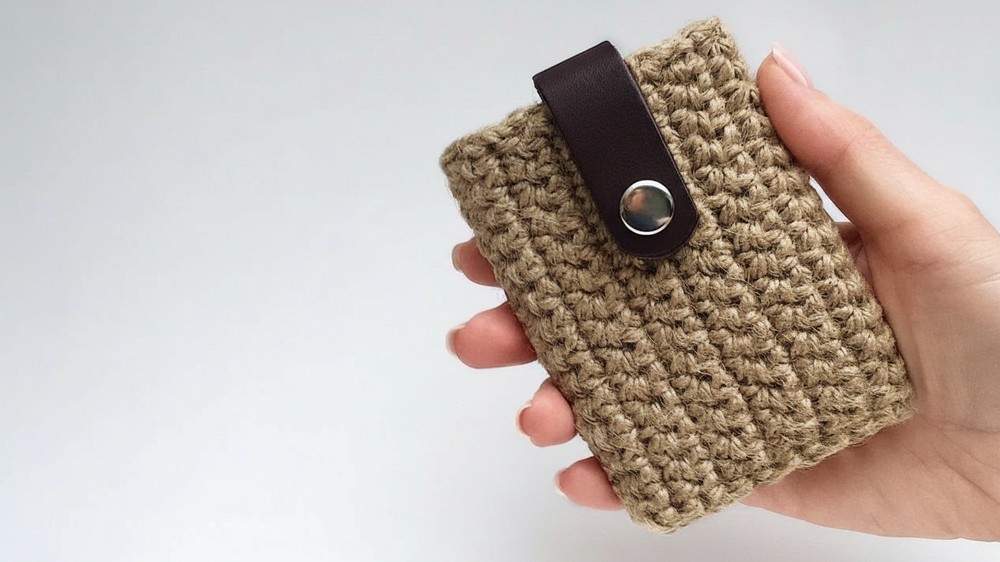
Mini Wallet / Card Holder Crochet Pattern
Skill Level
Beginner to Intermediate – Uses basic crochet stitches such as chains and single crochet, along with simple sewing for assembly and attaching buttons.
Materials
- Jute halwat yarn (or polyester cord alternative), 2 mm thickness (approx. 35 meters needed)
- Crochet hook size 4
- Needle with a large eye
- 1 button
- Scissors
Special Features
- Compact two-compartment design with secured closure
- Simple construction using single crochet stitches
- Adaptable size depending on chain length and rows
- Uses eco-friendly jute or polyester cord yarn
Step-by-Step Instructions
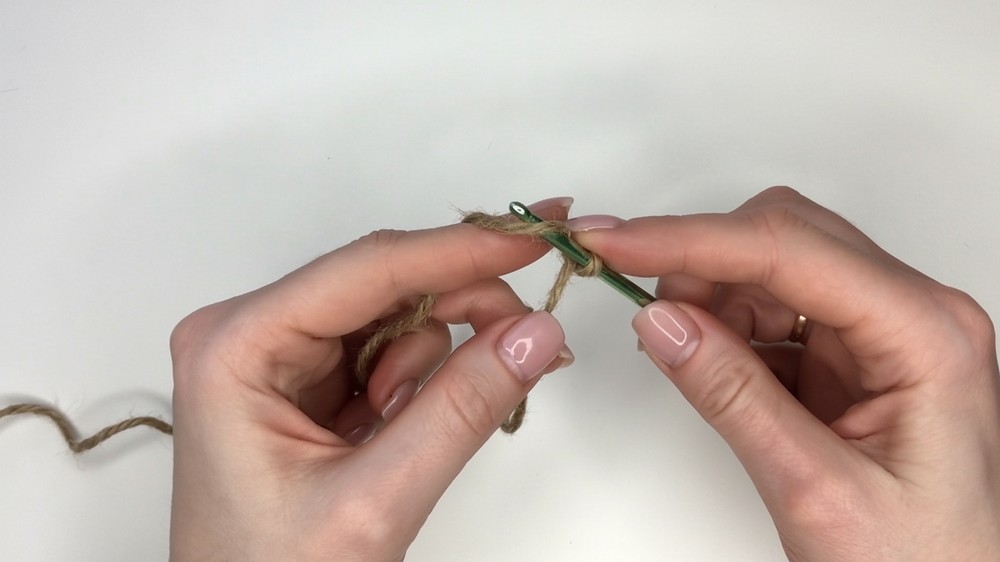
Step 1: Foundation Chain
- Start by making a chain of 16 air loops (chains). To create one air loop:
- Make a slip loop with the yarn tip on top and working yarn underneath.
- Use your hook to pull the yarn through this loop to create each chain stitch.
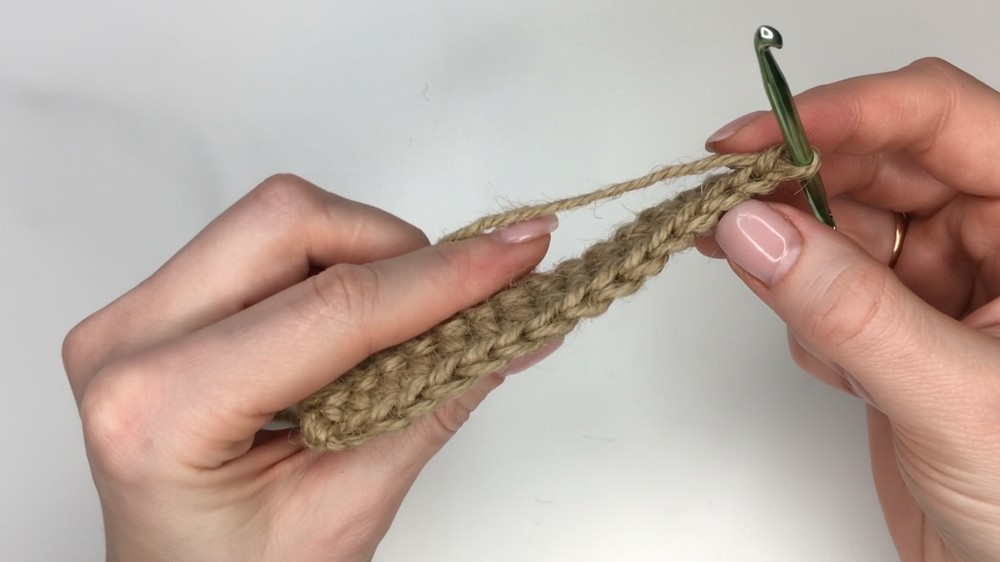
Step 2: Row 1 – Single Crochet (sc)
- Skip the first two chains from the hook; work your first single crochet (sc) into the 3rd chain from the hook.
- Continue working 1 sc into every chain across, ending with 14 single crochets.
- Keep loops consistent in size and tension for an even fabric.
Step 3: Rows 2 to 33 – Continue Single Crochet
- Chain 1 (lifting chain), turn your work.
- Work single crochet stitches across the entire row, crocheting into the back loops of the previous row’s stitches (or both loops as preferred).
- Begin each row by skipping the first two loops and working into the 3rd (maintaining stitch count).
- Repeat for a total of 33 rows or until desired height is reached.
Step 4: Accordion Fold – Creating Compartments
- After completing the rectangle, fold the fabric accordion-style into 2 compartments, folding at every 5 rows approximately to create even divisions.
- Use these folds as guideline for sewing side seams.
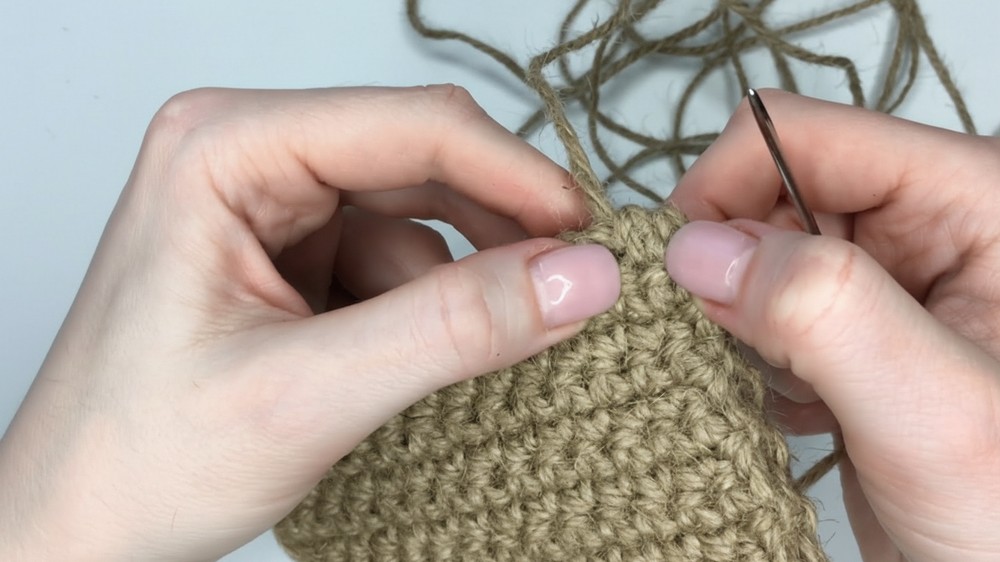
Step 5: Hide Yarn Tails
- Using a yarn needle and the yarn tail left from start, carefully weave and hide the tail inside the fabric, pulling the yarn through the posts of single crochet stitches on the wrong side.
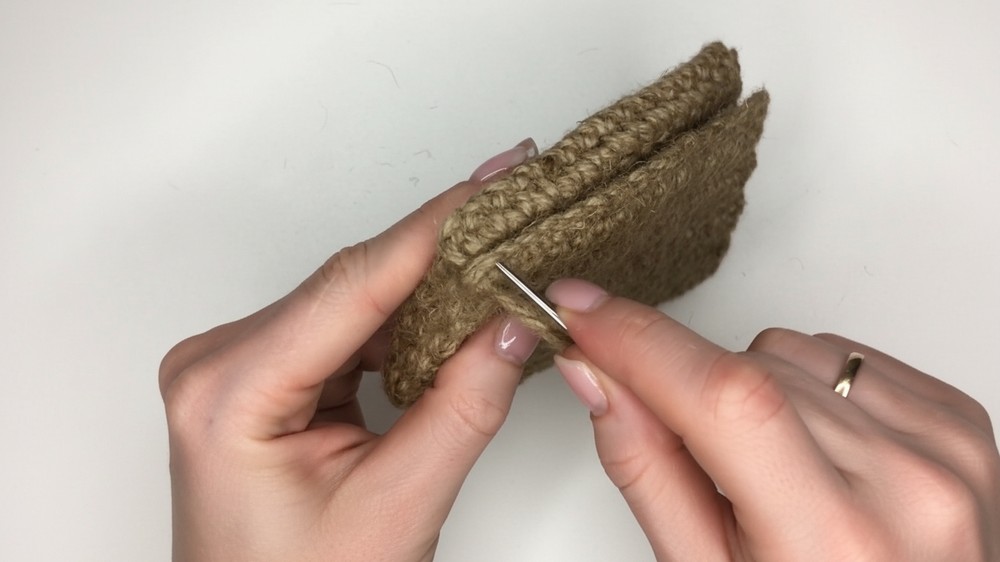
Step 6: Join the Sides – Invisible Seam
- Fold the piece to align the outside edges perfectly.
- With a yarn needle threaded with approx. 2.5 m yarn, begin joining sides by weaving back and forth through the stitch posts similar to a mattress stitch or invisible seam following the edge stitch pattern.
- Make sure to attach all layers firmly for durability but avoid pulling too tight to keep flexibility.
Step 7: Close Bottom Edge
- On the bottom edge (where the two compartments meet), sew with 6 single crochet stitches evenly spaced to close the opening securely.
Step 8: Attach Button
- Turn wallet right side out.
- Decide button placement on the flap area that will secure the wallet when closed.
- Using needle and yarn, sew button carefully with neat stitches ensuring it is anchored firmly.

Tutor’s Suggestions
- Keep your tension even throughout so sides align properly during joining.
- Use stitch markers to maintain fold lines and edges for clear sewing lines.
- Experiment with colors or yarn types for a personalized wallet.
- Wash and block your piece prior to assembly if needed for better finishing.
Uses
- Compact wallet ideal for cards, business cards, or small cash
- Stylish minimalistic accessory or gift idea
- Great beginner-to-intermediate crochet project for practice
Tip
Be gentle when sewing edges and button on to avoid stretching the stitches. Pull thread taut but not too tight for flexible, neat seams.
Conclusion
This mini wallet/card holder is functional, elegant, and quick to crochet. Following these steps and paying attention to joining technique, you’ll have a lovely handmade organizer to carry essentials with style.