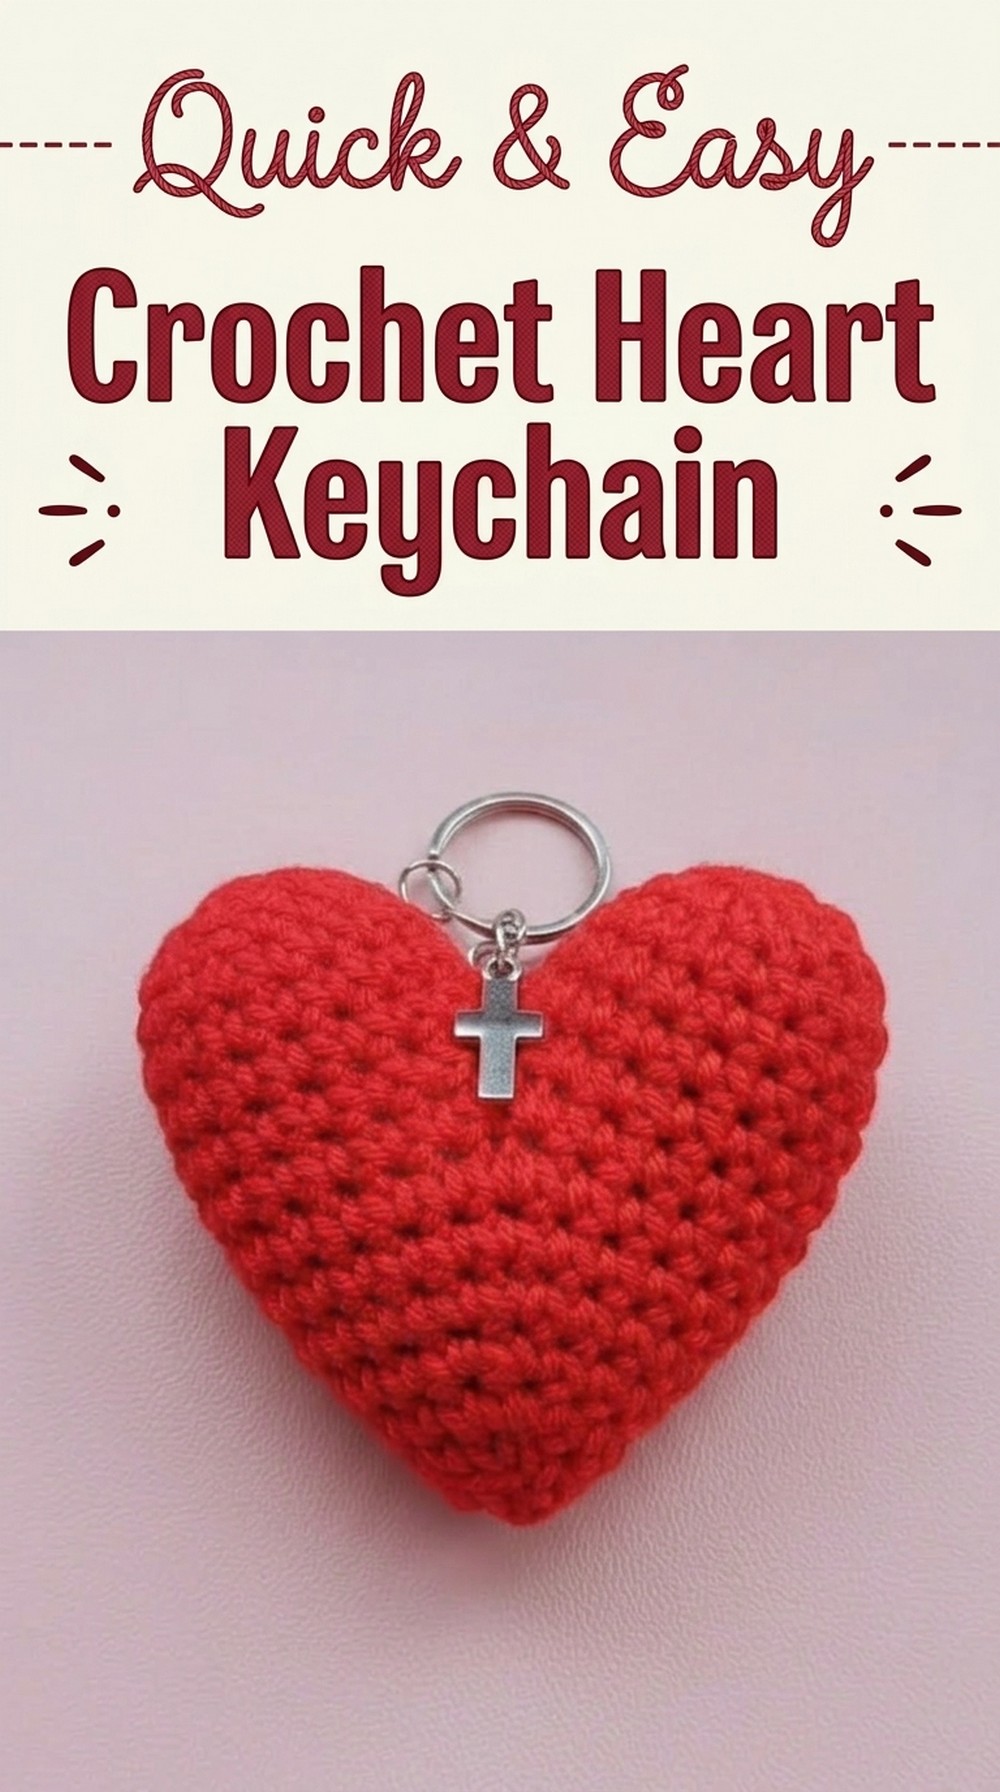
Relish a unique and easy method to stitch a lovely crochet heart keychain, ideal for gifts, decorations, or adorable accessories to spread love and joy.
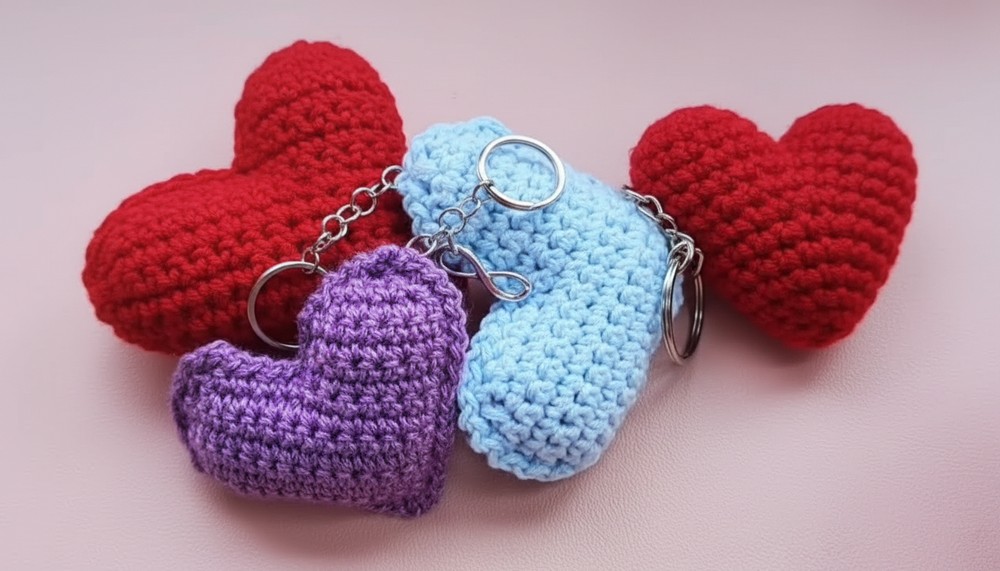
There’s something so special about crafting a tiny heart with your own hands. These soft, puffy hearts are not just adorable but also super fun to make. Perfect as gifts, bag charms, or cute little decorations, they add a touch of love wherever they go. The best part is, you can make them in any color or size you want, making each one personal and unique.
Easy-to-Follow Free Crochet Heart Keychain Pattern
With just a little bit of yarn, a crochet hook, and some stuffing, you’ll create something that feels handmade and full of care. The simple steps and creative freedom make it a perfect project for anyone, whether you’re a beginner or just want a quick, meaningful craft. These hearts aren’t just keychains—they’re tiny bundles of happiness!
Free Crochet Heart Keychain Pattern
Finished Size
- The finished size of the heart depends on the yarn thickness and hook size you use.
- Medium-weight yarn: Approx. 3 inches wide.
- Thinner yarn: Smaller hearts.
- Chunky yarn: Larger hearts.
Materials Needed
- Yarn:
- Choose any yarn in your preferred color.
- Medium-weight/Aran yarn recommended (acrylic or cotton works well for durable shaping).
- Crochet Hook:
- Use a size recommended for your yarn (e.g., 3.5 mm – 5.5 mm).
- Stuffing:
- Use acrylic stuffing, pillow stuffing, or even cotton to lightly fill the heart.
- Tapestry Needle:
- For sewing and weaving ends.
- Scissors.
- Optional Accessories:
- Keychain ring/split ring or attach to bags as a charm.
Gauge
Exact gauge is not critical for this project, as sizing may vary depending on your materials and tension. Follow the general steps provided.
Tips for Customization
- Use different yarn weights to create hearts in various sizes.
- Experiment with finishing styles: Zigzag edging, contrasting color borders, or a traditional slip stitch finish.
- Add beads or embellishments to your finished heart for a personalized touch.
- Incorporate multiple hearts to create chains of decorative accessories.
Special Techniques Used
- Magic Ring/Slip Knot Start: To begin the structure of the heart.
- Decrease (Invisible Decrease): Ensuring smooth shaping for the heart’s top points.
- Slip Stitch and Chain Stitch Combination: Used for zigzag edge finishing.
Pattern Instructions
Step 1: Begin the Heart
- Start by making a slip knot on your hook.
- Chain 14: (This forms the foundation).
- Count the chains carefully.
Note: The foundation chain determines the width. For a smaller heart, reduce the number of chains proportionally (e.g., chain 10 or 12).
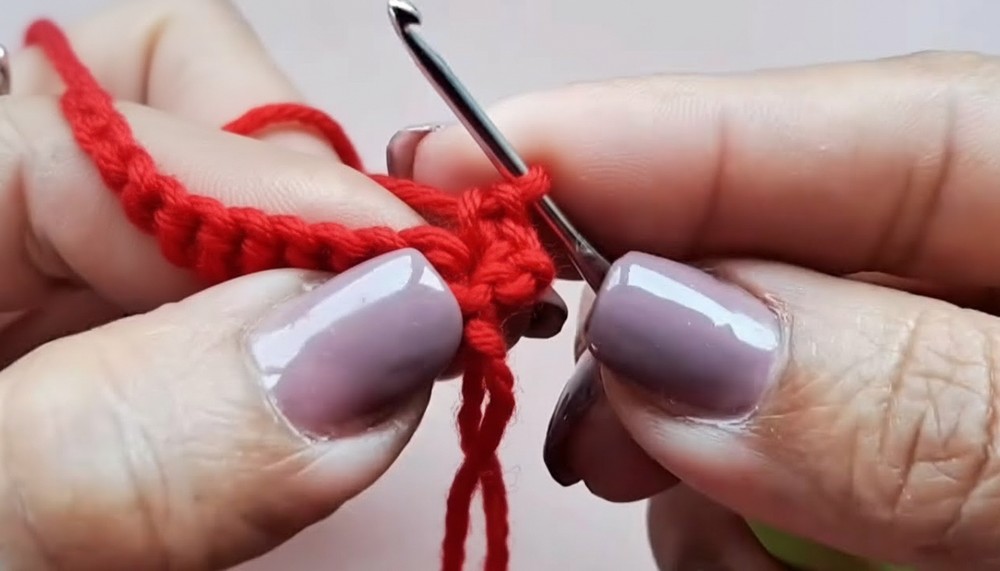
Step 2: Row 1 – Base Foundation
- Working back on this chain base:
- Start in the second chain from the hook (13th chain if starting from chain end).
- Make 13 single crochet stitches (sc) across the row.
- Chain 1 (to turn), then flip the fabric.
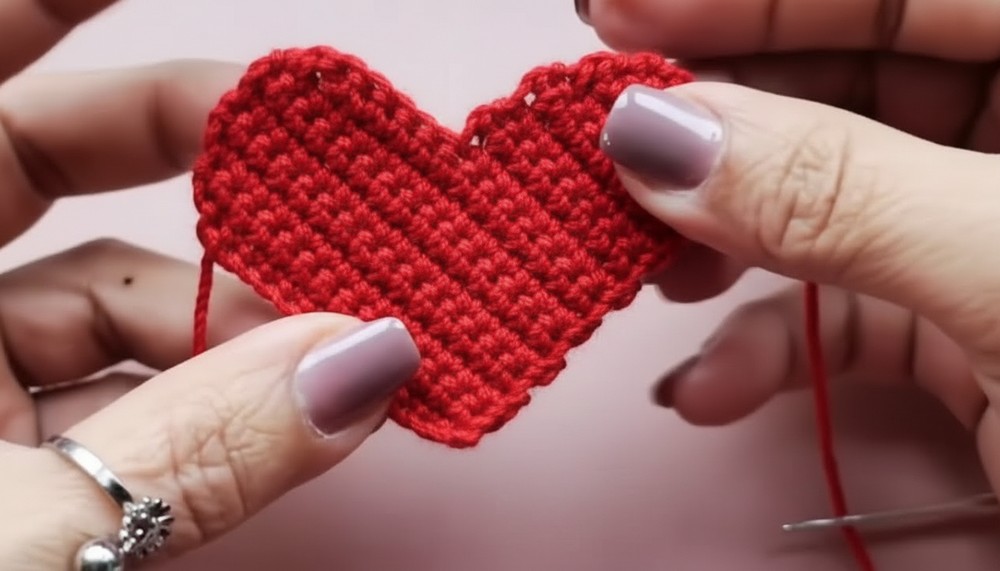
Step 3: Rows 2 to 6 – Increasing the Base
- Create a wider base by increasing:
- In the first stitch of Row 2, crochet 2 single crochets (increase) in the same stitch.
- Continue making single crochet (sc) into each stitch until you reach the last stitch.
- In the final stitch of that row, make another increase (2 single crochets in the same last stitch).
- For Rows 3 through 6, repeat the same steps as above.
- This results in a gradual spread with increased stitches on the first and last stitch (15 stitches at Row 3, etc.).

- This results in a gradual spread with increased stitches on the first and last stitch (15 stitches at Row 3, etc.).
Step 4: Rows 7 and 8 – Creating Top Curves
- Begin shaping the top by decreasing stitches:
- Row 7: Crochet 1 stitch in each of the first 11 spaces; leave the last 2 stitches and decrease them together.
- Row 8: Decrease the first 2 stitches together, crochet in the middle 7 stitches as single crochets, then decrease the last 2 stitches together.
- Continue decreasing row by row as it forms the curved shape of the heart.
Step 5: Creating Heart Peaks
- At about Row 9, your heart should start splitting into the two “peaks” of the heart.
- Work on one side (8 stitches across) to build the first curved half.
- Crochet 4 rows, reducing stitches at the start and end of each row. Continue until it tapers into a point.
- Finish off the thread for this half.
- Repeat the identical steps for the second curved peak on the other side.
Step 6: Assembly
- Once both sides are completed, create a second identical heart shape (repeat all steps above).
- Place both heart pieces together, ensuring the stitches align.
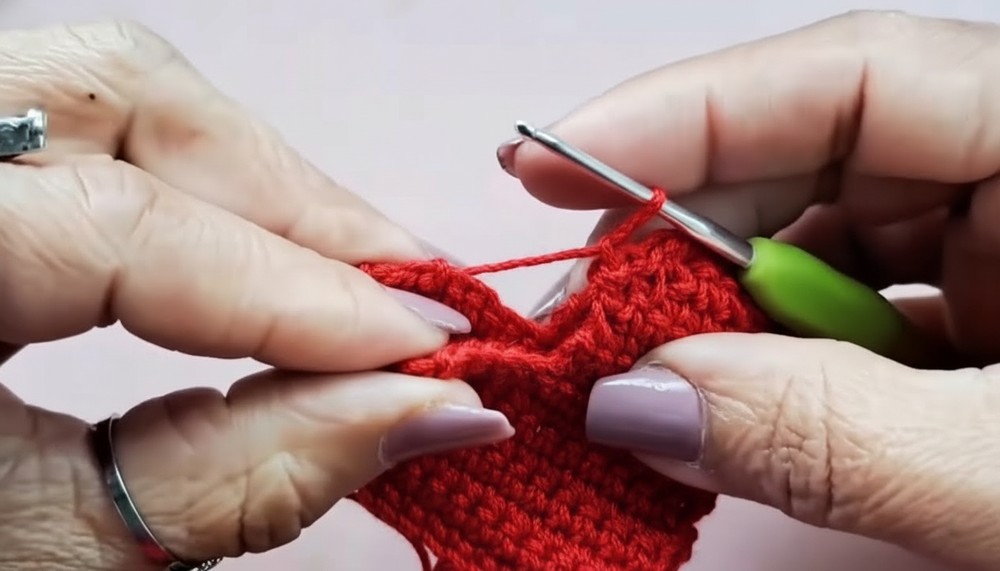
Step 7: Zigzag Edge Finishing
- Begin at the bottom tip and crochet around the edges to secure the two heart pieces together:
- Work through both fabric edges.
- Use a slip stitch followed by a chain stitch (air stitch) at each step, creating a decorative zigzag border.
- Leave a small opening for stuffing and generously fill the heart. Avoid overstuffing to maintain its soft, natural shape.
- Close the opening with the same zigzag stitch.
Step 8: Weaving Loose Ends
- Cut the threads leaving a tail. Use a tapestry needle to neatly weave the ends into the fabric for a clean finish.
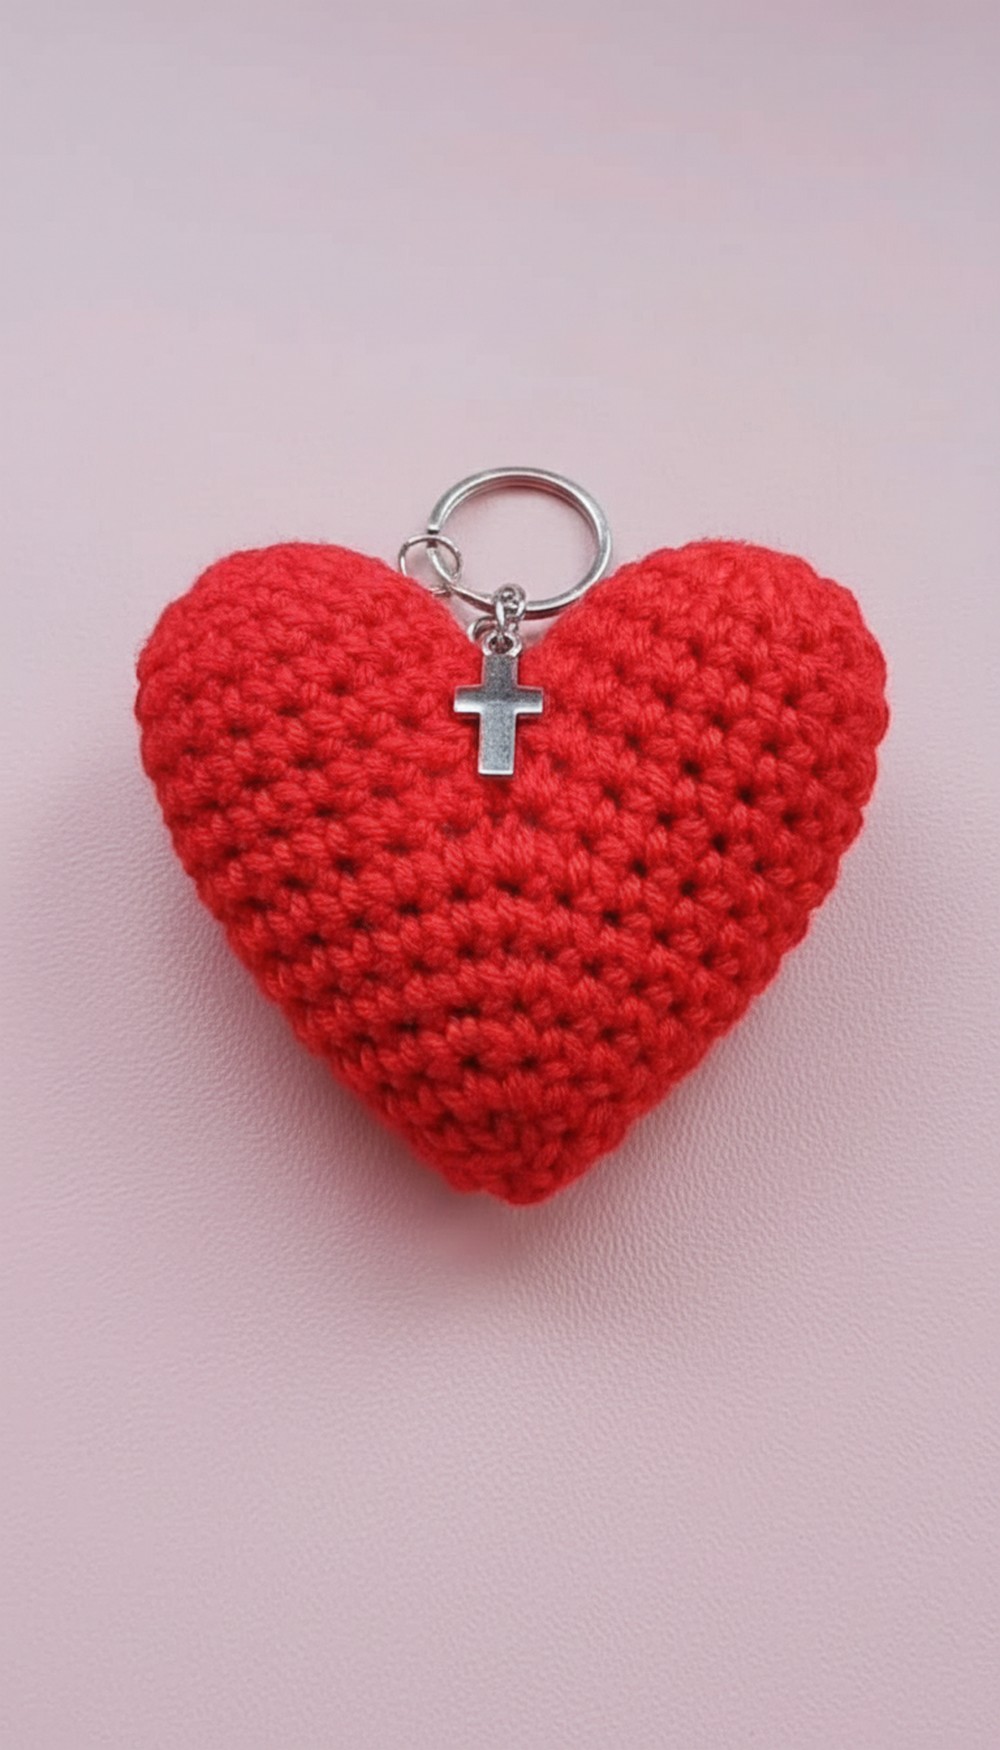
Conclusion and Final Look
Your crochet heart keychain is complete! It should have a soft, puffed appearance, with a zigzag edge adding a stylish touch. Attach it to a keychain ring, or use it as a decorative bag charm or pendant for gifting.
Important Tips
- Maintain consistent tension throughout for a uniform shape.
- Experiment with yarn colors for seasonal or festive variations (red for Valentine’s, green for Christmas).
- Watch your increases and decreases closely for accurate shaping.