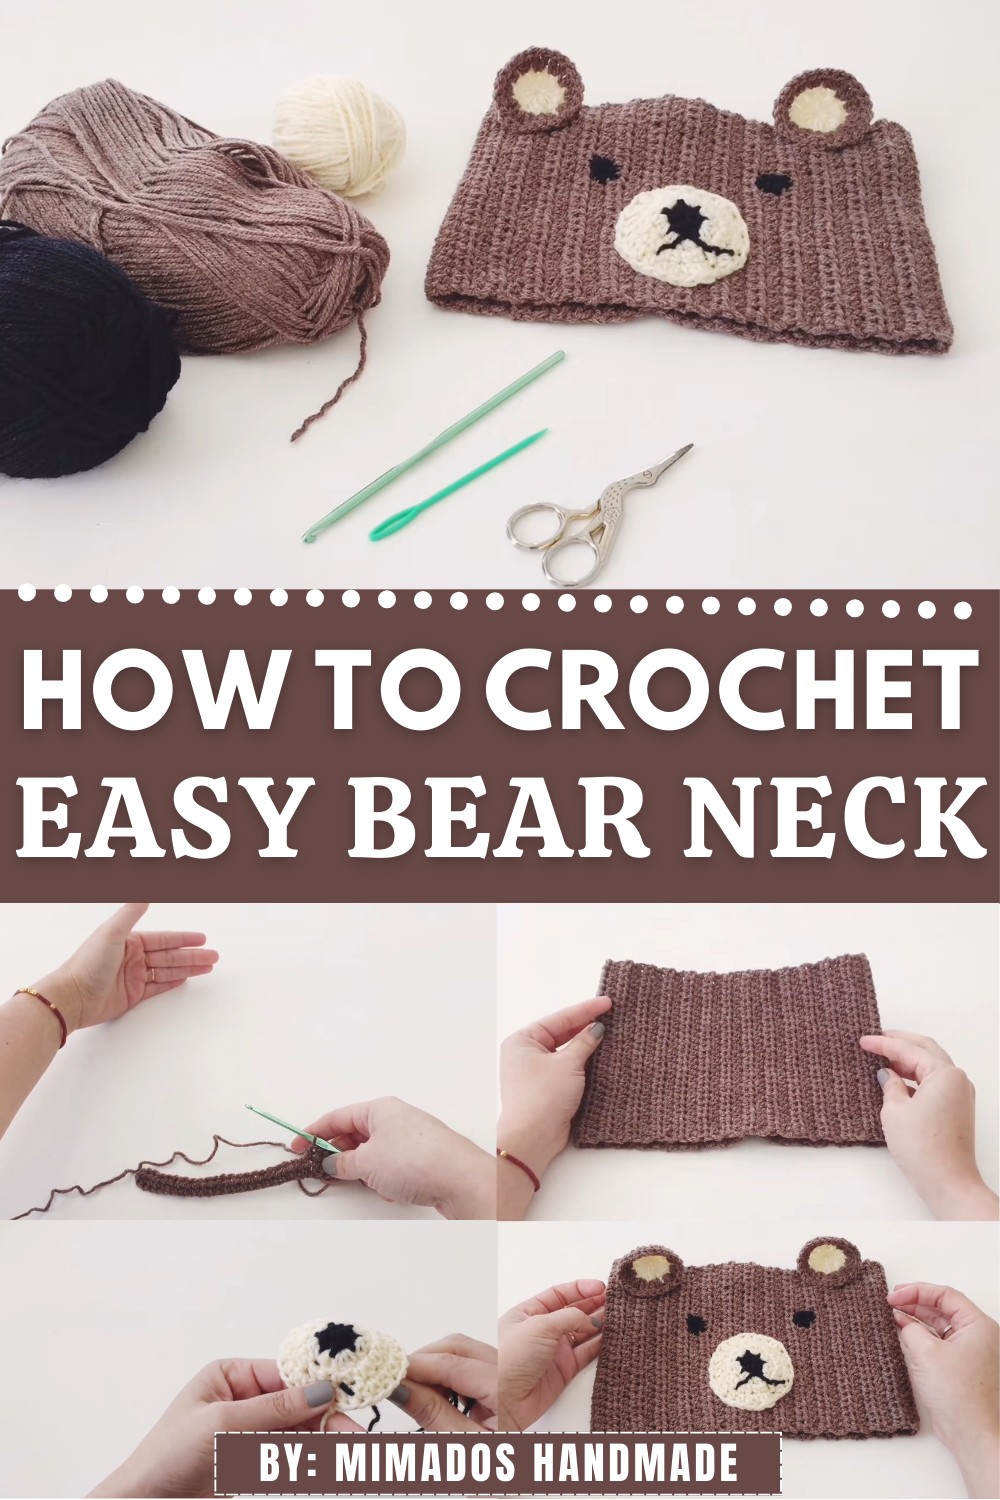
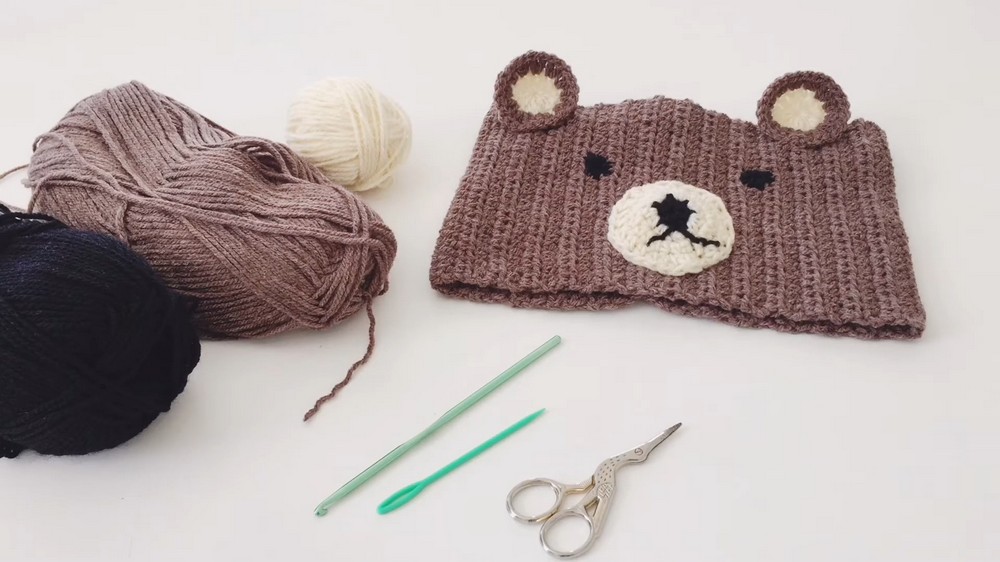
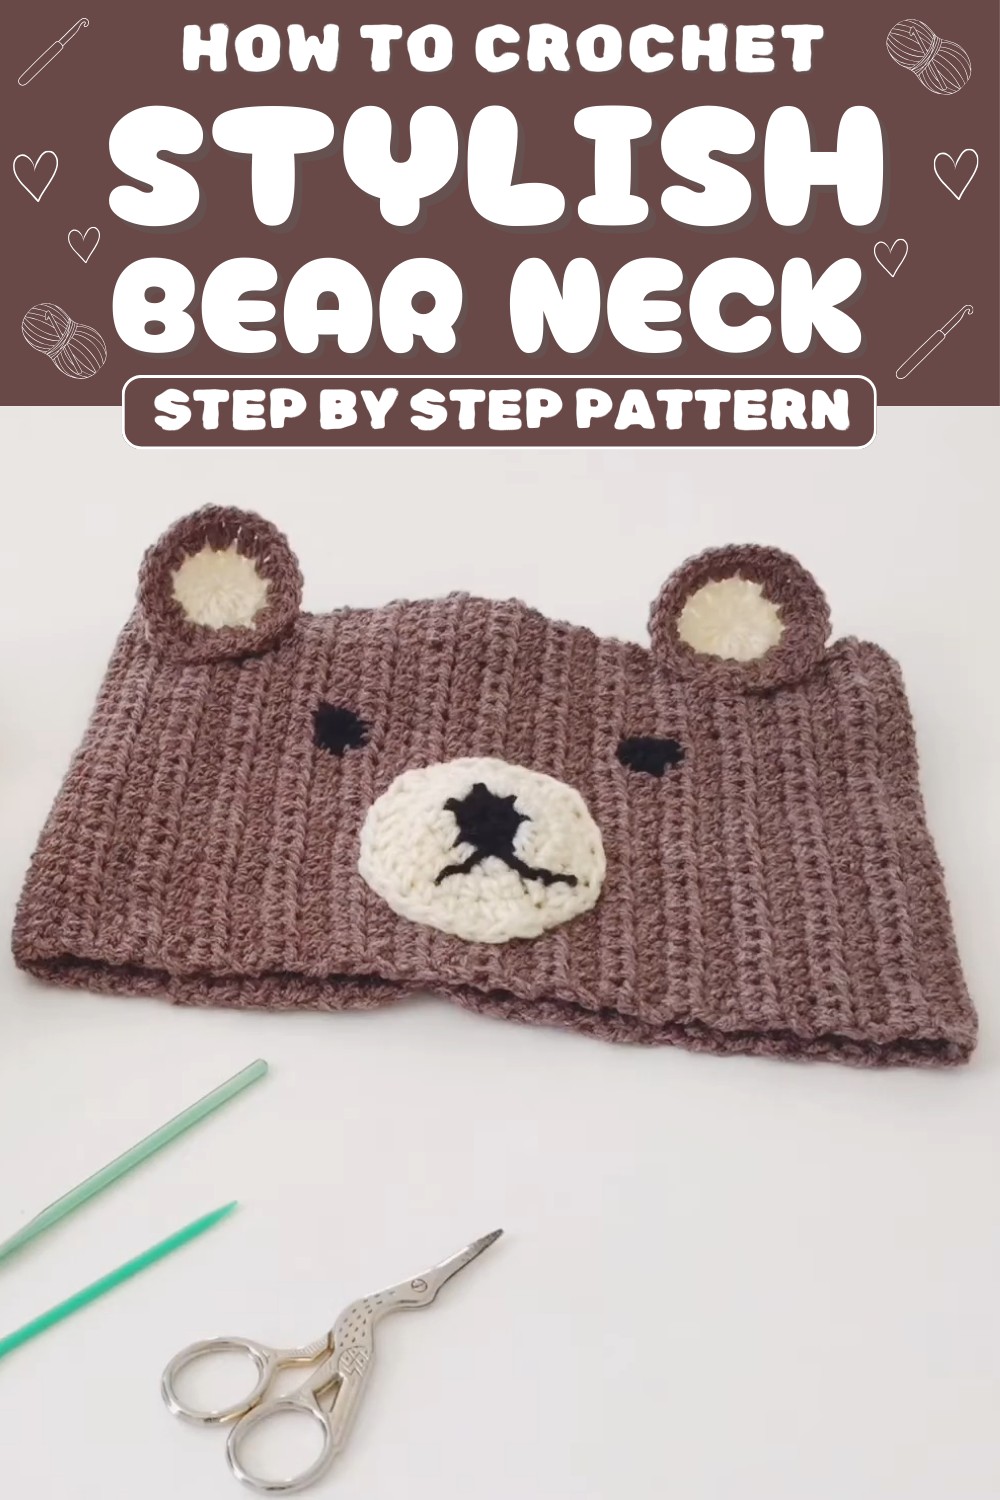
Charm everyone with a crochet bear neck creation that’s cozy, playful, and customizable that’s perfect for gifting, kids’ outfits, or stylish winter wear.
Handmade accessories have a special charm, and the free crochet bear neck pattern is perfect for combining functionality with creativity. This adorable design adds a playful, bear-inspired touch to any outfit, making it ideal for kids, gifting, or even personal use during chilly days. Featuring soft yarn, bear ears, and a snout detail, the pattern allows endless customization to suit your preferred colors and sizes.
Simple Steps to Crochet Bear Neck Warmer Pattern
Whether styled as a cozy neck warmer or paired with casual winter wear, it’s both practical and stylish. The process of crocheting this unique piece not only enhances your skills but also provides a rewarding experience. Perfect for keeping warm or spreading joy, this bear neck pattern makes crafting fun and impactful.
Materials & Supplies
To crochet your teddy bear neck, you’ll need the following materials:
- Wool for Base Color: A mid-weight yarn suitable for a 4mm hook (e.g., in brown, beige, gray, or any other desired base color).
- Contrast Color Wool: A lighter yarn shade to accent the ears and snout.
- Black Wool: For the nose and eye details—a small amount of black yarn will suffice.
- Crochet Hook: Size 4mm hook (or the appropriate hook matching the yarn weight).
- Wool Needle: To sew the parts together and create details like the eyes and snout.
- Scissors: Sharp scissors for trimming yarn.
- Measuring Tape: To ensure you maintain the exact dimensions.
Detailed Pattern Instructions
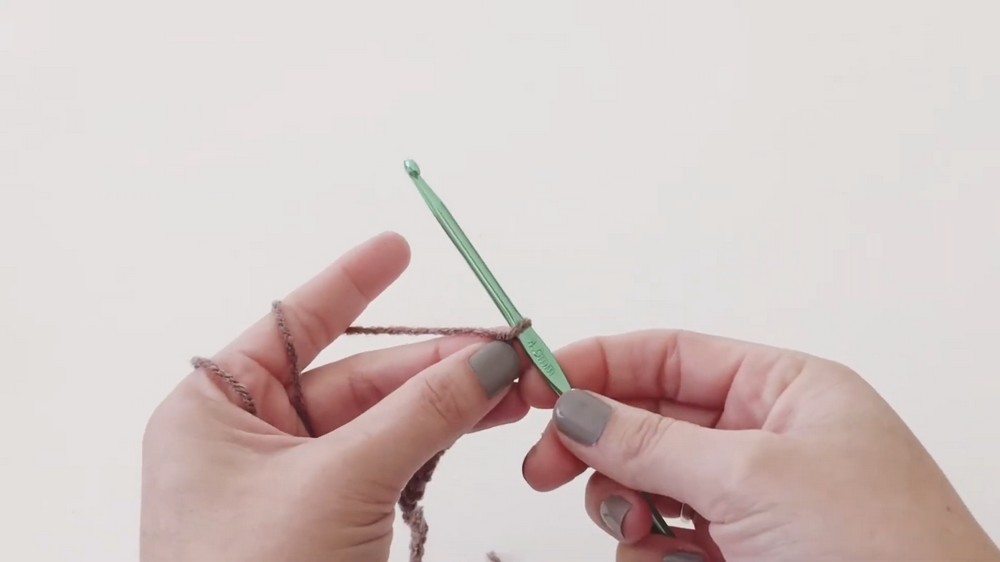
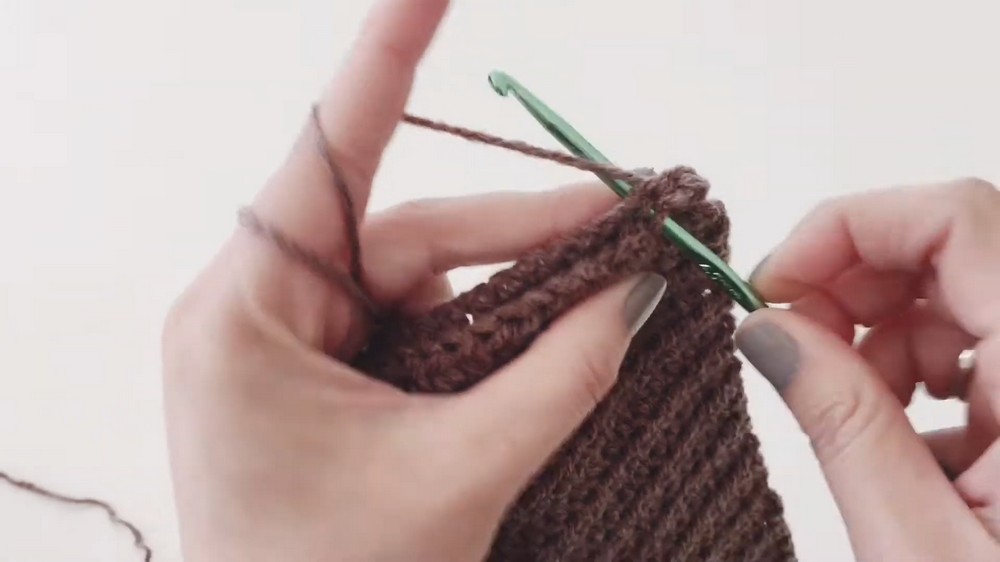
Step 1: Crocheting the Neck
- Chains: Start by chaining 25 stitches and add 2 extra chains (to begin the row).
- Use your base color wool for this.
- These chains define the width of the neck.
- First Row:
- Create one half double crochet (HDC) in each chain, starting from the third chain from the hook.
- Continue until the end of the row. Once done, you will have 25 half double crochet stitches.
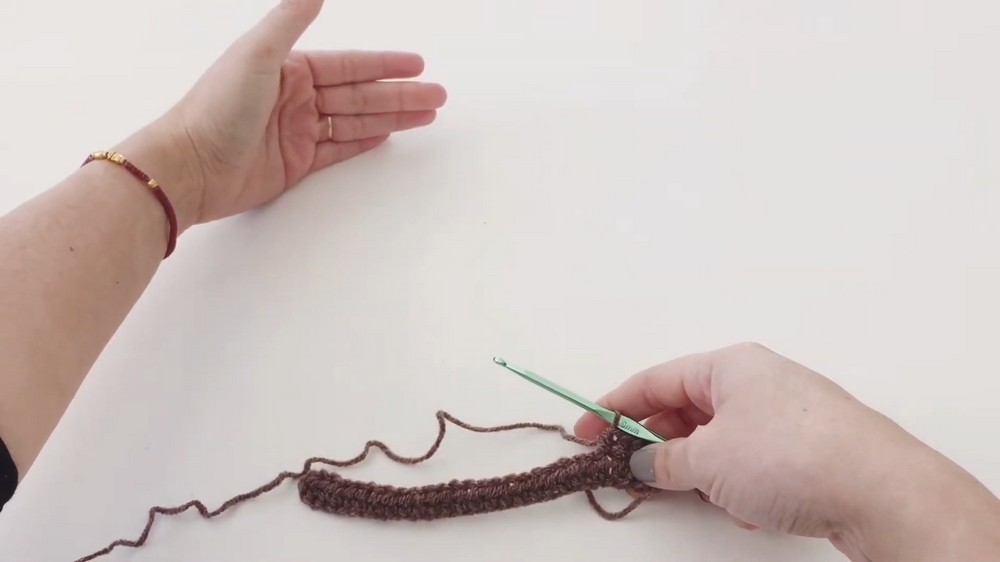
- Subsequent Rows:
- For Row 2, chain 2 (serves as the first half double crochet), turn your work, and make 1 HDC in each stitch of the previous row.
- Repeat this process for a total of 54 rows or until the neck piece measures 50 cm in length.
- Joining the Neck:
- Fold the neck piece lengthwise and align the edges. You can either sew the edges together using a wool needle or join them with slip stitches to form a seamless connection.
- Cut the yarn, secure it, and turn the piece inside out, so the seam is hidden.

Step 2: Crocheting the Ears
- Inner Ear (Contrasting Color Wool):
- Start with a magic ring. Chain 2 and make 12 double crochets (DC) around the ring.
- Pull the ring tight to close it. Slip stitch into the first DC to close the round. Cut the yarn.
- Outer Ear (Base Color Wool):
- Attach the base color wool to the previous round.
- Chain 3, make a DC in the same stitch, and create 2 DCs (an increase) in each stitch.
- At the end of the round, you should have 24 DCs.
- Cut and secure the yarn. Repeat this process to make 2 ears.
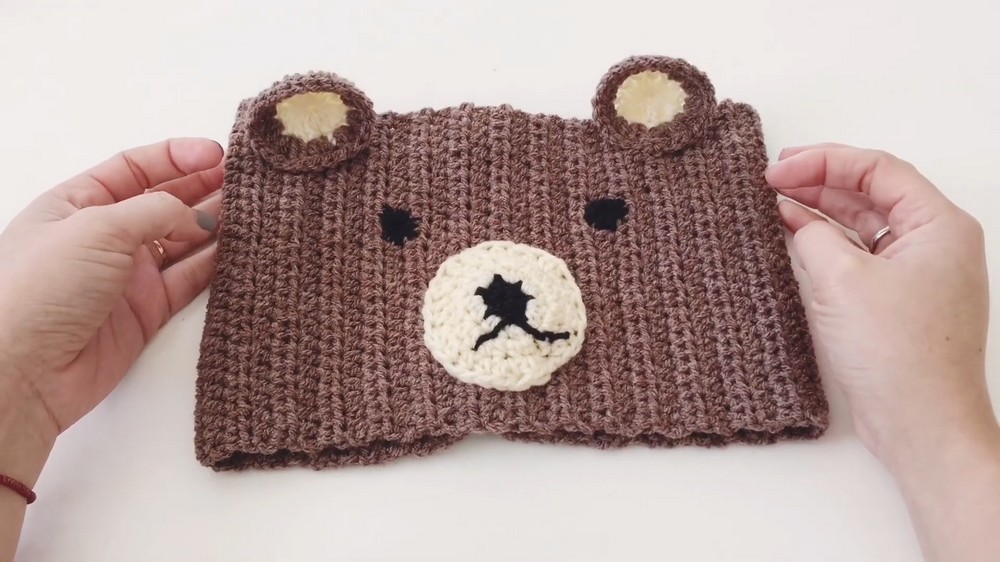
- Assembly:
- Position the ears on the neck and sew only the lower half of the ears to provide a raised effect that gives the teddy an animated look.
Step 3: Crocheting the Snout
- Nose Tip (Black Wool):
- Create a magic ring, chain 2, and make 6 HDCs around the ring. Close with a slip stitch and cut the yarn.
- Snout Base (Contrast Color Wool):
- Join the contrast wool to the nose tip.
- Chain 2, then make 2 HDCs in each stitch (total of 12 stitches).
- In Round 3, do an increase in alternating stitches, creating 18 stitches in total.
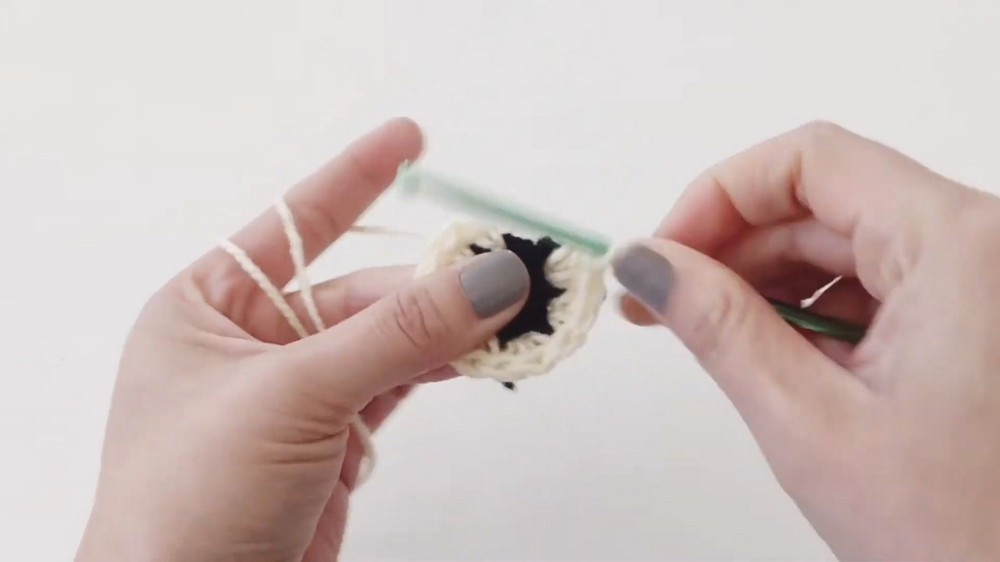
- In Round 4, create a pattern of 2 HDC + 1 increase, resulting in 24 stitches to complete the snout base.
- Cut the yarn and secure.
- Assembly:
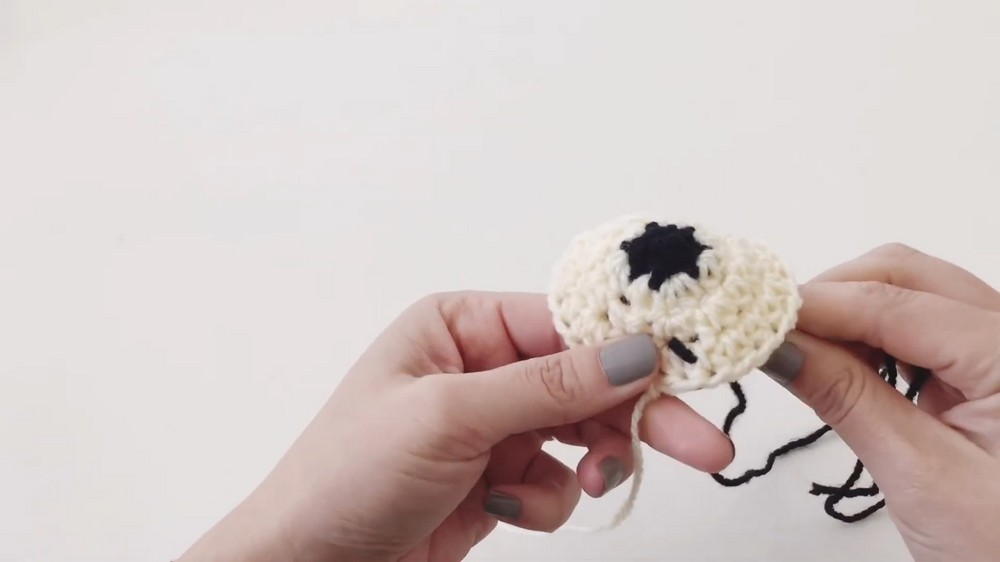
- Using a wool needle, carefully shape the black nose area into a teardrop shape and fill it in with yarn through strategic embroidery.
- Attach the snout securely onto the neckpiece.
- For the eyes, use black yarn to sew small dots.
Final Assembly
- Once the neck, ears, and snout are complete, sew all pieces together as per your preference. Make sure the ears are placed symmetrically, and the snout is properly centered.
- Turn the work inside out as needed to hide any loose stitches.
Customization Ideas
- Color Variations: Experiment with different base colors (e.g., cream, pastel shades, or bold hues). For a playful touch, use vibrant colors for the ears and snout.
- Personalized Size: To adapt the size for different proportions:
- For a child-size neck, chain fewer stitches (e.g., 20) and reduce the height to 30–40 cm.
- For a larger size, chain 30–35 stitches, and extend the height beyond 50 cm.
- Advanced Details: Add embroidered initials or cute animal-inspired accessories like a bowtie or mini buttons.
- Texture Play: Use fluffy or velvet yarn for a cozier and more luxurious feel.
Tips for Success
- Practice the Magic Ring: Perfecting this foundational technique will ensure your ears and snout look neat and well-rounded.
- Check Gauge: A standard HDC stitch gauge with a 4mm crochet hook is recommended.
- Tight Seams: Securely sew and weave in all loose ends to make the piece durable.
Conclusion
This handmade Teddy Bear Neck Accessory is a perfect project for all crochet enthusiasts, whether you’re making it for a loved one or as a gift. The playful ears, cozy neck design, and cute snout details make it both functional and adorable.