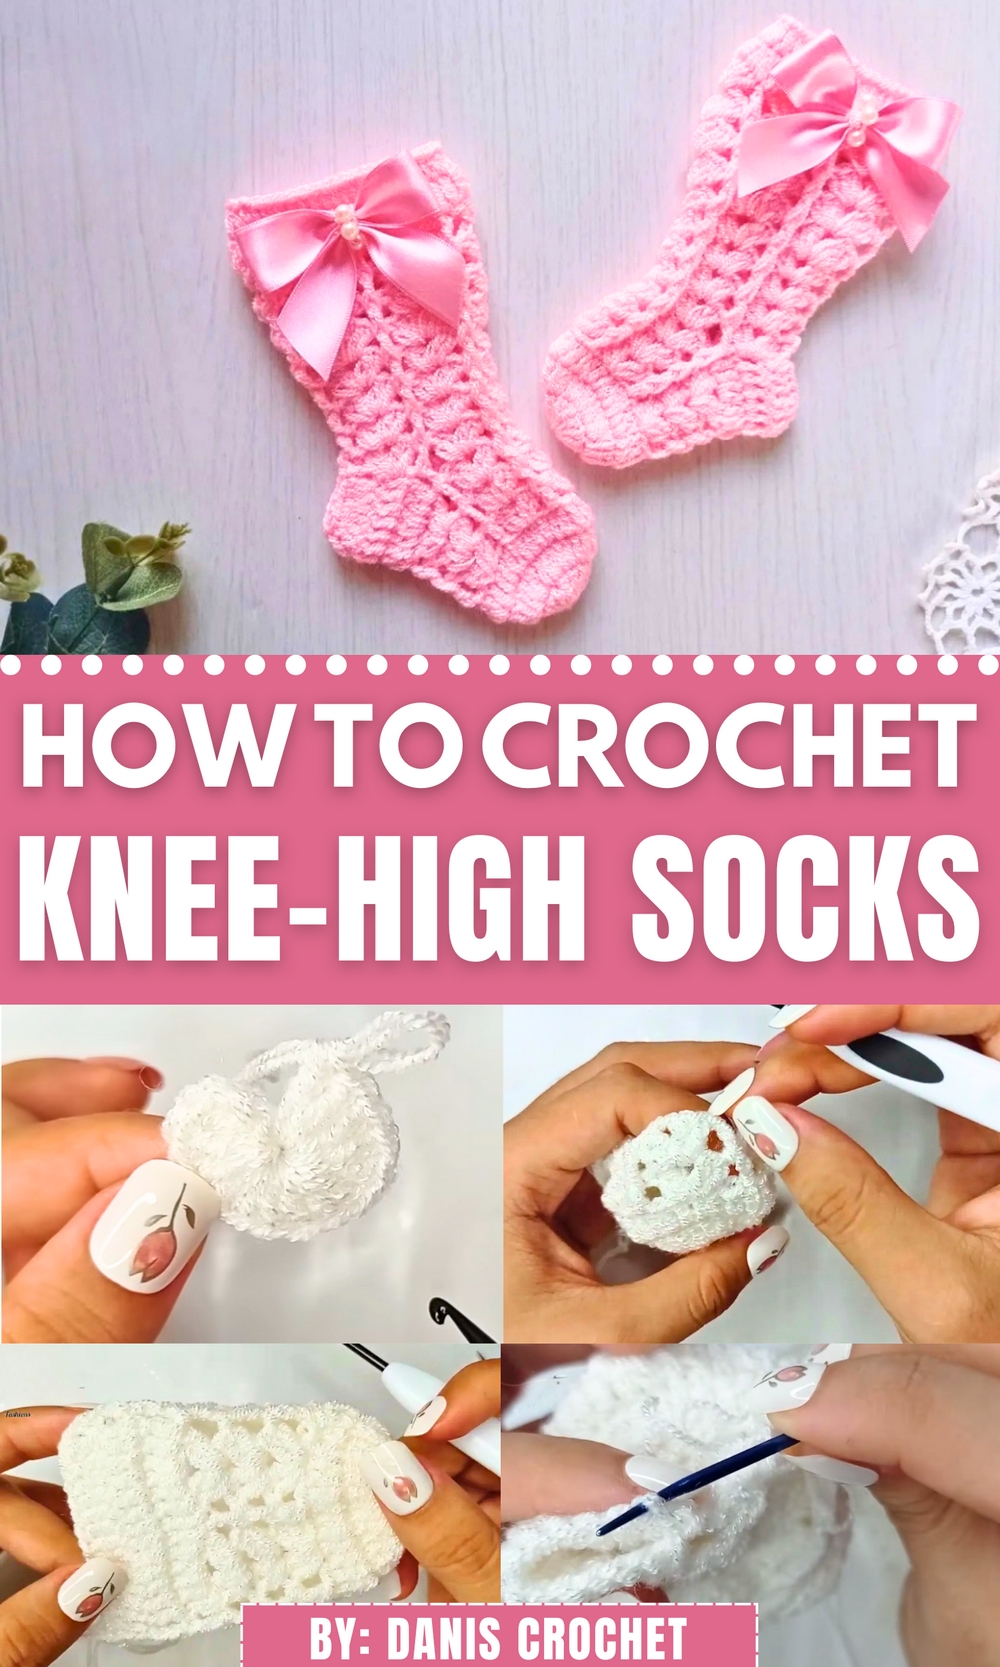
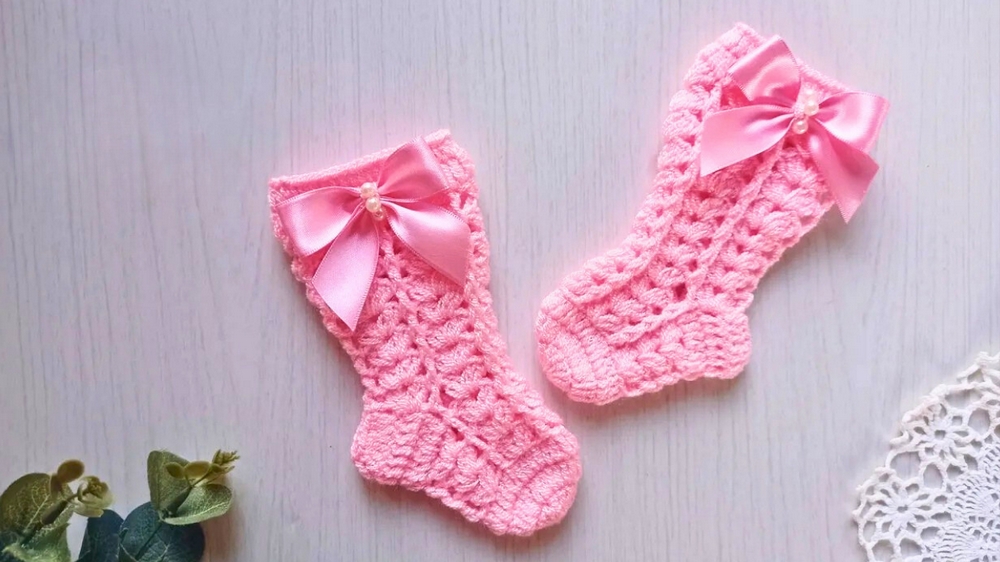
Step into comfort with this Free Crochet Knee-High Socks Pattern that adds warmth, charm, and a cozy touch to your everyday wardrobe or lounging time.
Long winters once meant bundling up in bulky layers that lacked personality, but those days are long gone. With the shift toward practical comfort and personal flair, knee-high socks have become more than just a cold-weather necessity. Adding a handmade touch gives them character, warmth, and a timeless charm that sets them apart from store-bought options. A touch of this style can effortlessly elevate loungewear or bring softness to structured boots. The Free Crochet Knee-High Socks Pattern makes this accessible, offering a stylish way to keep your legs cozy on chilly mornings or during slow evenings curled up indoors.
Free Cozy Crochet Knee-High Socks Pattern That Actually Looks Chic

These socks aren’t just for warmth, they serve as an easy accessory to personalize an outfit, whether you’re dressing up or winding down. They’re breathable yet insulating, stretch comfortably, and stay in place without slipping. Perfect for gifting or keeping, they strike the right balance between function and fashion.
With just a little effort, you can make comfort beautiful and practical all at once. This project invites warmth in more ways than one, letting your hands bring softness to your step, literally. It’s a small luxury worth adding to everyday life.
Step-by-Step Details
1. Gathering Materials
- Yarn: Omega Cris brand yarn, which is soft and shiny. The thickness is about 1mm, but is used doubled (2 strands, resulting in about 2mm). If the yarn is thinner, up to 3 strands can be used.
- Hook: 3.0mm crochet hook.
- Elastic: A thin elastic worked in two or three strands for a snug fit.
- Scissors: For cutting the yarn.
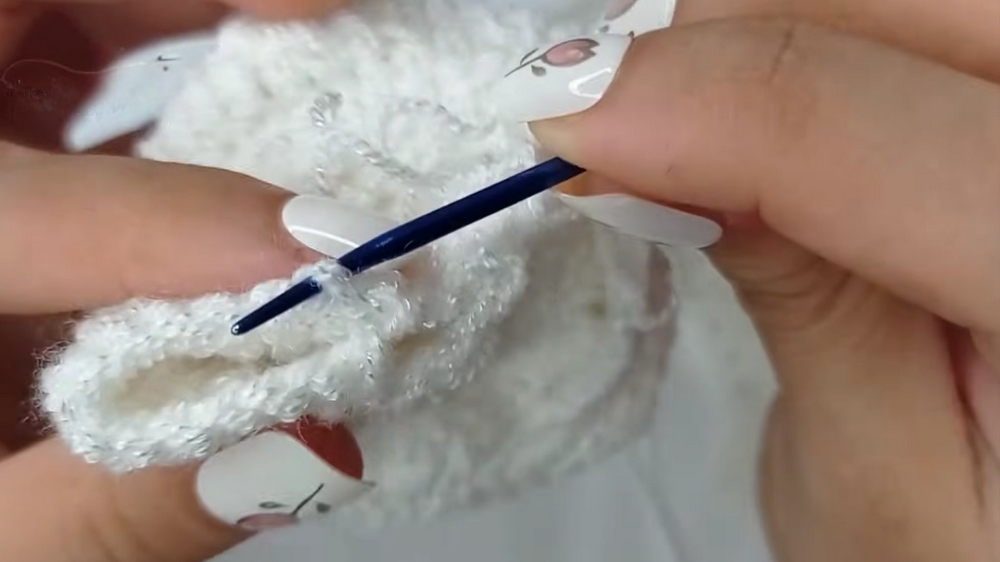
- Wool needle: For finishing and sewing parts together.
- Optional decorations: Tiny pearls, bows, or applique such as teddy bears, lions, or elephants. These details are optional but can elevate the overall design.
2. Creating the Sole of the Sock
- Starting with the foundation:
- Make a slip knot and crochet 4 chains.
- Work 14 double crochets into the first chain and finish the round with a slip stitch. Add the starting chain as the 15th stitch.
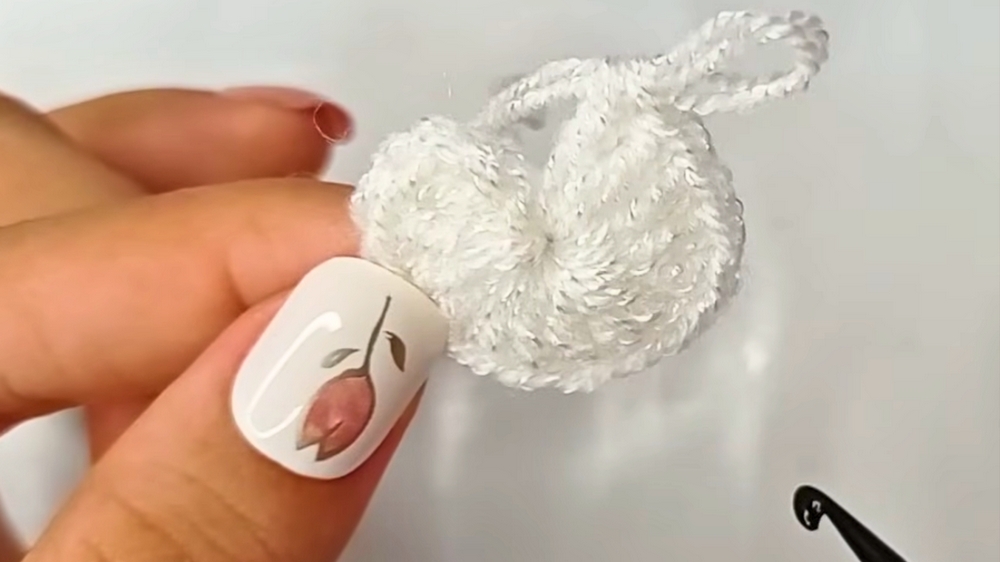
- Building the base:
- Round 2: Create 30 double crochets by making 2 double crochets (increases) in each stitch.
- Round 3: Work 1 double crochet on each stitch with no increases.
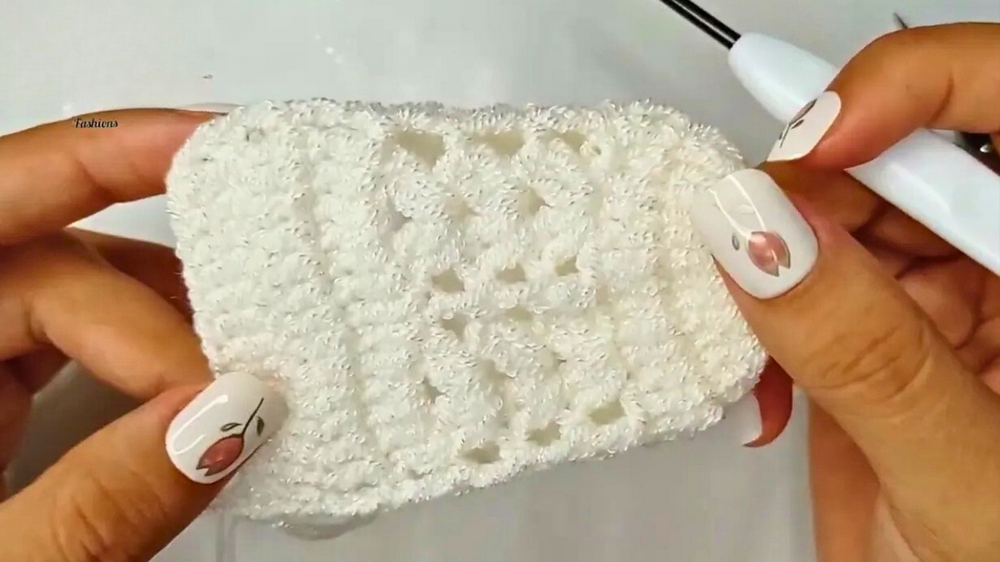
- Adding texture:
- From Round 4 onward, introduce a fan pattern:
- Skip 2 stitches, crochet 2 double crochets, 2 chains, and 2 more double crochets into the same stitch to form the fan.
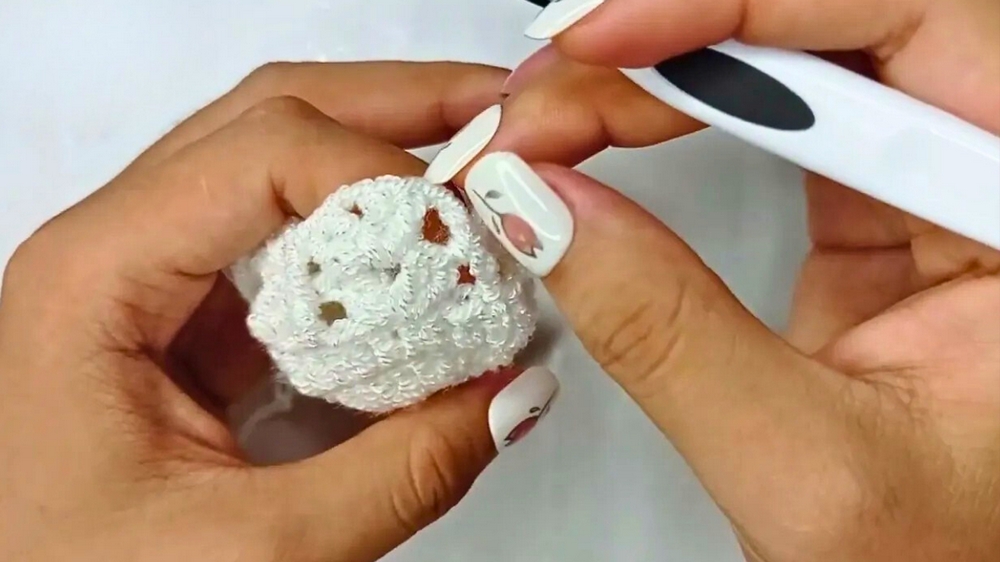
- Skip 2 stitches, crochet 2 double crochets, 2 chains, and 2 more double crochets into the same stitch to form the fan.
- From Round 4 onward, introduce a fan pattern:
3. Building the Heel
- In the heel section, reduce the work to focus on sewing together the back of the sock.
- Work double crochets to provide a snug but ample fit for the baby’s foot.
- Sew the heel seam using a wool needle to close the open section.
4. Designing the Leg of the Sock
- Using the fan pattern, continue building height for the leg of the sock.
- Increase the width by adding 1 extra double crochet in the fan pattern after Round 4 to form 3 double crochets, 2 chains, and 3 double crochets in each fan. This ensures a more comfortable fit around the baby’s leg.
5. Adding Elastic for a Better Fit
- Weave thin elastic into the final rows of the sock to give a secure fit. Adjust the elastic snugly and ensure it is hidden between the stitches.
6. Final Touches
- Add an optional decoration such as a bow, ribbon, or applique.
- Hide the yarn and elastic ends with a wool needle.
- Make sure no sharp edges or hard decorations are left, making the sock baby-friendly.
Special Features
- Adaptable for Baby Boys or Girls: The project suits both genders. Simply change the yarn color and add appropriate embellishments.
- Textured Design: With the fan pattern and ribbing effect on the stitch, these socks look cozy yet stylish.
- Secure Fit: The elastic ensures the sock stays in place without being too tight on the baby’s leg.
- Unisex and Customizable: Decorations like pearls, bows, or animal appliques make it unique and suitable for gifting.
Tutor’s Suggestions
- Experiment with colors and designs to create unique socks matching baby outfits.
- For matching baby themes, Dani recommends using different appliques. For instance:
- Teddy bear: Suitable for boys.
- Little bows or pearls: Ideal for girls.
- If you don’t want elastic, you can thread a satin ribbon through the penultimate row to create a beautiful adjustable bow.
Level of Difficulty
- Beginner to Intermediate: The steps are simple, but they require some familiarity with basic stitches such as slip knots, double crochets, and chaining. For beginners, repeating the patterns ensures ease of learning.
Uses
- Everyday Baby Wear: These socks can keep a baby’s feet warm and cozy.
- Baby Shower Gifts: Personalize the socks with details to give them as unique, handmade gifts.
- Photo Props: These can be used as charming accessories in newborn photography sessions.
A Final Tip
While working with the elastic, ensure it is not stretched too tight. The goal is to give the sock a snug fit without constricting the baby’s leg. If elastic is skipped, a satin ribbon adds elegance and adjustability.
Conclusion
This tutorial demonstrates how to crochet adorable and functional baby socks/booties. Whether for a personal project or as a thoughtful handmade gift, these socks are a satisfying project for any crochet enthusiast. Their simple yet customizable design makes them a favorite for various baby-themed occasions.