Spread loving cheer with the Free Crochet Amigurumi Heart Pattern, a delightful and simple project perfect for gifts or charming home décor.
Love often begins with small gestures, much like the handmade crochet heart that’s the star of this tutorial. Designed with charming precision, this padded amigurumi heart is both delightful and practical, offering endless possibilities as a keychain, keyring, or keepsake decoration.
Joy Crochet Amigurumi Heart Pattern for Heartfelt Surprises

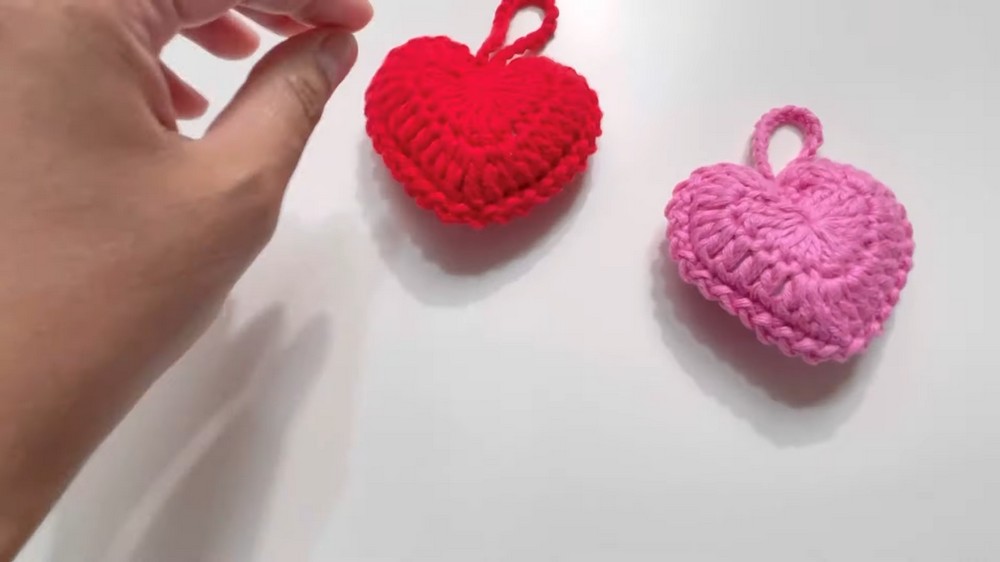
What makes this heart stand out is its seamless two-sided elegance, achieved using soft 100% cotton yarn and a 4 mm crochet hook to create a smooth yet sturdy structure.
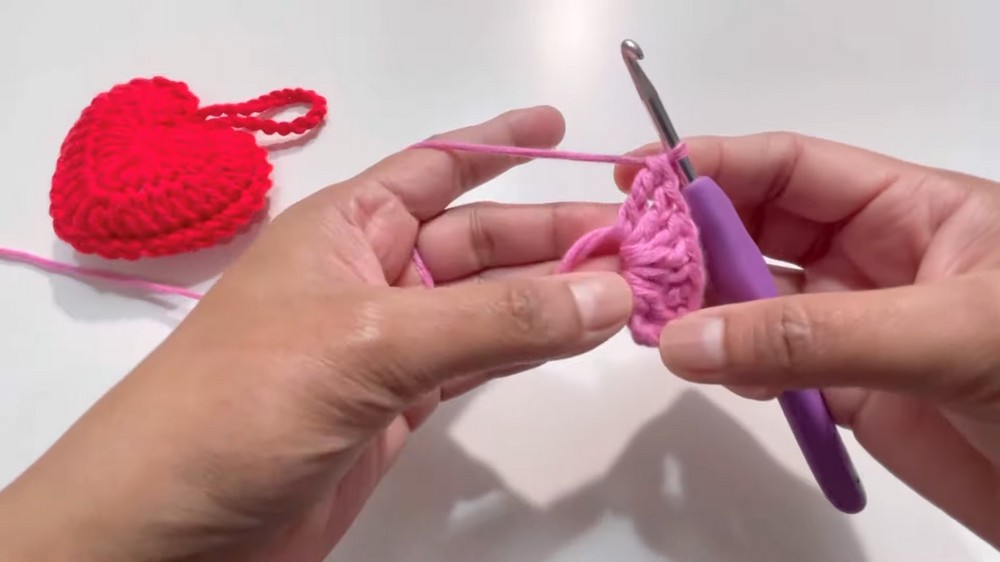
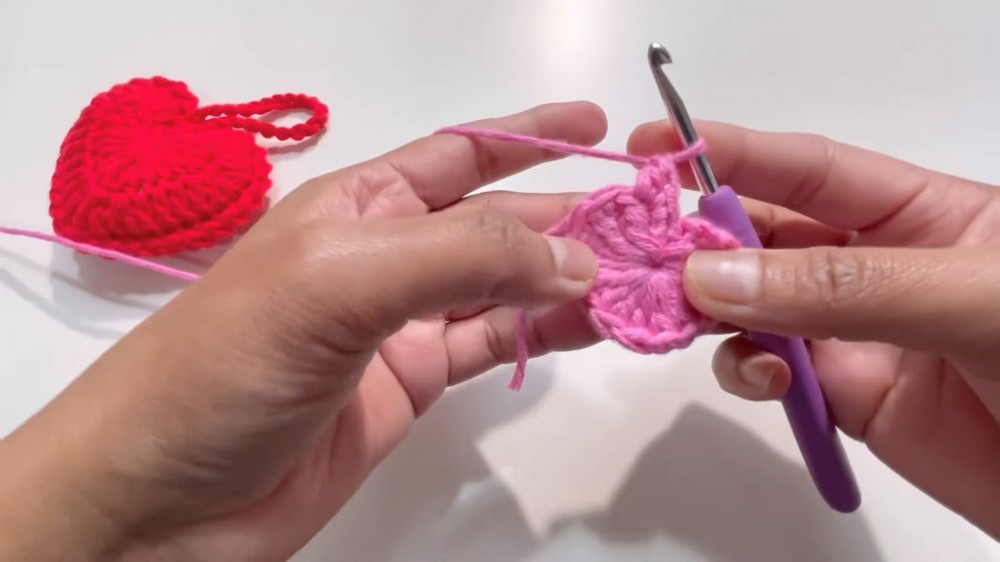
Its padded texture, filled gently with toy stuffing, adds dimension and gives it a cozy, handcrafted touch. The step-by-step tutorial incorporates classic crochet techniques such as the magic circle, treble crochets, double crochets, and slip stitches, with clever adjustments to sculpt the heart’s distinct shape and curvature.
The finishing touches, like a customizable loop, make this project adaptable—whether you’re designing a heart for Valentine’s Day, gifting it to a loved one, or using it as a decorative piece for your space.

In its simplicity, the heart radiates warmth, while the detailed stitches add a touch of artistry that both beginners and experienced crocheters can appreciate. By using moderate stuffing and neat slip stitches while joining the two parts, the design achieves a polished, balanced finish.

Headings and Information
Materials Needed
- Yarn: 100% cotton yarn for durability and softness.
- Hook: 4 mm crochet hook.
- Other Materials: Soft fiberfill or toy stuffing, yarn needle, scissors.
Special Features
- Two-Sided Design: The heart looks identical and seamless from both front and back.
- Padded Appearance: Stuffed with polyfill to give it shape and dimension.
- Hanging Loop: Includes an adjustable crocheted chain to turn the heart into a keychain, keyring, or small hanging ornament.
- Moderate Stiffness: Stuffed heart strikes a balance between firm and soft.
Level of Difficulty
This project is easy to intermediate:
- Great for crocheters who are comfortable with treble crochets, double crochets, and slip stitches.
- Familiarity with the magic circle technique is beneficial.
Tutor’s Suggestions
- Avoid Overstuffing: Ensure the heart isn’t too stiff or floppy; moderate stuffing creates an ideal padded appearance.
- Work Carefully on Slip Stitches: When joining the two heart pieces, make sure stitches align to avoid uneven edges.
- Adjust Loop Size: The hanging loop can be customized with additional chains for larger keyrings or smaller loops for compact designs.
Uses
- Personalized gifts for loved ones on special occasions.
- Cute keychain or ring accessory.
- Home decor as a wall hanging or ornament.
- Holiday-themed crafts (e.g., Valentine’s Day).
Step-by-Step Instructions
The tutorial demonstrates how to crochet a beautiful padded heart, perfect for a keychain or keyring. This stuffed heart is lightweight, versatile, and visually stunning, making it a thoughtful handmade gift for special occasions like anniversaries, Valentine’s Day, or simple tokens of appreciation. With a textured design on both sides, this project combines functionality and beauty to result in a unique finished product.
Conclusion
This stuffed crochet heart tutorial combines functionality with artistic design, making it a perfect beginner-friendly project with just the right touch of elegance. Whether used as a keychain, ornamental decoration, or gift, this heart is customizable, padded for texture, and made with durable materials for a long-lasting finish. Follow the full tutorial to craft your own version of this exquisite heart and infuse your handmade projects with love and creativity.
Final Tip
To achieve a polished look, weave in all loose ends carefully and ensure the stitches are tight when joining pieces to avoid gaps.