Twist ordinary yarn into charm with this Free Crochet Butterfly Pattern that’s quick to make, endlessly versatile, and perfect for any creative accent.
Butterflies have long symbolized change, hope, and quiet beauty, gracing gardens, windowsills, and the pages of childhood memories. Bringing that delicate charm into your hands can be as simple as a hook and yarn. With this free crochet butterfly pattern, you can make soft, lightweight accents that add a cheerful touch to anything they land on. These small creations are more than decorative, they’re versatile, quick to make, and endlessly useful.
Fast & Fun Crochet Butterfly Pattern for Hair Clips, Cards, and More
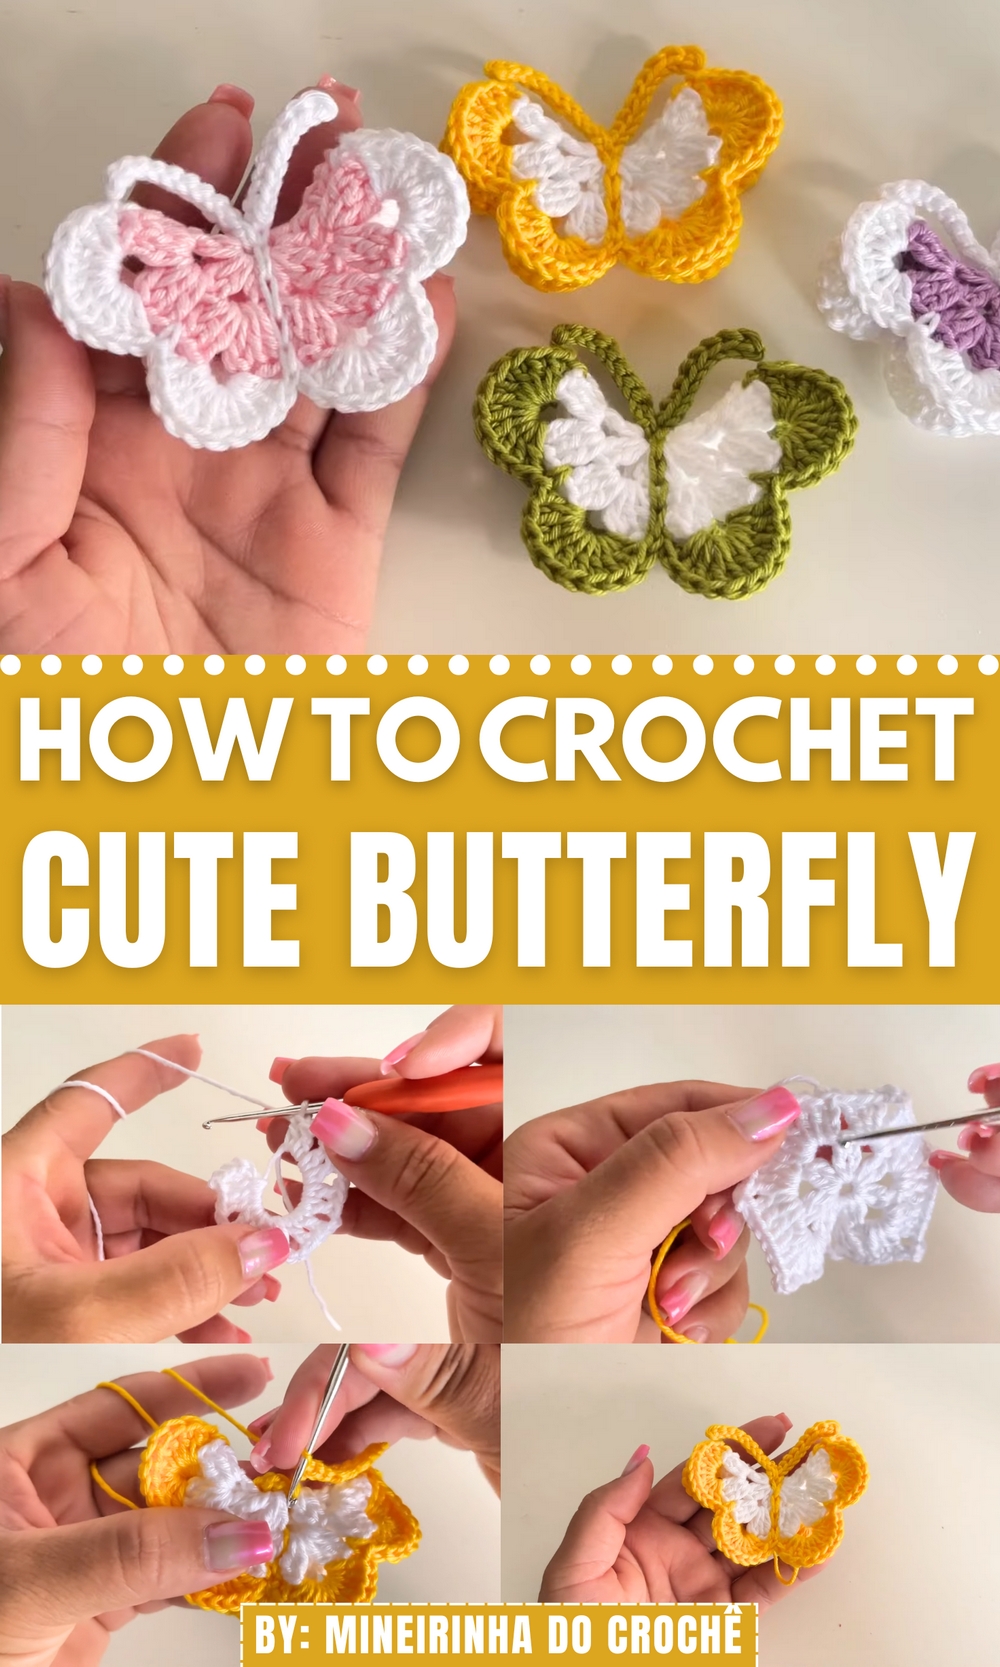
Use them as appliqués on hats, bags, or blankets. Turn them into pins, magnets, garlands, or hair clips. They also make lovely additions to gift wrapping or handmade cards, adding a thoughtful detail that stands out. Ideal for beginners or quick projects, these butterflies offer a satisfying way to use leftover yarn while making something that sparks joy.
Their simplicity allows for playful color combinations and a wide range of uses across seasons and occasions. Whether stitched in pastels for spring or bold tones for summer decor, each butterfly brings lightness and personality to your project. It’s a gentle reminder of nature’s beauty, stitched one wing at a time and a lovely way to share a bit of handmade charm with others or simply brighten your own space.
Special Features of the Crochet Butterfly
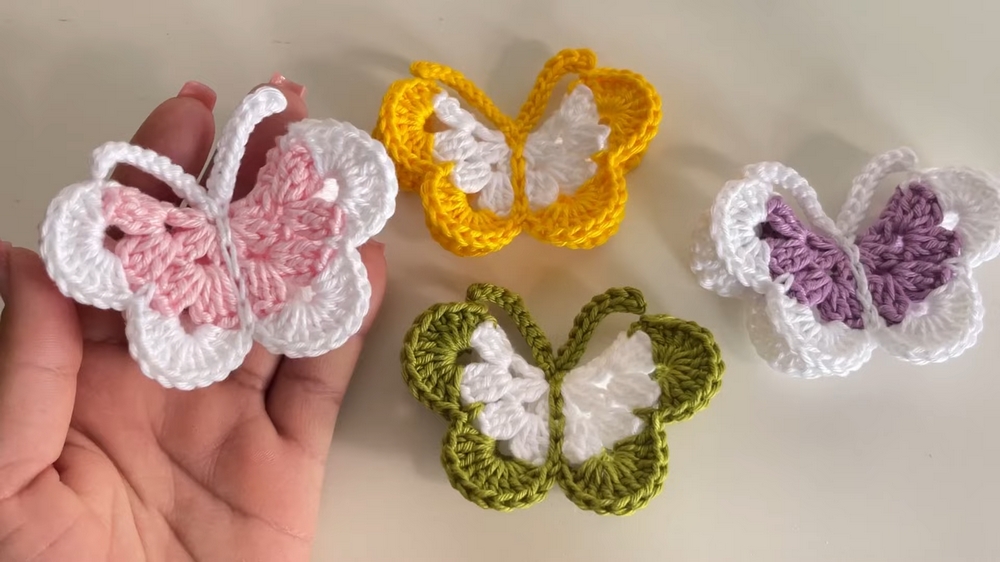
- Customizable Colors:
- The butterfly can be made in various color combinations, such as lilac and white, white and yellow, or vibrant finishes.
- You can experiment with a white base and colorful borders or vice versa.
- Versatility in Use:
- The butterfly can be used to create keychains, fridge magnets, or embellishments for garments and accessories.
- Its charming design makes it suitable for gifting or decorating.
- Quick to Make:
- The project is quick to complete, making it ideal for those looking for a fast and satisfying creative craft.
Level of Difficulty
- Beginner-Friendly:
- The process is straightforward and does not require advanced crochet skills, making it accessible for anyone learning crochet.
- Techniques used include: magic ring, double crochet, slip stitch, and creating chain loops.
Tutor’s Suggestions
- Thread Options:
- The tutor uses amigurumi thread for the tutorial but mentions you can choose any thread that suits your preference. Pick colors that appeal to you for a vibrant or subtle finish.
- Personalization:
- You can alter the finishing pattern by choosing whether the inner layers are white or colored. This flexibility allows you to create different styles, all following the same pattern.
- Folding and Securing:
- Folding and stitching the butterfly is an essential step to achieve the desired shape. Take care to secure the folds evenly with your thread.
Materials Needed
- Amigurumi thread (or any thread of choice)
- Two colors are recommended (e.g., white and yellow).
- 2.5 mm Crochet Hook
- Scissors
Step-by-Step Instructions
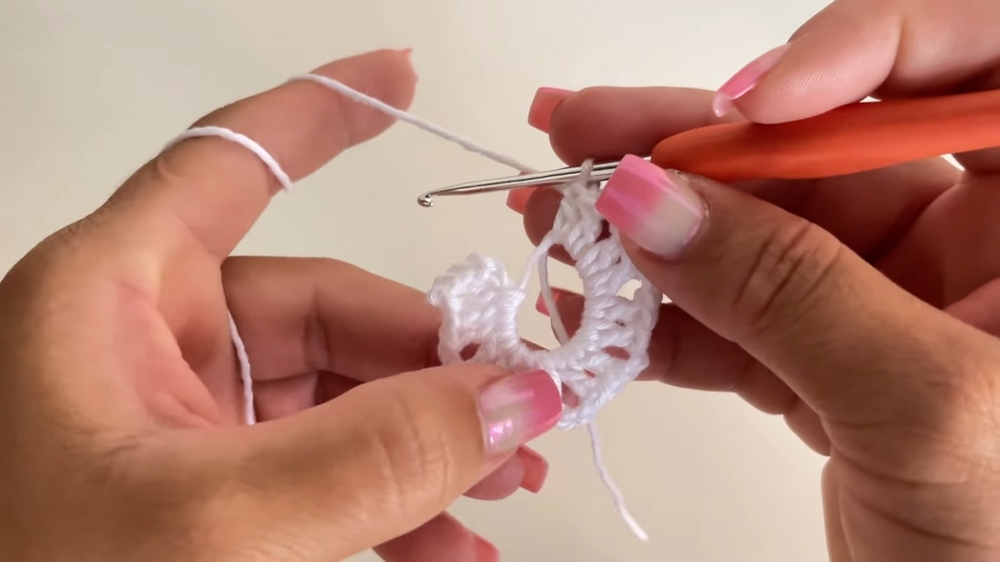
1. Create the Base Shapes (Magic Ring & Double Crochets):
- Start with a magic ring, then create:
- 3 chains, 2 double crochets, and 2 chains.
- Repeat this pattern 8 times to create blocks of double crochets.
- Pull the magic ring thread and close off with a slip stitch.
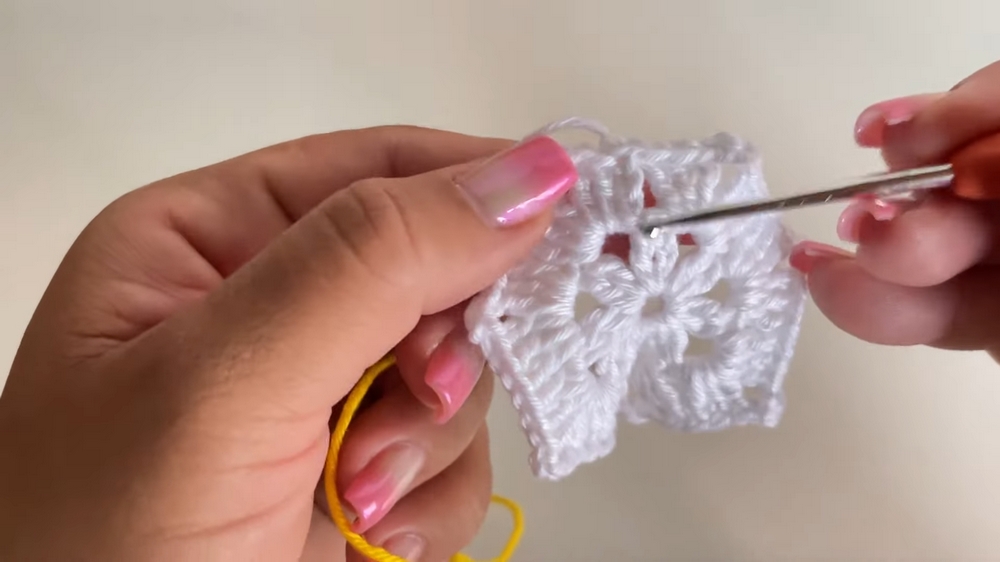
2. Form Fans Within Each Block:
- In each block (spaced by 2 chains), create fans of three double crochets.
- Between fans, include 3 chains to maintain spacing.
3. Add a New Color and Build Butterfly Wings:
- Change to a second color of thread. Secure the thread between fans with a single crochet.
- Within each fan structure, crochet 10 double crochets to build out the wing.
- Secure the spaces between two fans with a single crochet.
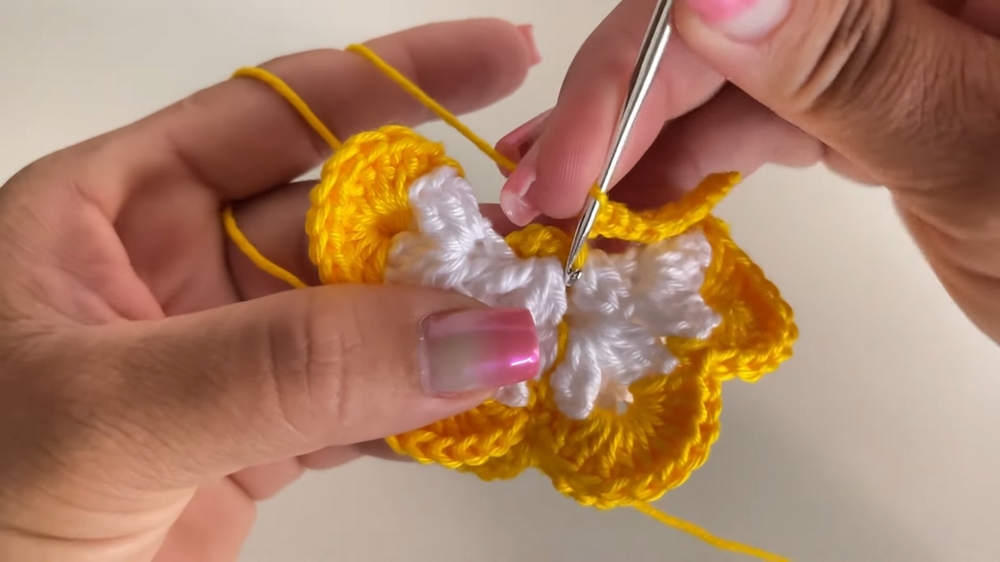
4. Shape the Butterfly’s Body:
- Fold the structure to align the wings symmetrically.
- Use the thread to stitch through the center and secure the folds into a butterfly shape.
5. Create the Antennae:
- Crochet 10 chains for the antennae. Skip the first chain and create slip stitches in the remaining chains.
- Repeat on the other side to complete the second antenna.
6. Finishing Touches:
- Adjust the antennae and shape the wings into place.
- Secure all loose ends and tie knots to finish off the butterfly.

Uses of the Butterfly
- Decorations: Add as an applique on bags, sweaters, or hats.
- Keychains or Magnets: Easily transform the butterfly based on your needs.
- Gifting: These butterflies make thoughtful, handmade gifts.
Tip for Success
- Pull the Magic Ring Firmly: Ensure the center ring is tightly adjusted to prevent gaps. A snug magic ring creates a neater finish overall.
- Consistency in Stitches: Keep your tension even and your double crochets uniform for a polished look. Focus especially on the wings for a balanced design.
Conclusion
This crochet butterfly is a delightful and quick project suitable for all levels, especially beginners. With simple materials, you can create something beautiful and versatile. Whether as a gift, décor, or utility piece, these butterflies are guaranteed to bring charm to any project. Follow the steps, practice your tension, and enjoy the process of creating these tiny works of art.