Make this cute Free Crochet Halter Top Pattern to have a beautiful new shirt that is perfect for a sunny day at the beach with your friends.

Stay Cool with This Lovely Free Crochet Halter Top Pattern
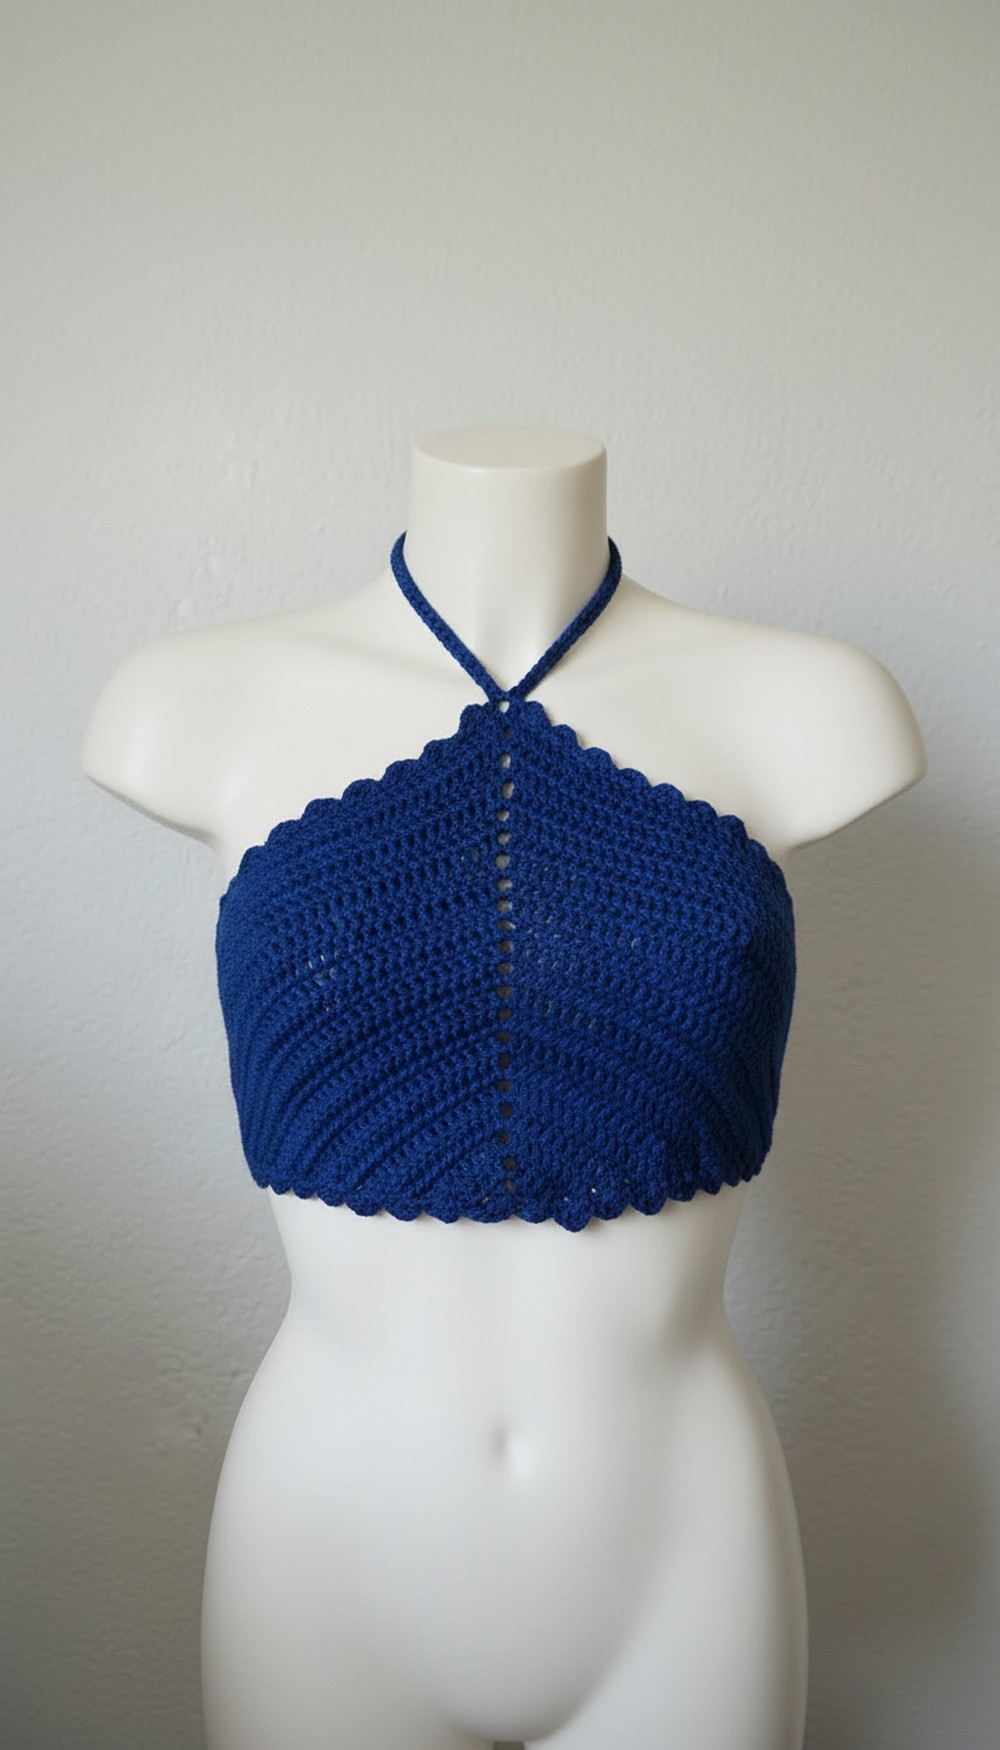
Shine like a bright star in the sun with this Free Crochet Halter Top Pattern that is the perfect for a happy summer day. It is made with very soft and light yarn that feels like a gentle hug on your skin while you play outside.
This top features a unique triangle shape that covers you perfectly and has long strings that tie around your neck and back for a comfy fit. The edges are decorated with pretty shell stitches that look like tiny ocean waves to make the design look fancy and special. You can use it as a fresh outfit for a trip to the beach or wear it to a fun party with your favorite skirt.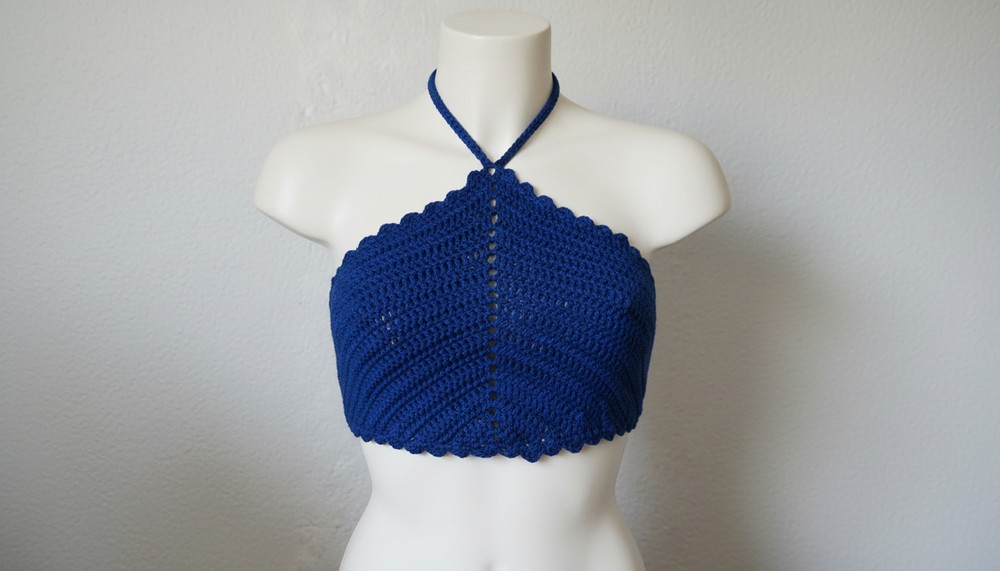
It is very special because you can crochet the whole thing in one go without ever stopping to cut your yarn until you are done. You will love how easy it is to make the top larger or smaller by just adding more rows until it fits you exactly right.
Crochet Halter Top Pattern
Materials You Will Need:
- Yarn: 100% cotton yarn (or any lightweight yarn). For demonstration, white cotton yarn was used.
- Alternative options: Acrylic yarn or a cotton acrylic blend.
- Hook Size: 3.5 mm crochet hook (or size recommended for your yarn).
- Measuring Tape: To check your progress and measurements.
- Stitch Markers: To mark important points in the pattern.
- Scissors: For cutting the yarn.
- Tapestry Needle: For weaving in ends.
- Optional: Pre formed bra cups or fabric for lining (to address any transparency issues).
Gauge:
Gauge is essential to ensure the correct size. Work a 10 x 10 cm (4 x 4 inches) swatch in double crochet (US terminology):
- Gauge: Approx. 15 stitches x 10 rows in double crochet = 10 x 10 cm.
Tip: If your swatch is off, adjust your hook size accordingly.
Finished Size:
The pattern below creates a size medium (M). The following are the approximate finished measurements:
- Length (center): 25 cm (10 inches).
- Width (bust area): 33 to 34 cm (13 to 13.5 inches).
Customization: Adjust size by adding or reducing the number of rows (length) or stitches (width) depending on your measurements.
Key Stitches and Abbreviations (US Terminology):
- Ch: Chain.
- Dc: Double crochet.
- Sl st: Slip stitch.
- Magic circle: A technique to start working in the round.
- Turn: Turn your project to the other side to begin the next row.
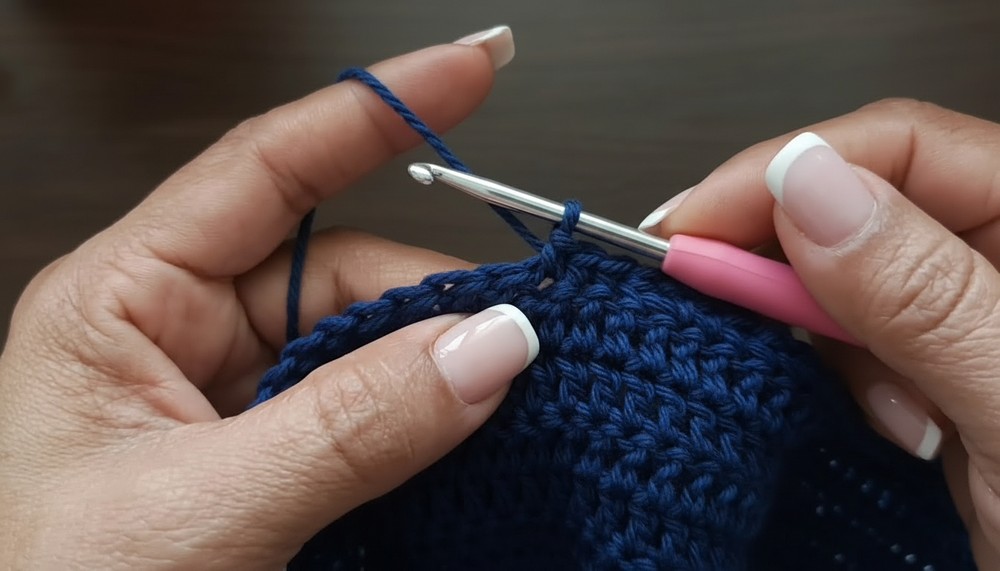
Pattern Instructions:
Step 1: Create the Foundation of the Top
- Magic Circle: Create a magic circle by wrapping the yarn around two fingers and pulling up a loop. Secure it with a slip stitch.
- Row 1:
- Start with 3 chains (acts as the first double crochet).
- Work 3 dc into the circle.
- Chain 2 (forms the middle space).
- Work another 3 dc into the circle.
- Pull the short tail of the magic circle to tighten the center.
- Turn: Secure your row by turning your work to begin Row 2.
Step 2: Begin Increasing Rows
Row 2:
- Start with 3 ch (counts as the first dc).
- Work 2 dc into the same space as the chains (total of 3 dc in this row).
- Continue working 1 dc over each stitch until the middle space.
- In the middle (ch 2 space from previous row):
- Work 1 dc, ch 2, and 1 dc (this creates the center space).
- Work 1 dc over the next stitches until you reach the final stitch.
- In the final stitch of the row, work 3 dc into the same space.
- Turn your work to begin Row 3.

Step 3: Continue Repeating Rows for Length
Row 3 and Beyond:
- Repeat the steps for Row 2:
- Always start and end with 3 dc in the same space to create width.
- Work 1 dc over each stitch.
- In the middle space, always work 1 dc, ch 2, 1 dc.
- Continue adding rows until the piece covers your bust area, measuring about 25 cm in length (or your desired size).
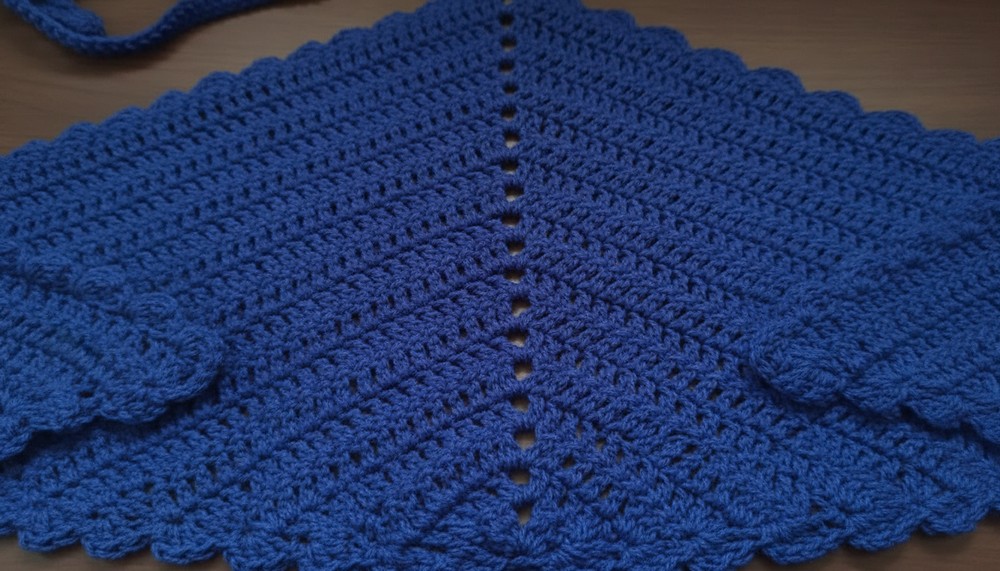
Step 4: Add the Decorative Border
- Once you have reached your desired top size, begin the shell/ fan border:
- Start the border by creating 2 ch, then work 2 dc into the same space.
- Skip 2 stitches, then make a sl st in the third stitch.
- Repeat across the edge to create a scalloped design.
- Turn at the corners and adjust the pattern neatly along edges for a polished finish.

Step 5: Create and Attach the Straps
- Create Straps:
- Work chains from the points of the neckline and back corners. Suggested length: 30–40 cm (adjust to your preference).
- Work back along the chain by creating sc in each chain.
- This creates sturdy straps to secure the top.
- Position: Two straps are tied around the neck, and two are tied at the back for closure.
Tips and Customization Ideas:
- Colors: Experiment by using multiple colors for a striped or gradient effect.
- Strap Length: Adjust the length of the neck or back straps based on preferences.
- Lining: Add fabric or pre formed bra cups for additional coverage and support.
- Sizing: For larger or smaller sizes, increase or decrease rows and stitches proportionately.
Conclusion and Final Remarks:
This crochet summer top is lightweight, stylish, and perfect for warm weather wear. Its simple design, with fan stitching and elegant straps, makes it flattering and breathable. Within just a few hours, you’ll have a stunning, handmade piece that can be customized to suit your style.
Whether you’re crocheting for yourself or creating items to sell, this top is a fantastic addition to your crochet projects. Show off your creativity by experimenting with colors, strap styles, or adding embellishments like beads or embroidered designs.