Sprinkle your style with a playful crochet flower top that bursts with color, fun vibes, and comfy charm for sunny days and happy adventures.
Handmade Crochet Flower Top Pattern to Light Up Your Day
This top is full of bright, beautiful flowers that look like they are blooming right on your clothes. It feels soft and light, so it’s comfortable to wear on warm days. You can put it on for picnics, trips, or just hanging out with friends. The flower shapes make it special and pretty, catching everyone’s attention. You can choose any colors you like to match your style.

It goes well with jeans, skirts, or shorts and makes your outfit happy and fun. This top is easy to wear and easy to care for. It adds a joyful, handmade touch to what you wear and makes you feel good all day. People will love how lovely and unique it looks. Wearing this, you carry a little garden of flowers with you wherever you go!
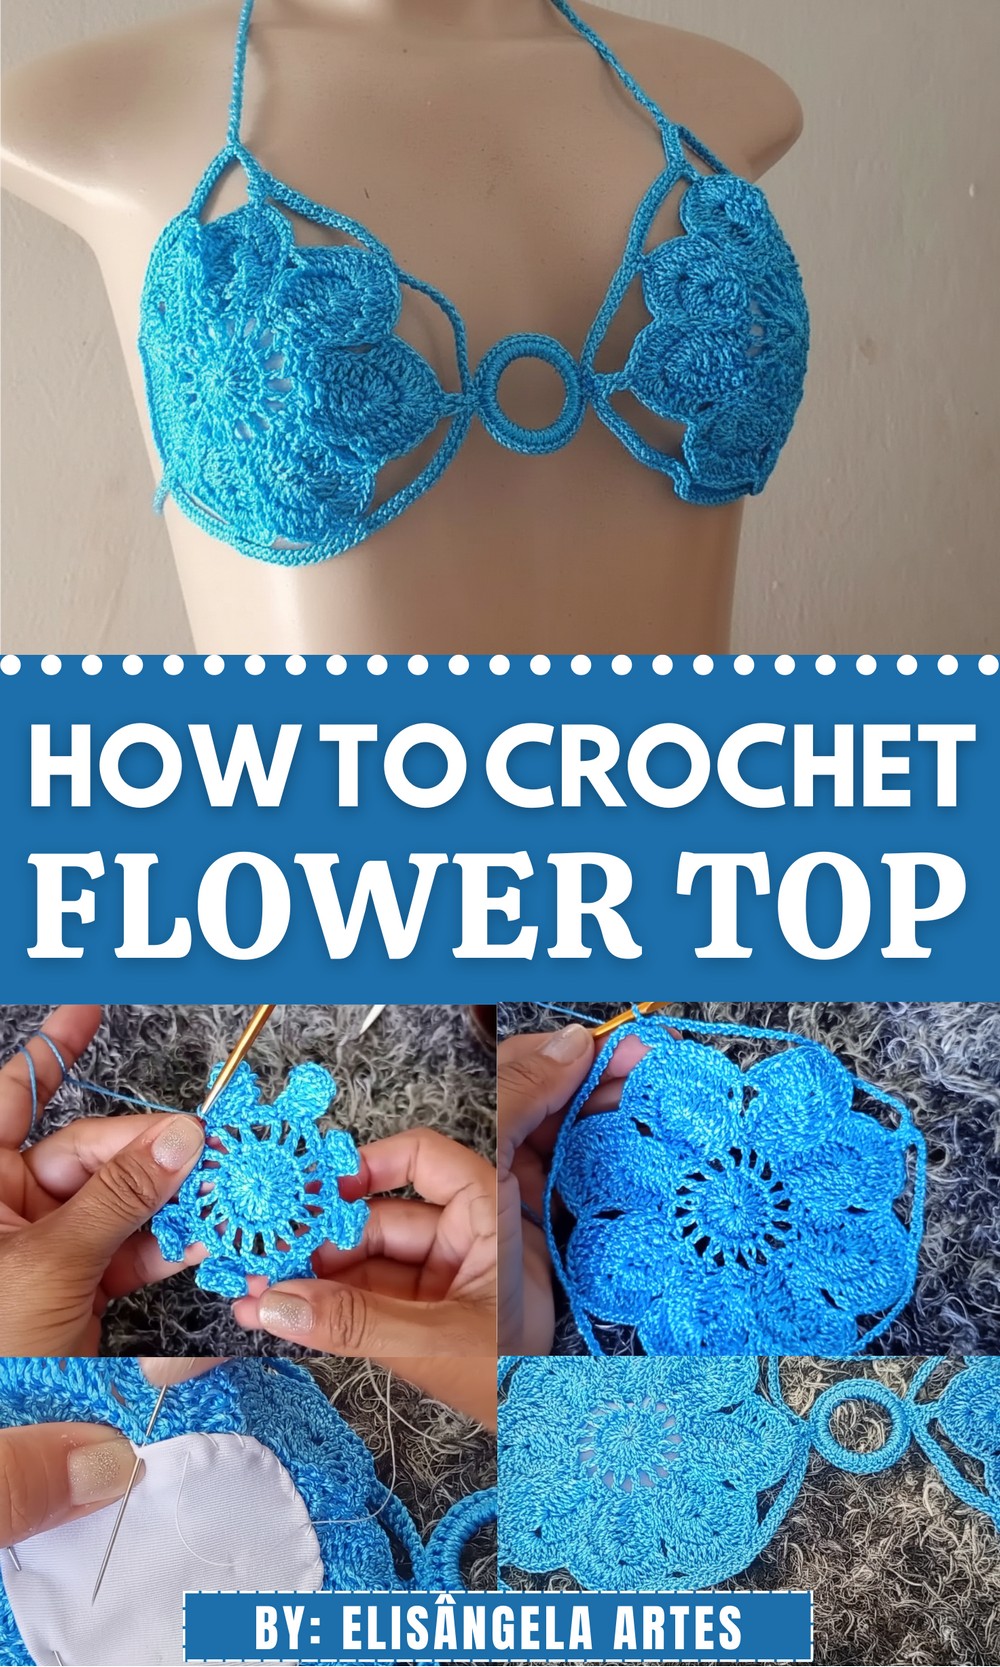
Crochet Floral Bikini Top with Acrylic Ring Pattern
Materials
- Polypropylene smooth yarn (e.g., Polipop Lenion, 500m, Tex 3676)
- Crochet hook (size suited to yarn, recommended similar to 1.75 – 2.5 mm)
- Acrylic ring (small, ~3 cm diameter)
- Needle and scissors
- Stitch markers (optional)
- Lining fabric pieces (stretchy, white or nude recommended)
- Sewing thread (kite string #10 or transparent nylon for lining)
- Lighter (for finishing yarn ends)
Special Features
- Adjustable size via chains and stitch counts
- Acrylic ring incorporated for design and structure
- Durable polypropylene yarn that holds shape and color
- Bubble stitch detail on straps (optional)
- Lining sewn inside to prevent transparency
- Double treble crochet stitches for texture and shaping
Step-by-Step Pattern
1. Starting the Center Loop
- Ch 4, then sl st into the 1st ch to form a small ring.
- Ch 3 (counts as 1 dc), then work 15 more dc into the ring. (Total 16 dc)

2. Closing the Round
- Sl st to the top of the initial 3 chains to close the round.
3. Second Round – Chain Spaces and Double Crochet with Separation
- Chain 3 (counts as 1 dc), ch 2, skip no stitches.
- In each dc of the previous round, work 1 dc, separated by ch 2 chains.
- Total of 16 double crochet stitches separated by 2 chains each.
- Close round with sl st to the initial chain 3.
4. Creating the Side Chain for Top Width
- Chain 7 (for XS; for size S chain 9, M 10-11, L 12 – adjust these for fit).
- On the 3rd chain from hook, work 1 dc, then 1 dc on the next chain.
- Continue working dc stitches across this side chain.
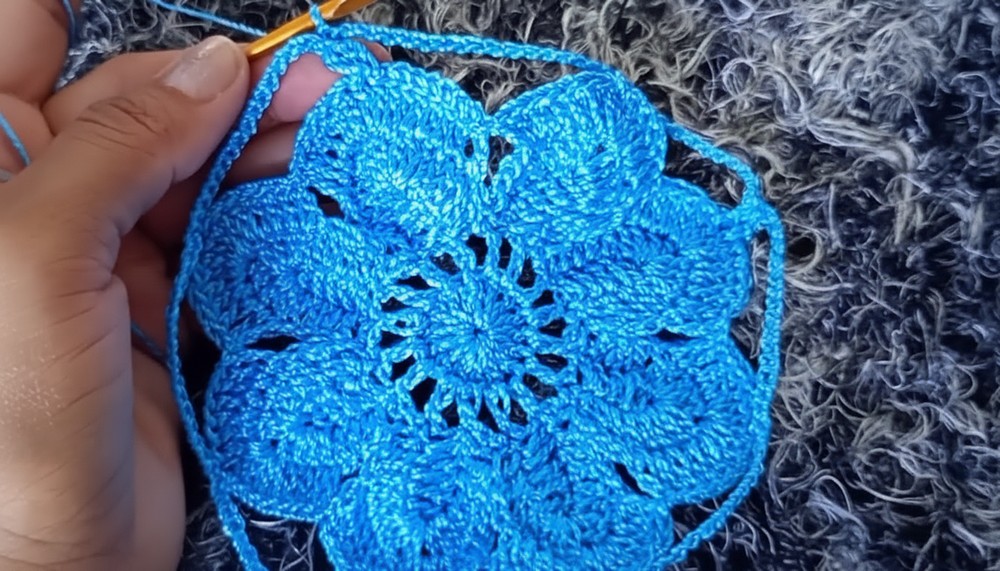
5. Continue Rounds – Double Crochet Petal Pattern
- Work rounds of dc over previous stitches, chaining between sets for separation as needed.
- In corners / chain spaces, work 3 dc clusters, separated by chains as per pattern.

- Maintain consistent stitch counts for shape.
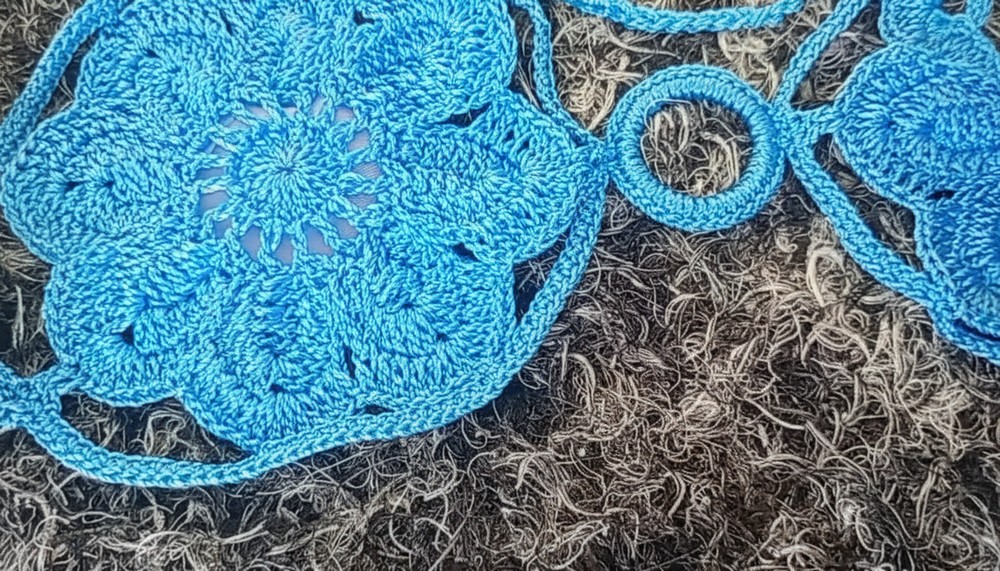
6. Petal Detail
- On some rounds, work groups of 3 dc, chain 1, then 3 dc in same space, creating petal shapes.
- Follow the pattern so petals line up around the circle.
7. Transition to Treble and Double Treble Crochets
- Use treble crochet (tr) stitches in specific places to add texture and height.
- For size adjustment, replace some treble crochets with double treble crochet (dtr) for larger sizes.
- Double treble: yarn over twice, insert hook, yarn over, pull through loops (3 loops on hook), yarn over, pull through first two loops, repeat until one loop remains.
8. Attaching Acrylic Ring
- After completing desired rounds/petal shaping, slip stitch around the acrylic ring to encircle it fully.
- Use single crochet stitches to firmly attach the ring to the crochet work.
- Ensure ring is centered where desired (usually center front).
- Leave tails of yarn for sewing.
9. Sewing the Ring
- Use needle and yarn to sew the ring securely along the attached edges.
- Sew through crochet stitches and ring alternately.
- Make sure the ring sits flat and secure.
10. Making the Straps
- For the neck strap: chain 45 cm length with double strands.
- Work dc stitches along the chain for thickness (optionally bubble stitch for texture).
- Knot and secure ends.
- For the waist strap: chain 60 cm, work similarly.
- Attach straps to top with secure knots or crochet stitches at ends.
11. Adding Lining
- Cut lining fabric circles matching the front cup size.
- Pin lining on inside of top.
- Sew carefully using strong thread (kite string or invisible nylon).
- Use small stitches for a neat finish.
- Leave edges rounded and smooth for comfort.

12. Final Finishing
- Weave in all yarn ends.
- Use lighter to carefully burn edges of cut polyester yarn to prevent unraveling.
- Block the top gently for final shape.
Tutor’s Suggestions
- Use stitch markers to mark corners or chain counts for size adjustments.
- Adjust chain length on sides for perfect fit.
- Acrylic rings can be found in haberdasheries; can use plastic or wooden rings for style variation.
- Use thinner nylon thread to make lining less visible.
- Practice the bubble stitch separately if unfamiliar before applying to strap.
Uses
- Ideal for summer beachwear, pool parties, and festival outfits.
- Coordinating with matching cover-ups or sarongs.
- Great pattern to customize for multiple sizes.
- Durable, quick drying, and color-safe with polypropylene yarn.
Difficulty Level
Intermediate – Advanced Beginner: Pattern uses simple stitches but requires attention to stitch counts, sizing, and combining techniques like sewing in the ring and lining.
Helpful Tip
Tip: When sewing in the acrylic ring and lining, hand sew slowly and make sure to catch both fabric and crochet stitches firmly, avoiding gaps. This ensures durability and a professional finish that will withstand wear and washing.
Conclusion
This floral crochet bikini top combines elegance and functionality with adjustable sizing and handmade details like the acrylic ring and lining. Using polypropylene yarn ensures durability and vibrant colors, perfect for festive beachwear.