Feel the breeze and shine bright with this easy-to-follow crochet halter neck top pattern that’s perfect for sunny days and casual fun.
Modern & Cool Crochet Halter Neck Top Pattern to Try
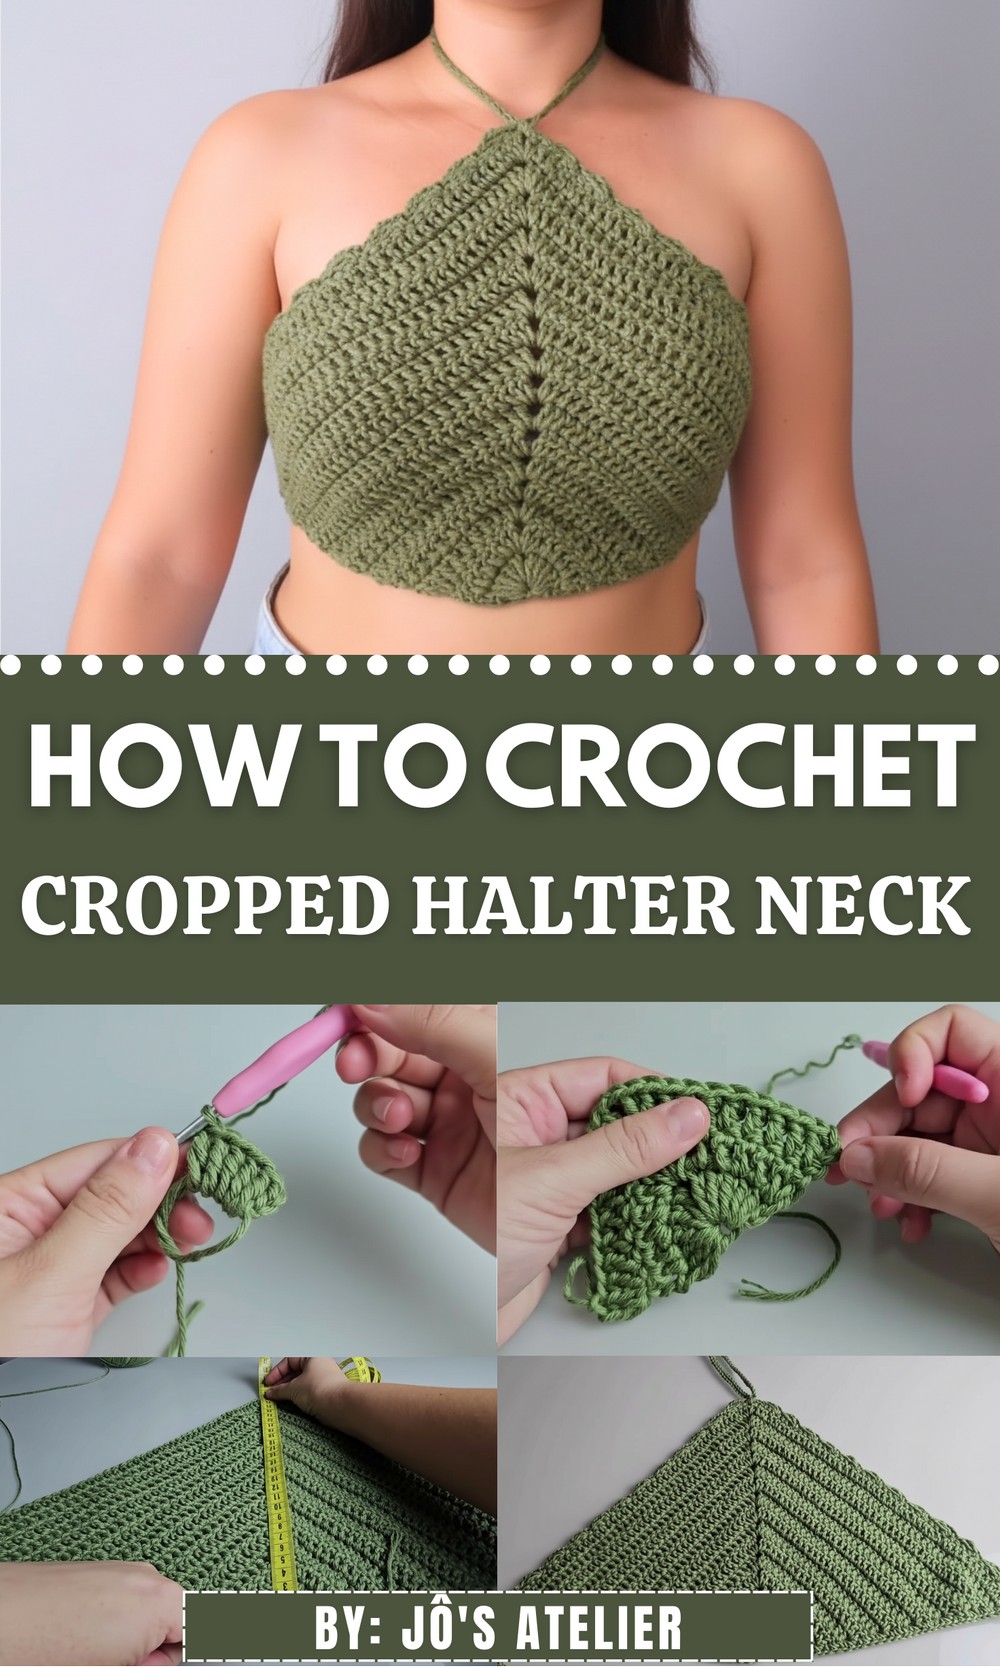
Imagine a warm sunny day when you want to wear something light, comfortable, and stylish all at once. This halter neck top fits perfectly for those moments. Its open back design and simple straps keep you cool while showing off a bit of skin in a tasteful way. Crafted with soft yarn and delicate crochet, the top feels gentle against your skin and looks beautifully handmade.
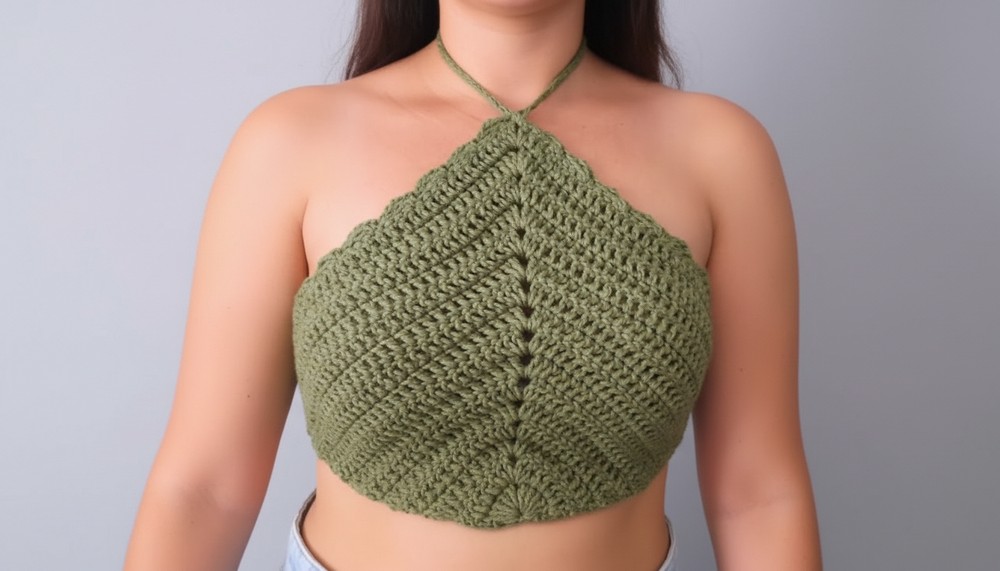
The small patterns create little holes that let air flow freely, making it perfect for hot weather. It pairs effortlessly with jeans, shorts, or skirts, making it a great choice for casual days, beach visits, or outdoor fun. The flattering shape suits many body types without feeling tight or heavy. Wearing this top gives you a fresh, breezy feel and a unique style that brightens any day. It’s easy to make and even easier to love.

Crochet Cropped halter neck Top Pattern
Difficulty: Beginner to Intermediate
Materials Needed
- Baroque 100% cotton yarn (size 6), color military green (or any cotton yarn you prefer)
- Crochet hook size 3.5 mm (or size you are comfortable with)
- Tapestry needle for weaving ends
- Scissors
Abbreviations
- ch = chain
- sc = single crochet
- dc = double crochet (also called high point)
- sl st = slip stitch
Special Features
- Minimal materials and quick to make
- Uses magic ring foundation for a seamless start
- Fan stitch increases for shaping
- Adjustable length and fit by adding rows
- Easy finishing with single crochet edging
- Perfect for casual wear or Carnival outfits
- Great pattern for sellers due to fast production speed
Step-by-Step Pattern
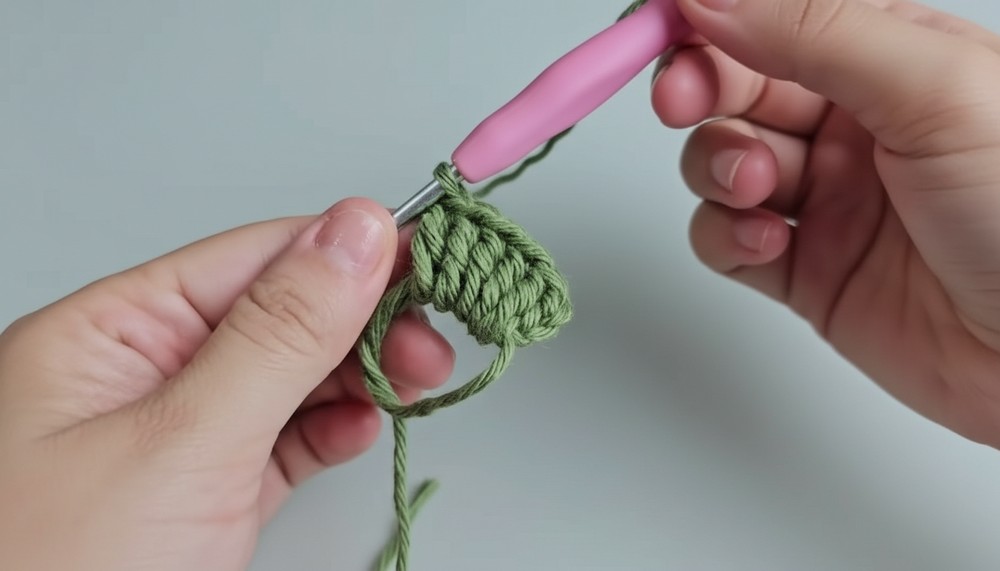
1. Begin with Magic Ring Foundation
- Make a magic ring.
- Ch 3 (counts as first dc),
- Work 5 dc into the ring, with a ch 2 between each dc.
- Total 6 dc spaced with chains, including the starting ch3.
- Pull the magic ring tight to close the center.
2. Round 2
- Ch 3 (counts as first dc).
- In the ch-2 space, work 2 dc, ch 2, 2 dc – this is a fan stitch.
- Repeat the fan stitch in each ch-2 space around.
- End with sl st to top of starting ch 3.
- You should have 6 fans total.
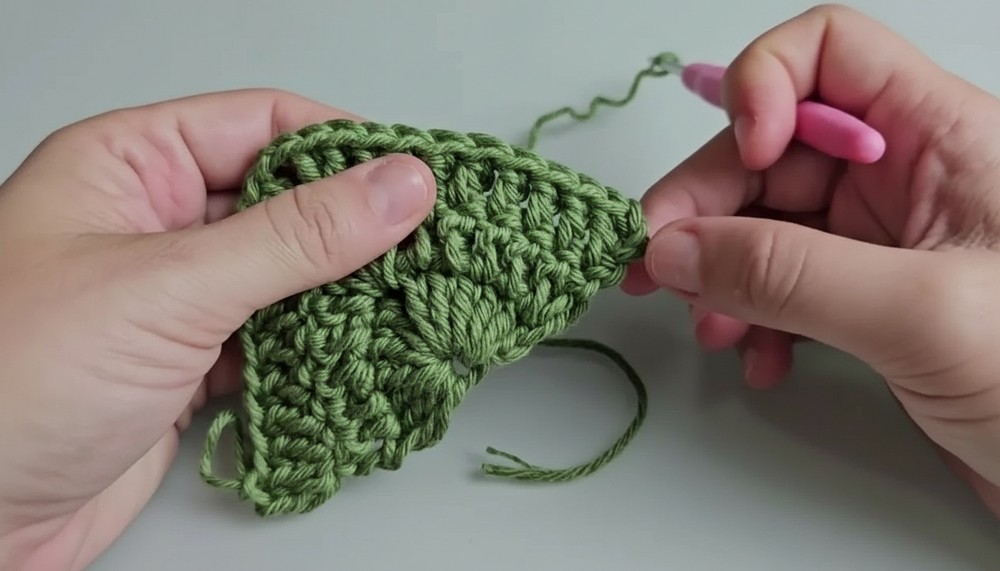
3. Round 3 and Subsequent Increase Rounds
- Ch 3 and turn.
- In the middle ch-2 space of each fan, work a fan: 2 dc, ch 2, 2 dc.
- In every dc stitch from the previous row, work 1 dc.
- Continue placing 2 dc, ch 2, 2 dc fans in chain spaces.
- As you increase rows, increase the number of fans evenly to maintain top shape.
4. Increasing Fans and Stitch Counts
- Watch the top forming evenly.
- Add the increases at chain spaces, adding one extra fan in the middle section as needed.
- Keep the stitch count balanced on left and right side to prevent crookedness.
- Use stitch markers or count to maintain symmetry.
- Reach approximately 8-16 rounds depending on desired size and length.
5. Tips for Adjusting Size
- For a smaller top, use fewer rows.
- For larger sizes, add rows and increase fans accordingly.
- Monitor shape frequently by laying flat or trying on.
- Adjust hook size if stitches are tight or loose (looser stitches: smaller hook; tighter stitches: larger hook).

6. Finishing the Body
- After final row, fasten off the yarn, leaving a tail to weave.
- Weave all ends neatly with tapestry needle.
7. Adding the Straps
- For the back tie strap, ch 50 cm (measure length on yourself or client).
- Sl st into each chain back to start, creating a sturdy strap.
- For the neck tie strap, make a smaller chain (35-40 cm).
- Attach straps securely on each side using slip stitches.
- Weave in all loose ends.

8. Edging and Final Touches
- Optionally, make a round of sc around edges (neckline and bottom) for a clean finish.
- Check and tighten any loose stitches.
- Block your top lightly for even shape.
Tutor’s Suggestions
- Work in good lighting so individual stitches can be accurately placed.
- Always count your fans and stitches after each row.
- Keep yarn tension consistent for a uniform look.
- Use scissors to trim yarn ends neatly and a tapestry needle for weaving to secure.
- Try different colors or cotton blends for summer variations.
- For sale items, consider offering strap lengths customization.
Uses
- Perfect casual crop top for summer or Carnival
- Ideal piece for selling due to quick work-up and trendy design
- Can be paired with high-waisted shorts or skirts
- Great for gifting or personal wardrobe additions
Tip for Best Results
Tip: When working your fan stitches, always make sure the increase fans are symmetrical on both sides to keep the top balanced and flat. Use stitch markers to keep track of the center and sides.
Conclusion
This military green front crop top is a stylish, easy-to-make piece perfect for beginner to intermediate crocheters looking for a quick project with beautiful results. With its adjustable size, minimal materials, and charming fan stitch design, it’s a perfect addition to any summer wardrobe or sales collection.