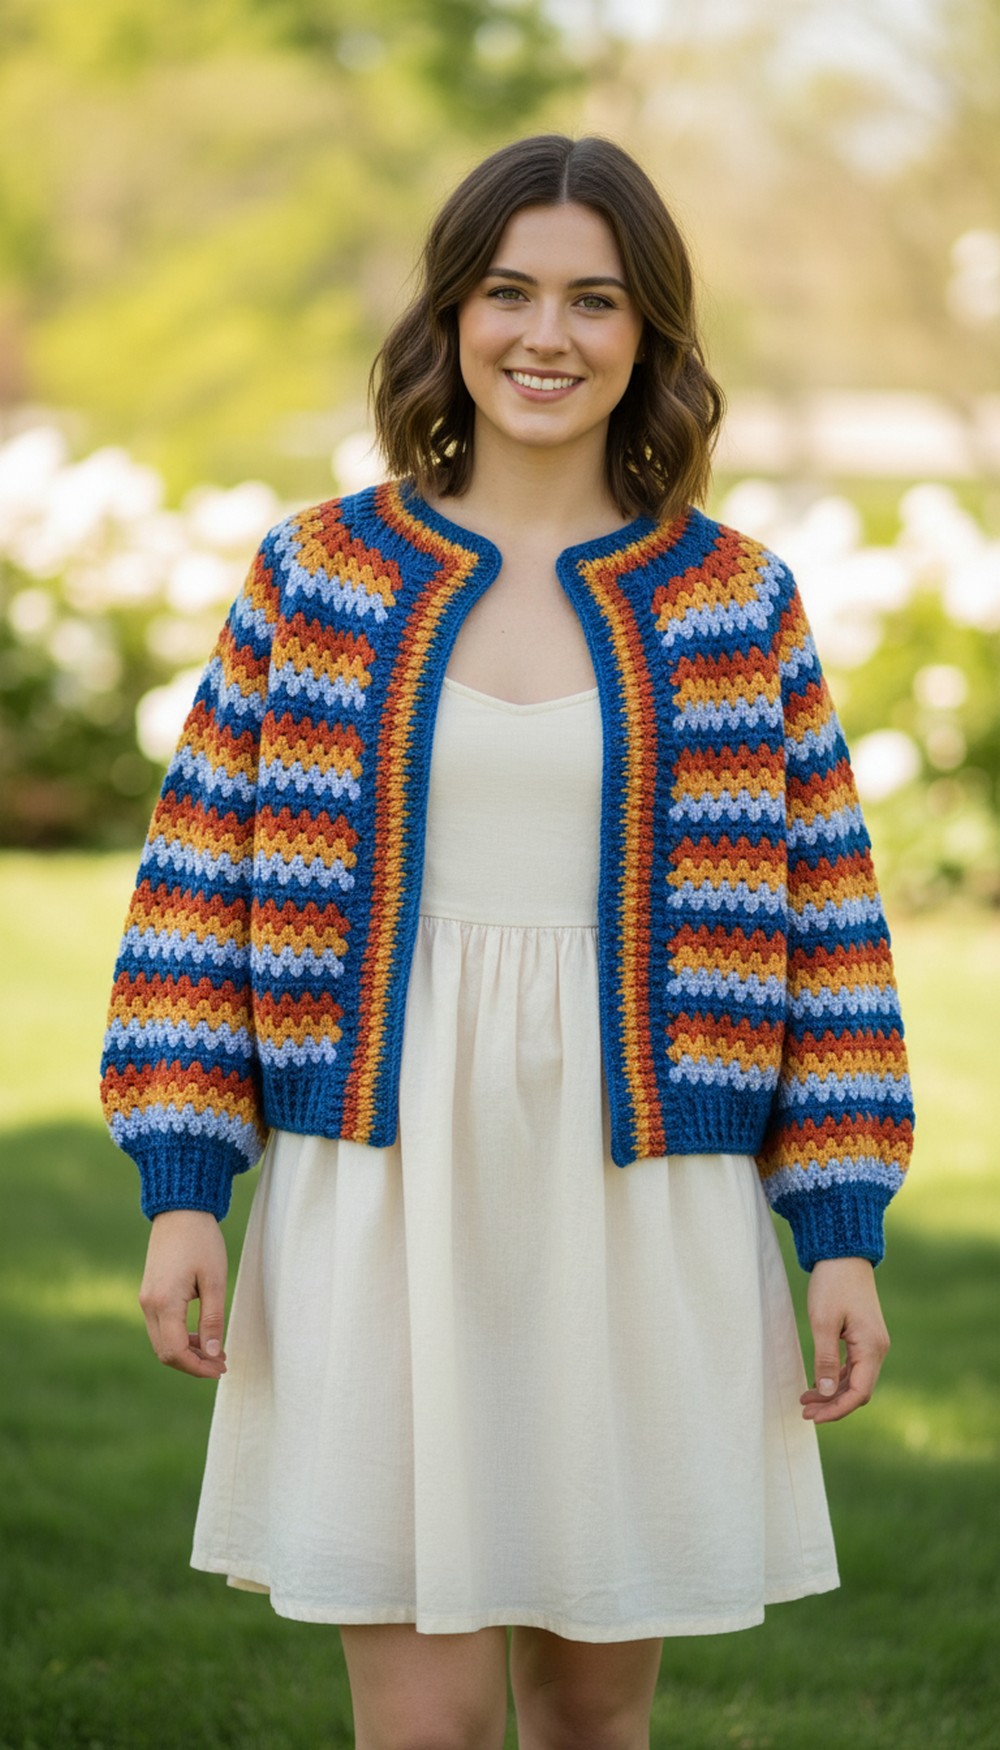
A cozy cardigan takes shape from tiny squares with this free crochet cardigan granny square pattern that fits well with simple daily styles.
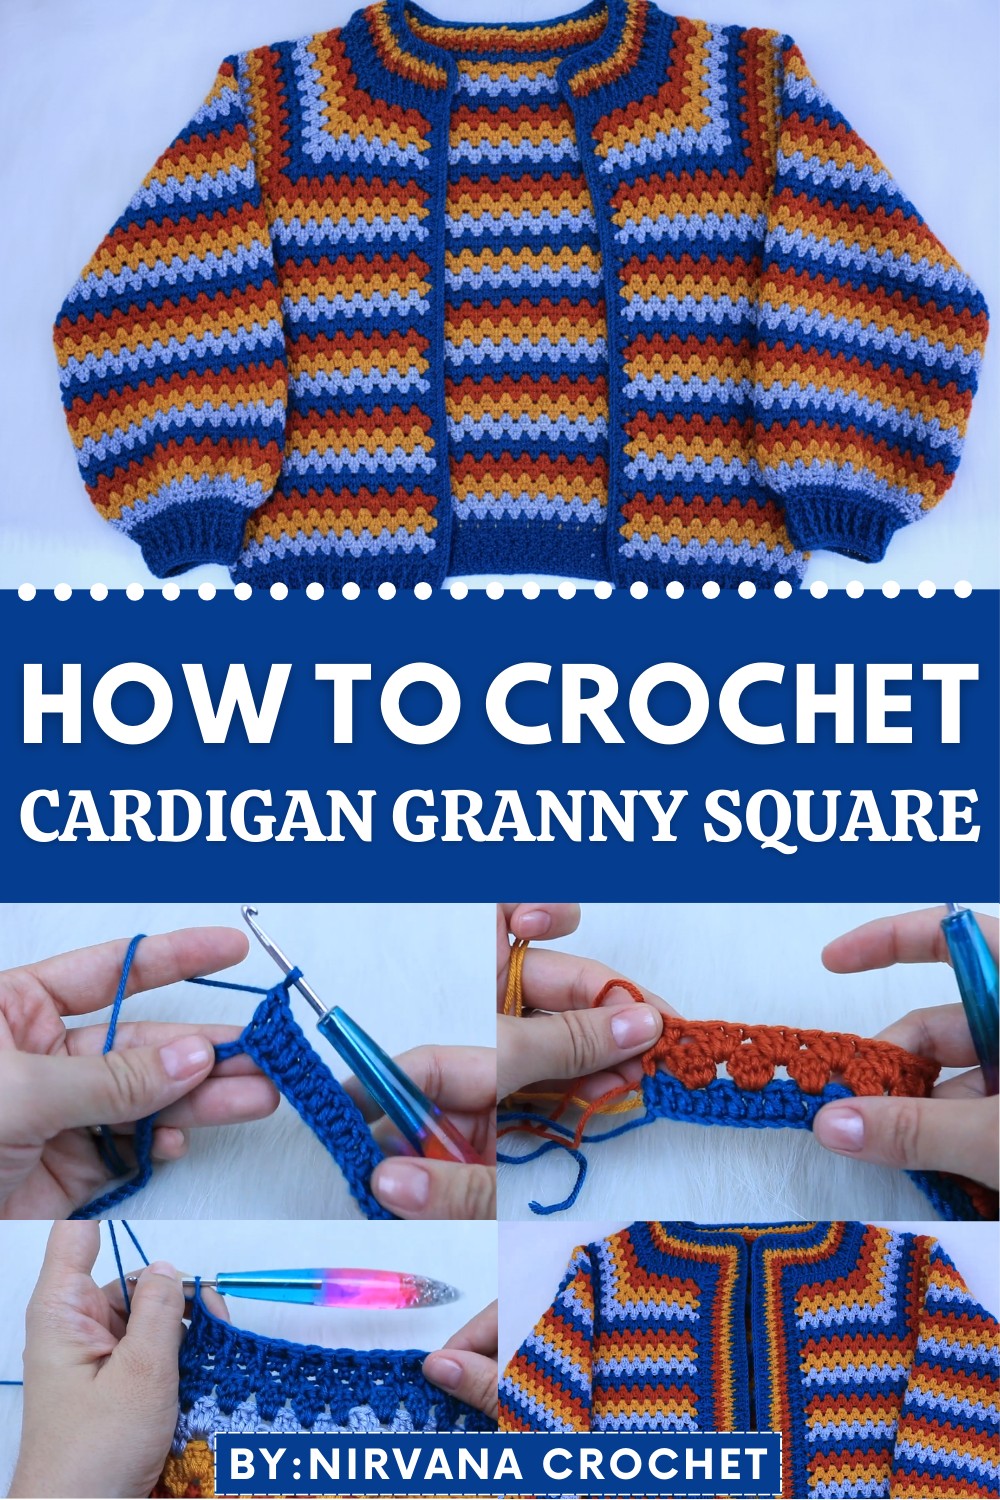
Stay Stylish And Warm With This Free Crochet Cardigan Granny Square Pattern
A granny square crochet cardigan is a stunning and colorful piece of clothing that anyone can make with a little patience and creativity. This free pattern teaches you how to make a cozy and stylish cardigan by using vibrant granny squares that easily come together. One of its best features is its flexibility, as you can choose any yarn colors you like to create your own unique design. 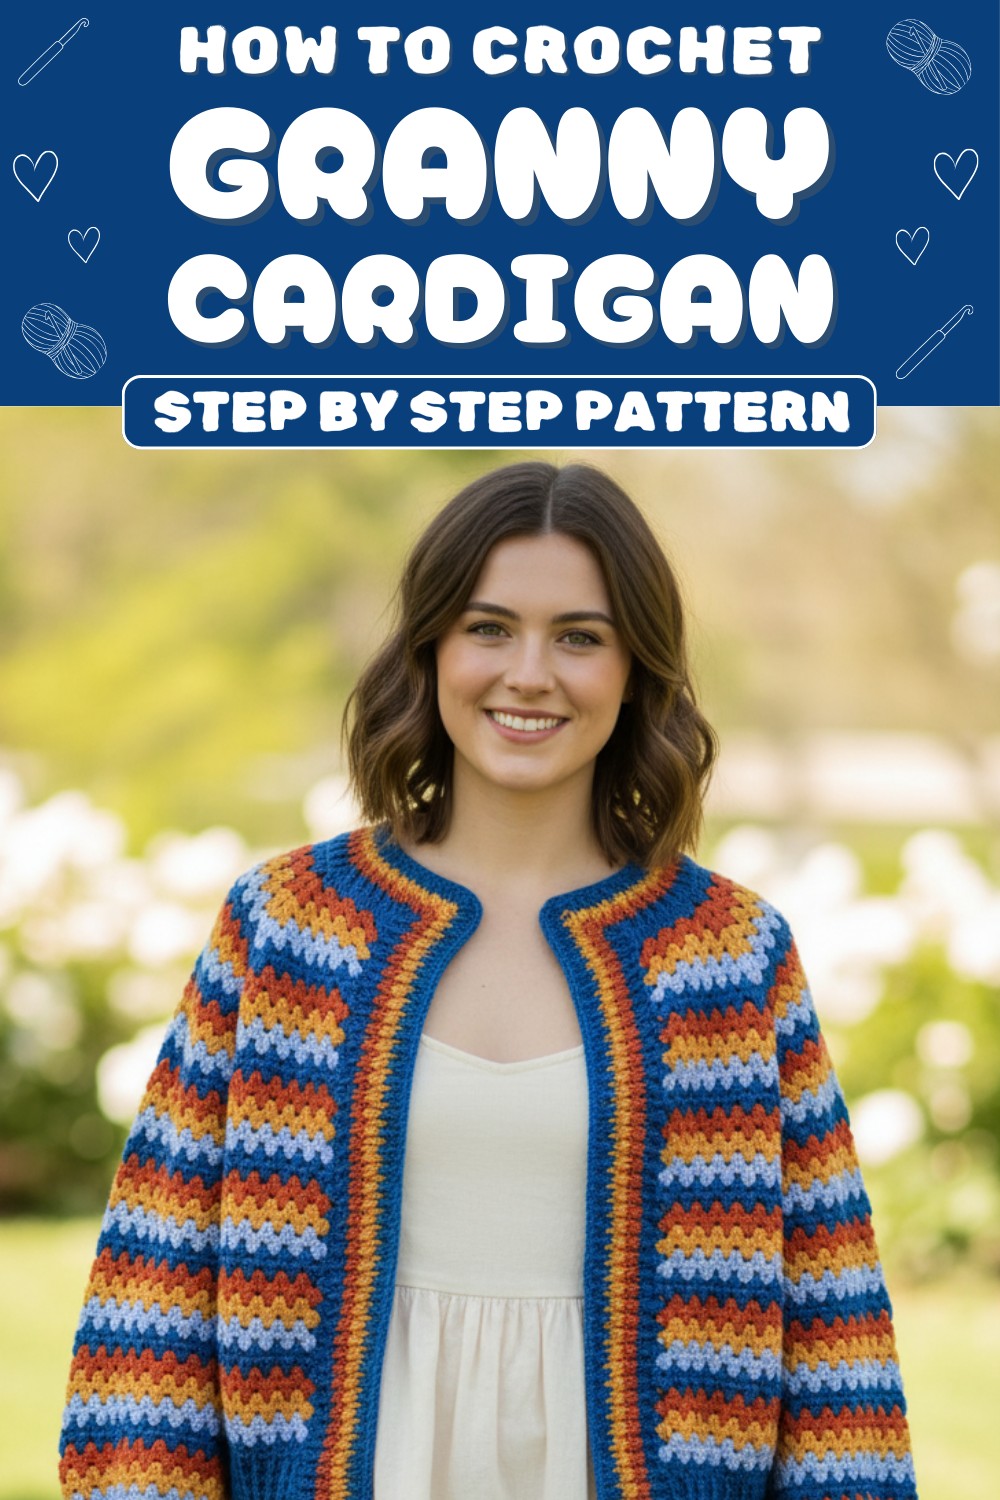
The cardigan is warm, soft, and lightweight, making it perfect for chilly days or for layering over your outfit. Following simple instructions, you’ll learn how to crochet basic stitches like double crochet and how to shape the yoke, back, and sleeves.
This cardigan pattern also allows you to customize the size to fit perfectly. It is not only practical but also a beautiful way to express creativity while making something handmade that you will feel proud to wear or give as a gift.
Crochet Cardigan Granny Square Pattern
Materials Needed:
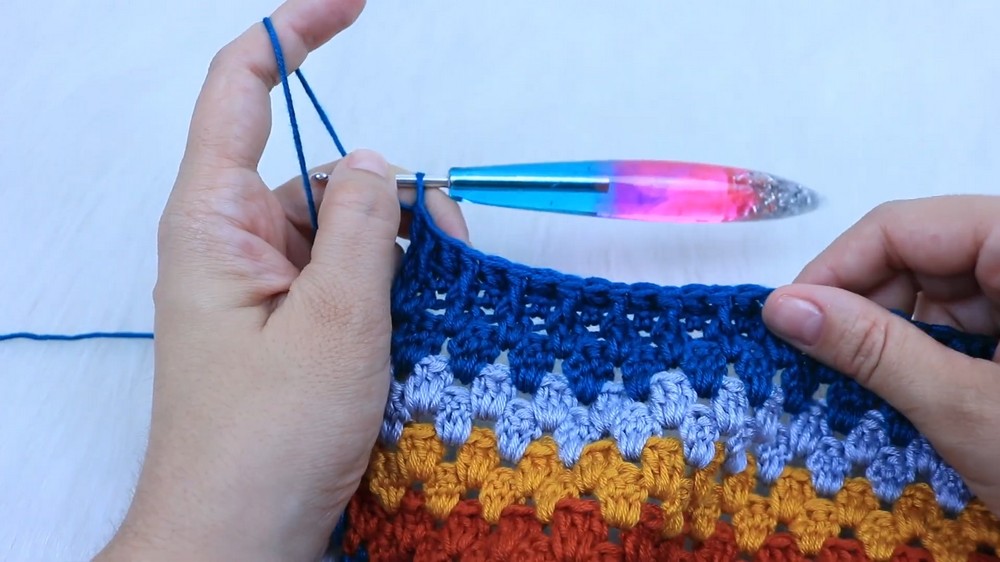
- Yarn: Use yarn of any style and color as desired (100% acrylic recommended). The video tutorial uses four color variations.
- Crochet Hook: Size 3.5mm as recommended.
- Measuring tools: Tape measure for:
- Circumference of head
- Chest contour
- Desired length of cardigan
- Other Tools:
- Tapestry needle to weave in ends.
- Scissors for cutting yarn.
Preparation:
- Measurements:
- Head circumference (for reference, size M is 58 cm).
- Chest circumference and desired cardigan length.
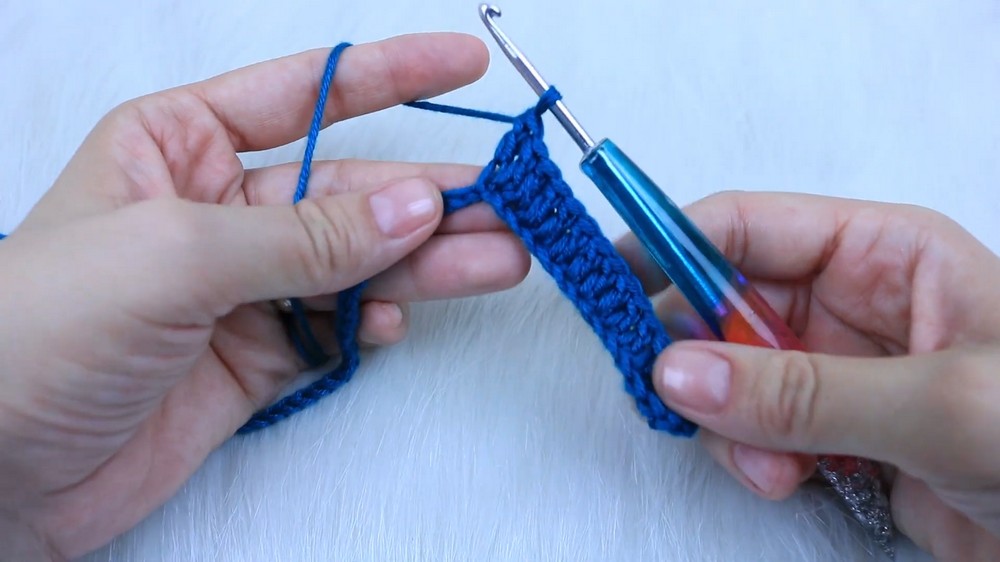
- Slip Knot & Foundation Chains:
- Create a slip knot and crochet chains until reaching the measurement of the head circumference.
- Count the chains to confirm the total and ensure it aligns with your tension and yarn thickness.
- Dividing Foundation Chains:
- Divide the total number of chains into five sections:
- Shoulders: Two sections (divide total chains by 5 for each shoulder).
- Back: Total divided by 2 minus shoulder measurement.
- Chest: Divide the back measurement by two.
For example:
- Size M Example:
Head circumference = 58 cm
Chains = 108
Shoulders = 21.6 chains each
Back = 32.4 chains
Chest = 18 chains for each side.
Note: The number of chains should be adjusted based on the chosen yarn and crochet tension. Always round numbers to the nearest multiple of 3 to match the stitch pattern.
- Divide the total number of chains into five sections:
Starting the Yoke:
- Crochet the Chest Section:
- Crochet 15 double crochet stitches, starting with two additional chains.
- Corners:
- For the corners, crochet 2 additional chains, then begin the shoulder section.
- Shoulders:
- Crochet 23 double crochet stitches for each shoulder.
- Back:
- Crochet 38 double crochet stitches.
- Repeat the Pattern:
- Continue repeating the sequence (corner, shoulder, chest, and back) until the foundation row is completed.
- Continue repeating the sequence (corner, shoulder, chest, and back) until the foundation row is completed.
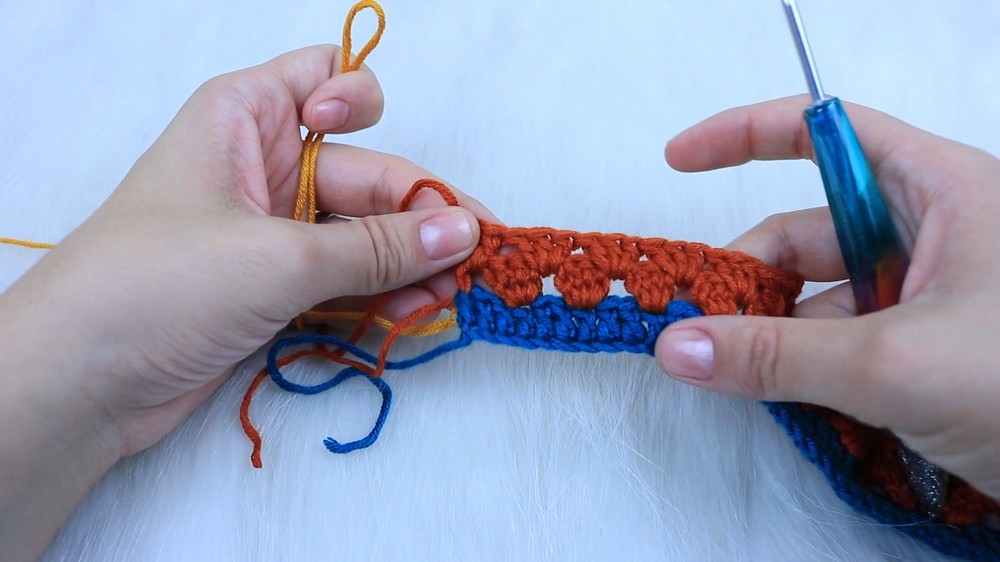
Body Section:
- Change Color (Optional):
- If desired, change the yarn color after completing two rows.
- Establish the Block Pattern:
- Skip two stitches, and in the third stitch crochet 3 double crochet stitches as a block.
- Skip two stitches again and repeat blocks until the first corner is reached.
- Corner Pattern:
- At each corner, crochet:
- 3 double crochet, 2 chains, and another 3 double crochet in the corner hole.
- Continue repeating the pattern.
- At each corner, crochet:
- Building the Yoke:
- Crochet rows until the yoke measures adequately based on the chest contour measurement. Adjust as needed, adding extra blocks to ensure ease.
- Crochet rows until the yoke measures adequately based on the chest contour measurement. Adjust as needed, adding extra blocks to ensure ease.
Closing the Yoke:
- Establish Sleeve Holes:
- Add blocks to create sleeve space by crocheting chains (6 chains for each block).
- Join Sleeves:
- Crochet blocks around the sleeve holes, continuing the established block pattern for the body.
Lengthening the Cardigan:
- Repeat Rows:
- Continue the pattern until the body section reaches 4 cm less than the total desired length.
Bottom Finish:
- Single Row in Main Color:
- Crochet one row in the main color of your cardigan.
- Final Rows:
- Crochet two half double crochet stitches in each hole. The sequence includes:
- Alternating rows with half double crochet stitches and raised front double crochet stitches.
- Crochet two half double crochet stitches in each hole. The sequence includes:
Sleeves:
- Foundation:
- Starting at the sleeve hole, crochet 2 double crochets in each hole for the first five holes, followed by blocks of 3 double crochet stitches for the remainder of the row.
- Repeat Rows:
- Alternate between 2 double crochet stitches per hole and blocks of 3 double crochet stitches until row 5.
- Length Adjustment:
- From row six onward, crochet only blocks of 3 double crochet stitches until reaching the desired sleeve length.
- Cuff:
- To taper the sleeve, crochet 2 double crochet stitches in each hole for one row.
- Follow with rows of raised stitches and single crochet for the cuff.

Finishing Touches:
- Neck Adjustment (Optional):
- Decrease stitches on the neck area by replacing blocks with double crochet stitches. Continue with the alternating raised stitch sequence to finalize the neckline.
- Weaving in Ends:
- Use a tapestry needle to securely hide all loose strands on the reverse side of the cardigan.
Final Words:
Congratulations on completing your crochet cardigan. This pattern offers versatility, allowing you to adapt the measurements and stitch colors to suit your preferences. Always block and shape the cardigan after finishing to enhance its appearance.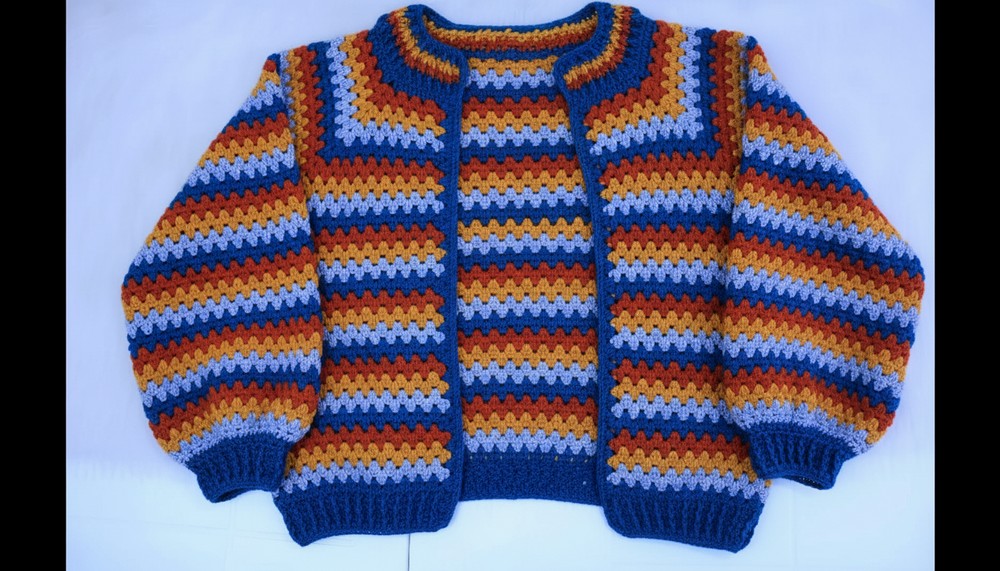
Tips for Maintenance:
- Washing: Hand wash the cardigan in lukewarm water with gentle detergent.
- Drying: Lay flat to dry on a clean, absorbent surface to prevent stretching.
- Storage: Store the cardigan folded in a cool, dry place to maintain its texture and shape.
Enjoy wearing your stylish creation or gifting it to someone special.