Catch the fun of crocheting a bright mini flower bouquet keychain, a perfect way to add charm to your bag or surprise someone with a handmade gift.
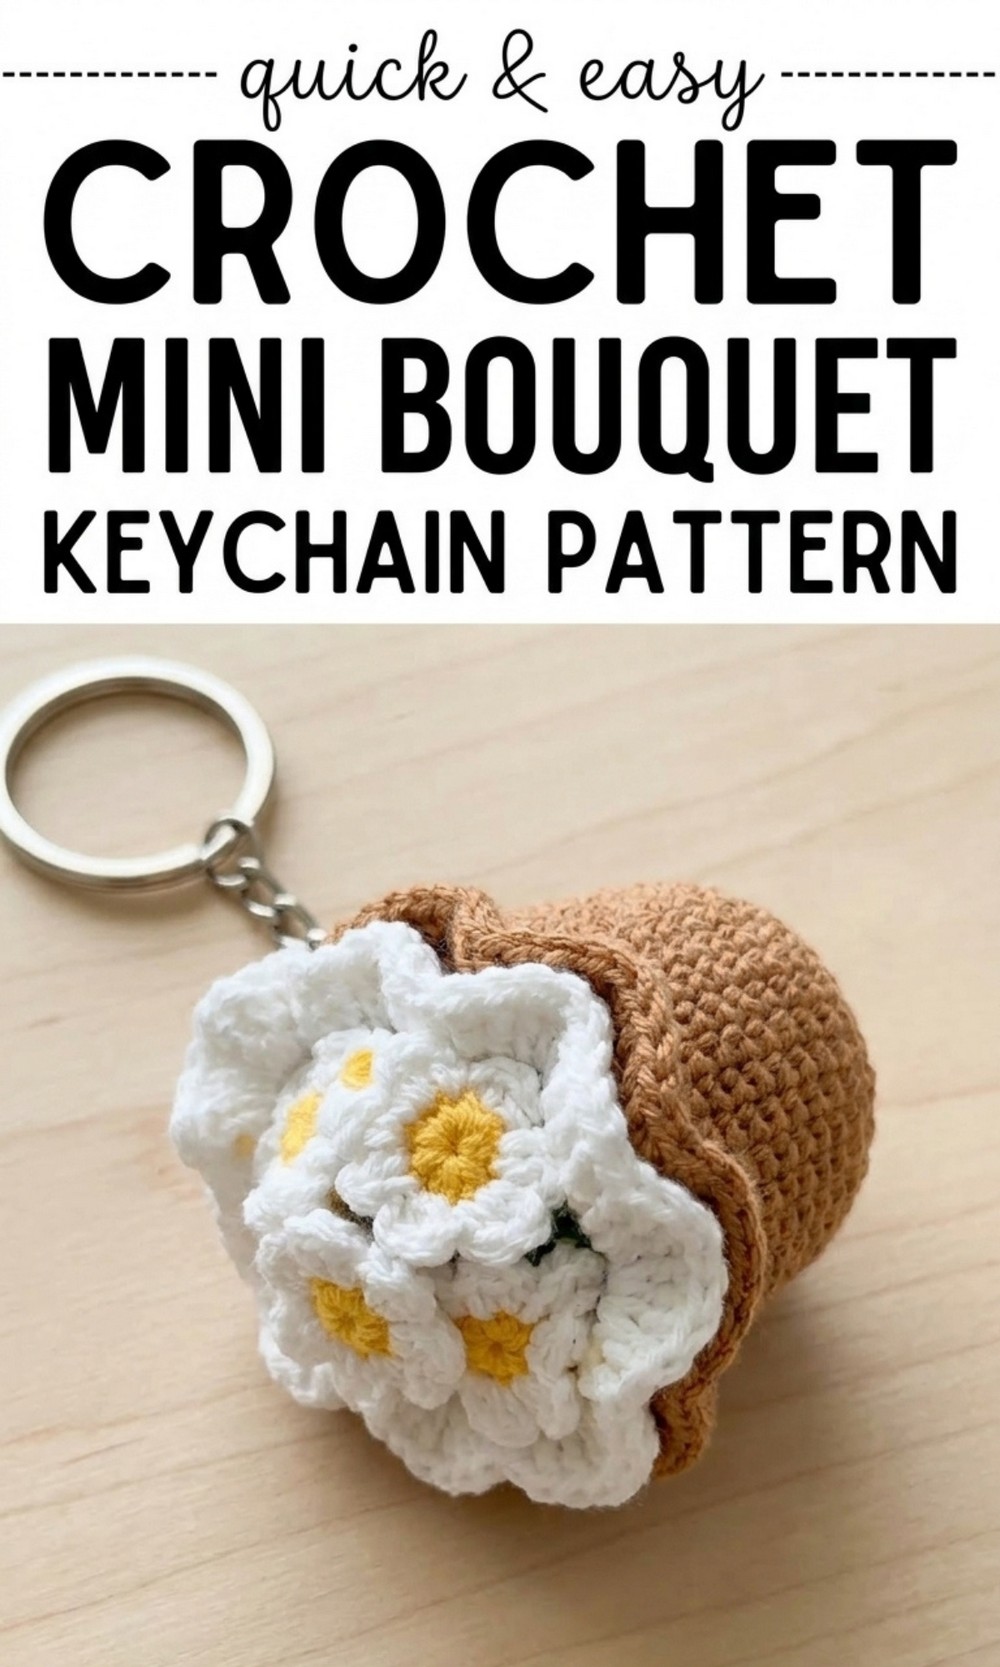
Beautiful Free crochet mini flower bouquet keychain Pattern perfect for daily use
Holding a tiny garden in your hand is a wonderful feeling that brings a lot of happiness to your day. This beautiful project uses soft yarn to create a small bunch of colorful flowers like roses and daisies that stay fresh and bright forever.
This Free Crochet Mini Flower Bouquet Keychain Pattern is use to decorate your school bag or give it to your best friend as a very special handmade gift. The appearance is very unique because the flowers are small enough to fit in your pocket but big enough to show off your great work.
This is an easy and fun crochet project that brings a cheerful and delicate bouquet to your hands, perfect for anyone who loves little handmade treasures.
Adorable Crochet Mini Bouquet Pattern
Finished Size
The finished bouquet measures approximately 4 inches tall and 2.5 inches wide (size may vary depending on yarn weight and tension).
Materials Needed
- Yarn:
- Milk Cotton Yarn or similar weight yarn in the following colors:
- Base: Brown
- Flowers: Red, Yellow, White
- Leaves: Green
- Ribbon and Separator: White
- Adjust colors as preferred.
- Milk Cotton Yarn or similar weight yarn in the following colors:
- Crochet Hook: 2.5 mm crochet hook
- Tapestry Needle
- Stitch Markers
- Hot Glue Gun
- Fiberfill for stuffing
Gauge
For a 1″ x 1″ square worked in single crochet (sc): 5 stitches x 5 rows using a 2.5 mm hook and Milk Cotton Yarn. Gauge is approximate as the size is non critical.
Abbreviations (US Terms)
- ch: chain
- sc: single crochet
- sl st: slip stitch
- hdc: half double crochet
- dc: double crochet
- inc: increase (2 sts in the same st)
- dec: decrease (joining 2 sts into 1)
- st: stitch
- BLO: back loop only
Special Techniques
- Magic Ring (MR): Create a loop with yarn and work the first round of stitches into the circle. Pull the tail to close.
- Working Single Decrease (dec): Insert hook into the BLO of two stitches, yarn over, pull through both loops, then yarn over again and pull through all loops on the hook.
- Back Loop Only (BLO): Work only into the back loop of a stitch, leaving the front loop unworked.
Pattern Details
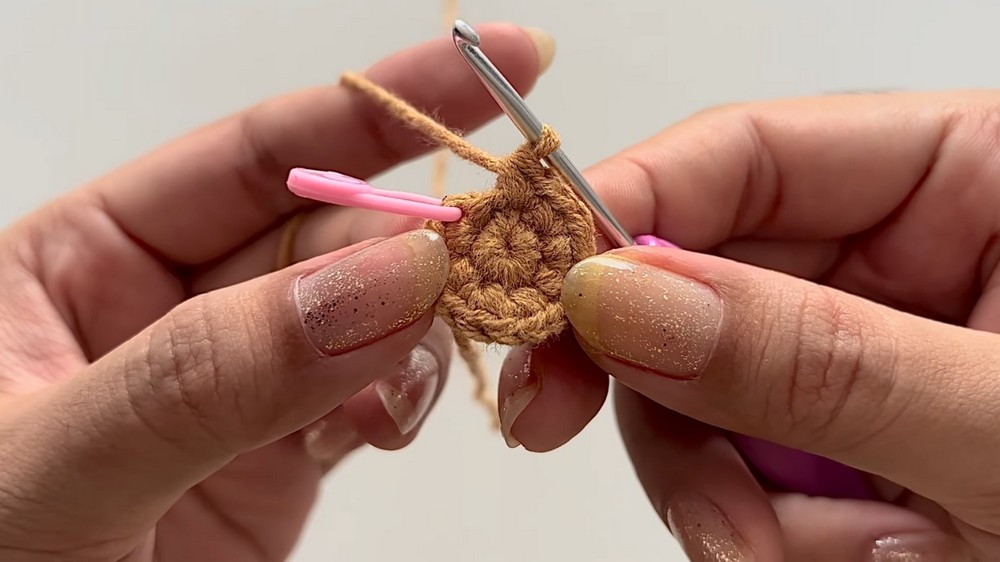
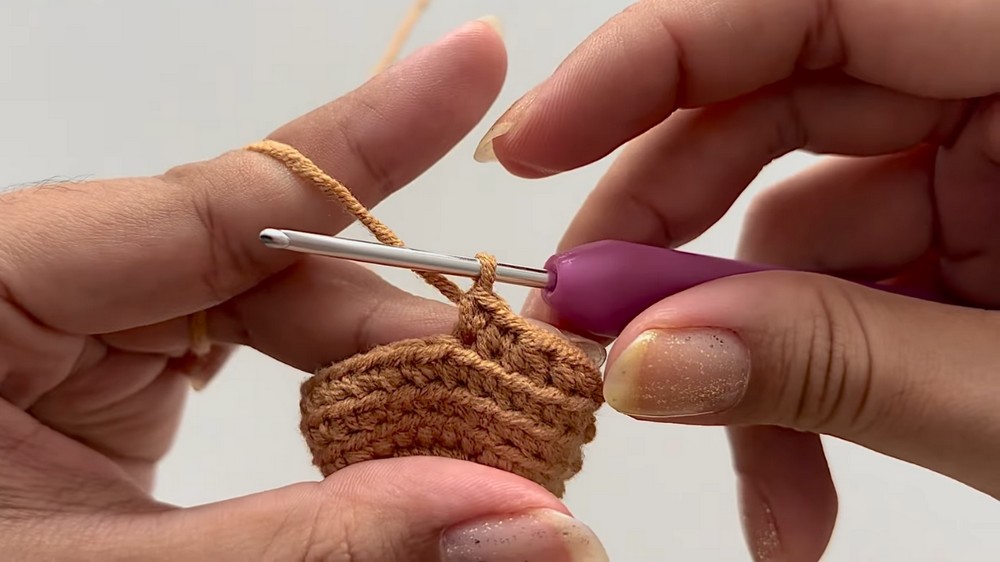
Bouquet Base
- Round 1:
- Using brown yarn, make a magic ring.
- Work 8 sc into the magic ring.
- Pull tail to close the ring. Join with a sl st to the first st.
- Ch 1. (8 sts)
- Round 2:
- Work 1 sc and 1 inc into the same st where the sl st was made.
- Repeat (1 inc) for all 8 sts. (16 sts)
- Join with sl st to the first st, ch 1.
- Round 3:
- Repeat the pattern (1 sc, 1 inc) for 8 times. (24 sts)
- Join, ch 1.
- Round 4:
- Work 1 sc in each st around. (24 sts)
- Join, ch 1.
- Round 5-6:
- Using BLO, work 1 sc in each st around. (24 sts per round)
- Repeat for two rounds.
- Round 7:
- Work (2 sc, 1 dec) for 6 times. (18 sts)
- Join, ch 1.
- Round 8:
- Work 1 sc in each st around. (18 sts)
- Join, ch 1.
- Round 9:
- Work (1 sc, 1 dec) for 6 times. (12 sts)
- Join, ch 1.
- Round 10:
- Work 1 sc in each st around. (12 sts)
- Join, ch 1.
- Round 11 (Last Round):
- Work 6 dec. (6 sts)
- Close with a sl st and cut yarn, leaving a long tail for sewing.
- Use the needle to close the remaining hole securely.
- Stuffing:
- Stuff the base with fiberfill before the final round is completely closed. Ensure the base is firm yet pliable.
Layered Ruffles
The ruffles are worked in back loops of certain rounds to create the layered look.
- First Lower Layer
- Use the back loops of Round 9.
- Attach yarn, ch 2. Work 2 dc in each stitch around. Join with sl st. (24 dc)
- Fasten off and weave in ends.
- Second Lower Layer
- Use back loops of Round 7.
- Attach yarn, ch 2. Work (hdc, ch 1, hdc) in each st around. Join and fasten off.
- First Upper Layer
- Use back loops of Round 5 (with preferred color).
- Repeat the pattern (dc, ch 1, dc) in each st around.

- Second and Third Upper Layers
- Follow the same instructions as the first upper layer but in subsequent rounds above it. Use lighter shades or white to finish.
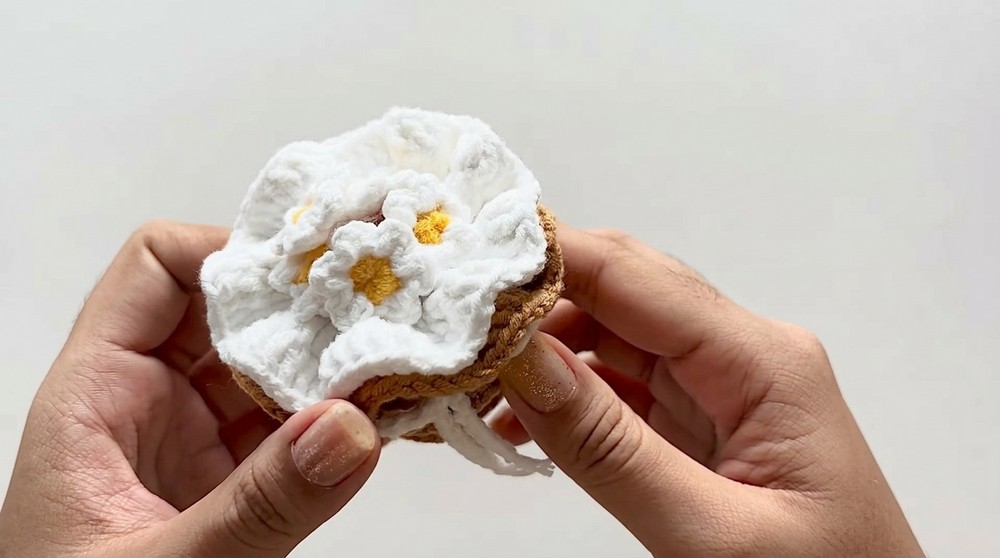
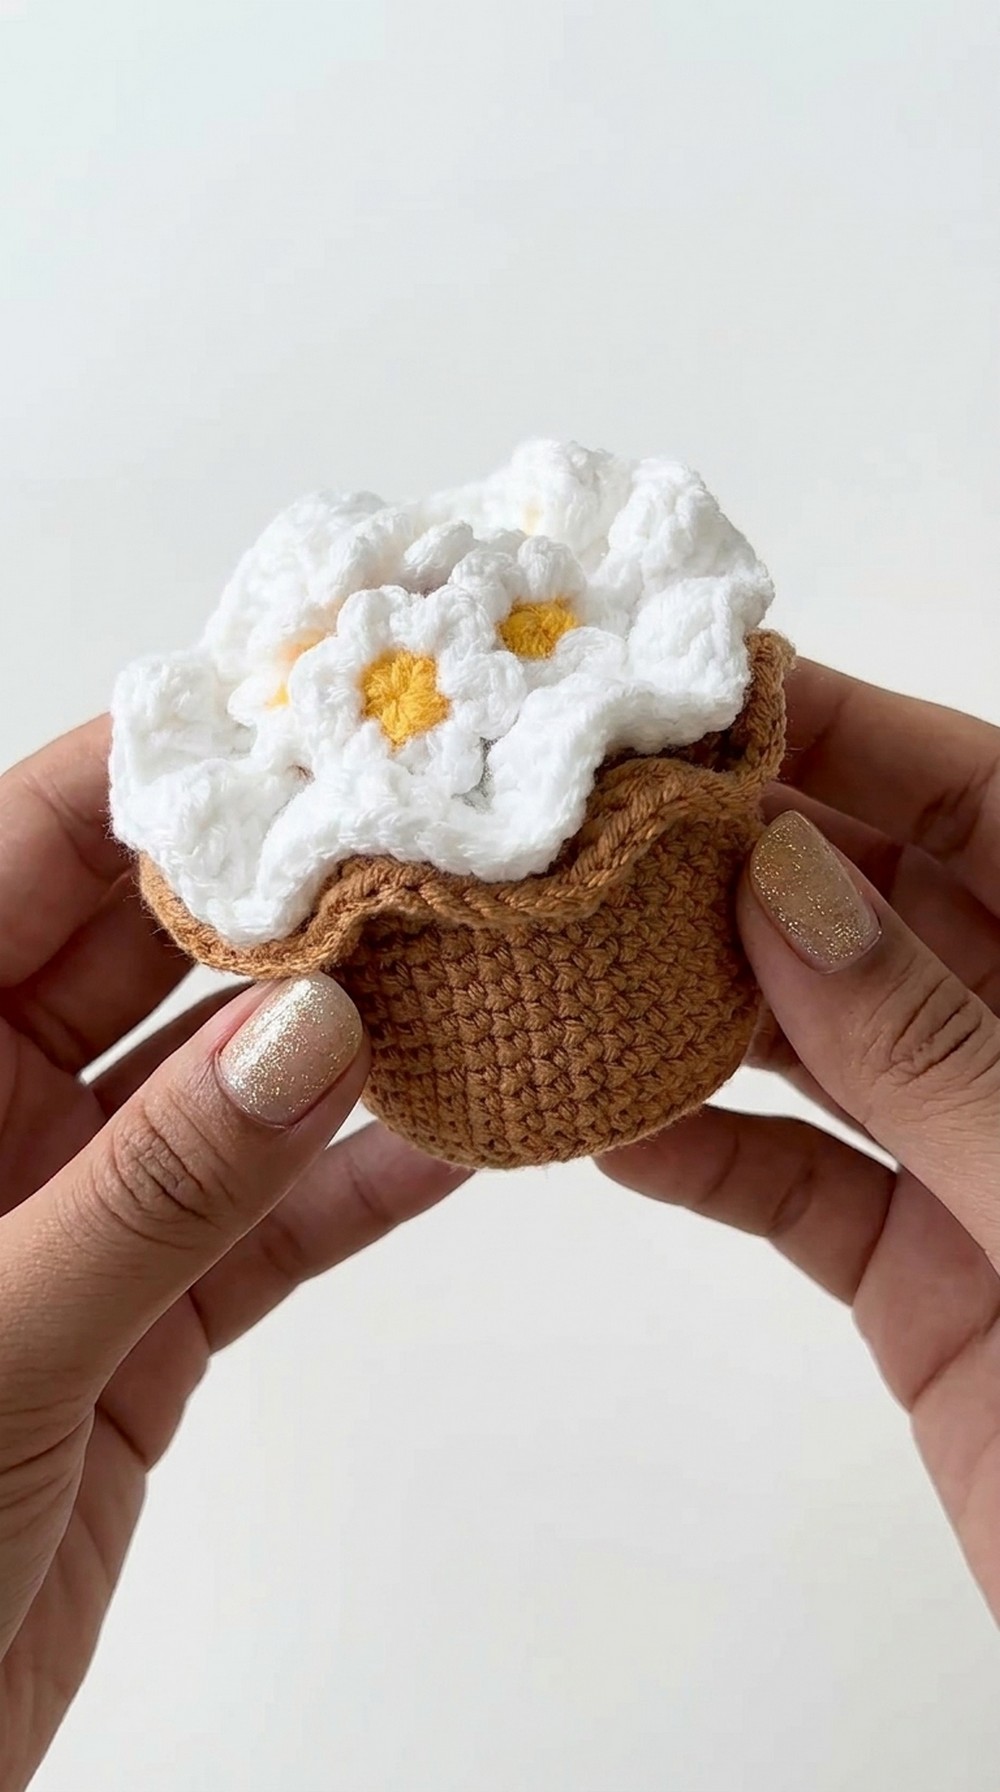
Flowers and Assembly
Rose
- Base: With red yarn, chain 7.
- Increase: Work 2 sc in the first 2 chains, then work 3 sc per remaining chain.
- Roll the piece into a rose shape, secure with hot glue.
Sunflower
- Start with brown yarn. Make a magic ring. Work 6 sc into the circle.
- Change to yellow yarn. Create 6 petals:
- Petal Pattern: Work (sl st, ch 1, sc, ch 1, sl st) at each stitch.
- Attach leaves made from magic ring and 3 repeating leaf patterns.
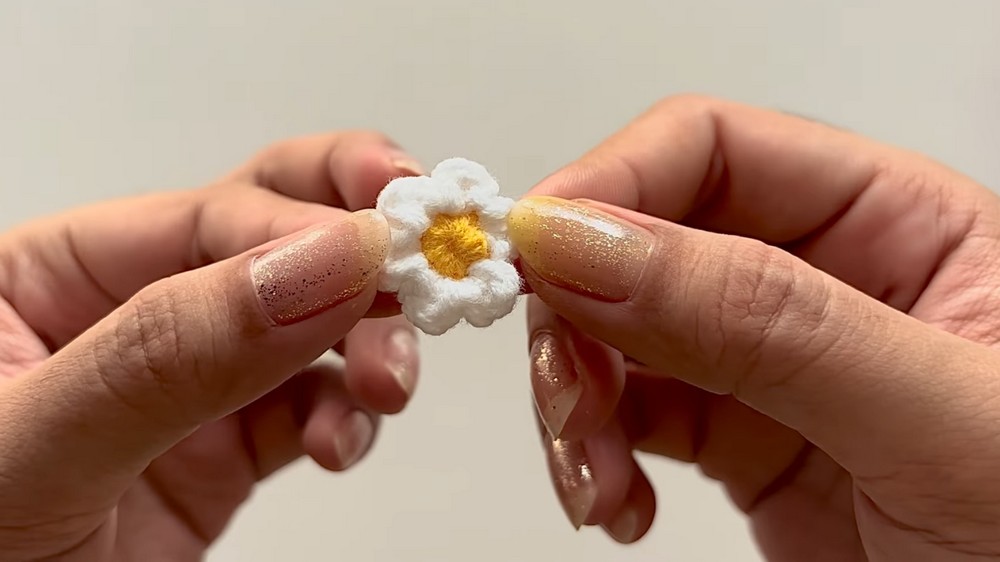
Daisy
- Follow the sunflower pattern but use yellow for the center and white for the petals.
Assembly
- Glue the center flower first on the top of the bouquet base.
- Surround it with additional flowers to create a full, round bouquet.
- Add leaves between flowers for extra detail.
- Tie a ribbon around the middle section for a polished look.
Customization Ideas
- Colors: Use pastel shades for a softer look or bold colors for vibrant bouquets.
- Flowers: Experiment with other flower shapes (ex: tulips or lavender).
- Base Size: Adjust the size of the base by adding or subtracting rounds.
- Ruffles: Mix shorter and longer ruffles to create varied textures.
Conclusion and Final Remarks
This Adorable Crochet Mini Bouquet is perfect as a gift, decorative piece, or even a wedding favor. The layered ruffles, combined with vibrant flowers and intricate leaves, create a beautifully realistic miniature bouquet that will truly stand out.