Refresh your table settings effortlessly with this Free Crochet Napkin Holder Pattern that brings charm, neatness, and reusable function to every mealtime.
Tucked away in many homes are small, thoughtful touches that speak louder than extravagant centerpieces. A handmade napkin holder often goes unnoticed at first glance, but it’s the kind of piece that ties a dining setup together with charm and intent. Using just a few simple materials and minimal time, you can produce something that not only organizes your table but adds a personal expression to every meal served. The free crochet napkin holder pattern comes into play here, introducing a practical and stylish accent that keeps things tidy while subtly standing out.
Crochet Napkin Holder Pattern That Combines Style & Order
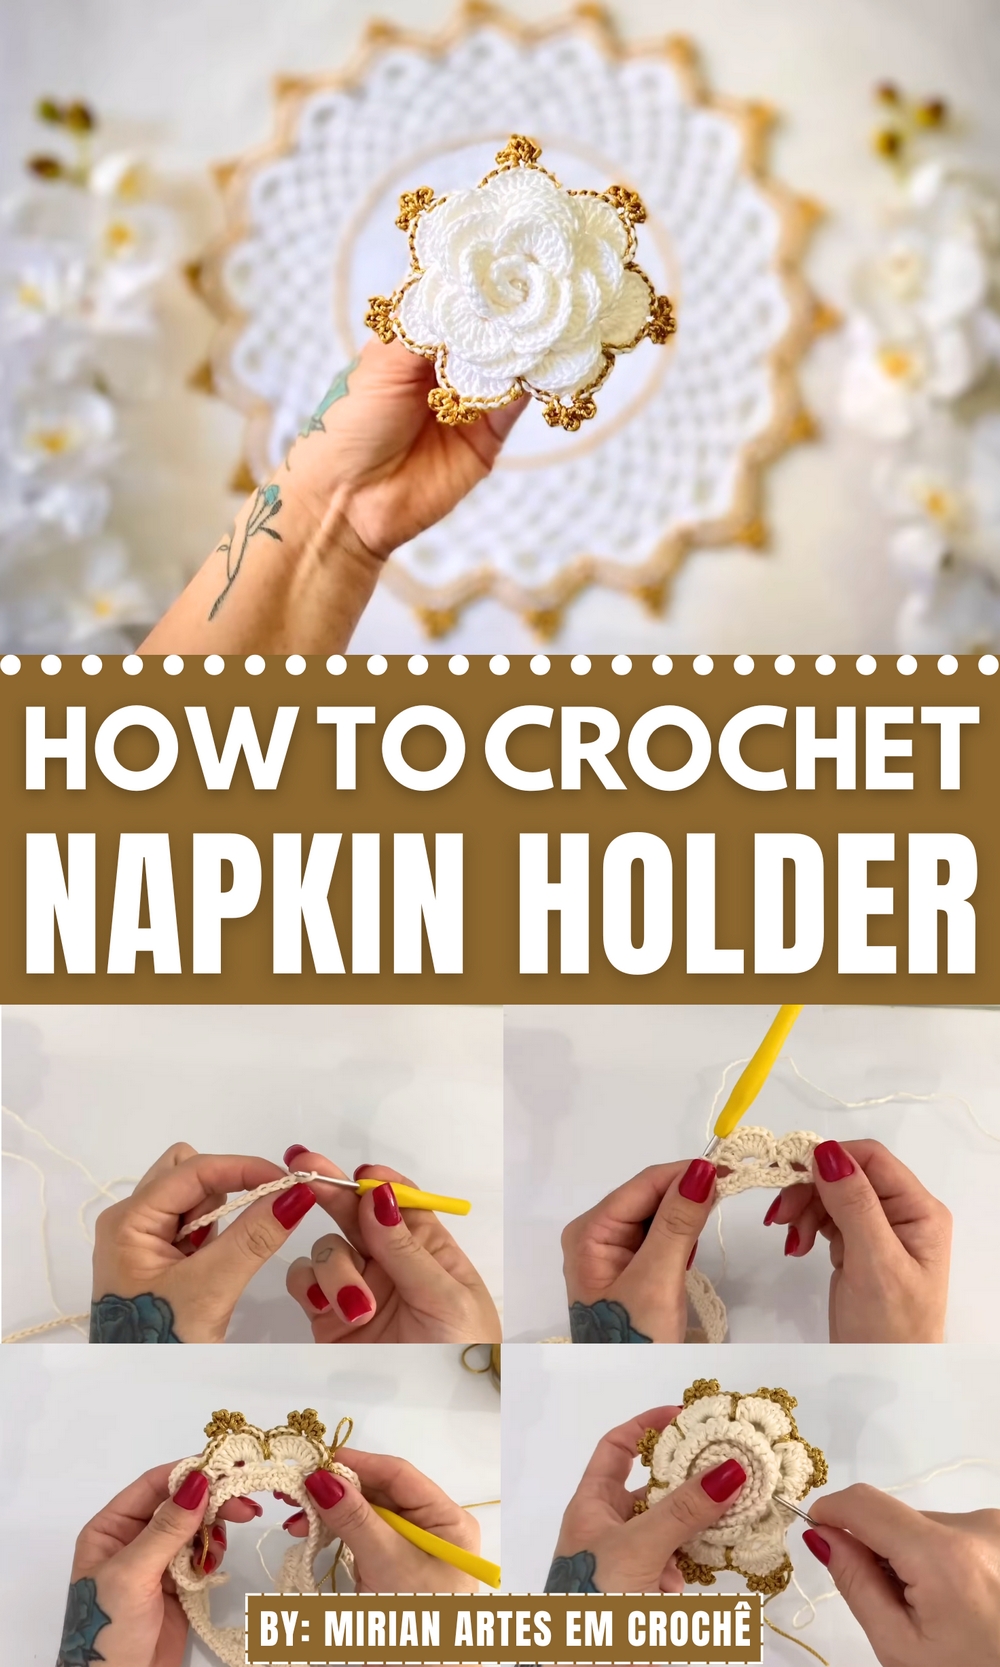
This item isn’t just about holding napkins, it’s about enhancing the dining space with texture, warmth, and a dash of creative usefulness. Whether placed on kitchen counters, picnic tables, or formal setups, its handmade character carries both visual interest and everyday convenience. Lightweight, reusable, and washable, it’s perfect for seasonal themes or year-round use.
With just basic stitches and a few easy-to-follow steps, even those with beginner skill levels can shape this functional decor item with ease. This is more than just storage, it’s a symbol of thoughtful homekeeping that blends seamlessly with daily life. Small in size, but big on charm, it’s a satisfying addition to any handmade household collection.

Step-by-Step Details
- Gathering Materials:
- Needle of size 2.5 mm.
- Yarn with thickness 4 (the instructor uses viscose yarn for detailing, but silk or polypropylene yarn can also be used).
- A wooden or acrylic ring.
- Scissors for finishing touches.
- Tapestry needle for sewing.
- Glue (optional for extra security).
- Starting the Base:
- Begin with a cord of 90 chains.
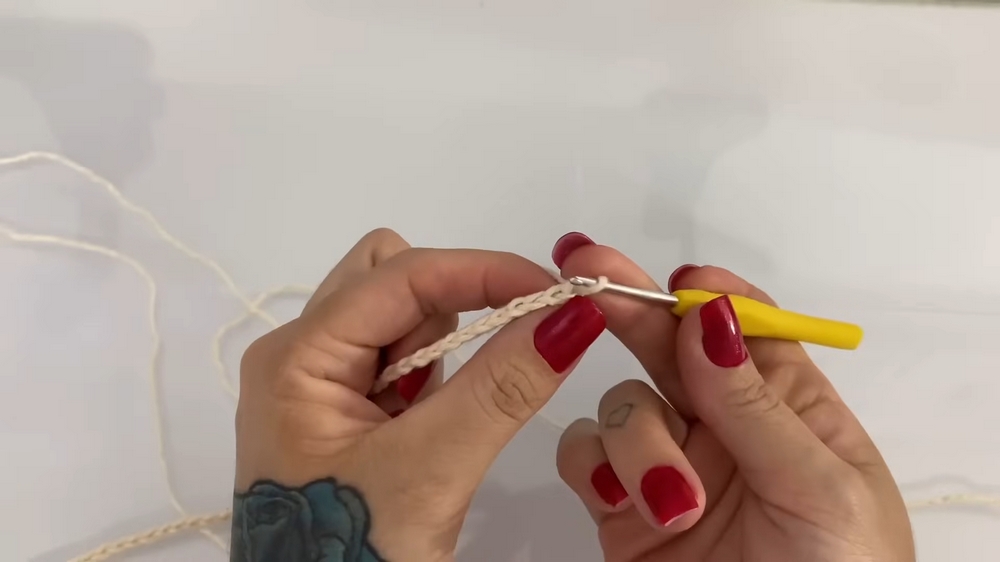
- Skip the first chain, and in the second chain, work single crochets. Continue single crochets across the length of the cord.
- Begin with a cord of 90 chains.
- Creating the Knots:
- After completing the single crochet row, chain five stitches: two chains for a double crochet and three for the knot top.
- Skip three chains, then in the fourth, create a double crochet followed by three chains and another double crochet in the same stitch. This forms the “knot” pattern.
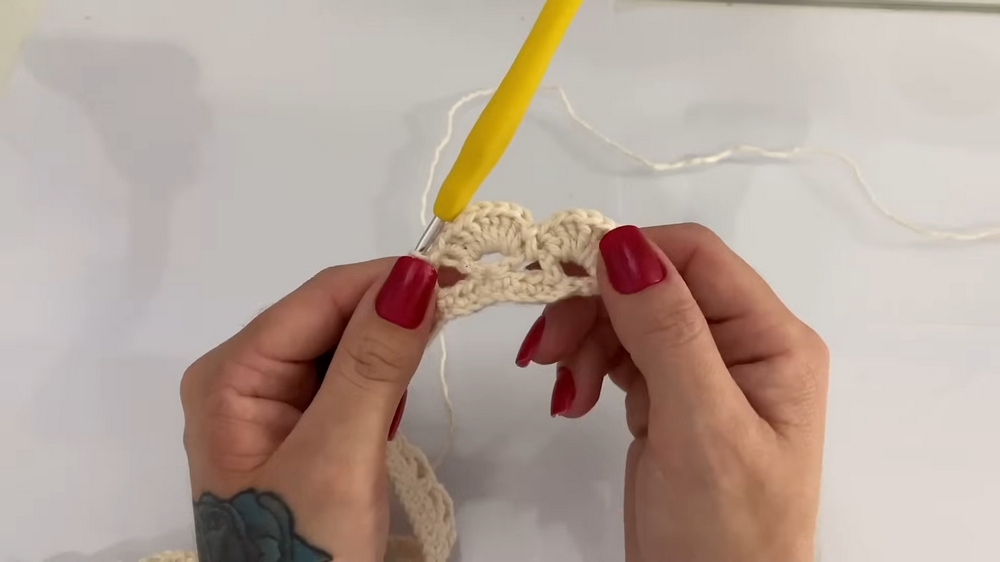
- Repeat this knot-formation process across the chain until you have 23 knots.
- Building Petals:
- In each “knot,” work 9 double crochets to form a petal.
- Slip stitch between one knot and the next to keep the petals arched.
- Repeat for all 23 knots to complete the petals.
- Adding the Bottom Detail:
- After finishing the petals, switch to creating the bottom detail of the napkin holder.
- Alternate between slip stitches and chains in the bottom row until the row is complete.
- Leave enough thread (60-70 cm) for sewing the flower.
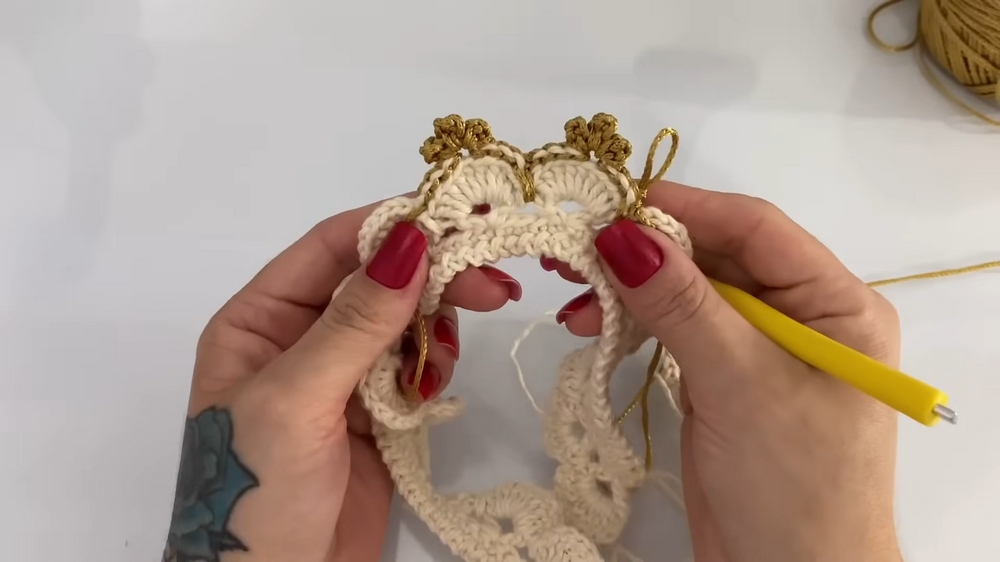
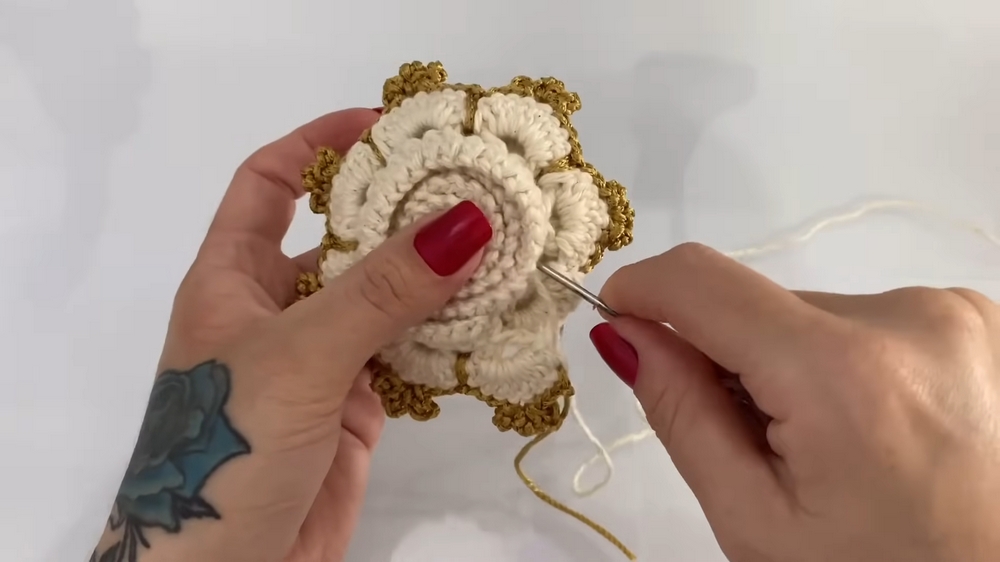
- Adding a Decorative Detail:
- Using gold yarn (or any decorative yarn of choice), add a chain detail to seven petals on the reverse side of the napkin holder for an elegant effect.
- Create “picots” with small loops of chains to enhance the detailing.
- Rolling and Sewing the Flower:
- Roll the petals carefully into a spiral (snail) shape to form the flower.
- Use the tapestry needle and leftover thread for zig-zag sewing to secure the flower shape.
- Stitch through all layers to ensure durability.
- Attaching the Ring:
- Use the same thread to attach the wooden or acrylic ring.
- Wrap the thread around the ring three times for security, and use additional stitches or glue to reinforce the attachment.
- Hide excess threads by pulling them through the piece and snipping them off neatly.
Special Features
- Customizable Details: The project allows flexibility with yarn types, colors, and designs to match personal preferences or specific themes.
- Elegant Aesthetic: The gold thread or decorative accents elevate the design, giving it a luxurious feel.
- Versatile Use: While primarily a napkin holder, it can also add charm to wedding decor, special dinners, or festive celebrations.
Tutor’s Suggestions
- Yarn Choice: You can choose yarn of different thicknesses, but this will affect the final size of the project.
- Materials: The instructor recommends viscose, silk, or polypropylene yarns for a sharp and polished look.
- Customization: The napkin holder is beautiful with or without gold detailing, so feel free to adapt based on your project needs.
- Supportive Tutorials: The instructor suggests watching the placemat (sousplat) tutorial for creating a matching table set.
Level of Difficulty
This project is beginner to intermediate. While the basic steps like single and double crochet are beginner-friendly, the decorative details and flower assembly require attention to detail and a bit of patience, making it ideal for those with some prior crochet experience.
Uses and Applications
- Napkin Holders: Elevate the presentation of a dining table.
- Decor Accents: Use as a decorative piece for weddings, parties, or special events.
- Gift Items: A great handmade gift for friends and family.
- Ecommerce Potential: As the instructor mentions, it’s also a popular item for custom orders (e.g., sets of 8-10 napkin holders).
Tip
When working on the petals, ensure that your tension is consistent across all stitches. This will help the petals curve uniformly and create a symmetrical look. Additionally, when rolling the flower, roll it lightly to avoid distorting its shape.
Conclusion
The Napkin Holder pattern is a fantastic way to create a beautiful, handmade table accessory that pairs perfectly with a matching sousplat. With detailed steps, special customization options, and versatile applications, it offers a rewarding project for crochet enthusiasts of all levels. Whether for personal crochet or custom orders, the final result is always stunning and functional.