Bring a smile to your day with this free crochet bear snuggly pattern that is simple and lets you build a soft and lovely toy at home.

Free Crochet Bear Snuggly Pattern That’s Perfect for Adventures
Who doesn’t love a cute and cuddly bear that you can make all by yourself? This free crochet bear snuggly pattern is the perfect way to create a soft, adorable little friend that’s both fun to make and wonderful to keep. With its squishy body, fluffy texture, and charming features like tiny ears, a round head, and a cheerful little face, this bear is more than just a toy—it’s a hug you can hold.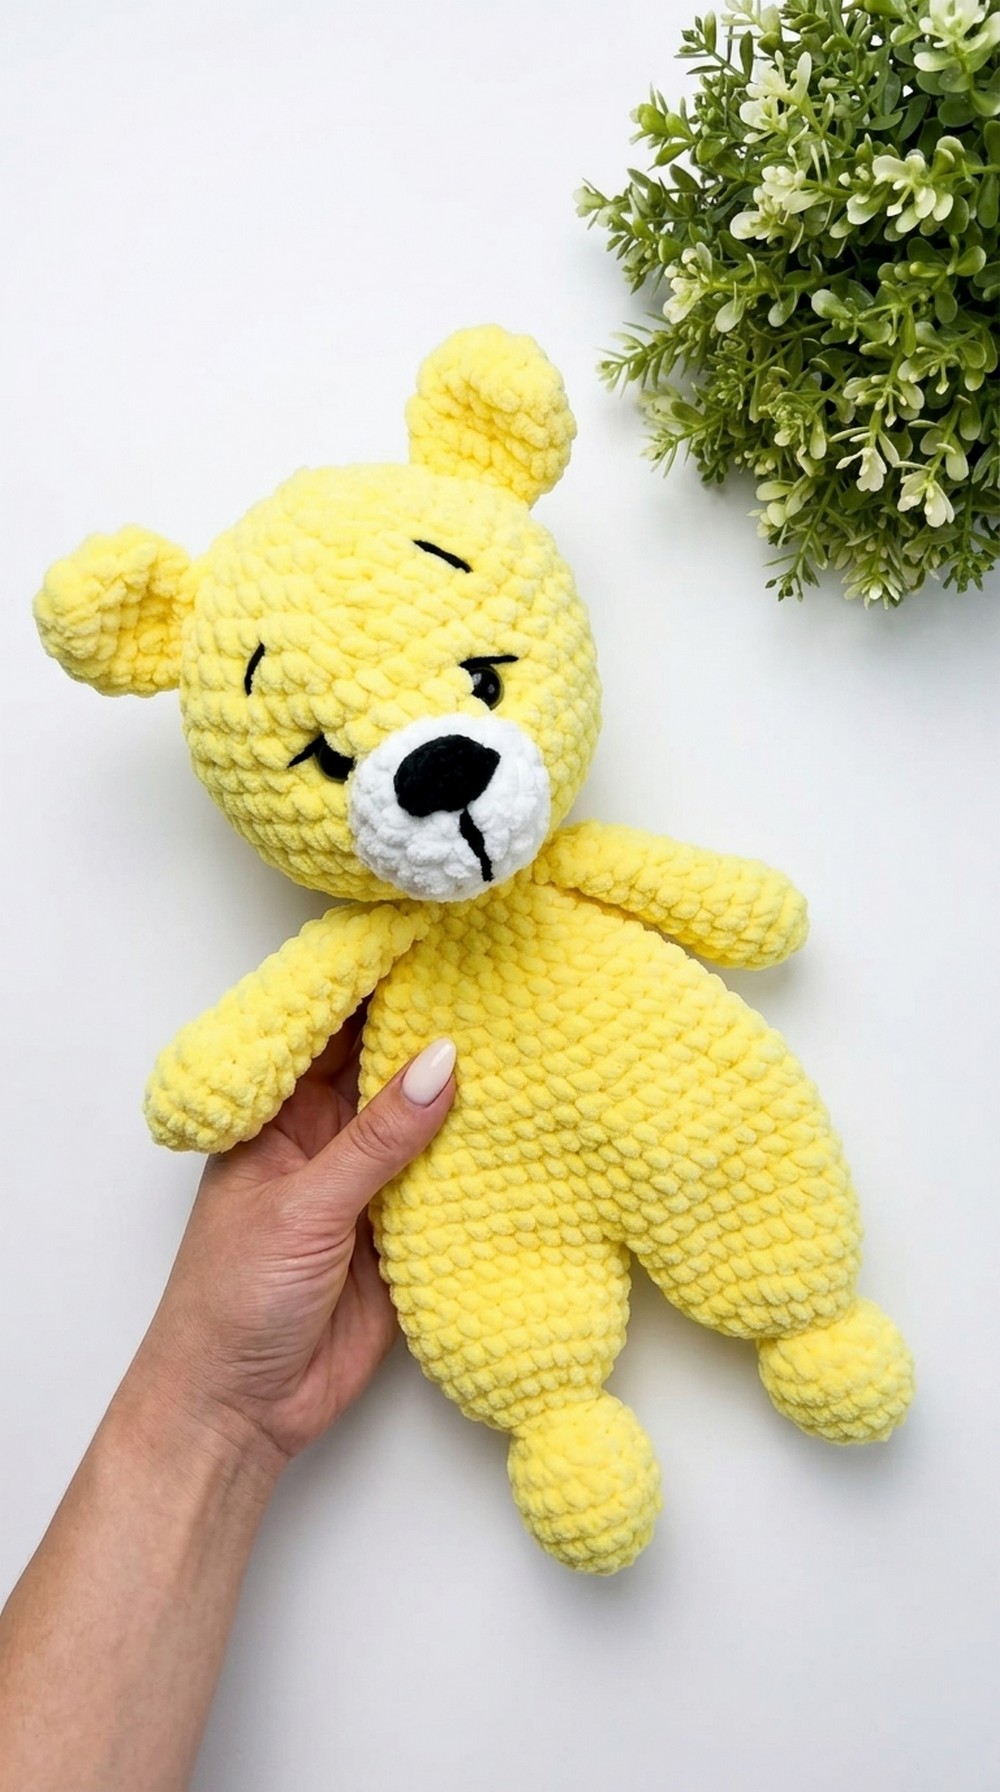
It’s perfect for kids to cuddle, play with, or keep as a bedtime buddy. You can also make it as a special handmade gift for someone you love. The pattern is easy to follow, and you’ll enjoy watching your bear come to life stitch by stitch. It’s cute, cozy, and guaranteed to bring smiles to anyone, no matter their age.
Crochet Bear Snuggly Pattern
Materials Required
- Yarn
- Plush yarn: For the main head, body, arms, legs, ears, and tail (choose any color).
- Contrasting yarn: White yarn (for the muzzle).
- Black yarn (DK weight): For facial details (nose, eyebrows, etc.).
- Tools
- Crochet hook: 5.5 mm.
- Darning needle: To sew components and add finer details.
- Scissors: For trimming thread and yarn.
- Stitch marker: Useful to track rounds.
- Fiberfill stuffing: For stuffing the head, body, arms, legs, tail, and muzzle.
- 12–14 mm security eyes: For the teddy bear’s eyes (optional; can embroider instead).
- Optional
- Pins: To hold pieces in place before stitching.
Abbreviations
- ch: Chain.
- sc: Single crochet.
- sl st: Slip stitch.
- inc: Increase (2 sc in one stitch).
- dec: Decrease (combine two stitches into one).
- st: Stitch(es).
Pattern and Instructions
Step 1: The Head
- Begin with plush yarn.
- Create a slip knot and chain 2.
- Skip the first chain, insert the hook into the second chain, and work 6 sc into it (alternative: you may start with a magic ring and work 6 sc in it).
- Pull the yarn tail gently to close the gap between stitches.

- Round 1 (Increase):
- Work 2 sc (increase) in every stitch around. Total: 12 stitches.
Place a stitch marker in the first stitch of the round.
- Work 2 sc (increase) in every stitch around. Total: 12 stitches.
- Round 2:
- Alternate between 1 sc and inc, all the way around. Total: 18 stitches.
- Round 3:
- Alternate between 2 sc and inc, all the way around. Total: 24 stitches.
- Round 4:
- Alternate between 3 sc and inc, all the way around. Total: 30 stitches.
- Round 5: Work a combination of 2 sc, followed by an increase, and then 2 more sc, forming a pattern that avoids stacking increases directly on top of previous ones. Total: 36 stitches.
- Rounds 6–11:
- Sc in every stitch (1 sc per stitch). Total: 36 stitches per round.
- Add eyes:
- Insert 12–14 mm security eyes between Rounds 2 and 3. Leave approximately 6–7 stitches between each eye. Attach eye backings securely.
Step 2: Decreasing for the Head
- Begin decreasing (Round 12):
- Alternate between 5 sc and dec, all the way around. Total: 30 stitches.
- Follow the decrease pattern:
- Round 13: 4 sc followed by dec. Total: 24 stitches.
- Round 14: 3 sc followed by dec. Total: 18 stitches.
- Round 15: 2 sc followed by dec. Total: 12 stitches.
- Round 16: 1 sc followed by dec. Total: 6 stitches.
- Finishing the Head:
- Work decreases until the gap is as small as possible. Secure by threading the last stitches with the darning needle. End with a slip stitch.
- Stuff the Head:
- Fill the head evenly with fiberfill, ensuring it is firm but not overly packed.

- Fill the head evenly with fiberfill, ensuring it is firm but not overly packed.
Step 3: Arms
- Repeat the initial step: slip knot and chain 2.
- Work 6 sc into the second chain from the hook.
- Round 1: Work 2 sc into each stitch. Total: 12 stitches.
- Round 2:
- Sc in each stitch (no increases). Total: 12 stitches.
- Rounds 3–9:
- Continue working sc in each stitch to increase the arm’s length. Fill lightly with fiberfill during the process.
- Round 10:
- Flatten the arm and work 4 sl st across the top to close the arm gap.
- Make another arm with identical instructions.
Step 4: Ears
- Start identically to the arms:
- Slip knot and chain 2. Work 6 sc into the second chain.
- Round 1:
- Inc in every stitch. Total: 12 stitches.
- Rounds 2–3:
- Sc in each stitch. Total: 12 stitches per round.
- Round 4:
- Alternate between 1 sc and dec to reduce the stitch count. Total: 8 stitches.
- Flatten the ear and work 4 sl st across the top.

Step 5: Muzzle
- Chain 2 and work 6 sc into the second chain.
- Follow rounds 1–3 from the head for shaping:
- Round 1: Inc in every stitch (12 stitches).
- Round 2: Alternate between 1 sc and inc (18 stitches).
- Round 3: Sc in each stitch (18 stitches).
Step 6: Tail
- Work the tail similar to the arms but stop after Rounds 6–7. Flatten, thread shut, and lightly fill with fiberfill.
Step 7: Body & Legs
- Legs: Follow instructions for arms but increase stitch counts to 24 stitches at the widest point. Connect the legs after completing them.
- Work 24 stitches on one leg, move to the second leg, and continue to form a single combined round of 48 stitches.
- Form the body:
- Alternate between rounds of sc and decrease rows (similar to the head).
- Attach the tail to the back of the body.
Step 8: Assembly
- Muzzle: Attach the muzzle just beneath the eyes using darning needle. Use black yarn to create a nose and optional stitch for the mouth.
- Ears: Position symmetrically and attach on either side of the head.
- Head to Body: Sew the head securely onto the neck opening.
- Arms: Attach arms one round below the neck.
Final Touches
- Create the fine details, including:
- Black DK yarn eyebrows and shaping the eye sockets for a cute expression.
- Massage and reshape the teddy bear before completing.

Final Words
Congratulations on completing your teddy bear comforter, This project blends functionality and charm, making it a wonderful addition to your crochet collection or a fantastic gift for loved ones.
Tips to Maintain the Pattern
- Consistency: Ensure uniform tension while crocheting to maintain smoother and neater stitches.
- Storage: Store the comforter in a cool, dry place to prevent yarn stretching or discoloration.
- Cleaning: Hand wash gently using mild detergent, then air dry.
- Customization: Feel free to experiment with different yarn colors or add a bow/scarf for personalization.