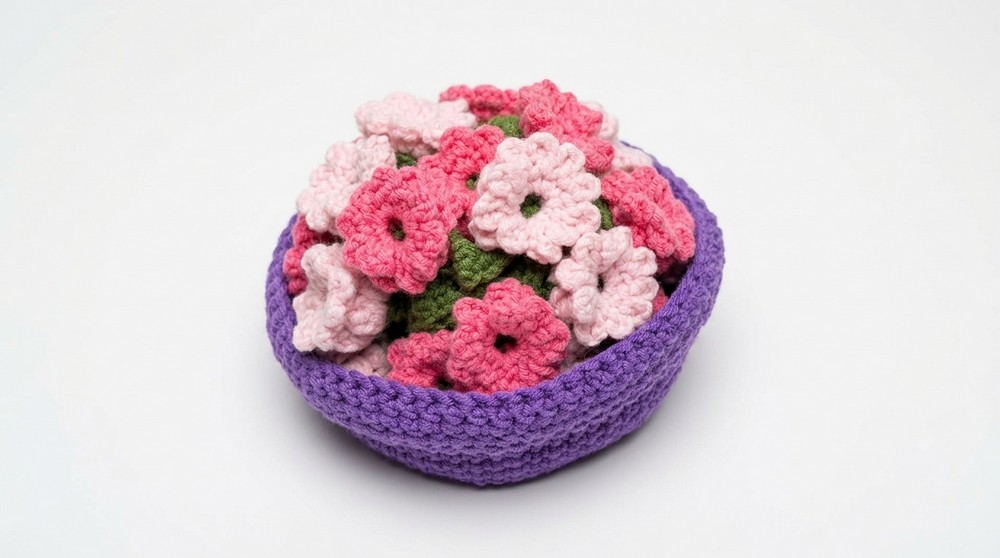
Make your table look bright with this free crochet flower coaster pattern designed to help you create colorful coaster effortlessly for daily use at home.
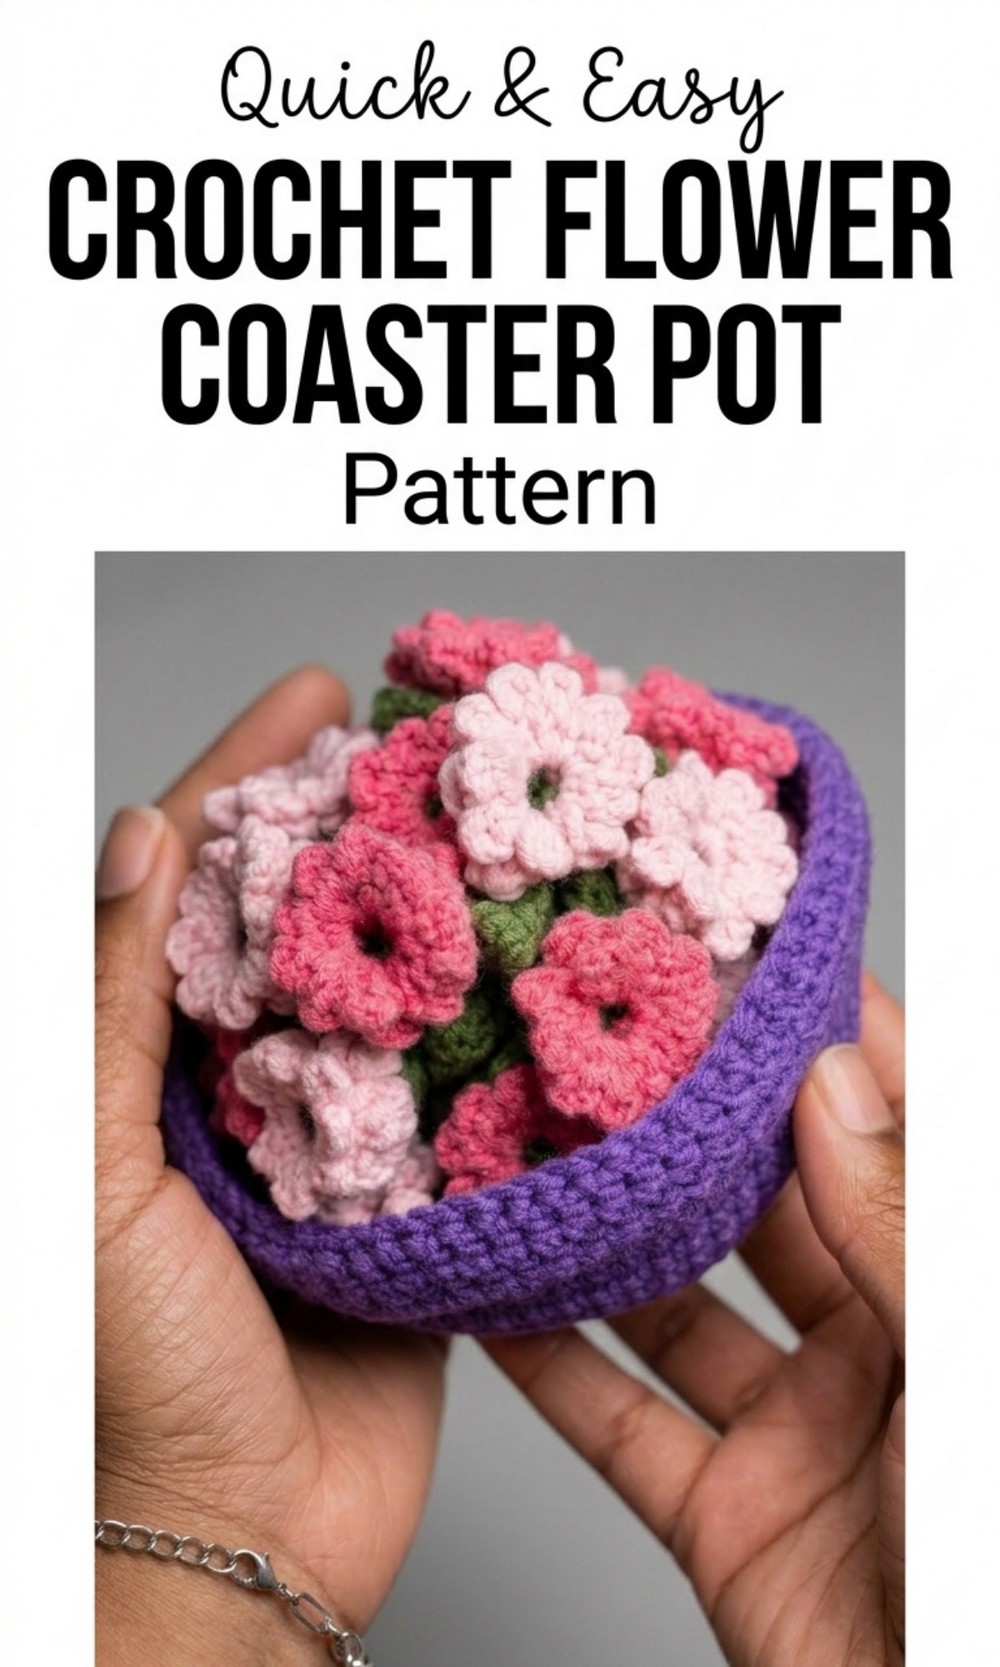
Gorgeous Free Crochet Flower Coaster Pattern to Add Elegance to Your Drinks
Would you like to turn your kitchen table into a colorful garden where every sip feels brighter and more joyful? The “Free Crochet Flower Coaster Pattern” is a delightful way to create a soft, flower shaped coaster that instantly adds beauty to your space. With its bright petals and cozy texture, this coaster not only protects your table from spills and heat but also makes every moment feel special.
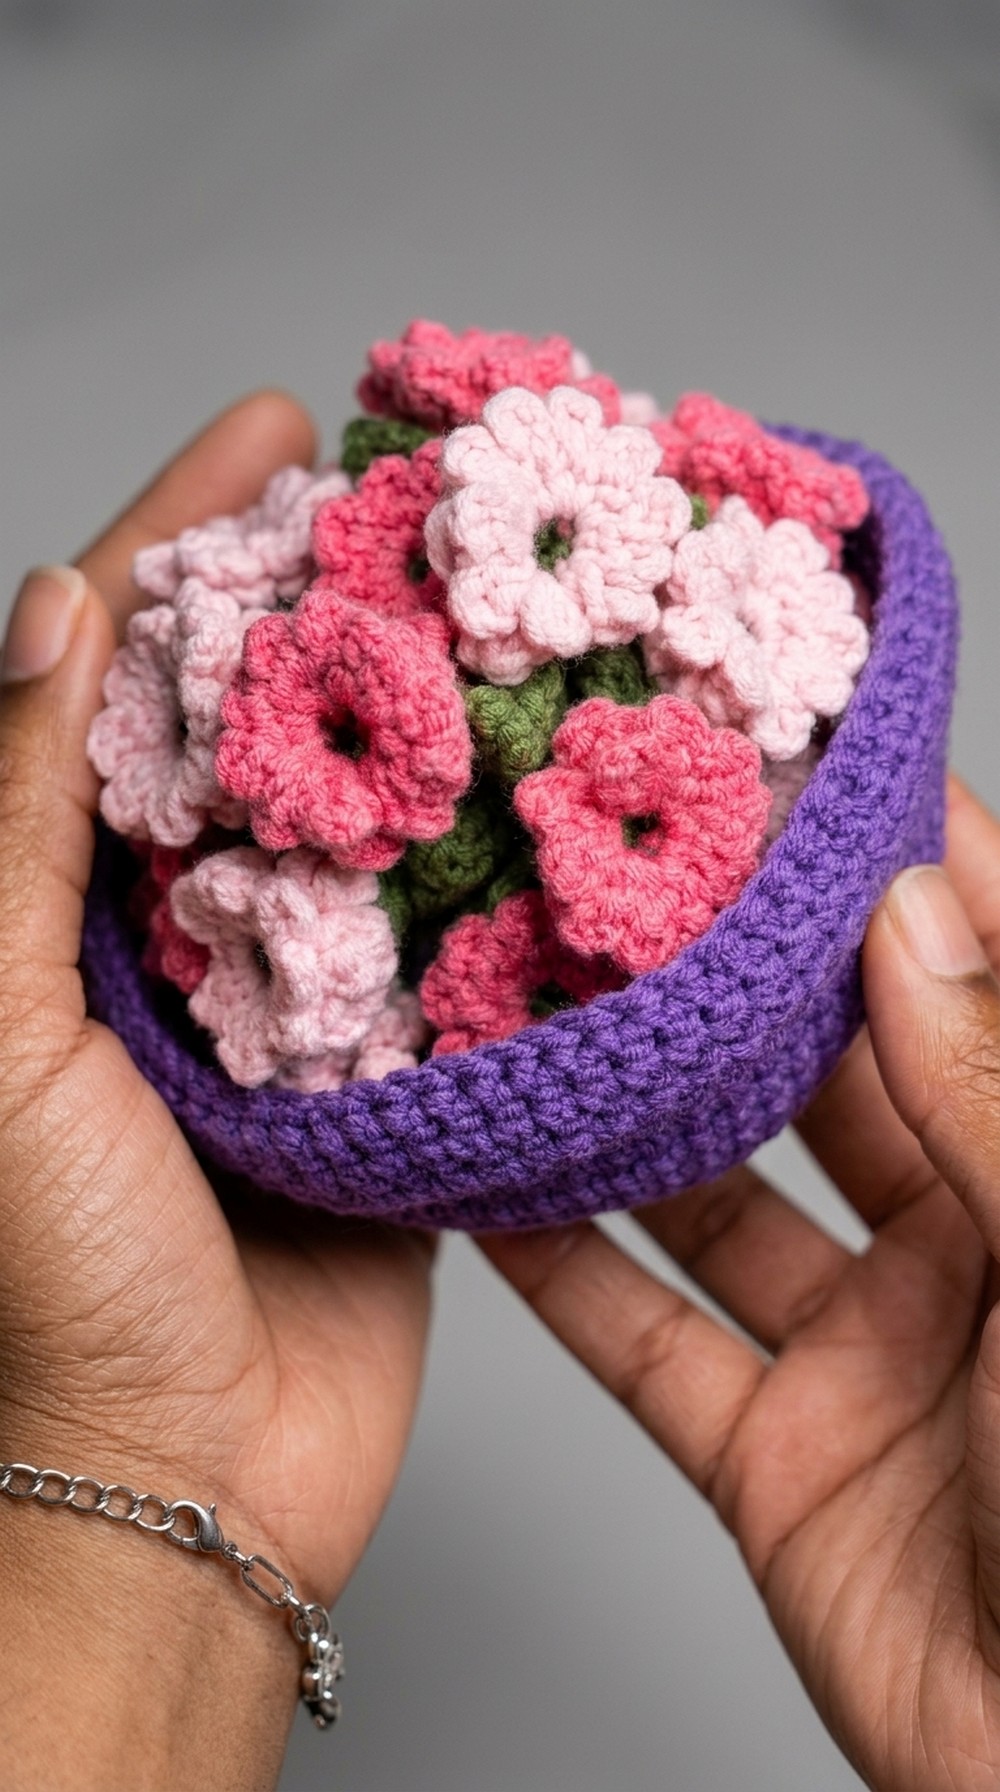
Whether it’s for your morning coffee or a refreshing glass of juice, this coaster brings a cheerful vibe to your day. It’s easy to make, perfect as a gift, and full of creative fun. Add a little bloom to your table and watch it come to life.
Crochet Flower Coaster Pattern
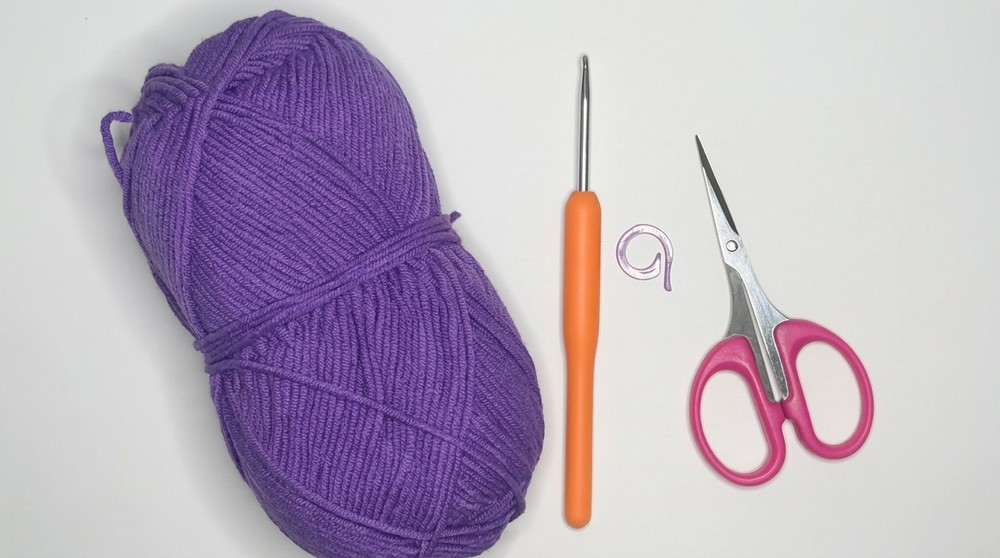
Materials Needed
- DK Yarn: Choose any color you like.
- Crochet Hook: 3.5 mm.
- Stitch Marker: To mark the beginning of each round.
- Scissors: For cutting yarn after finishing rounds.
- Yarn Needle: For weaving in ends neatly.
Special Techniques Used
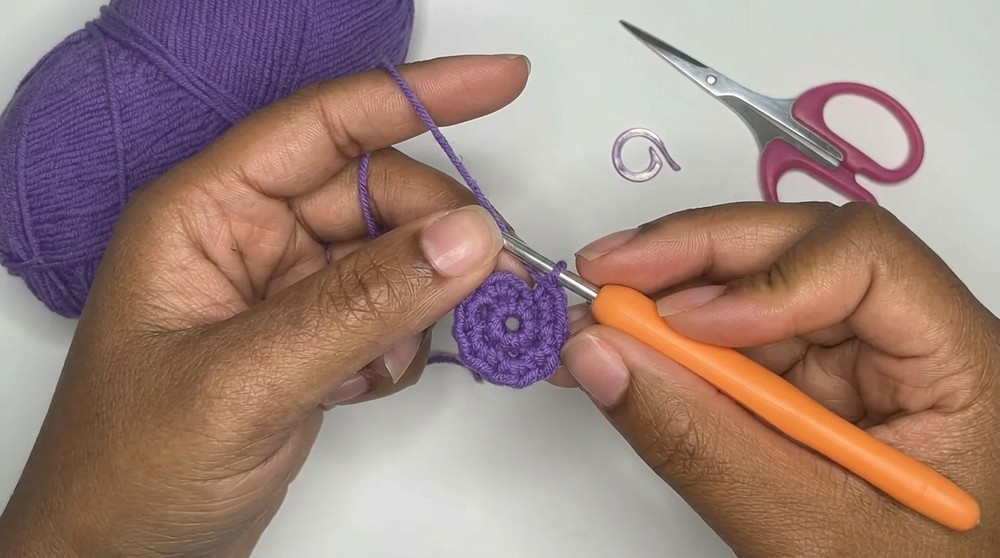
- Magic Circle: To begin the base of the pot seamlessly.
- Back Loop Only Crochet: For shaping the sides of the pot.
- Slip Stitch and Chain Stitch: Used to create details like the lip of the pot.
- Increasing: Adding stitches in specific patterns to shape the pot.
Step by Step Instructions
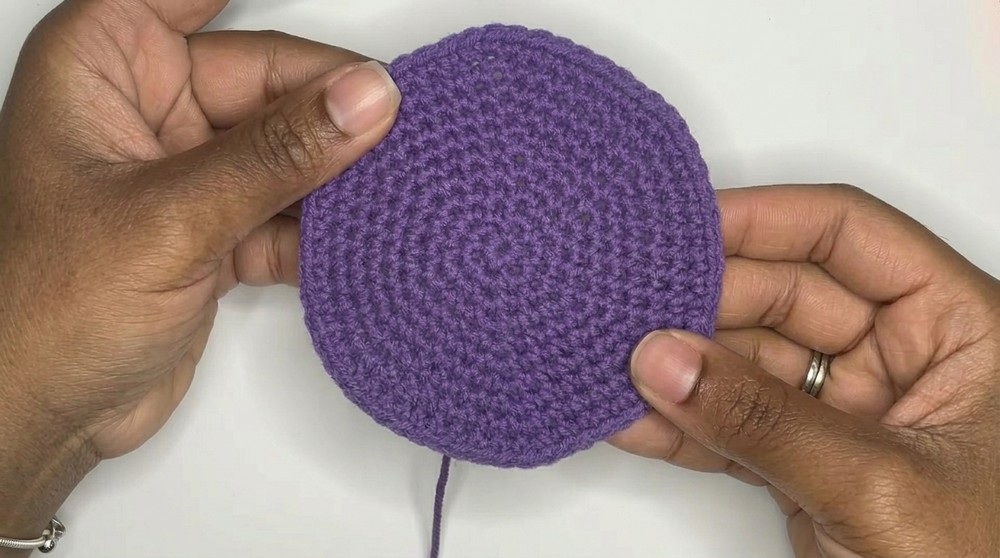
Step 1: Bottom of the Pot
- Magic Circle and Round 1: Create a magic circle and crochet 6 single crochets (sc) inside the loop. Pull the yarn tail to tighten the circle.
- Round 2: Increase in all 6 stitches (2 sc in each stitch); total = 12 stitches. Use the stitch marker at the start of this round.
- Round 3: Alternate between 1 sc in a stitch and 1 increase in the next stitch; total = 18 stitches.
- Round 4: Alternate between 2 sc in consecutive stitches and 1 increase in the next stitch; total = 24 stitches.
- Round 5: Alternate between 3 sc in consecutive stitches and 1 increase in the next stitch; total = 30 stitches.
- Round 6: Alternate between 4 sc in consecutive stitches and 1 increase in the next stitch; total = 36 stitches.
- Rounds 7 to 10: Continue the increasing pattern:
- Round 7: 5 sc + 1 increase; total = 42 stitches.
- Round 8: 6 sc + 1 increase; total = 48 stitches.
- Round 9: 7 sc + 1 increase; total = 54 stitches.
- Round 10: 8 sc + 1 increase; total = 60 stitches.
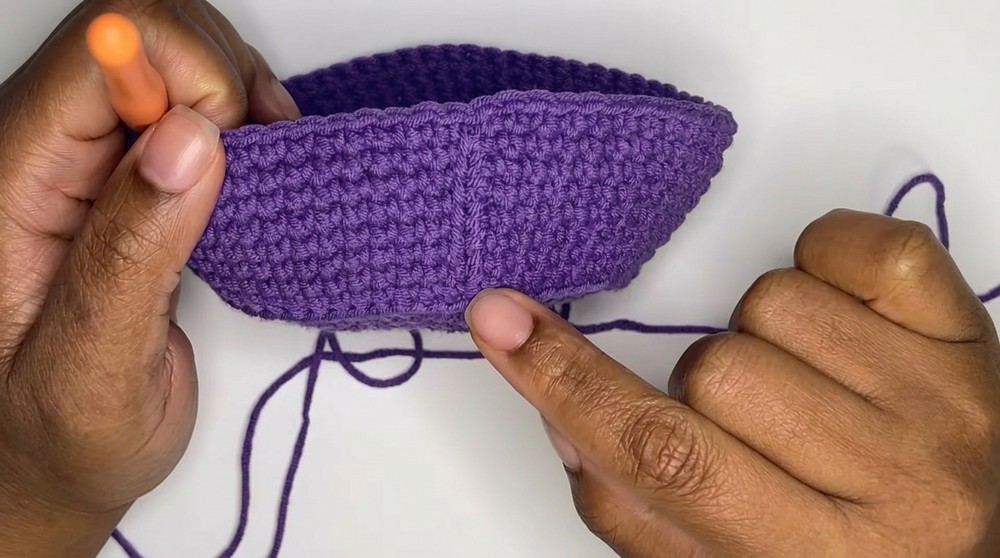
Step 2: Sides of the Pot
- Round 1: Crochet into the back loop only of each stitch. This forms the base of the sides. Total = 60 stitches.
- Rounds 2 to 3: Crochet 1 sc in each stitch for two rounds, maintaining 60 stitches.
- Increasing Rounds for Width:
- Round 4: Crochet 19 sc + 1 increase. Repeat this pattern 3 times; total = 63 stitches.
- Round 5: Crochet 1 sc in each stitch, no increases; total = 63 stitches.
- Round 6: Crochet 20 sc + 1 increase. Repeat this pattern 3 times; total = 66 stitches.
- Rounds 7 to 8: Crochet 1 sc in each stitch for two rounds, no increases; total = 66 stitches.
Step 3: Lip of the Pot
- Round 1 (Front Loops Only):
- Slip stitch and chain 1 into the first stitch.
- Crochet into the front loops only for this round; total = 66 stitches.
- Rounds 2 to 3: Skip the slip stitch and chain 1 made earlier and crochet 1 sc in each stitch for two rounds, maintaining 66 stitches.
Finishing the Pattern
- Tie Off Yarn: After completing the final round, slip stitch and tie off the yarn. If you prefer, make a chain stitch before cutting the yarn to secure the knot.
- Weave in Ends: Use a yarn needle to weave in the starting and finishing yarn tails. Split the yarn for a secure knot, if desired.
Final Words and Tips
- Versatility: This pot can hold the flower coasters as intended or be repurposed to store small items like jewelry, stationery, or accessories.
- Relax Your Tension: As highlighted in the video, keep your tension relaxed to make it easier to work with your stitches, especially in the magic circle.
- Stitch Marker Tip: Always move the marker to the start of the next round to avoid confusion.
- Customizing Size: If you want a larger or smaller pot, adjust the number of rounds and increases accordingly.
- Practice Techniques: Back loop and front loop crochet add texture, so practice these techniques before starting if you’re unfamiliar with them.
This pattern is a great introduction to creating 3D crochet items. With patience and following each step carefully, you will have a beautiful, functional pot ready to hold your coasters or other items.