Carry your essentials effortlessly with this Free Crochet Bag Pattern, offering style, durability, and a touch of handmade elegance.
A stylish bag can instantly elevate any outfit while offering practical storage for daily essentials, making it a must-have accessory for modern life. Lightweight yet durable, it easily accommodates personal items such as a phone, wallet, keys, or small notebooks, all while maintaining a polished and chic appearance. Following a Crochet bag Pattern allows enthusiasts to bring this functional accessory to life with elegance and precision.
Versatile Crochet Bag Pattern for Any Outfit

This type of bag is admired for its versatility, combining simplicity with a refined structure that suits a variety of occasions. Its clean lines and textured finish give it a contemporary yet timeless charm, making it ideal for casual outings, work, or even special events. The pattern provides flexibility to experiment with colors, stitches, and embellishments, allowing each bag to reflect individual style while retaining its signature sophistication.
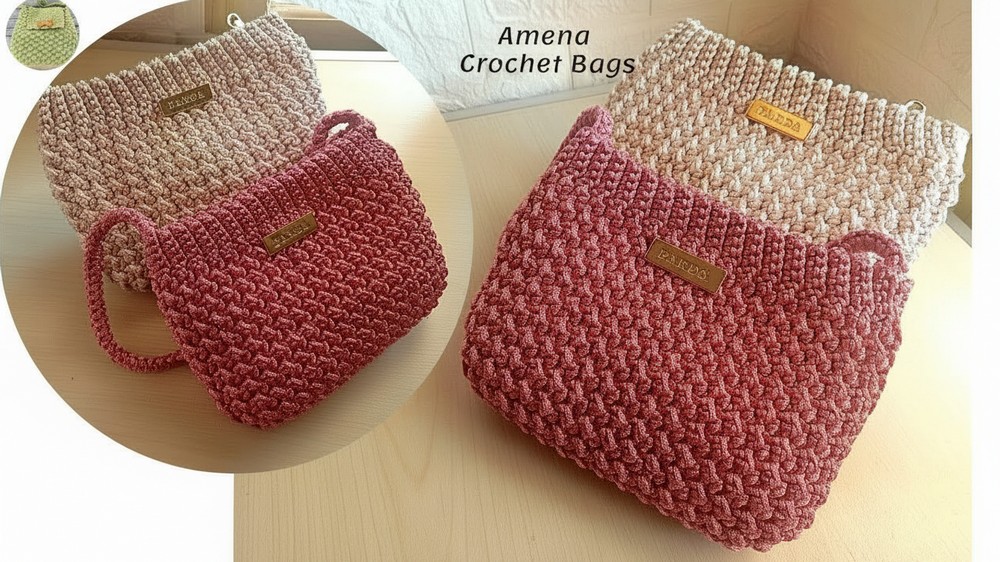
Beyond aesthetics, this accessory offers comfort and practicality, with straps and closures designed for easy access and secure carrying. Its durable construction ensures that it withstands everyday wear while remaining lightweight and stylish. Present trends continue to celebrate accessories that balance beauty with function, and this Crochet bag Pattern embodies that ideal, offering a project that results in a visually appealing, versatile, and highly useful accessory for any wardrobe.
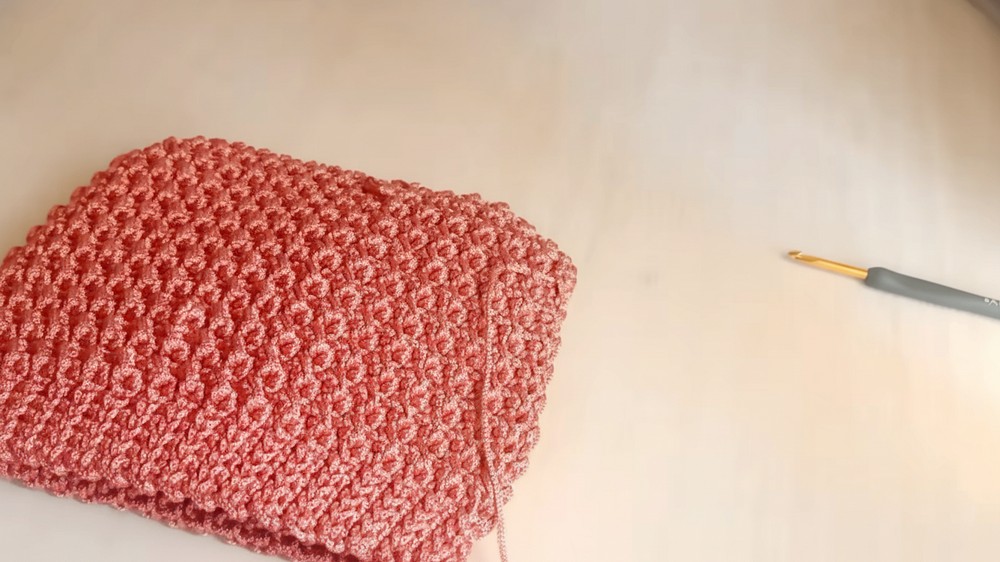
Step-by-Step Details
Step 1: Gather Materials
To complete this bag design, you’ll need the following:
- 3mm polyester macramé thread (about 500 grams or approximately 200 meters).
- 5mm crochet hook.
- Optional tools and materials: zipper, fabric for the lining, and metal rings (optional for the strap).
Step 2: Create the Base
- Begin by making a starting knot followed by 24 chains.
- Starting from the second chain from the hook, work the following pattern:
- 5 slip stitches, followed by a half-double crochet (hdc), then a slip stitch (sl st).
- Repeat the pattern of one hdc and one sl st until the last two chains.
- In the last two chains, work increases on both sides as follows:
- In the first chain, make one hdc and one sl st.
- Turn the work and repeat this on the other side of the same chain.
- Repeat this for the next chain.
- Continue the row by alternating hdc and sl st until only 5 stitches remain. Finish with 5 slip stitches.
- You’ve now completed the first row, which establishes the base for the bag.
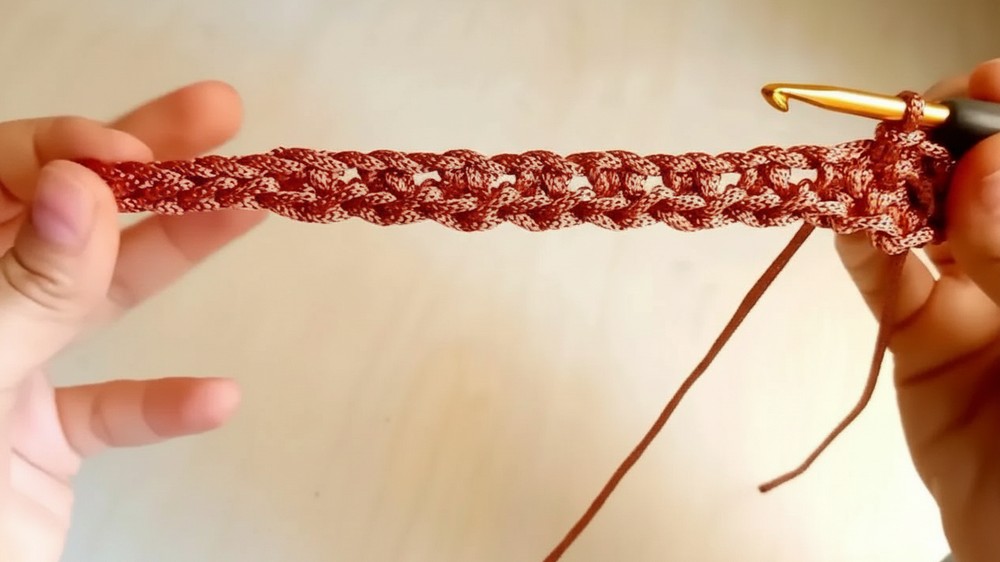
3: Build the Subsequent Rows
- Row 2:
- Begin with 1 chain.
- Work the first 5 stitches and the last 5 stitches in single crochet (sc) in the back loop.
- For the rest of the stitches, maintain the pattern of hdc and sl st, without any increases.
- End with 5 sc in the back loop, and this completes row 2.
- Row 3:
- Begin and end this row with 5 slip stitches in the back loop.
- Work 9 units (1 hdc + 1 sl st).
- In the middle 4 stitches, perform an increase by creating 4 units (hdc + sl st) in 2 chains (2 units per chain).
- Complete the row with 5 slip stitches.
- Row 4 (No Increases):
- Start and end with 5 single crochets in the back loop.
- The rest of the row alternates between hdc and sl st, with no increases.
- Row 5 (Last Increment Row):
- Begin with 5 slip stitches in the back loop.
- Work 10 units (hdc + sl st).
- Above the two units in the middle, make 4 units (2 units per chain).
- Complete the row by crocheting 10 units and finishing with 5 slip stitches.
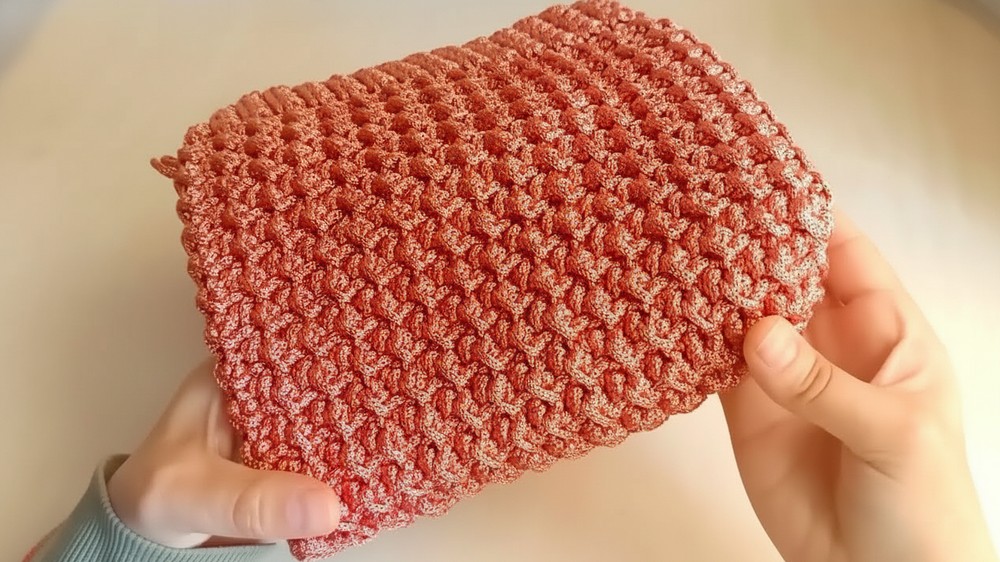
- After the fifth row, continue crocheting to build the height of the bag. Rows 6–32 alternate between rows starting/ending with single crochet stitches and rows starting/ending with slip stitches. These rows contain no increases.
4: Introduce Decreases
- Row 33 (First Decrease Row):
- Select the 11th unit for your first decrease.
- Start with 5 slip stitches and work 10 units.
- For the 11th unit, skip both the hdc and sl st, and instead begin an hdc in the next unit.
- Repeat this process to decrease one more unit in the same row, and complete the rest of the row with the same pattern.
- Row 34: Do not make any decreases; crochet the row steadily.
- Row 35 (Second Decrease Row): Select the 10th unit and perform two decreases, following the same skipping method as in row 33.
- Row 36–37 (Finishing Rows):
- Row 36: Work steadily without decreases.
- Row 37: This is the last row. Decrease by skipping two units somewhere near the 8th unit. Complete the rest of the row.
- After the 37th row, turn the bag inside out, fasten off with a meter-long thread to prepare for sewing.
5: Closing and Finishing
- Sew both sides of the bag together with a needle using the cut thread. This will seal the bag shape.
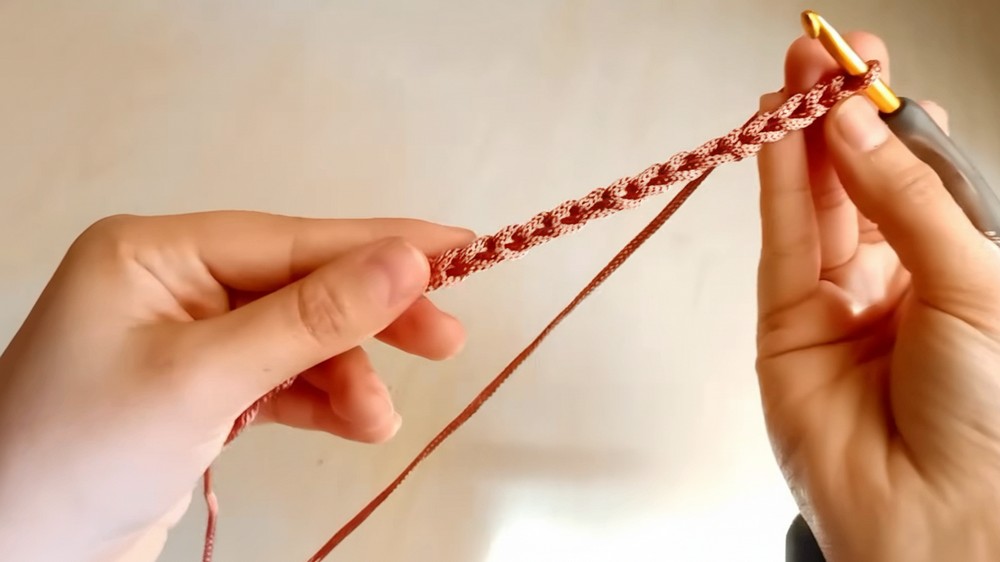
- Create a strap using the Roman Lycee rope method. The tutorial suggests a 75 cm-long strap for carrying on your shoulder, but you can adjust the length if desired.
- Attach the strap either by sewing it directly to the bag or by using metal rings to make the strap adjustable or detachable.
6: Add a Lining (Optional)
- Measure your bag and cut the lining fabric to the correct width and length.
- Fold and sew the sides of the fabric, ensuring it matches the size and shape of the bag.
- Sew a zipper onto the lining fabric for added functionality.
- Finally, secure the lined zipper into the center of your bag opening with clean stitches.
Special Features
- Elegant and Durable Design: Made with polyester macramé thread, this bag is sturdy and stylish, making it ideal for everyday use.
- Customizable Options: You can personalize the bag with different colors, adjust the size, or add decorative elements.
- Functional Additions: The zipper keeps your belongings secure, and metal rings offer flexibility for strap length and style.
- Beginner-Friendly Pattern: The project consists of simple crochet techniques like slip stitches, half-double crochets, and basic increases/decreases, making it manageable for most skill levels.
Level of Difficulty
This project is easy to moderate difficulty, as explained by the tutor. While beginner crocheters may need some practice with the increases and decreases, the instructions are clear and repetitive, making it easy to grasp.
Tutor’s Suggestions
- Focus on the Units: Remember, each “unit” consists of one half-double crochet and one slip stitch. Count your units carefully to avoid mistakes.
- Use the Proper Thread and Hook: The tutor recommends a 3mm polyester macramé thread and a 5mm hook for a neat, resilient finish.
- Customize the Strap Length: Adjust the strap length for your specific needs, depending on whether you want a shoulder bag or a crossbody bag. You can add metal rings to make an adjustable strap!
- Neat Edges Matter: Always work slip stitches or single crochets along the edges in the back loop to achieve clean and professional-looking borders.
Uses and Materials
Uses:
- A fashionable, lightweight shoulder or crossbody bag for everyday carrying.
- A perfect accessory for outings, trips, or casual events.
- It can serve as a thoughtful DIY handmade gift.
Materials:
- 500 grams of 3mm polyester macramé thread (around 200 meters in total).
- 5mm crochet hook.
- Optional: Zipper, lining fabric, and metal rings for additional functionality.
Tip
To achieve consistent results, make sure to maintain steady tension throughout the project. This is especially important for uniform unit sizes and clean edges, which greatly enhance the overall look of the bag.
Conclusion
This beautiful crochet bag tutorial walks you through the process of making a functional and trendy accessory with just a few basic tools and techniques. By following the step-by-step instructions, you’ll create a durable, handmade bag that is perfect for daily use or as a personalized gift. The attention to detail, from the decorative stitches to the optional lining and straps, ensures a polished and professional finish