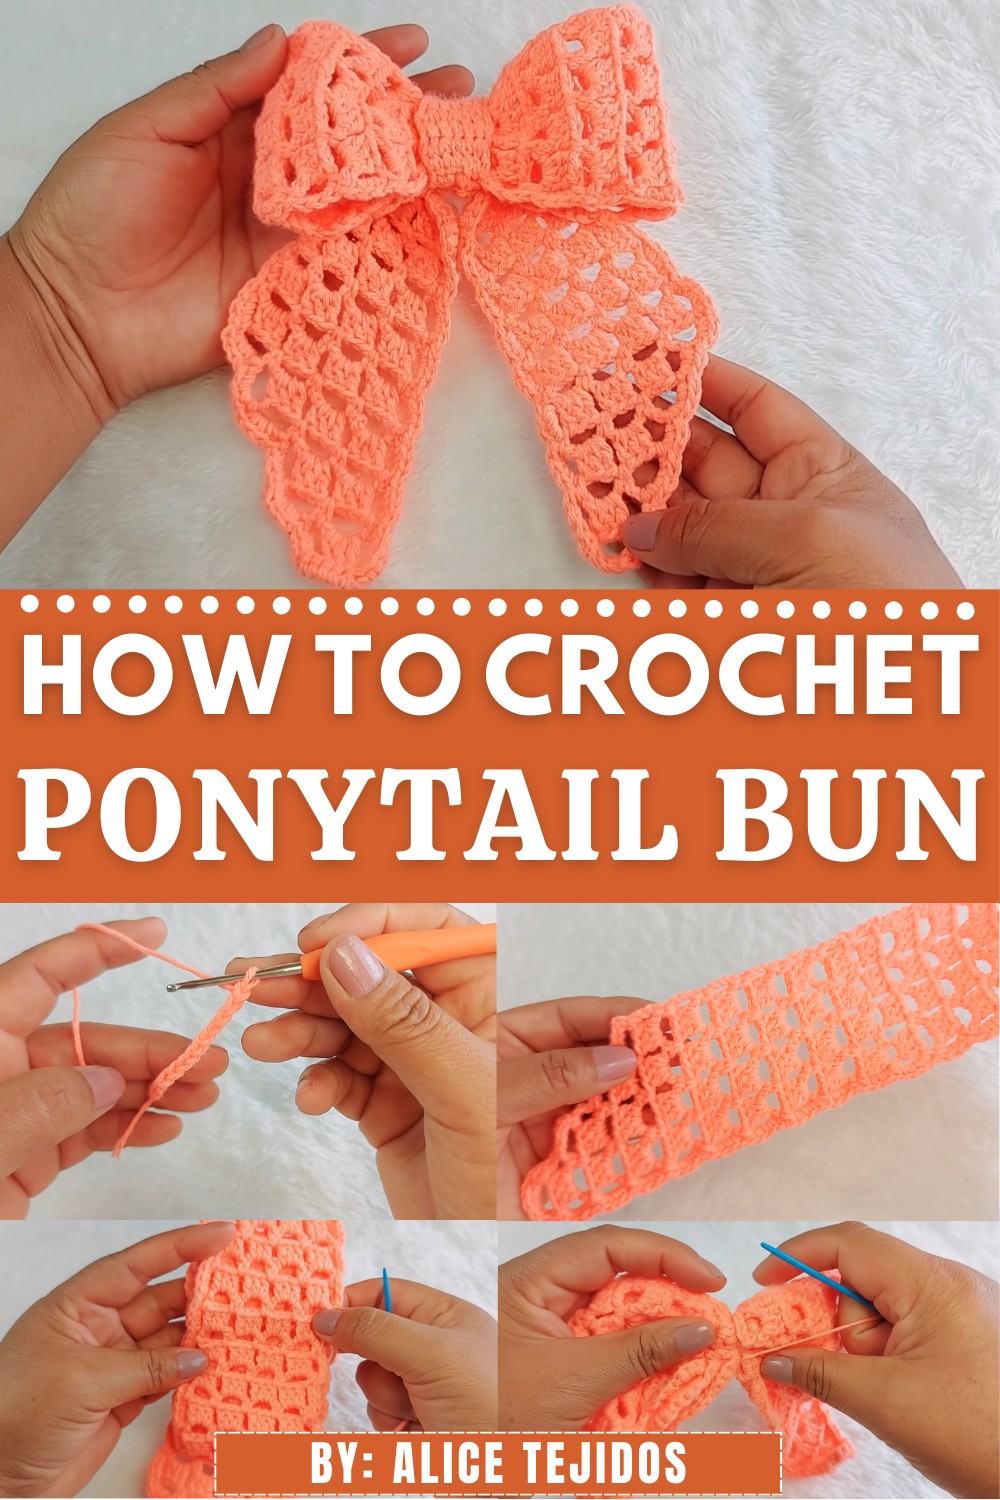
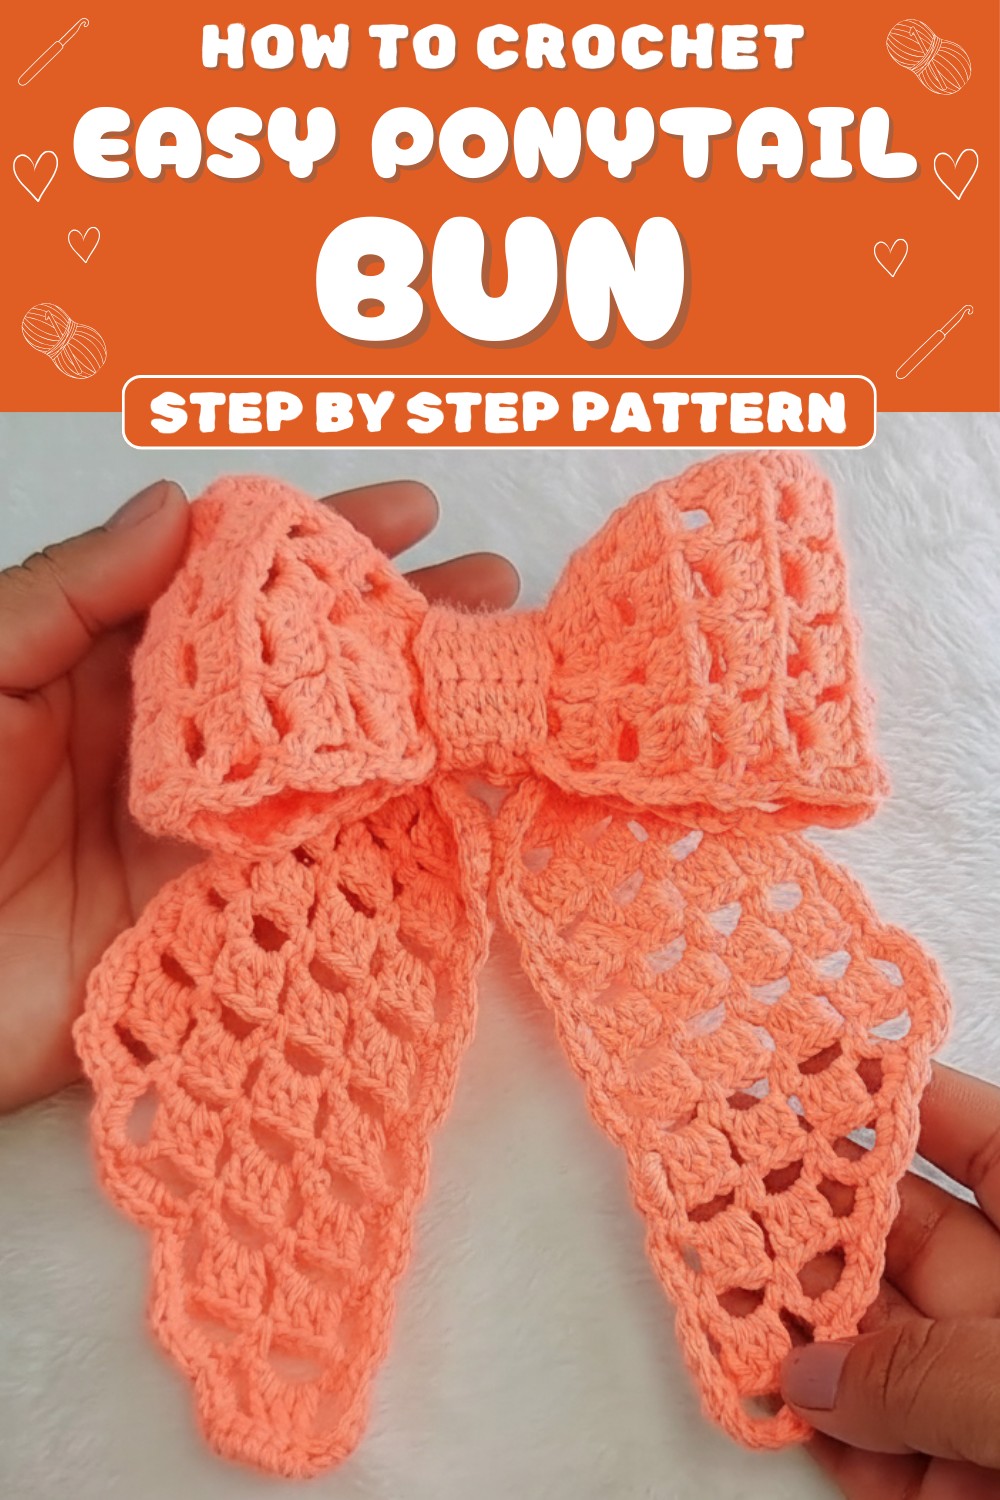
Upgrade your hairstyle with the Crochet Ponytail Bun Pattern and create a soft stylish handmade bun that is easy fun and perfect for any hair look.
Plain hair accessories can feel boring, but this soft handmade creation adds charm, style, and fun to any hairstyle. The Crochet Ponytail Bun pattern shows a delicate, round hairpiece made with soft yarn and neat stitches, shaped like a cute bun that looks natural, stylish, and cheerful.
Handmade Crochet Ponytail Bun Pattern for Daily Hairstyles
It can be used to decorate ponytails, add flair to everyday hairstyles, or give as a thoughtful handmade gift that anyone will love. Its most special features are the soft texture, flexible fit, and realistic bun shape, which make it unique, durable, easy to wear, and perfect for adding a playful, handcrafted touch to every hair look.

Materials:
- Yarn: Olana yarn, size 2 (or any soft, lightweight yarn suitable for accessories).
- Crochet Hook: Size 2.5 mm.
- Scissors.
- Tapestry Needle.
Optional: Measuring tape for checking dimensions.
Skill Level:
Intermediate to Advanced
Key Abbreviations:
- ch – chain
- sc – single crochet
- dc – double crochet
- slst – slip stitch
- sp – space
- st(s) – stitch(es)
Special Notes:
- Gauge is not critical for this project, as the bow can be adjusted to your preferred size.
- Follow each step carefully to ensure proper alignment when making reductions and joining pieces.
- This pattern uses US crochet terminology.
Step-by-Step Pattern:
Part 1: Large Bow Piece
- Foundation Chains:
- Work a row of chains in multiples of 3 + 1.
- Example: Start with 13 chains.
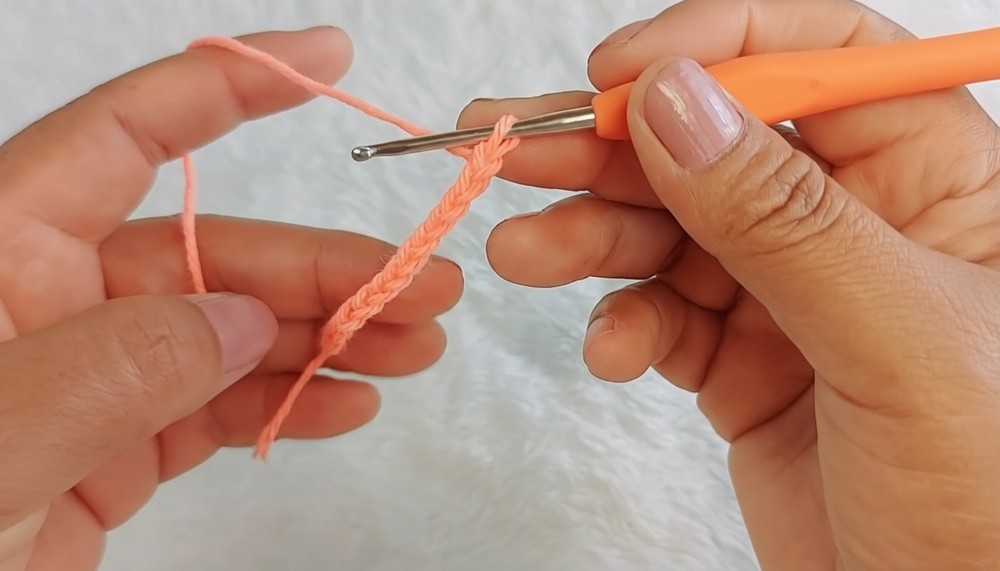
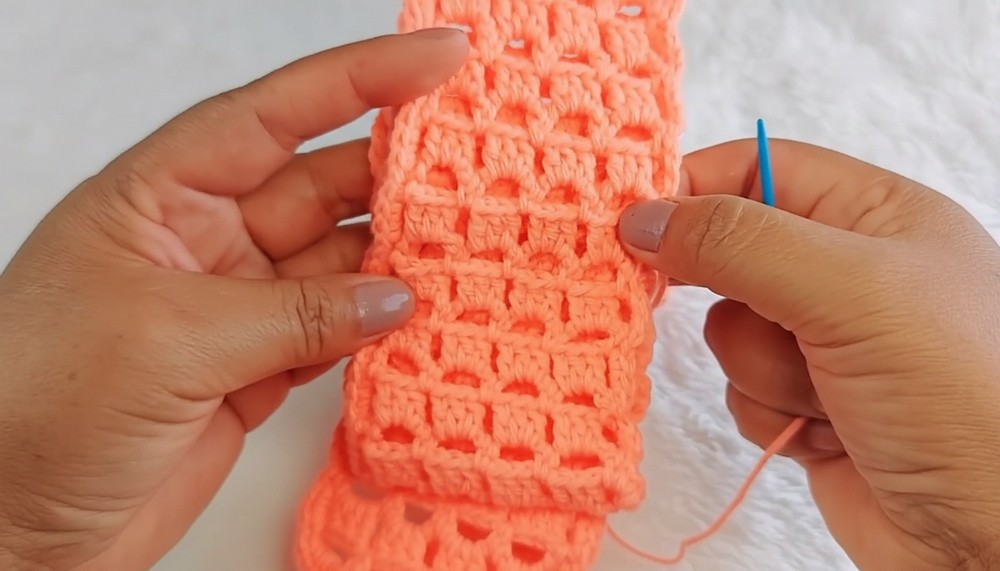
- Row 1 – Establish Pattern:
- Ch 3, skip 1 st (counts as the first dc).
- In the next st, make 3 dc stitches:
- Yarn over, insert into st, pull yarn through, yarn over, pull through 2 loops, yarn over, pull through remaining 2 loops. Repeat twice more.
- Ch 1, skip the next 2 sts, and work another 3 dc into the third st.
- Repeat the sequence (3 dc, ch 1) to the end, ensuring you finish with 1 dc in the last st.
- Turn your work.
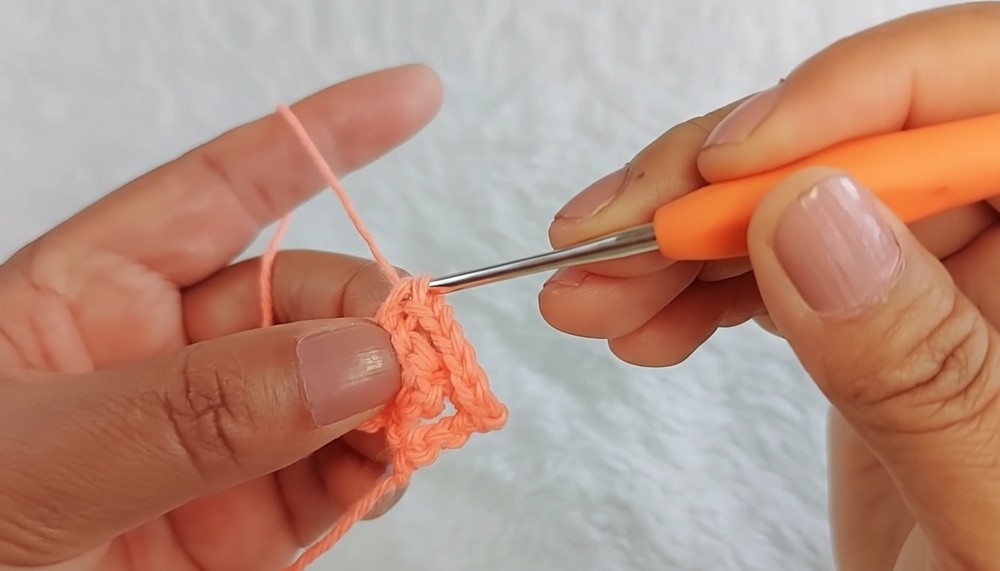
- Row 2 – Chain Spaces:
- Ch 1, work a single crochet in the first sp.
- Ch 5, and work a single crochet in the next sp.
- Repeat the sequence (ch 5, sc) across the row until the end.
- Turn your work.
- Row 3 – Repeat and Build Pattern:
- Ch 4 (counts as a dc and chain 1).
- In each space created by the ch 5 from the previous row:
- Make 3 dc stitches, followed by ch 1.
- Follow this sequence again to fill each space.
- End the row with 1 dc in the last space.
- Turn your work.
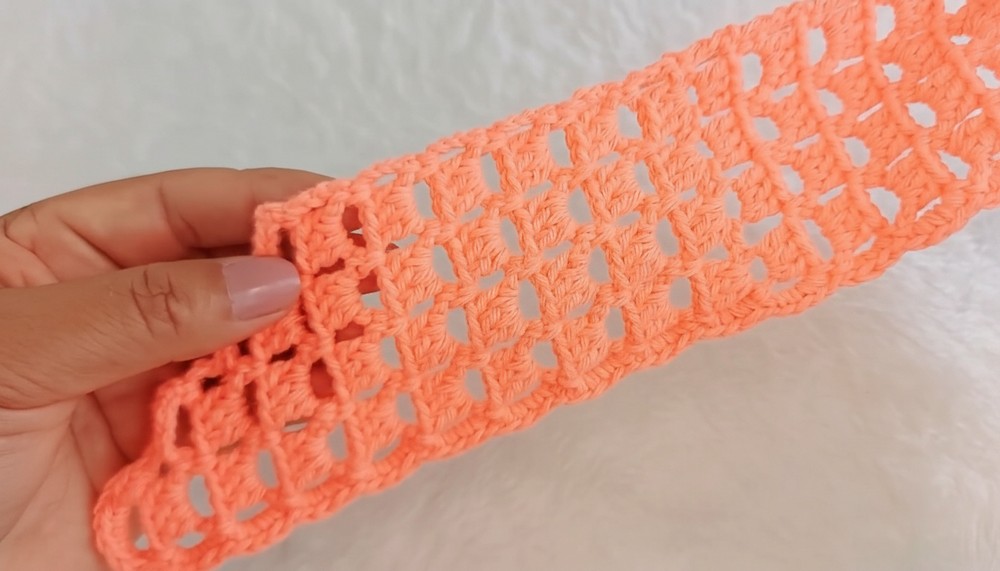
- Continue Row Alternations:
- Repeat Rows 2 and 3 alternately until the fabric measures approximately 28 cm in height and 6 cm in width.
- Secure and Finish:
- Cut the yarn and hide ends using a tapestry needle, making sure no loose threads remain.
Part 2: Smaller Bow Piece
- Follow the same instructions as Row 1 through Row 3 in Part 1, but adjust the height:
- Crochet until the fabric measures approximately 9 cm in height and 6 cm in width.
- Make reductions:
- Instead of completing 3 spaces per row, decrease by 1 space per row moving forward.
- Work only in the first 3 spaces, then reduce to 2 spaces, and finally finish with 1 space.
- This creates a tapered effect for the smaller bow piece.
- Secure the yarn and carefully hide the ends.
Part 3: Bow Center Wrap
- Foundation Chains:
- Make 6 chains, then add 1 additional ch (this counts as a turning chain).
- Row 1 – Single Crochet:
- Begin in the second chain from the hook.
- Work 1 sc across (total of 6 sc).
- Turn your work and repeat the process.
- Continue Single Crochets:
- Repeat rows of 6 sc until the fabric measures approximately 5 to 6 cm in height.
- Repeat rows of 6 sc until the fabric measures approximately 5 to 6 cm in height.
- Join Center Wrap:
- Use a tapestry needle to join both ends into a ring-like wrap.
- Secure with extra stitches and cut any excess yarn.
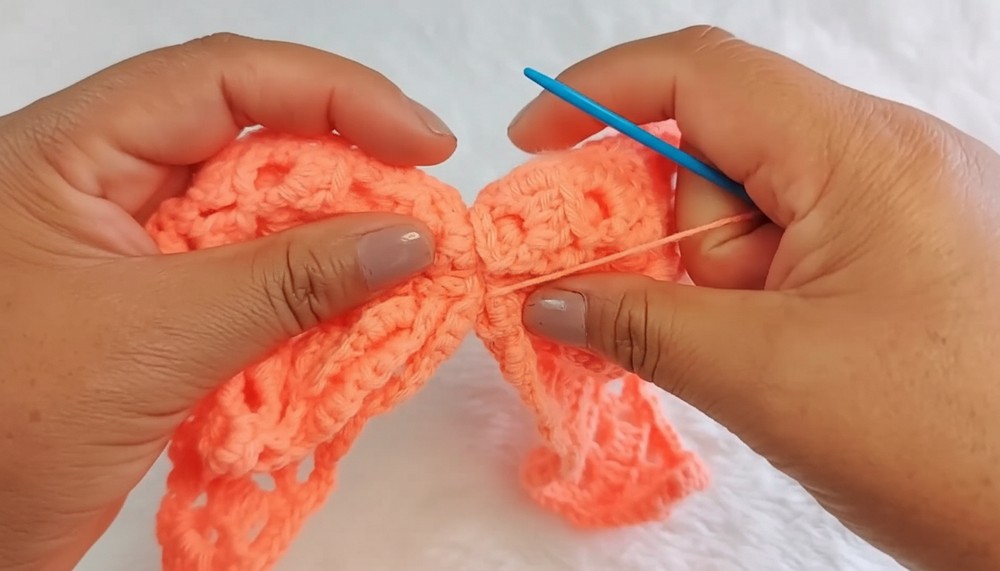
Part 4: Assemble the Bow
- Position the large bow piece and place the smaller bow piece on top with their wrong sides facing upward.
- Fold and secure the bows:
- Locate the midpoint by folding each bow carefully.
- Use a tapestry needle to stitch both bow pieces together at the center.
- Adjust until the bows appear aligned and well-positioned.
- Attach the Center Wrap:
- Take the completed wrap and place it around the joined bows at the center.
- Use a tapestry needle to secure the wrap in place, ensuring it’s tightly wrapped.
- Hide excess threads and adjust placement to achieve a neat finish.
Pattern Variations
Color Options:
- Choose contrasting colors for the large and small bow pieces for added dimension.
- Use variegated or textured yarn for unique effects.
Size Adjustments:
- For a larger bow: Increase the foundation chains and add extra rows in both parts of the bow.
- For a smaller size: Reduce the foundation chains and work fewer rows.
Additional Features:
- Add beads or small embellishments to the center wrap for a decorative touch.
Conclusion
By following this pattern, you’ll create a charming crochet ponytail bow that is both elegant and versatile. This project allows room for customization in size and color, making it a thoughtful handmade gift or stylish accessory.
Pattern Correction & Tips:
Corrections:
- Ensure you follow the sequence for alternating rows correctly (ch 5 rows vs. 3 dc rows).
- Do reductions in the smaller bow piece methodically, reducing spaces in each row as shown above.
Tips:
- Blocking: Block the bow pieces before assembly to ensure crisp edges and even shapes.
- Consistency: Be mindful of keeping your stitch tension consistent for a smooth texture.
- Ends: Hide yarn ends neatly to give your bow a polished look.