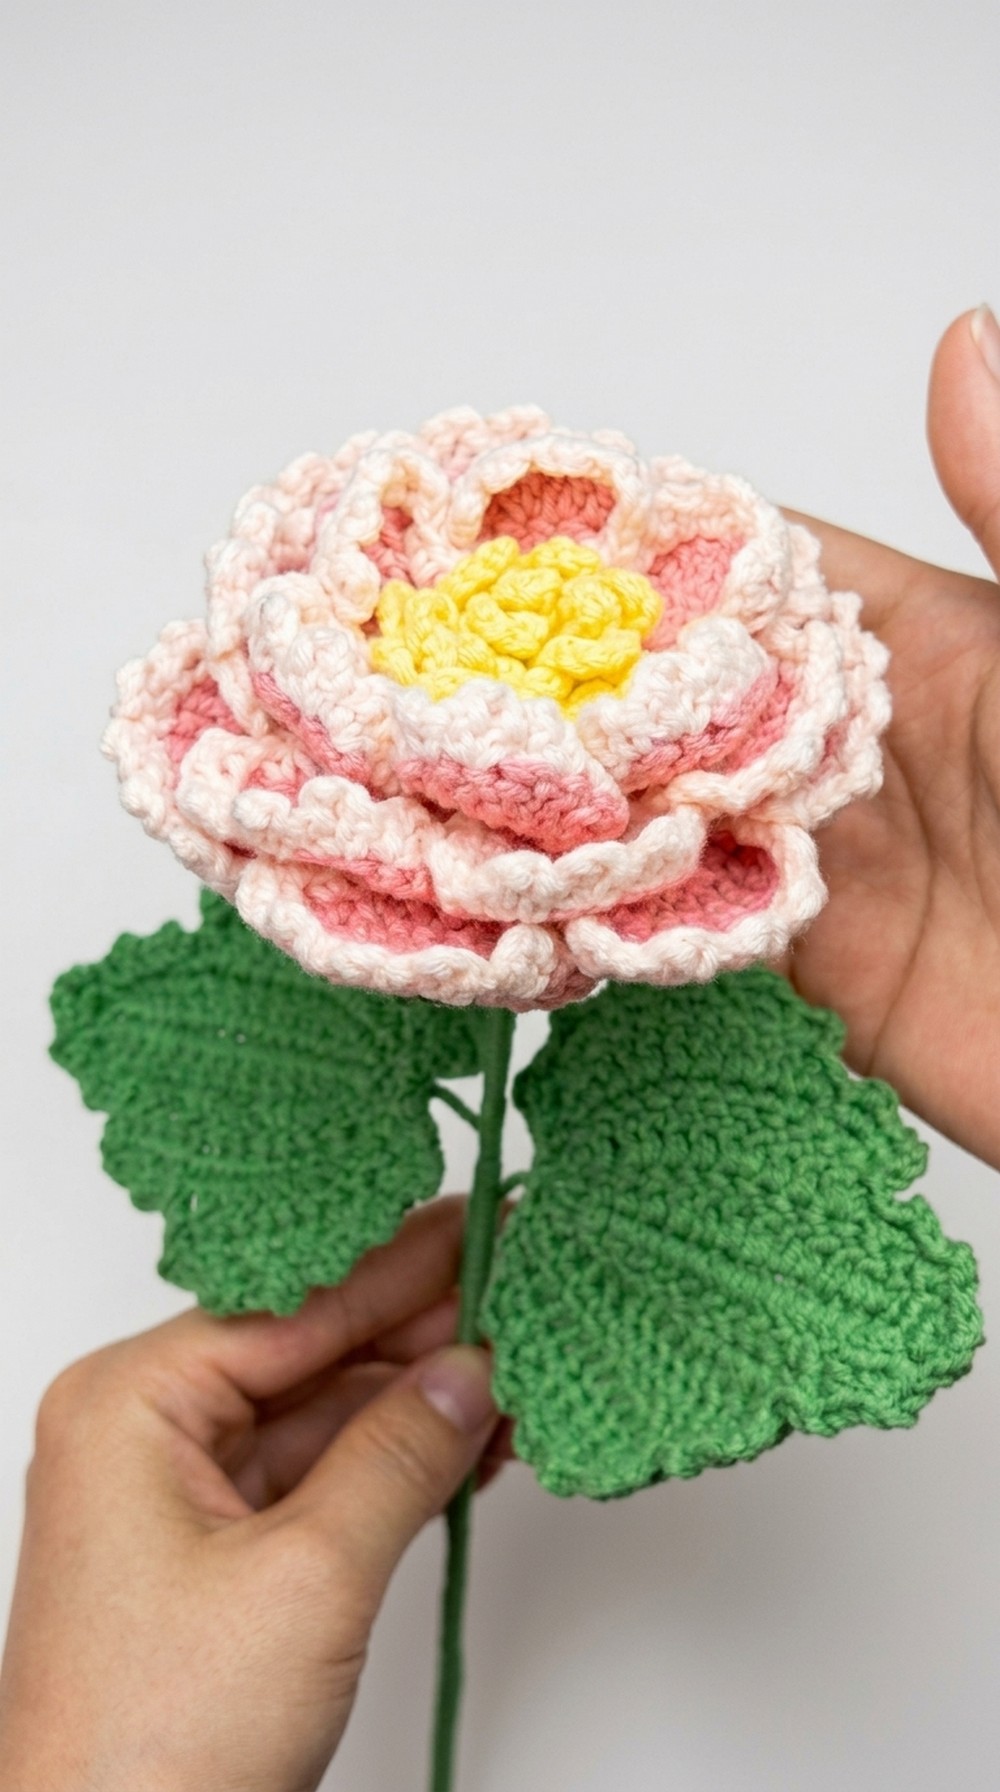
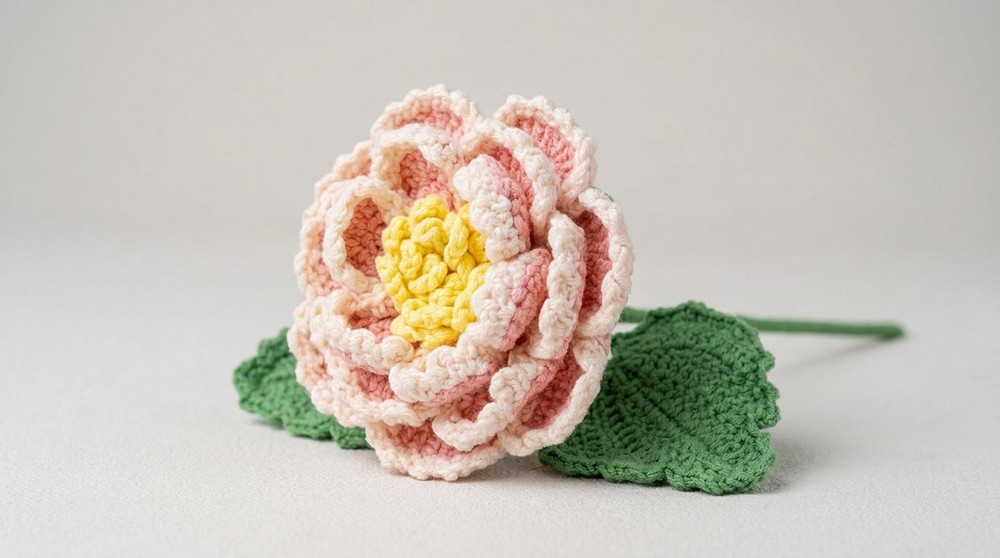
Open a world of beauty with this Free Crochet Peony Flower Pattern to have a beautiful and soft little bloom that is perfect for a very pretty garden.

Bring Spring Indoors with This Beautiful Free Crochet Peony Flower Pattern
Dazzle your guests with the beauty of a handmade creation using this free crochet peony flower pattern. The peony is known for its soft, layered petals and vibrant colors, and this crochet version captures its beauty perfectly. You can create lifelike flower with delicate pink petals, a bright yellow center, and realistic green leaves and stems.
This stunning flower never wilt, making them ideal for decorating your home, brightening up a special event, or giving as a unique gift. You can even get creative by experimenting with colors to match your style.
Whether you want to design a bouquet or simply add a touch of charm to your space, this crochet peony pattern is a fun and rewarding way to showcase your creativity.
Cute Crochet Peony Flower Pattern
Finished Size
- Flower Diameter: Approximately 12 to 15 cm across, depending on yarn thickness and crochet tension.
- Length of Stem and Leaf: Adjustable based on floral wire used.
Materials Required
- Yarn:
- Peony petals: Pink (main color, optionally gradient rimmed with lighter shades such as pastel pink/white).
- Sepals and leaves: Green yarn.
- Pistil: Yellow yarn.
- Hook Size: 5 mm crochet hook (adjust for gauge).
- Floral Wire: Two pieces (40 cm each).
- Hot Glue Gun: For stem shaping and securing the parts.
- Scissors: To cut yarn and wire.
- Yarn Marker: Optional, to track critical stitches.
- Needle: For sewing loose ends.
- Stuffing Material: Light stuffing for the flower base (optional).
Gauge
Exact gauge is not critical for this pattern. Work loose enough to allow smooth petal formation in layers without curling excessively.
Pattern Instructions
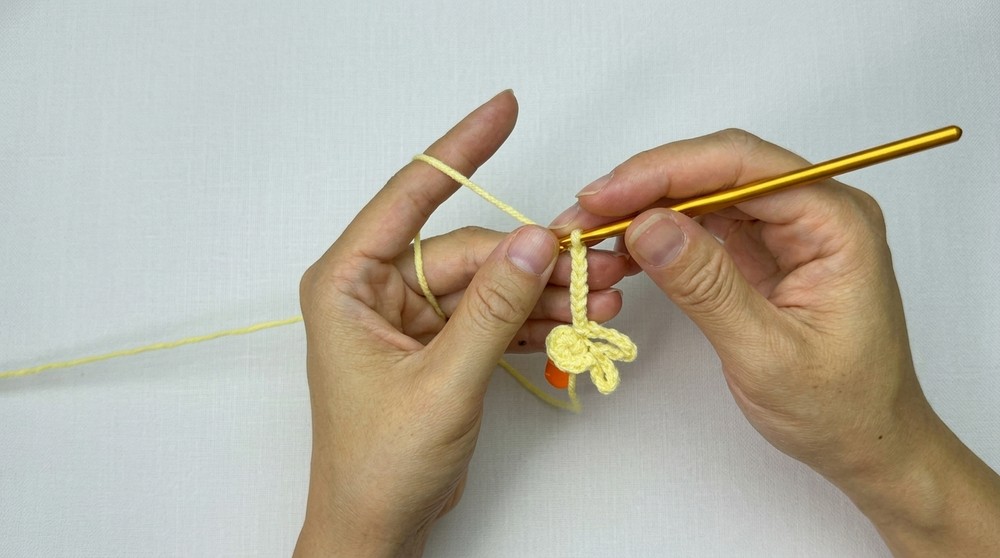
I. Pistil (Center of the Flower)
- Start with the Yellow Yarn:
- Create a magic ring as the base. Wrap yarn around your fingers to form a ring, ensuring the working yarn crosses over the tail.
- Inside this ring, crochet 8 single crochets (SC). Pull the yarn tail firmly to close the loop.
- Row 2 (Front Loops Only):
- Slip stitch into the first front loop, then mark the first back loop.
- Chain 8, slip stitch into the same front loop to form the first pistil strand.
- Repeat for all front loops, creating 8 protrusions at the flower center.
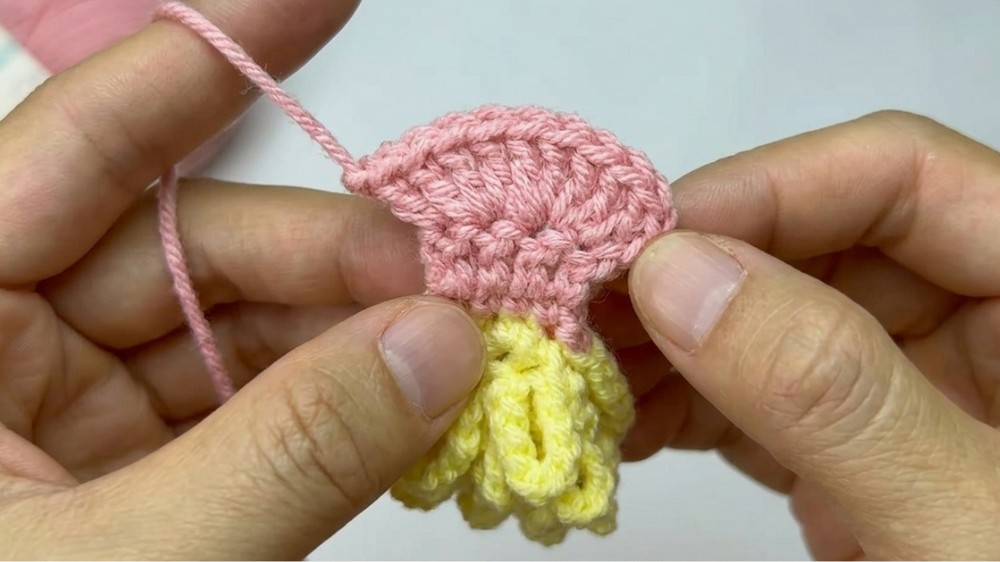
II. Petals (First Layer)
- Attach Pink Yarn to a marked back loop from the pistil.
- Base Formation: Crochet 24 SC along all the back loops without increase/decrease. Slip stitch into the first stitch front loop to close.
- Shaping First Layer Petals:
- For each group of 4 stitches: Chain 2, turn your work, crochet 4 double crochets (DC).
- Rows 2 to 3: Continue increasing each row with the following stitch pattern:
Row 2: Alternate DC and DC increases.
Row 3: Repeat same alternation until you reach 10 DC.
- Final Touch:
- Top off each petal with lace edging: In each stitch, crochet SC, chain 3, SC into the same space. This will create pointed lace edges.
- Slip stitch into the space connecting petals to secure lace shaping.
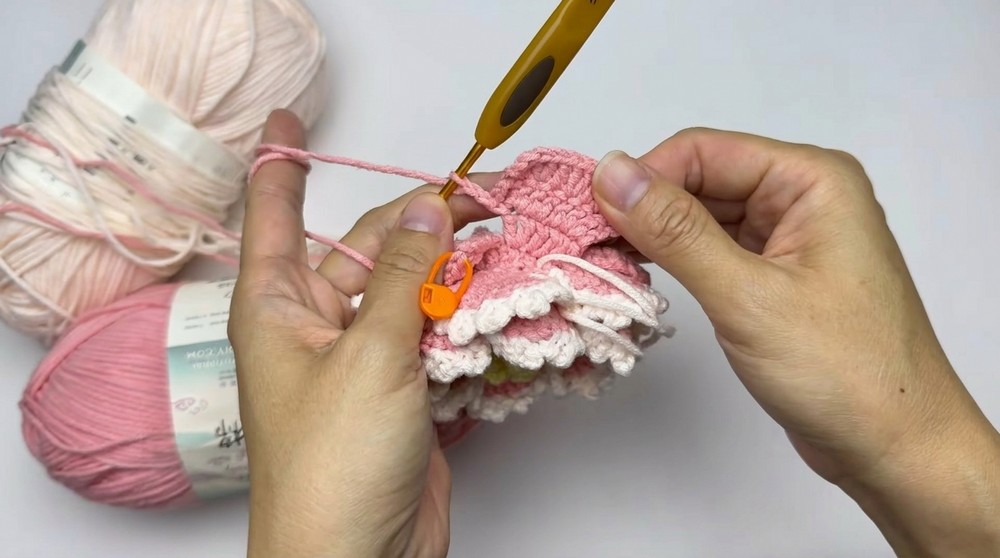
III. Petals (Second Layer)
- Positioning:
- Skip 2 stitches from the end of the first layer. Attach pink yarn to the next available loop.
- Base Formation: Crochet 24 SC along the back loops once again. Repeat similar shaping steps for petals as in the first layer: Each petal occupies 4 stitches, and the final row has 10 DC per petal.
- Lace Edging:
- Repeat the lace edge technique used for the first layer by crocheting SC, chain 3, SC into the top stitches.
- Ensure petals of the second layer alternate staggered positions above the first layer.
IV. Petals (Third Layer)
- Begin in the Same Fashion: Work 24 SC along next available back loops for this new layer. Stagger petals further by starting from loops positioned backward and repeating previous shaping techniques for petals.
- Customize: Crochet petals slightly longer and fuller if desired by increasing the number of DC stitches in final rows.
V. Sepals
- Attach green yarn to back loops of the flower edge.
- Base Formation: Crochet 24 SC, then work the following pattern for sepals:
- Each sepal occupies 4 stitches. Begin rows with chain 2, work 4 DC per sepal, and decrease stitches while forming pointed edges similar to petals.
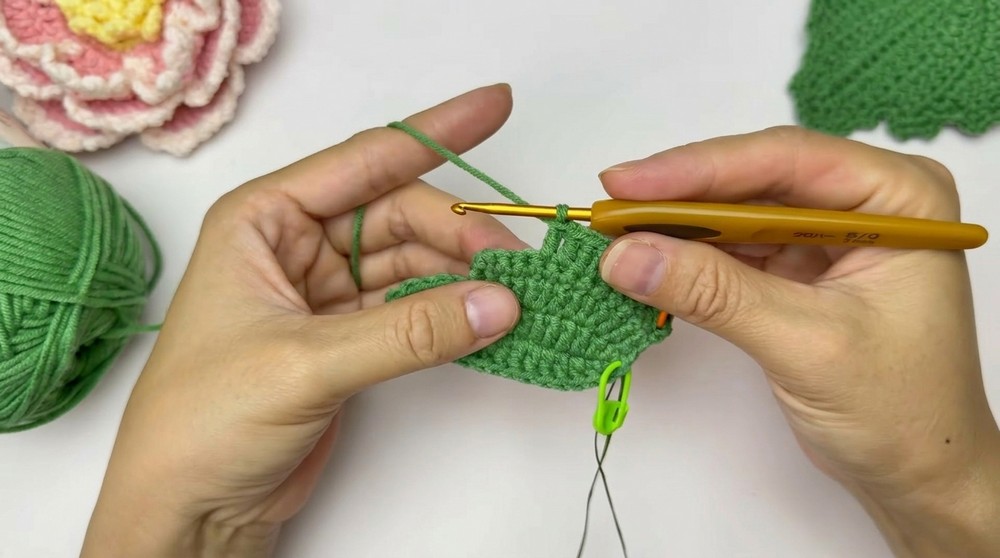
VI. Leaves
- Create the Leaf Base: Work 16 chains with green yarn. For the final chain, add floral wire along the yarn for extra structure. Wrap wire around yarn ends for durability.
- Work along both sides of the chain base using the following pattern:
- Row 1: SC, HDC (Half Double Crochet), 11 DC, HDC, SC.
- Row 2: Turn and build width by alternating SC and DC increases.
- Add lace edging (SC, chain 2, SC) along the sides.
- Finishing Touch: Secure the yarn ends to wrap wire reinforcement at the leaf’s edge.
Tips and Customization Ideas
- Gradient Effects: Use lighter shades for lace edges to enhance the flower’s depth.
- Floral Bouquet: Combine multiple peony flowers and leaves for a floral arrangement.
- Attach Variations: Use the flower as an applique for clothing, bags, or accessories.
Conclusion
Your peony flower is now complete, The layered design, vibrant colors, and intricate lace edges beautifully mimic nature’s charm. It’s a versatile creation that complements home decor, outfits, or gifts.